simPRO User Guide
Logging In
Section titled “Logging In”You can log in to simPRO on any device that has a web browser and an Internet connection. simPRO recommends using Google Chrome, but it should also work in any other Chrome-based browser like Microsoft Edge, Brave, or Vivaldi.
- To log in, type
https://wovenandwoods.simprosuite.com/into the address bar:
- Your username will be your initials. If you have forgotten your password, you can reset it using the link on the page.
- After logging in, you will see the main simPRO dashboard (this may vary depending on your account setup).
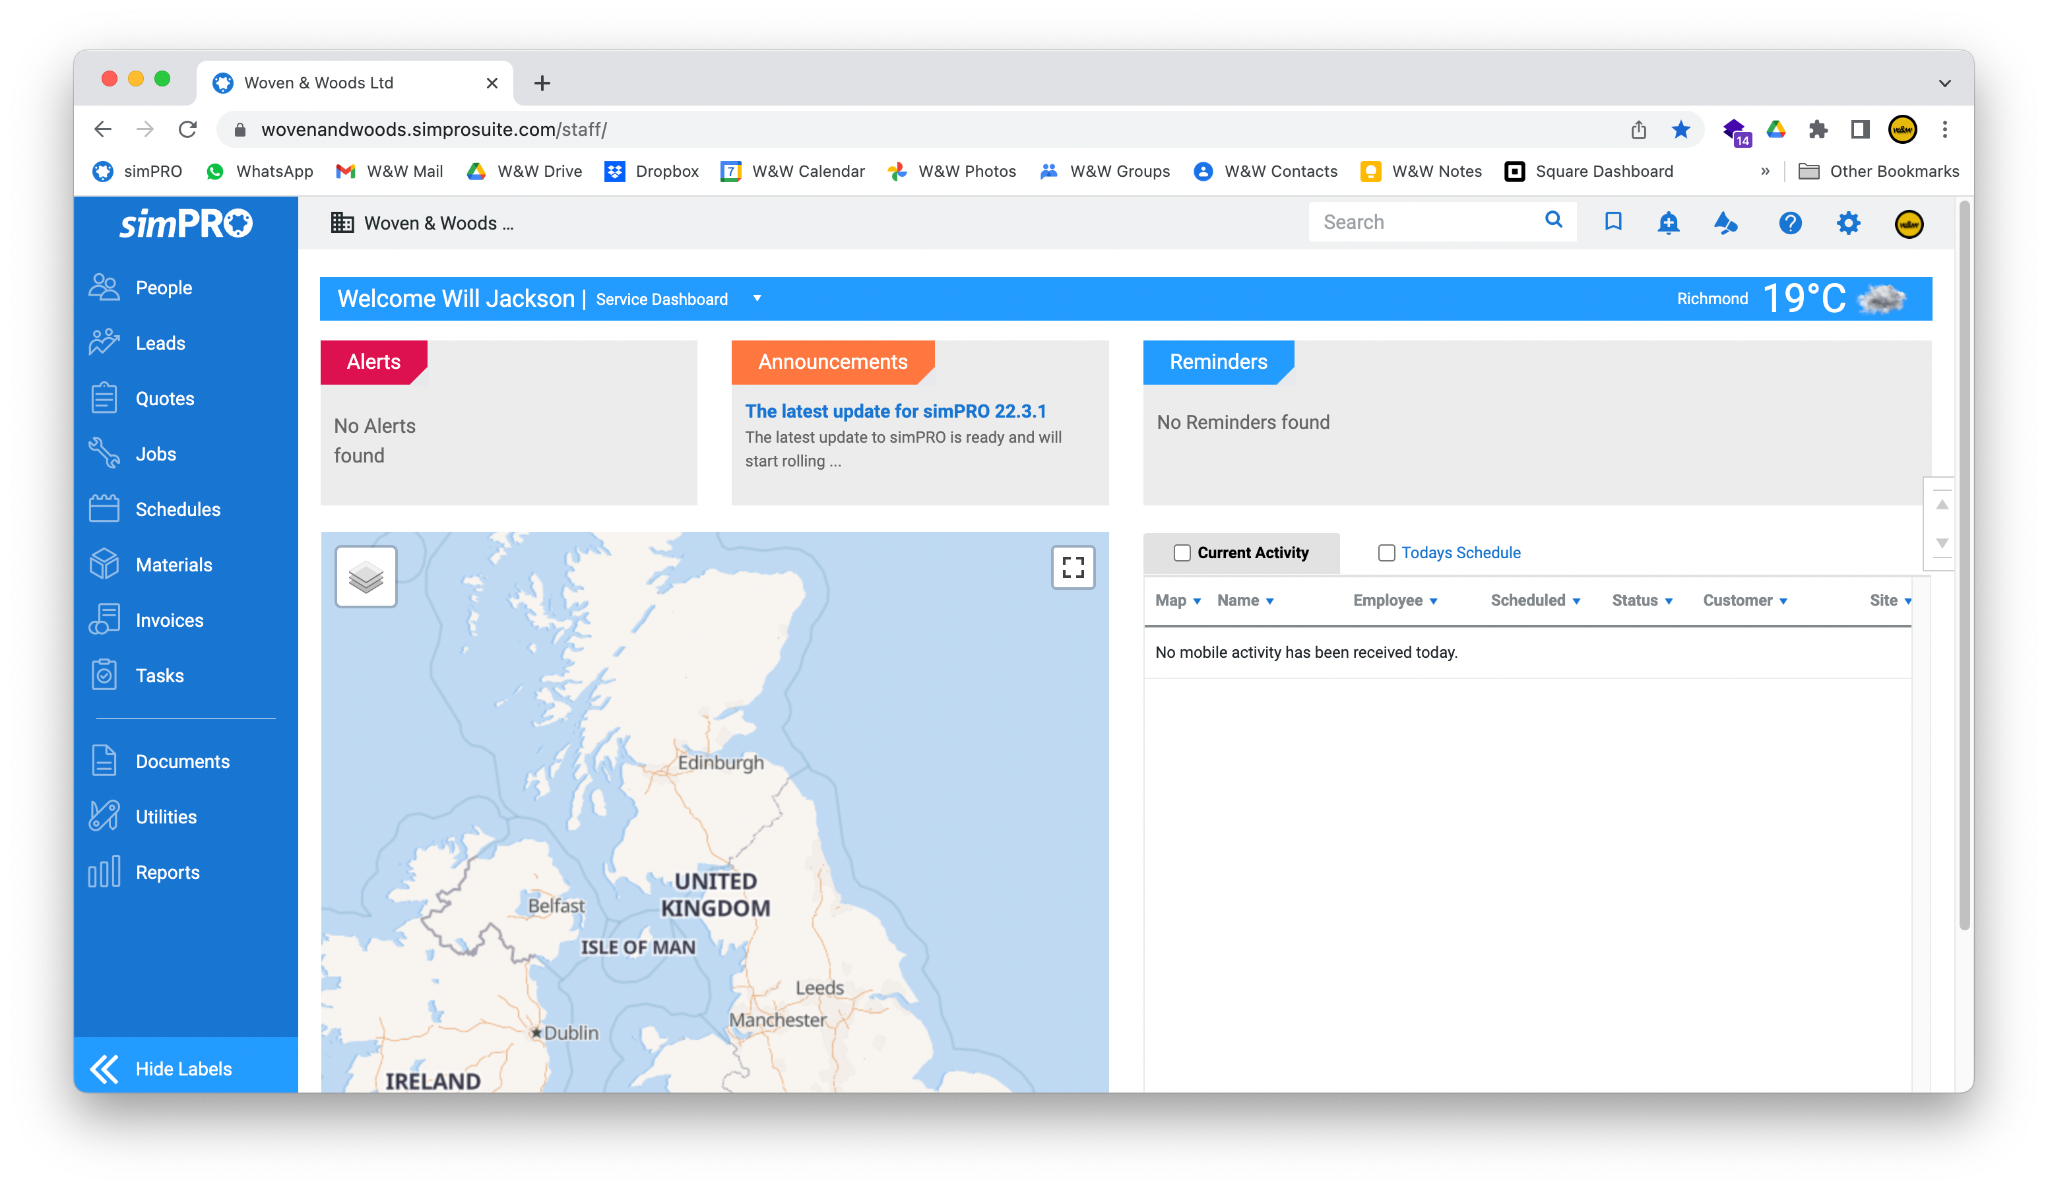
- You can access different sections of simPRO using the bar on the left-hand side. Expand it by clicking the double-arrow button at the bottom of the screen.
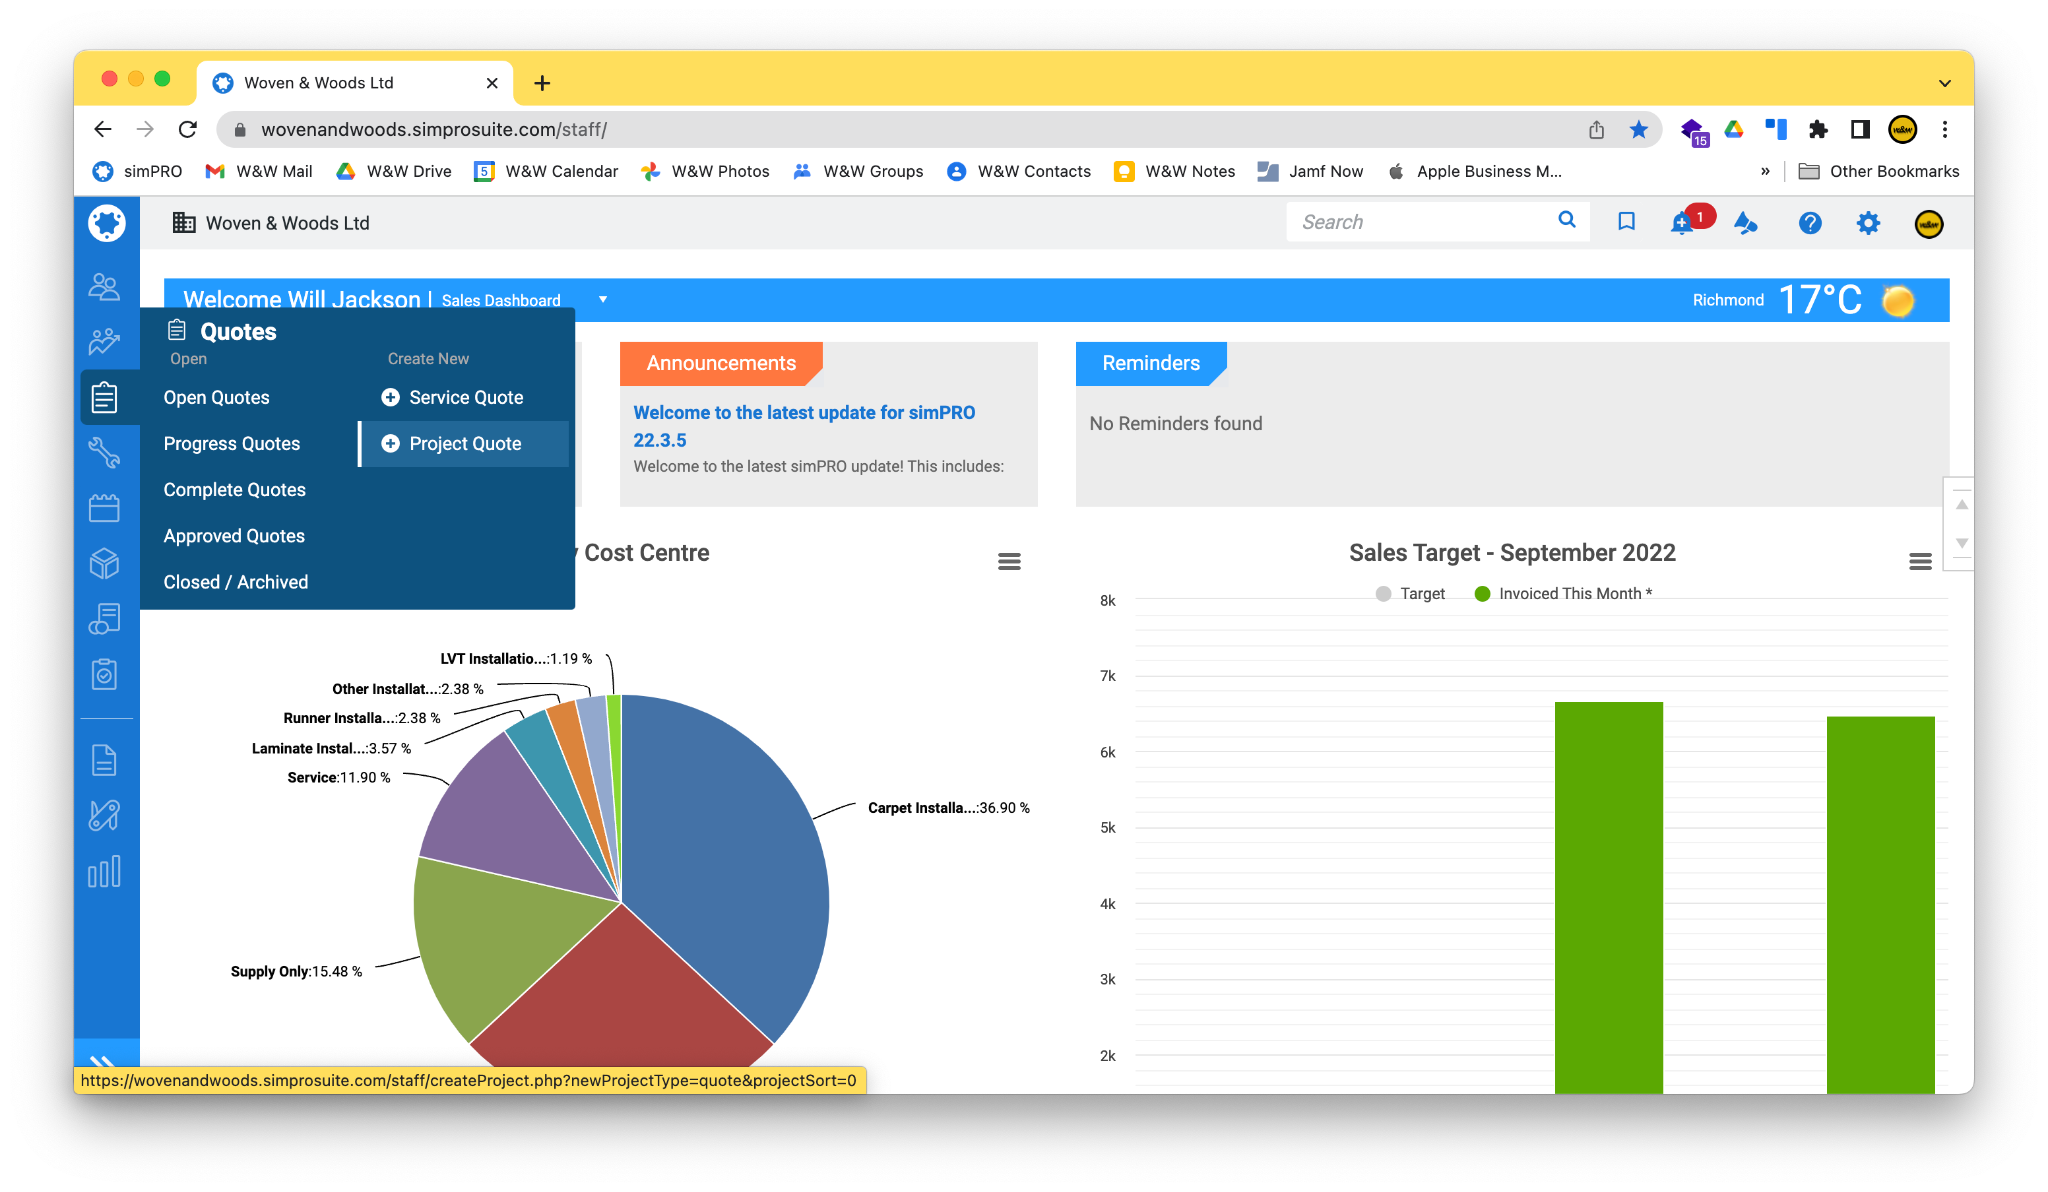
Create a New Quote
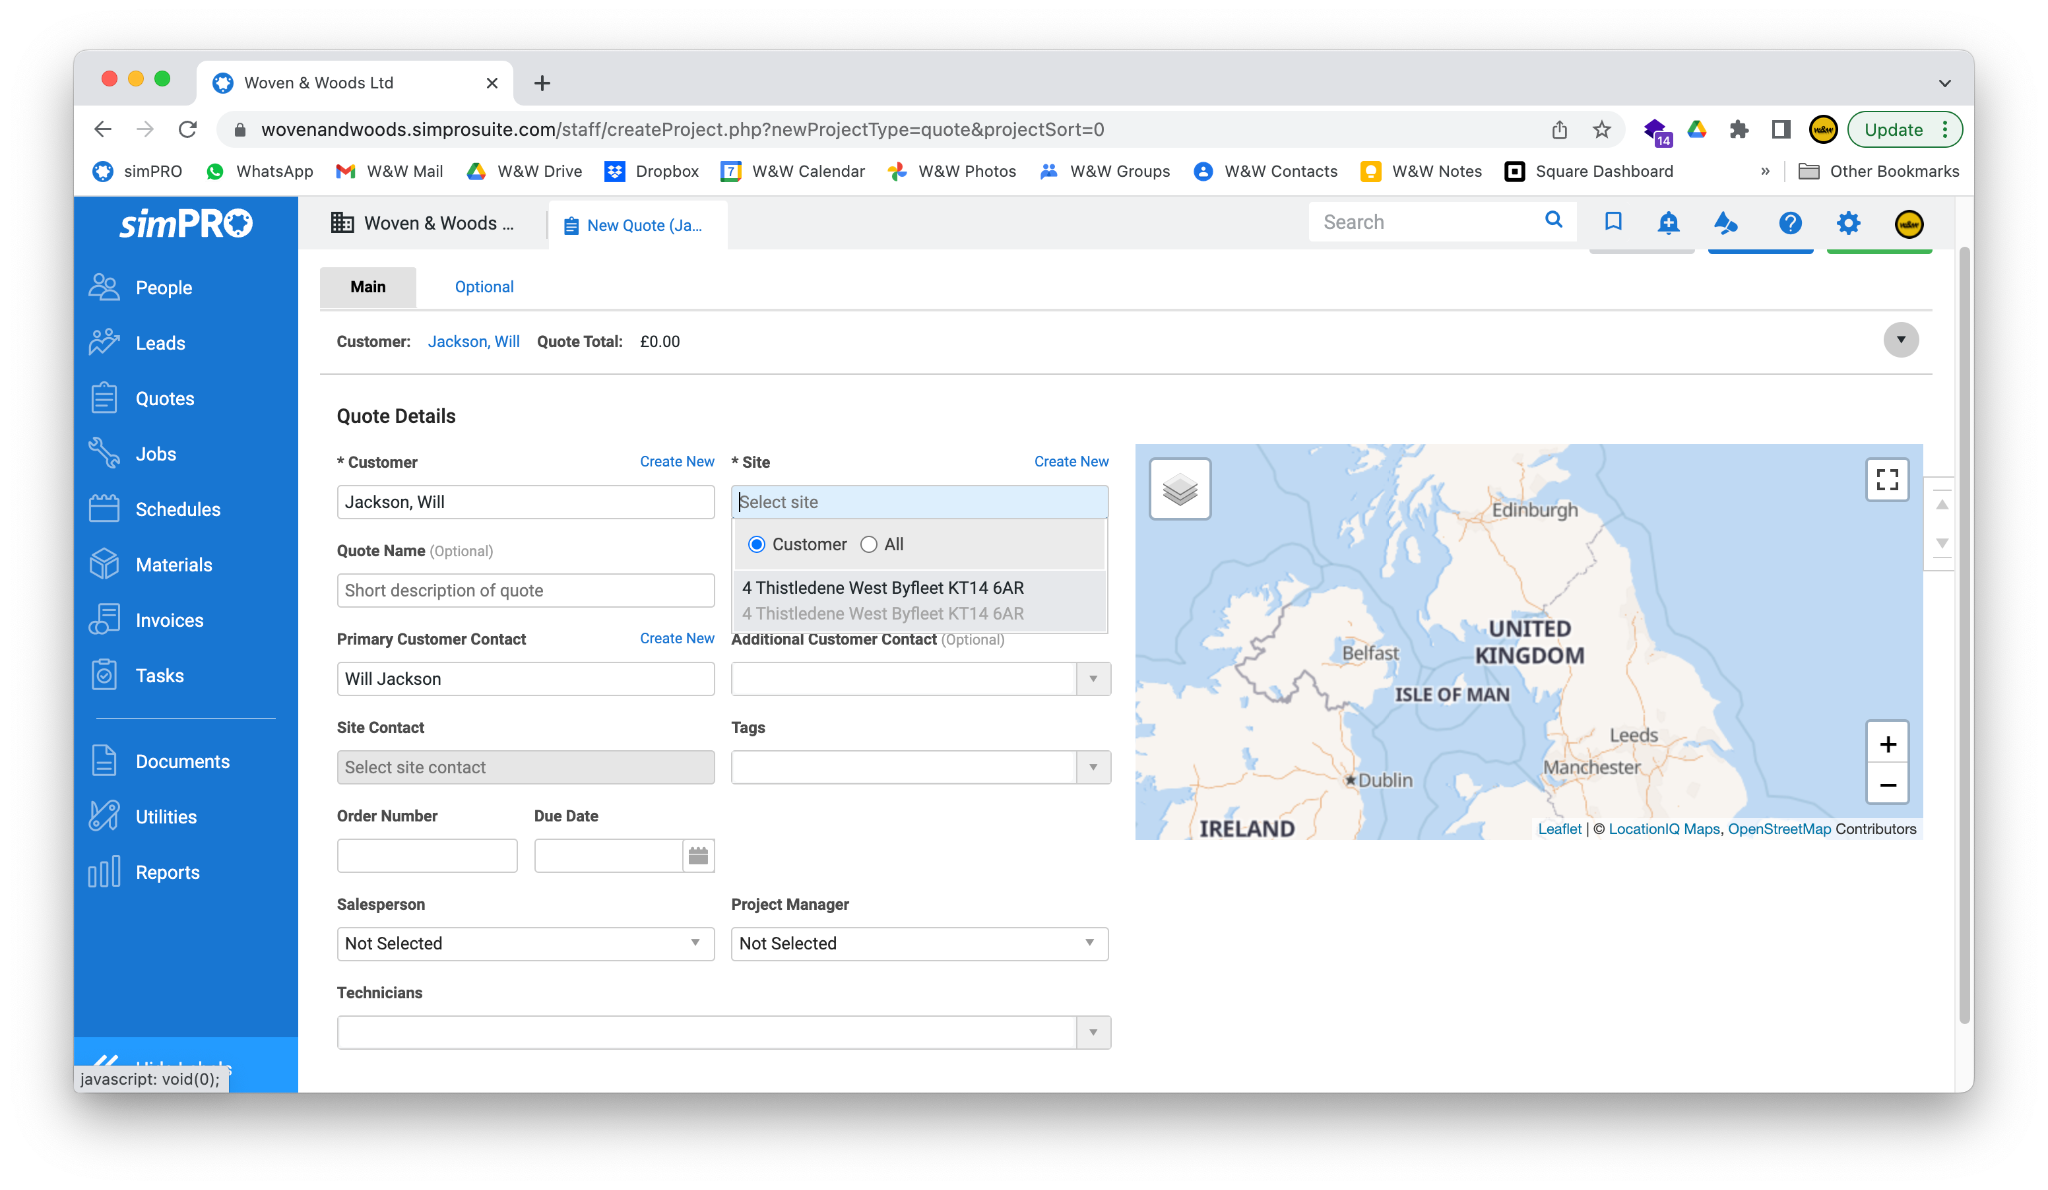
Section titled “Create a New Quote”- To create a new quote, hover over the Quotes option in the sidebar and select Project Quote.
Customer
Section titled “Customer”- If the quote is for an existing customer, start typing their name into the Customer field to search. Click their name when it appears to pull through their details.
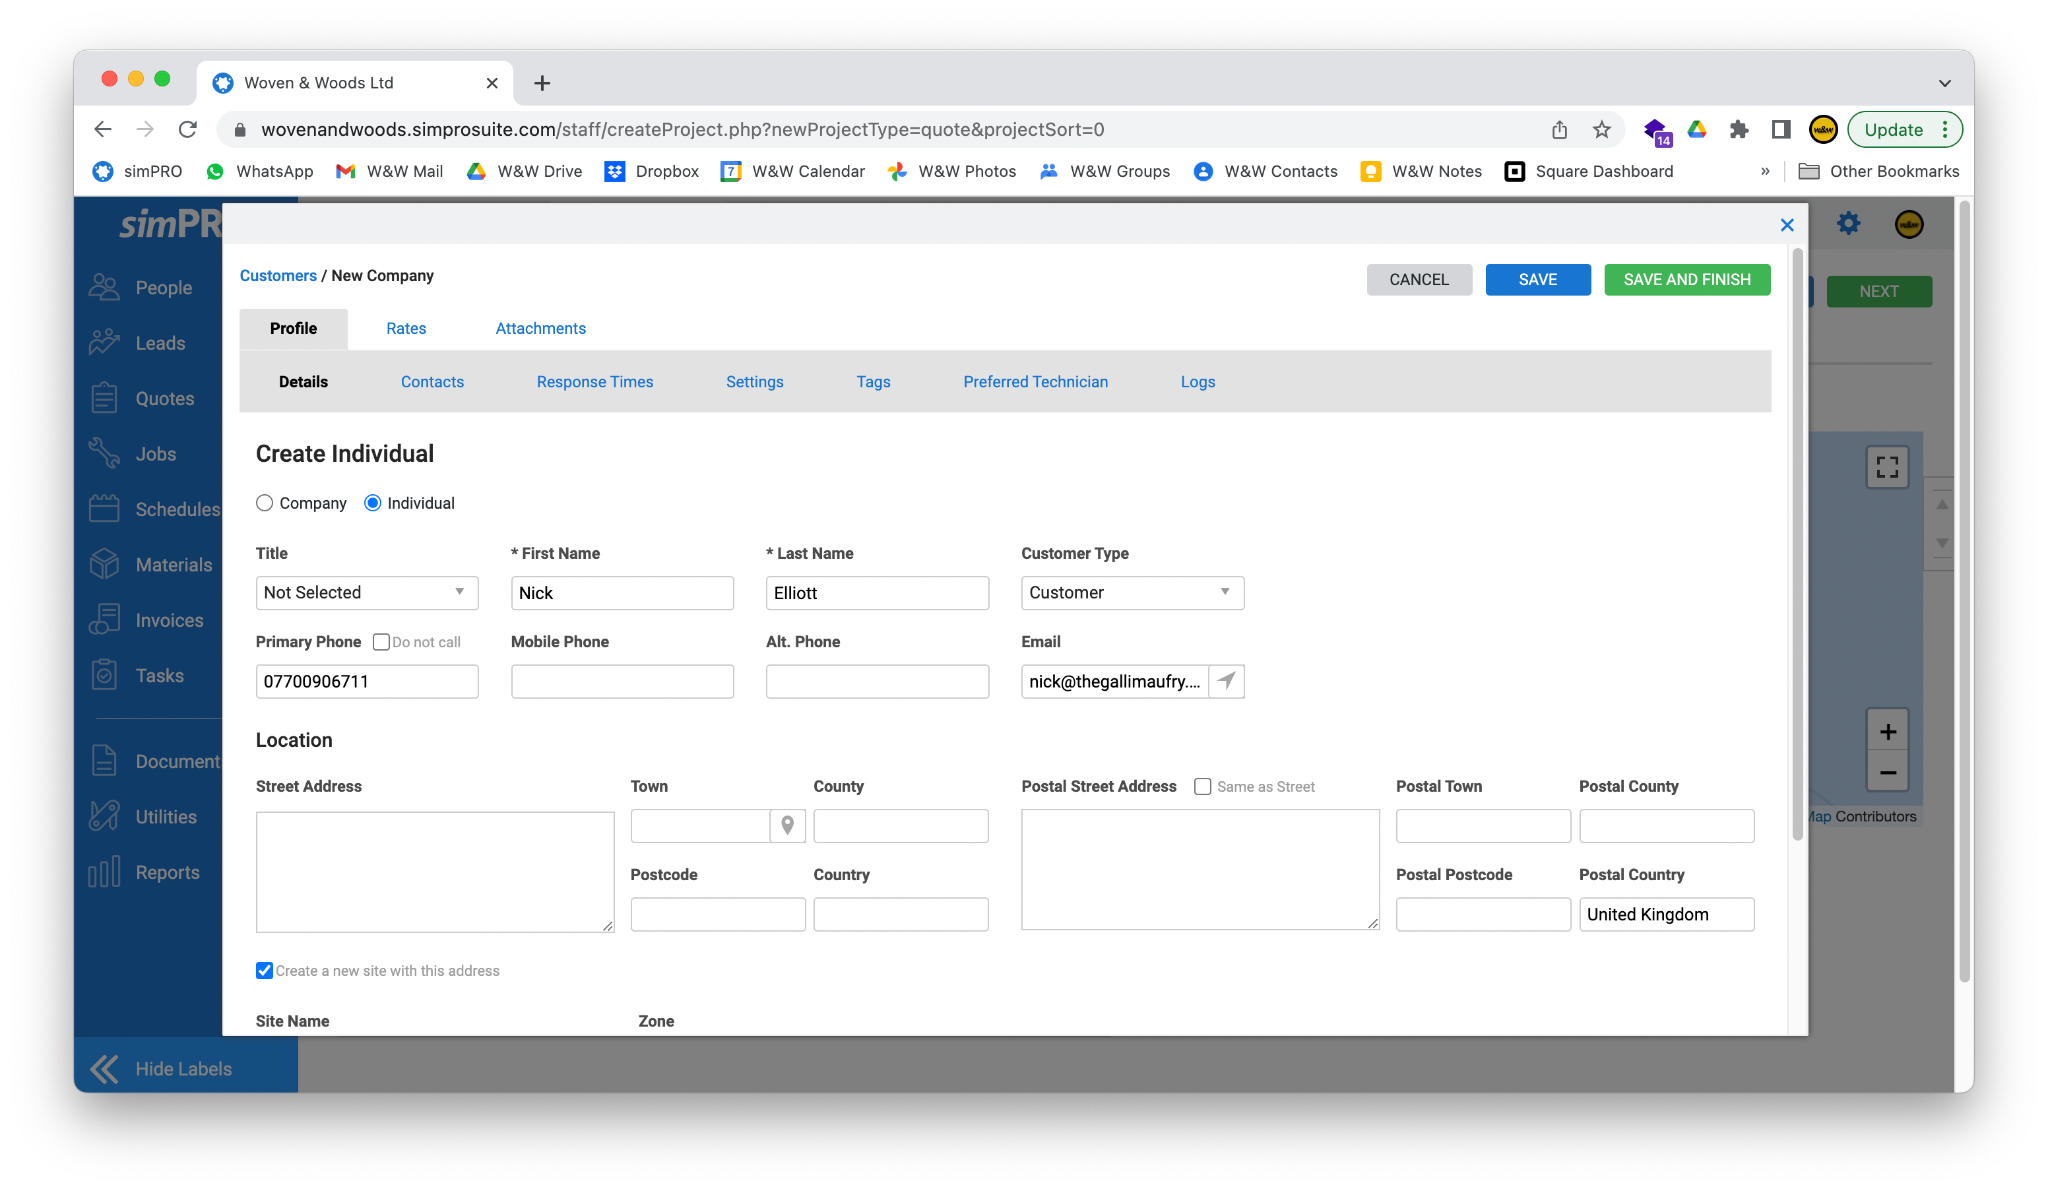
- Alternatively, for a new customer, click the Create New link to input their details.
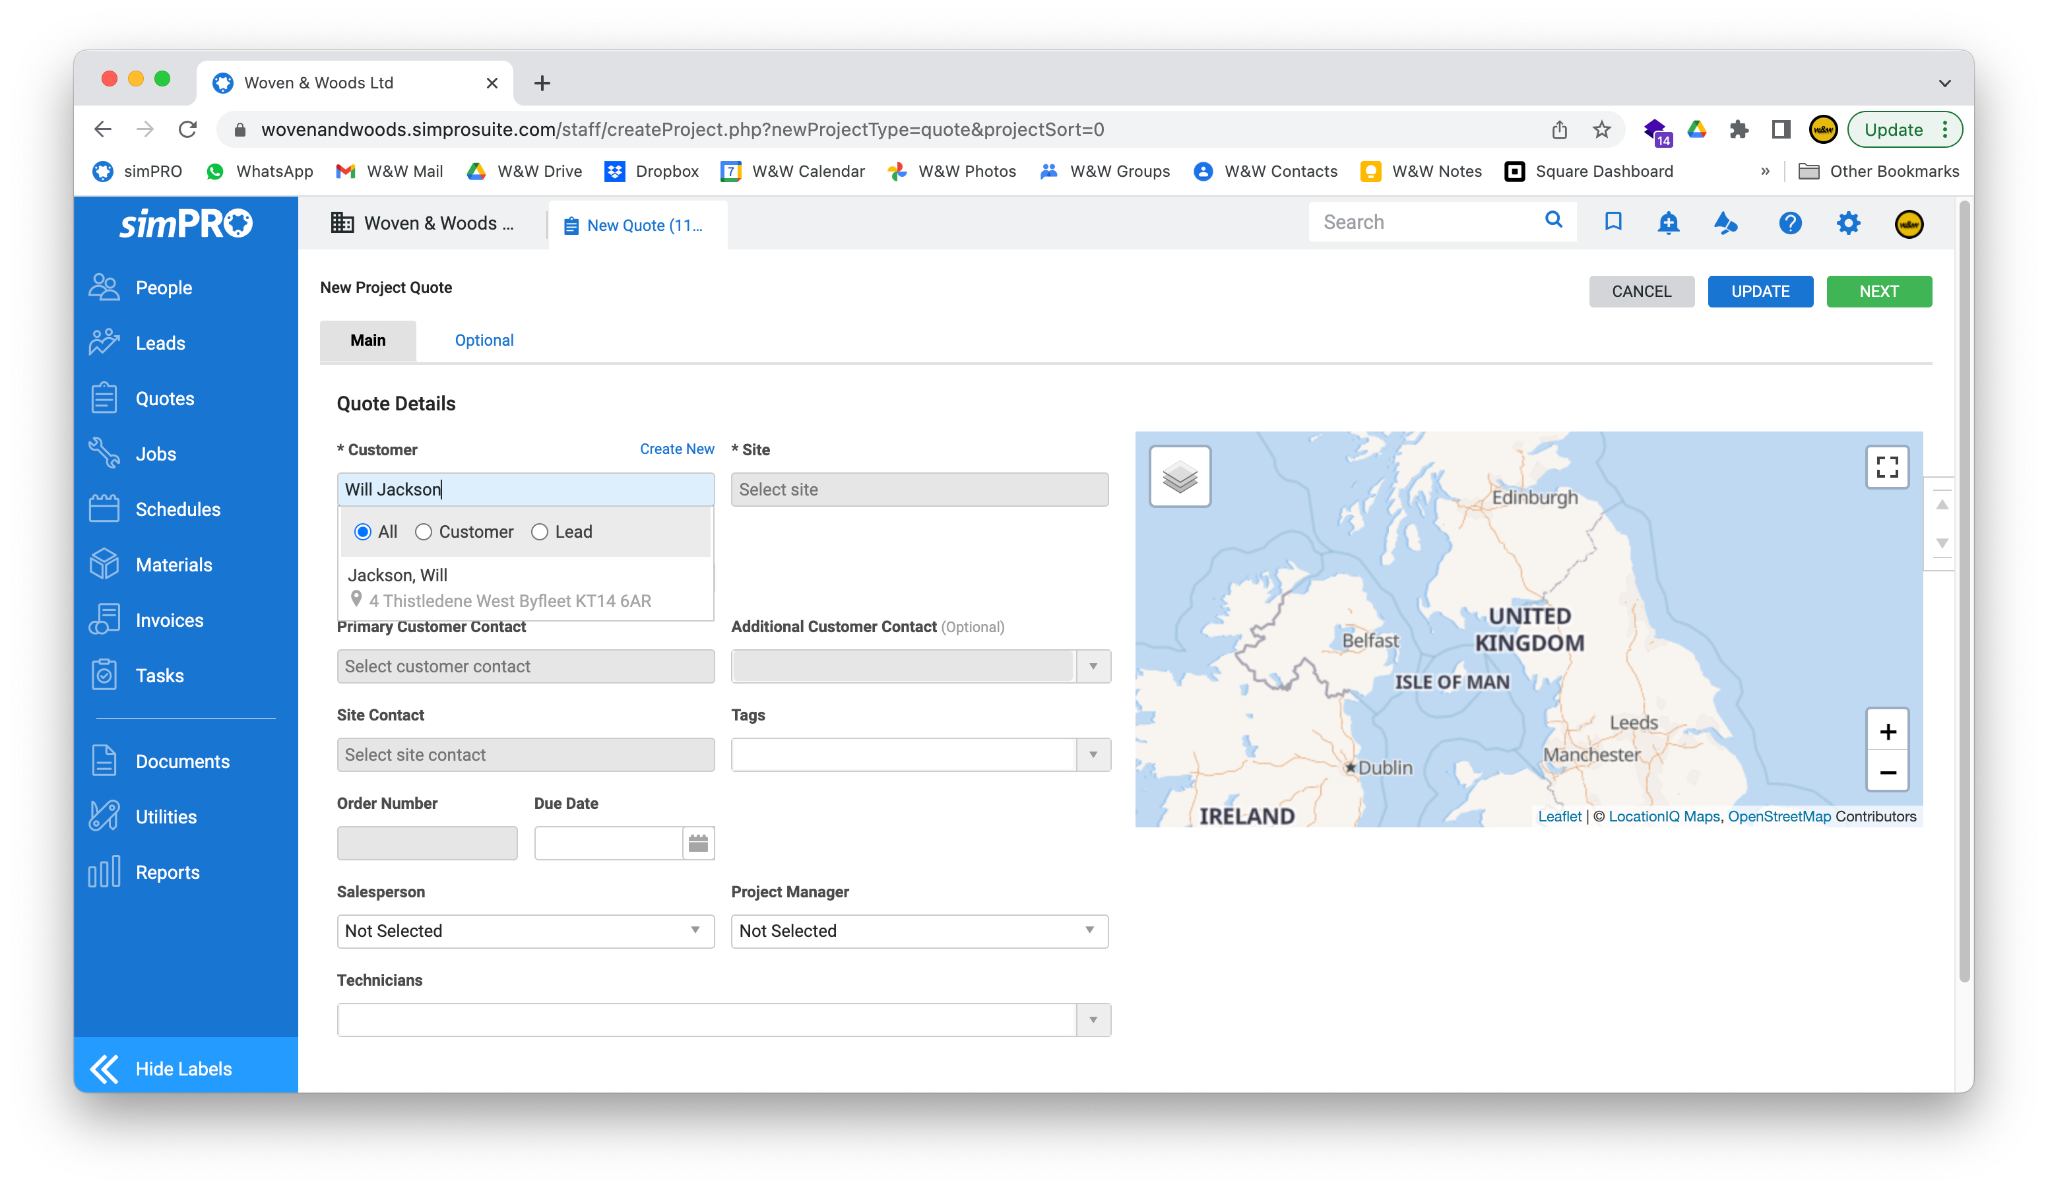
- Enter the customer’s details as follows:
| Field | Notes |
|---|---|
| Create Individual | Individual, unless the user is a company. |
| Title | Not necessary, but you can enter a title if the customer prefers. |
| First Name | Must be completed. |
| Last Name | Must be completed. |
| Customer Type | Leave as Customer. |
| Primary Phone | This will appear on any future documents for this customer; ensure it’s correct. |
| Mobile Phone | Optional. If the customer only has a mobile number, put it in Primary and leave this blank. |
| Alt Phone | As above. |
| Make sure you enter this correctly. Emails sent to the wrong address can cause GDPR issues. | |
| Tags | Select the showroom this customer is working with. This is very important for reporting purposes. |
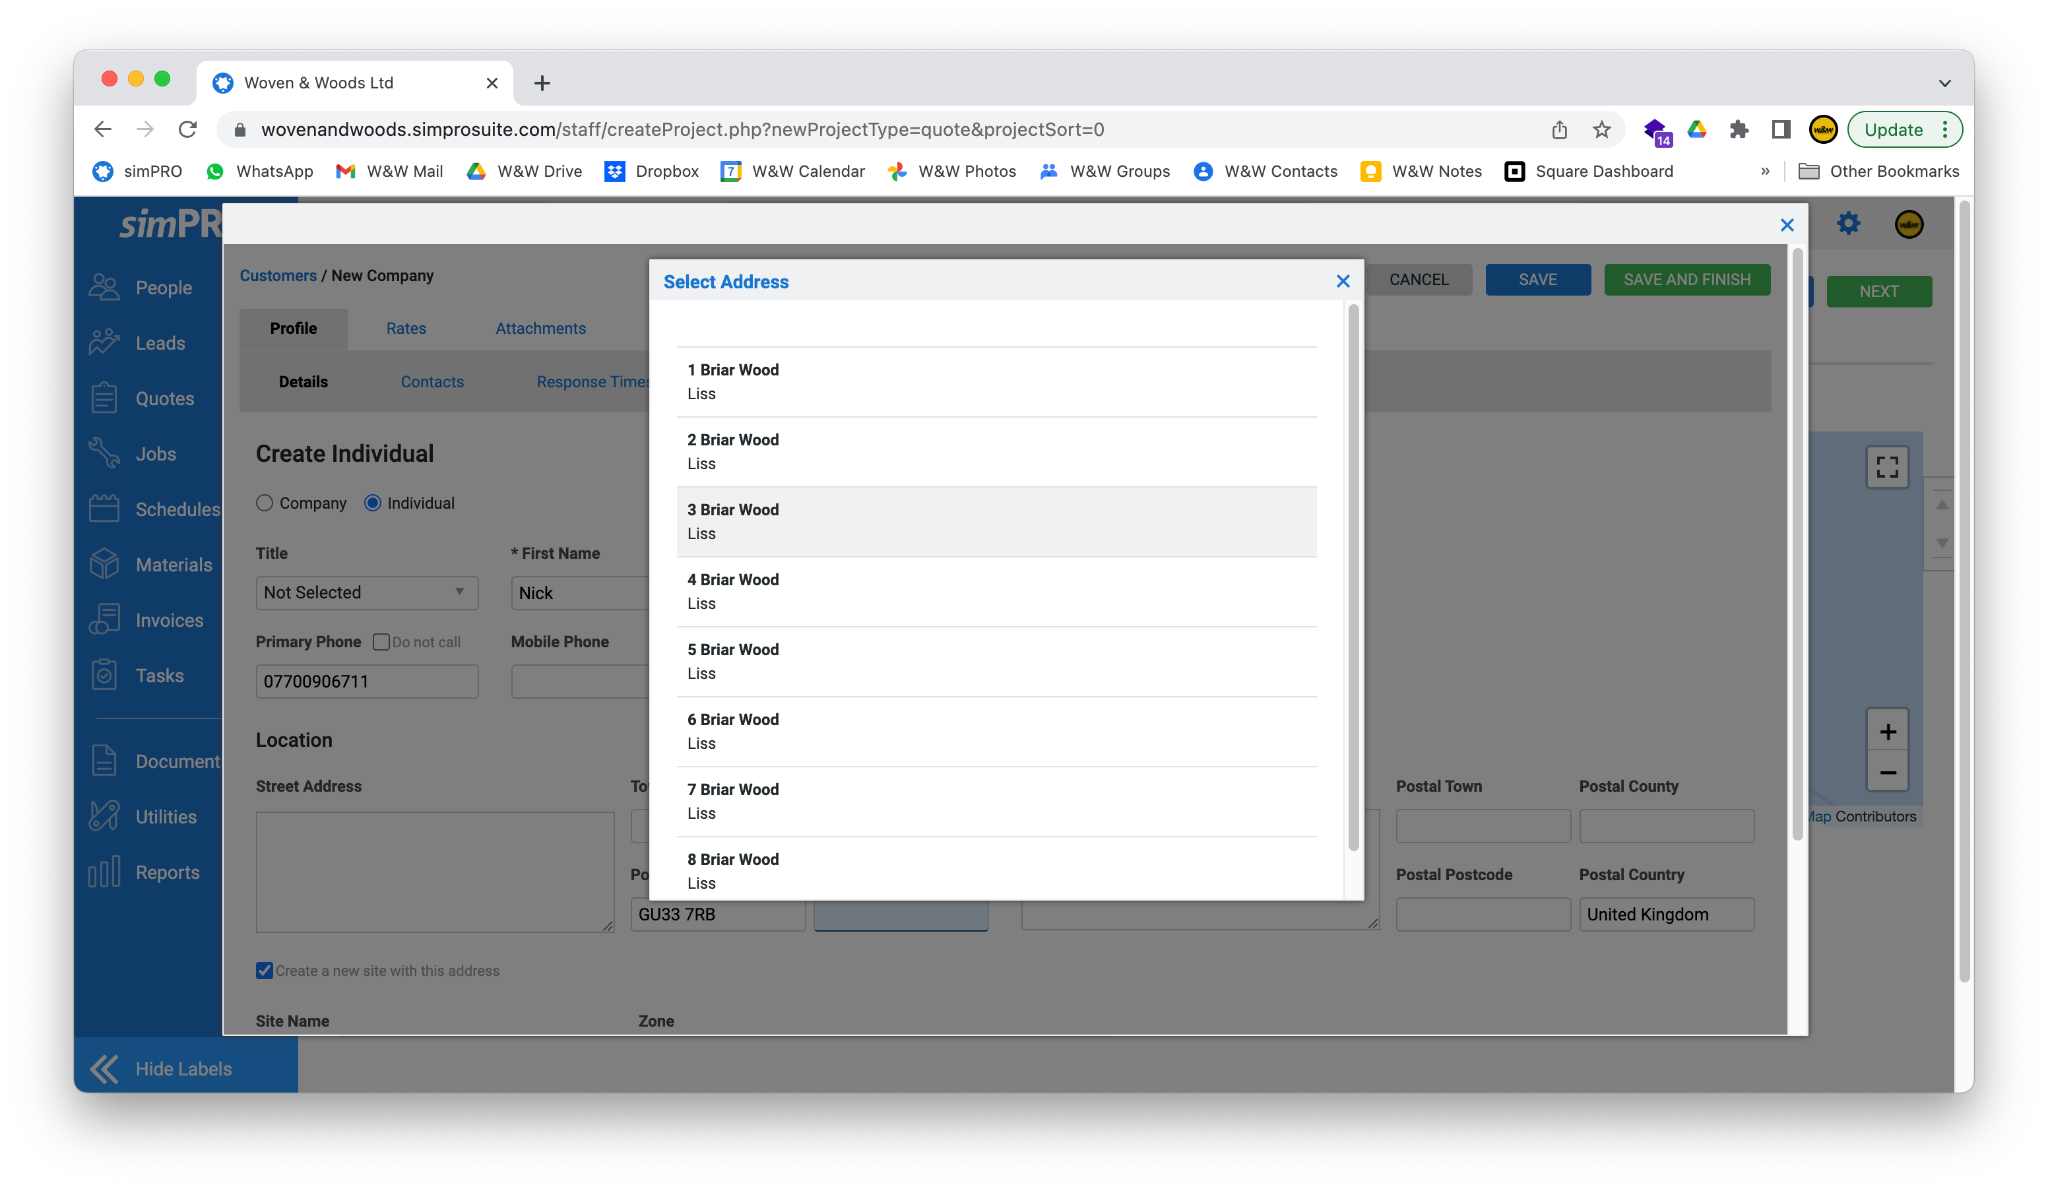
- To enter the Street Address, first enter the postcode into the Postcode field on the lower-left of the screen. Press Tab, and a list of addresses within that postcode will appear. Click the correct property. If no addresses are found (or the address is incorrect), click out of the pop-up and enter the full address manually.
- When the full Street Address has been entered, enter the Postal Address. If this is the same as the Street Address, you can click the Same as Street box, and the details will be automatically filled in for you.
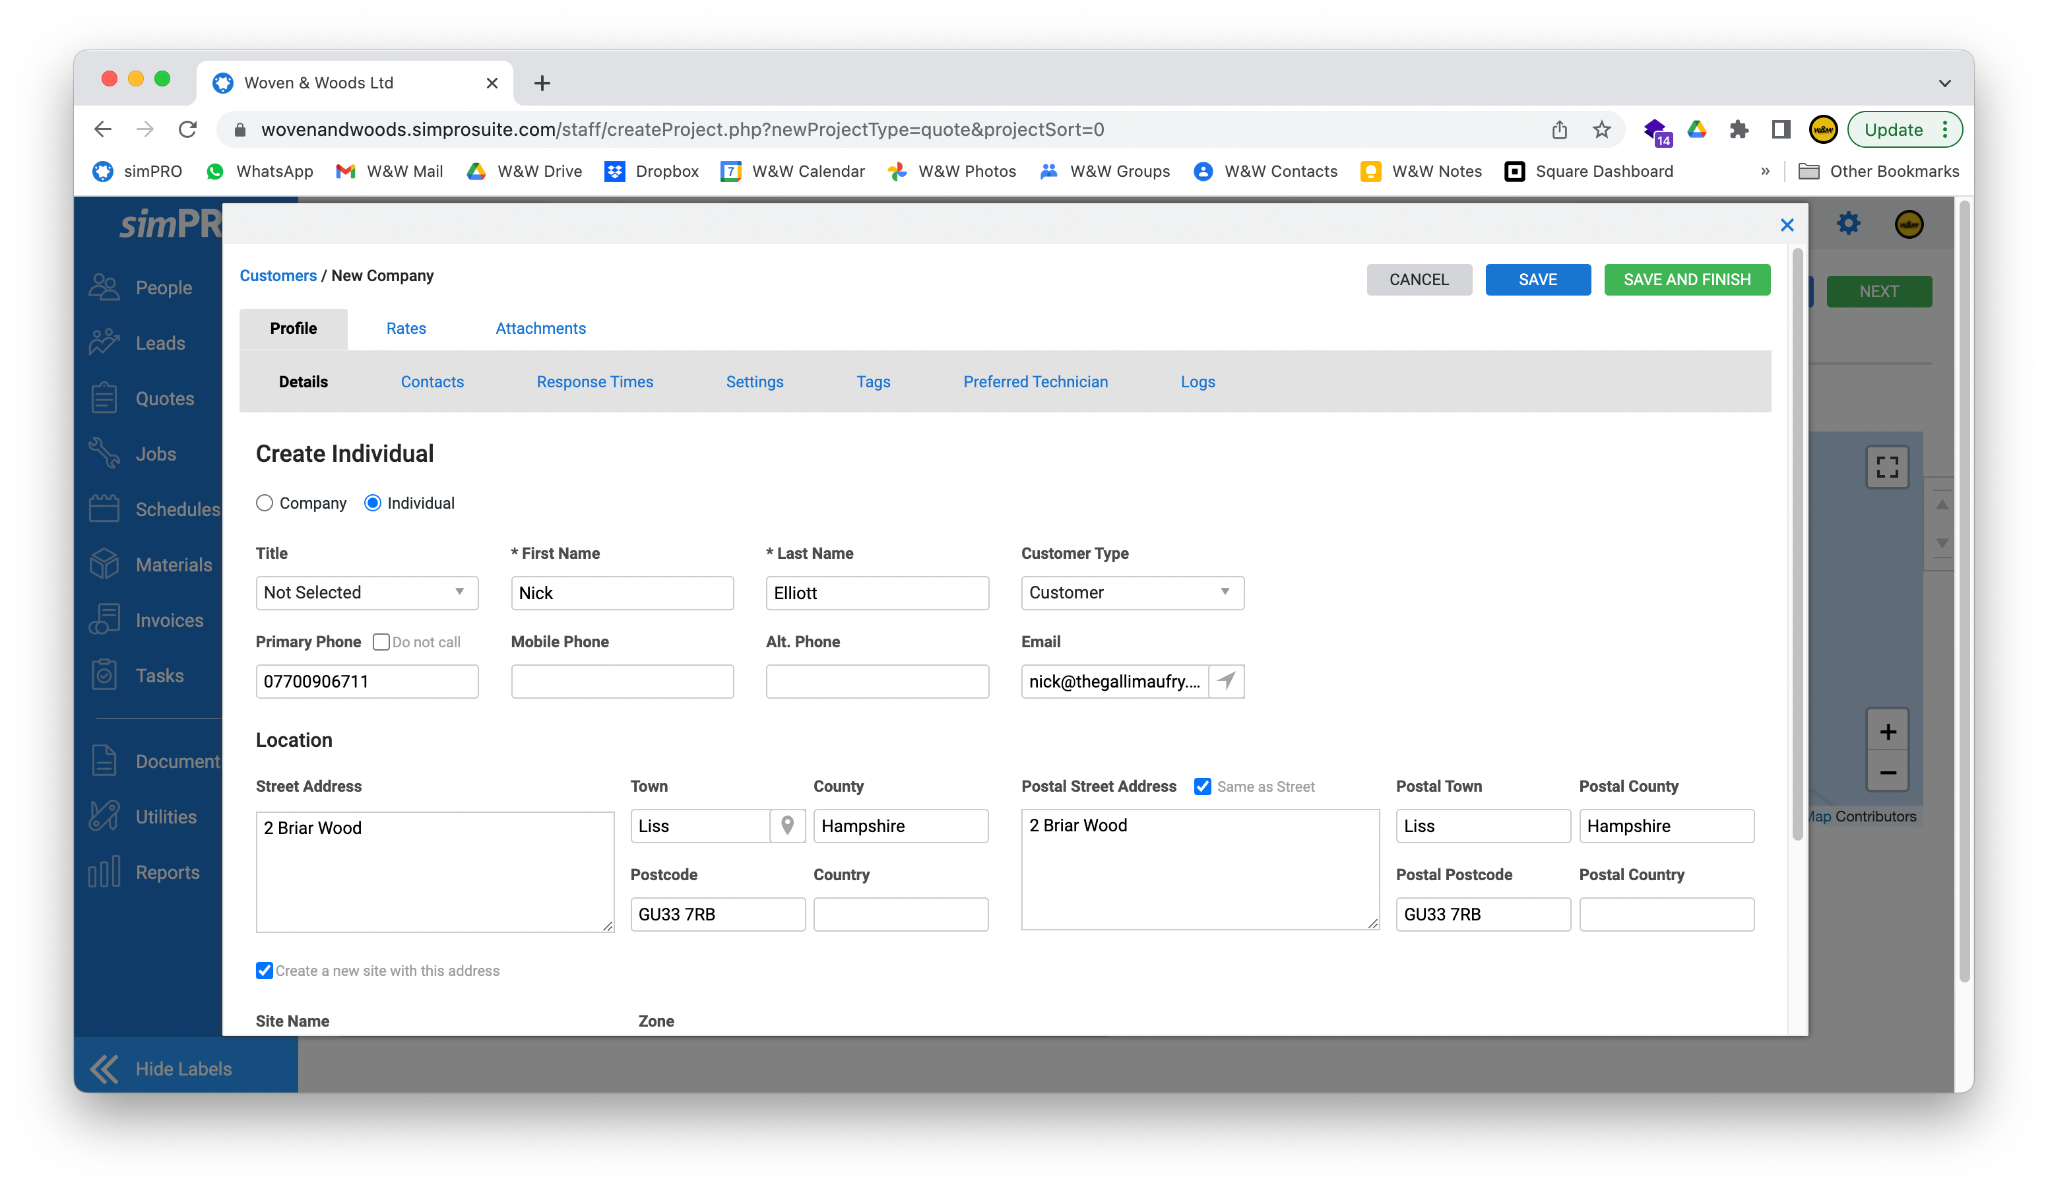
- Click the Save and Finish button in the top right of the screen to save the customer and return to the New Quote screen.
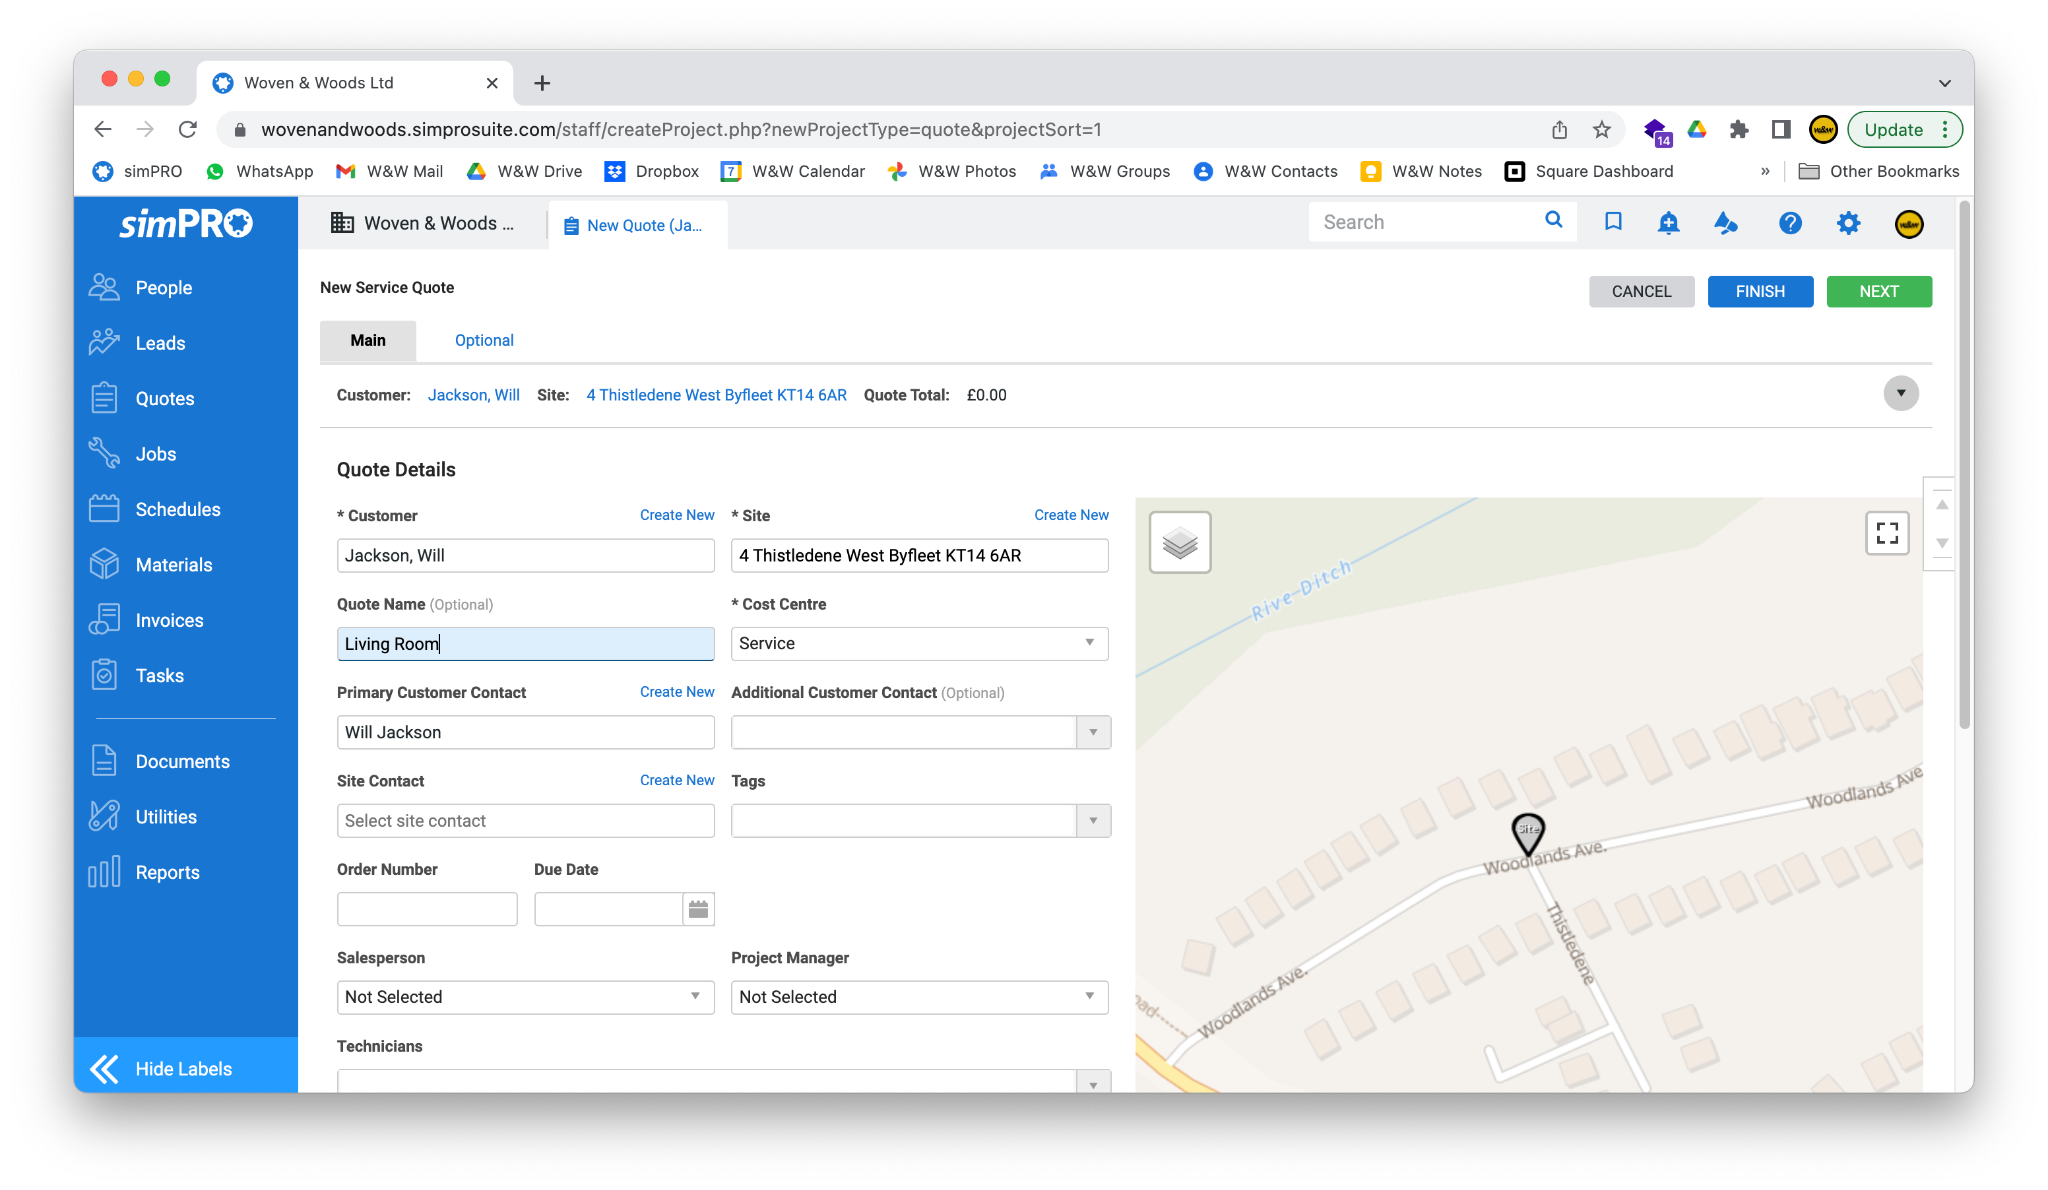
- Click on the Site field. A dropdown box should appear with the customer’s address. If you have set up the customer correctly (or they already existed), you should be able to simply select the address, and the details will be filled in for you.
Quote Name
Section titled “Quote Name”- Enter a descriptive name to differentiate this quote from others for the same customer. The name of the room you are quoting for is usually a good option (e.g., ‘living room’, ‘bedroom’).
Salesperson
Section titled “Salesperson”- Click the Salesperson box and select your name from the dropdown.
Project Manager
Section titled “Project Manager”- If you will be managing the project yourself, select your name from the Project Manager dropdown box. Otherwise, select the relevant member of staff.
- Once all the above fields are completed, click the green Next button in the top right of the screen.

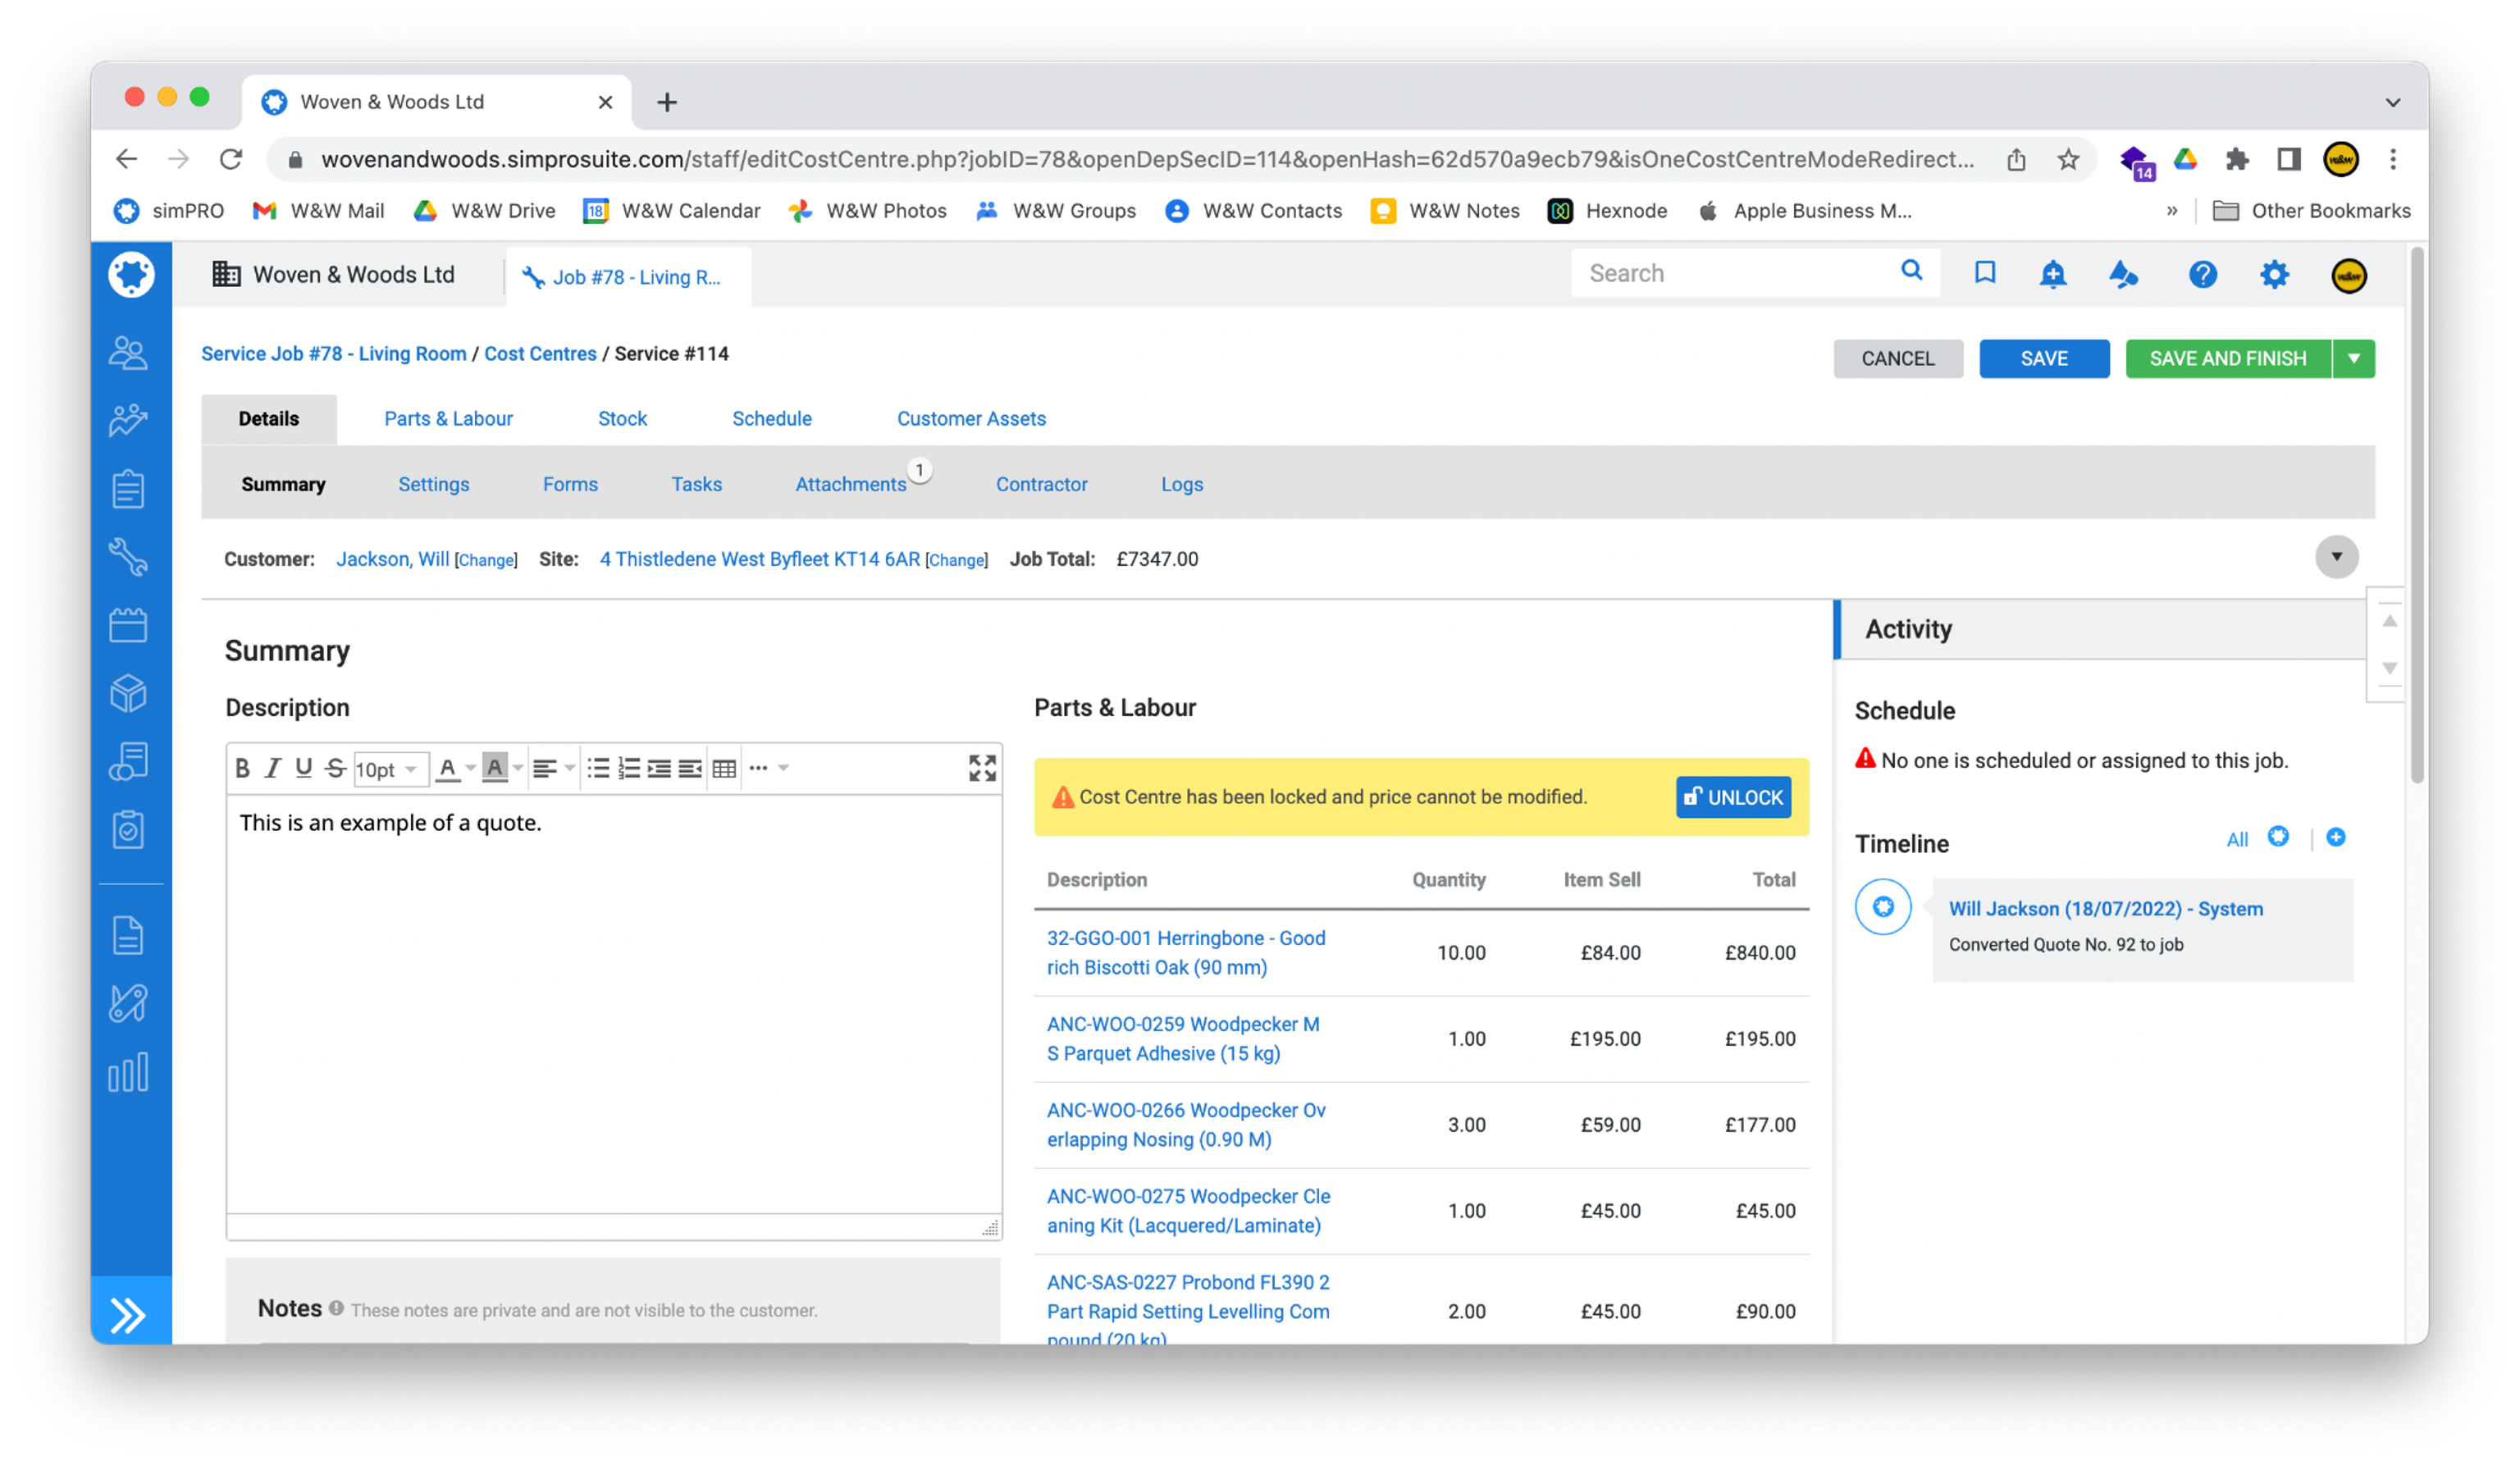
Build the Quote
Section titled “Build the Quote”- simPRO should redirect you to the main page for your new quote, which will look like the screenshot below.
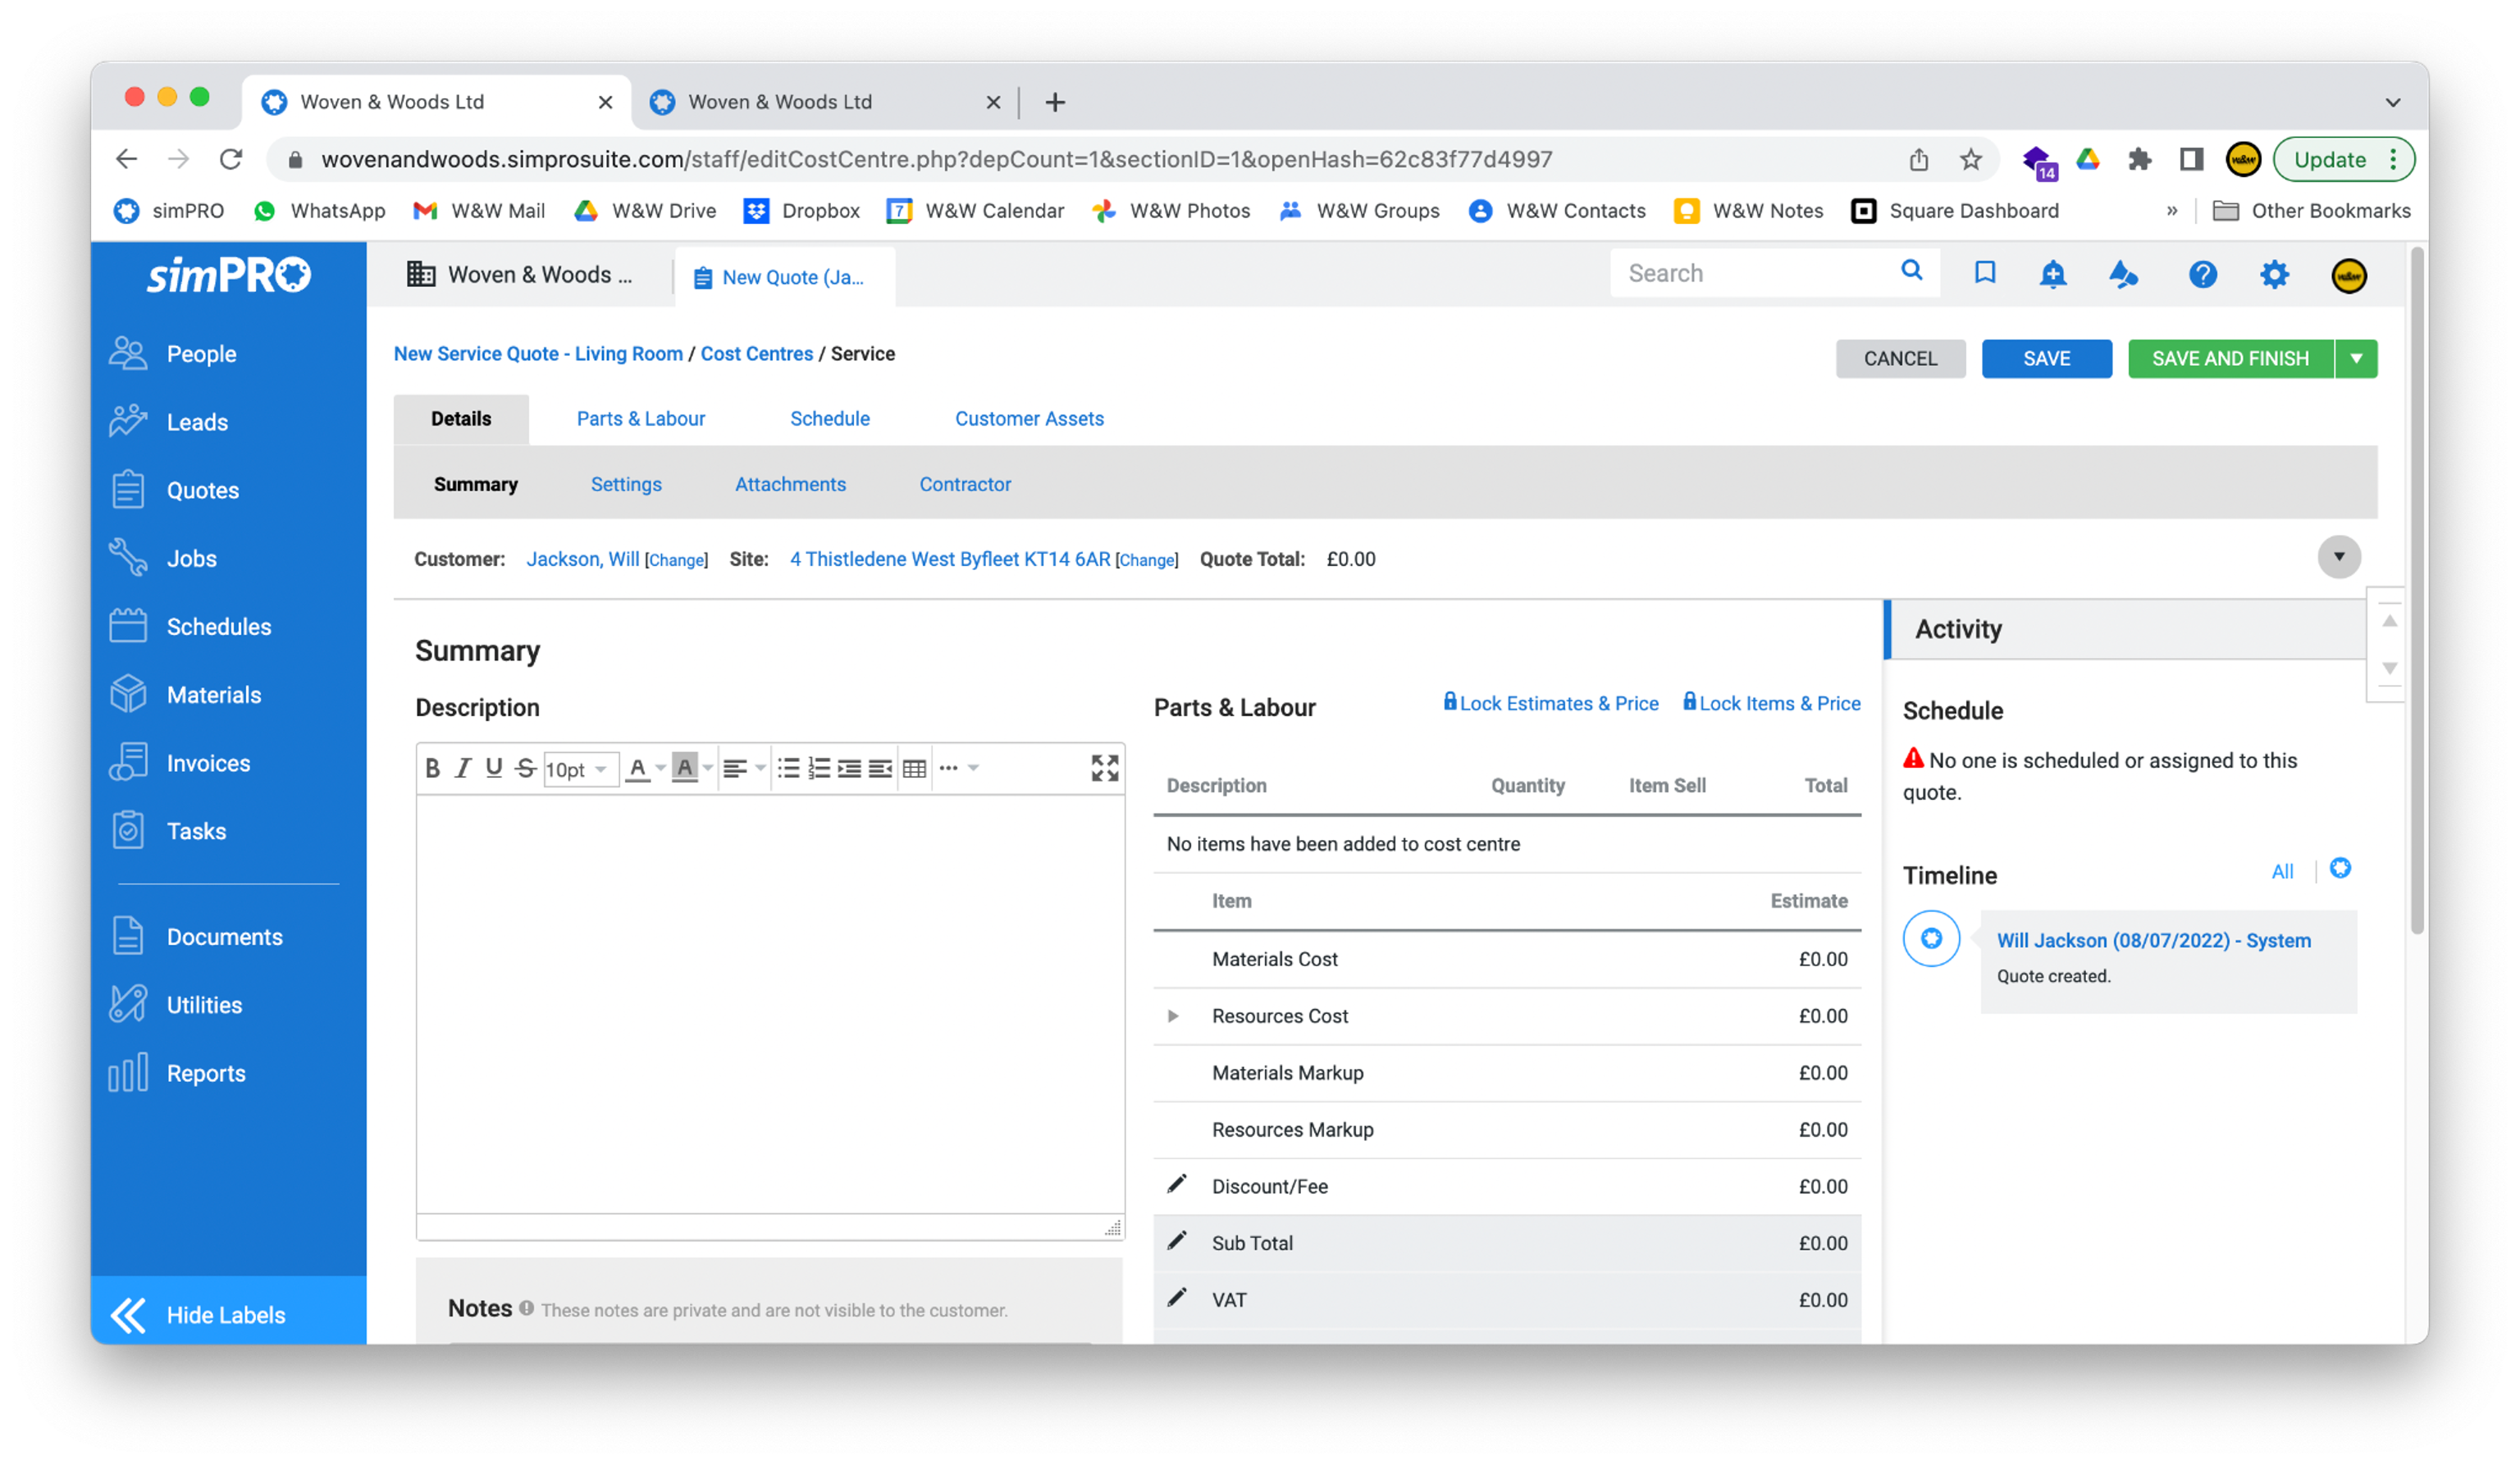
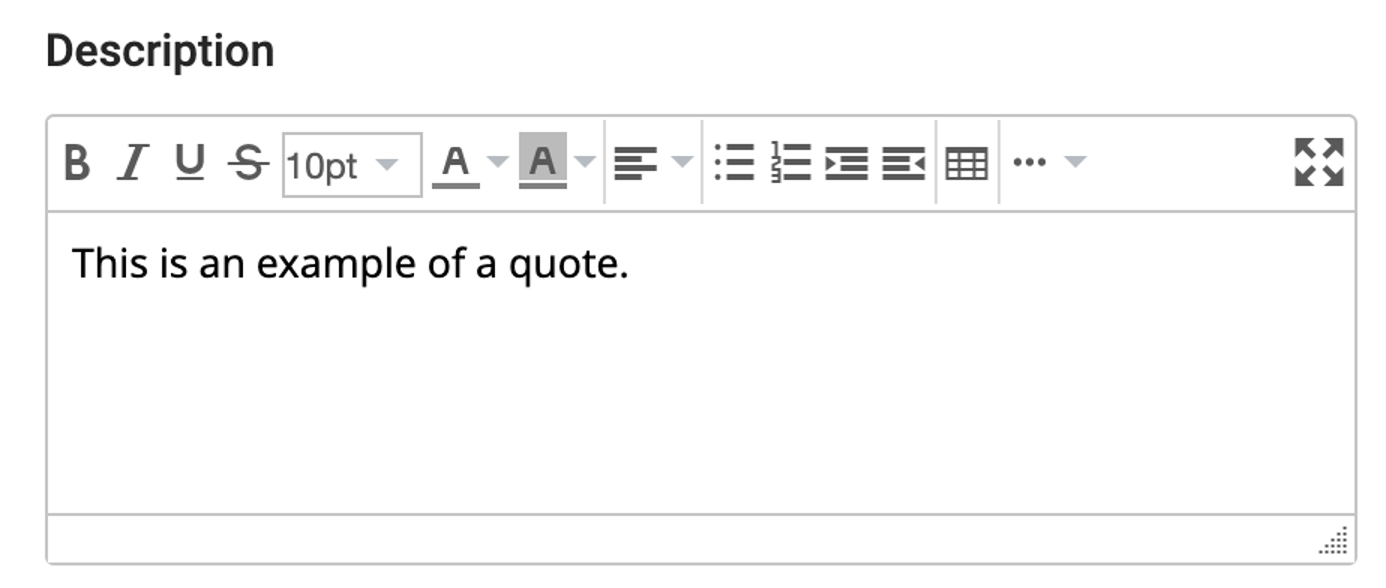
- Enter a brief description of the job in the Description box. This will appear on the final quote when sent.
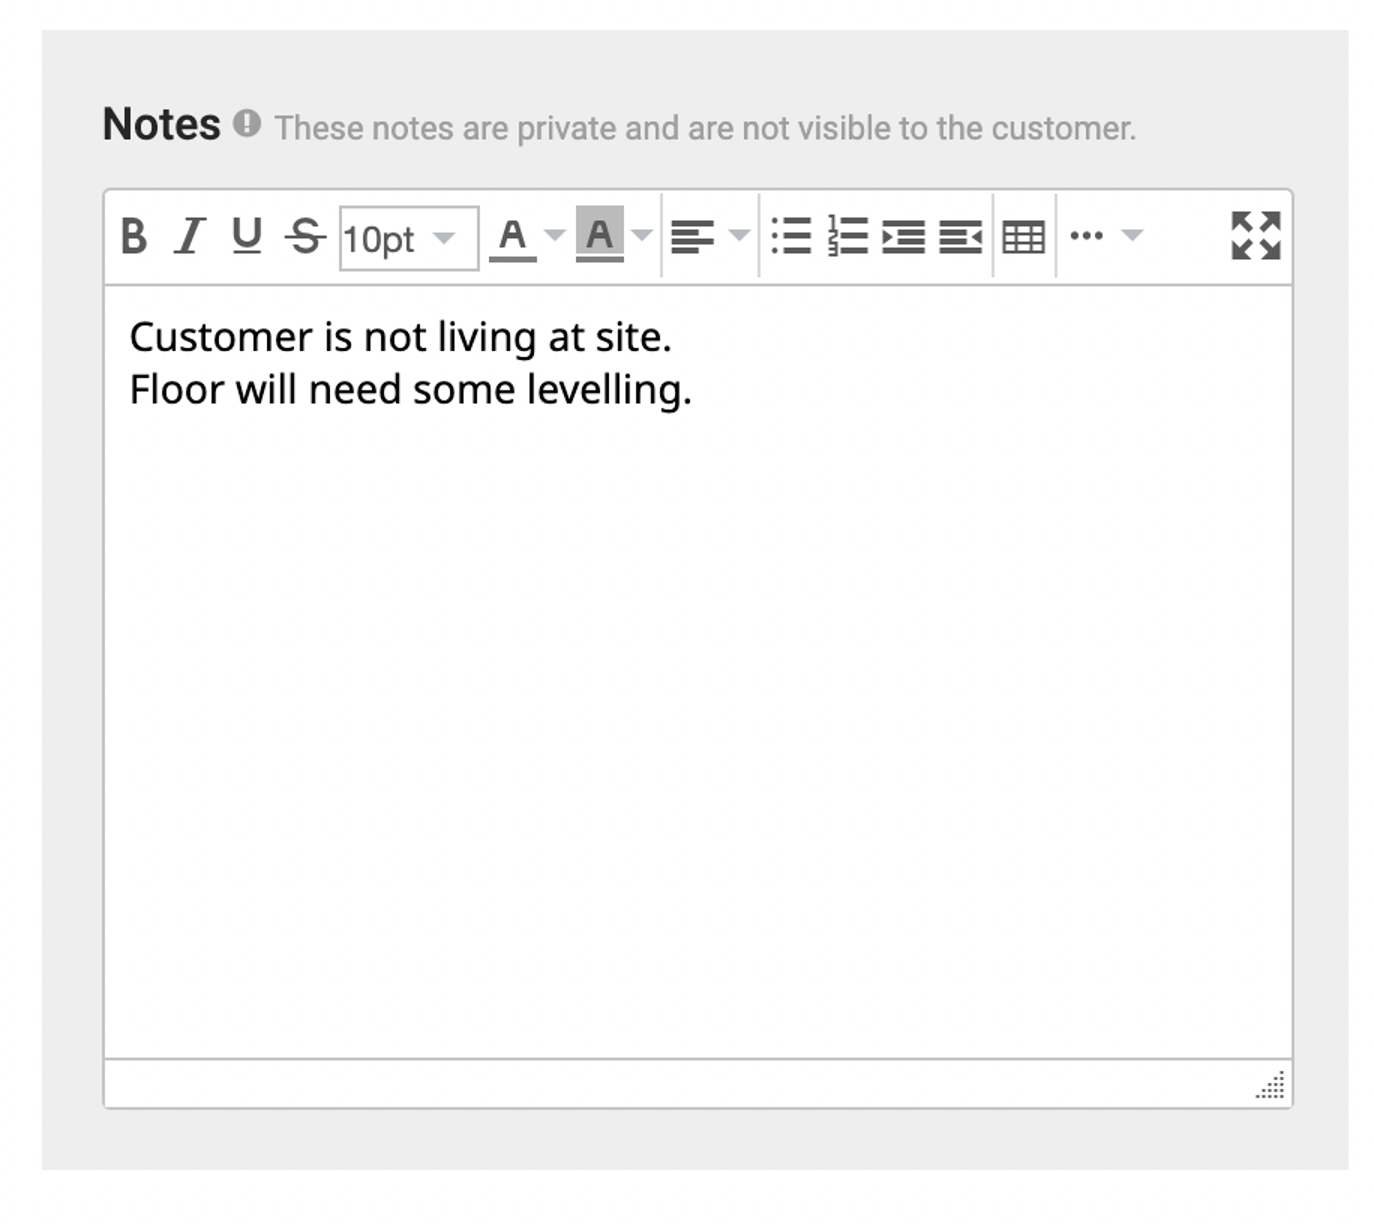
- Any notes about the job can be entered into the Notes field at the bottom of the screen. These notes are only viewable by other staff members, not the customer. It’s important to include all relevant information so anyone looking at this job in the future is aware.
- When you have finished adding notes, click the blue Save button in the top-right corner of the screen. You can click Save at any time to save changes without exiting. Clicking Save and Finish will save your work and close the page.

Add Parts
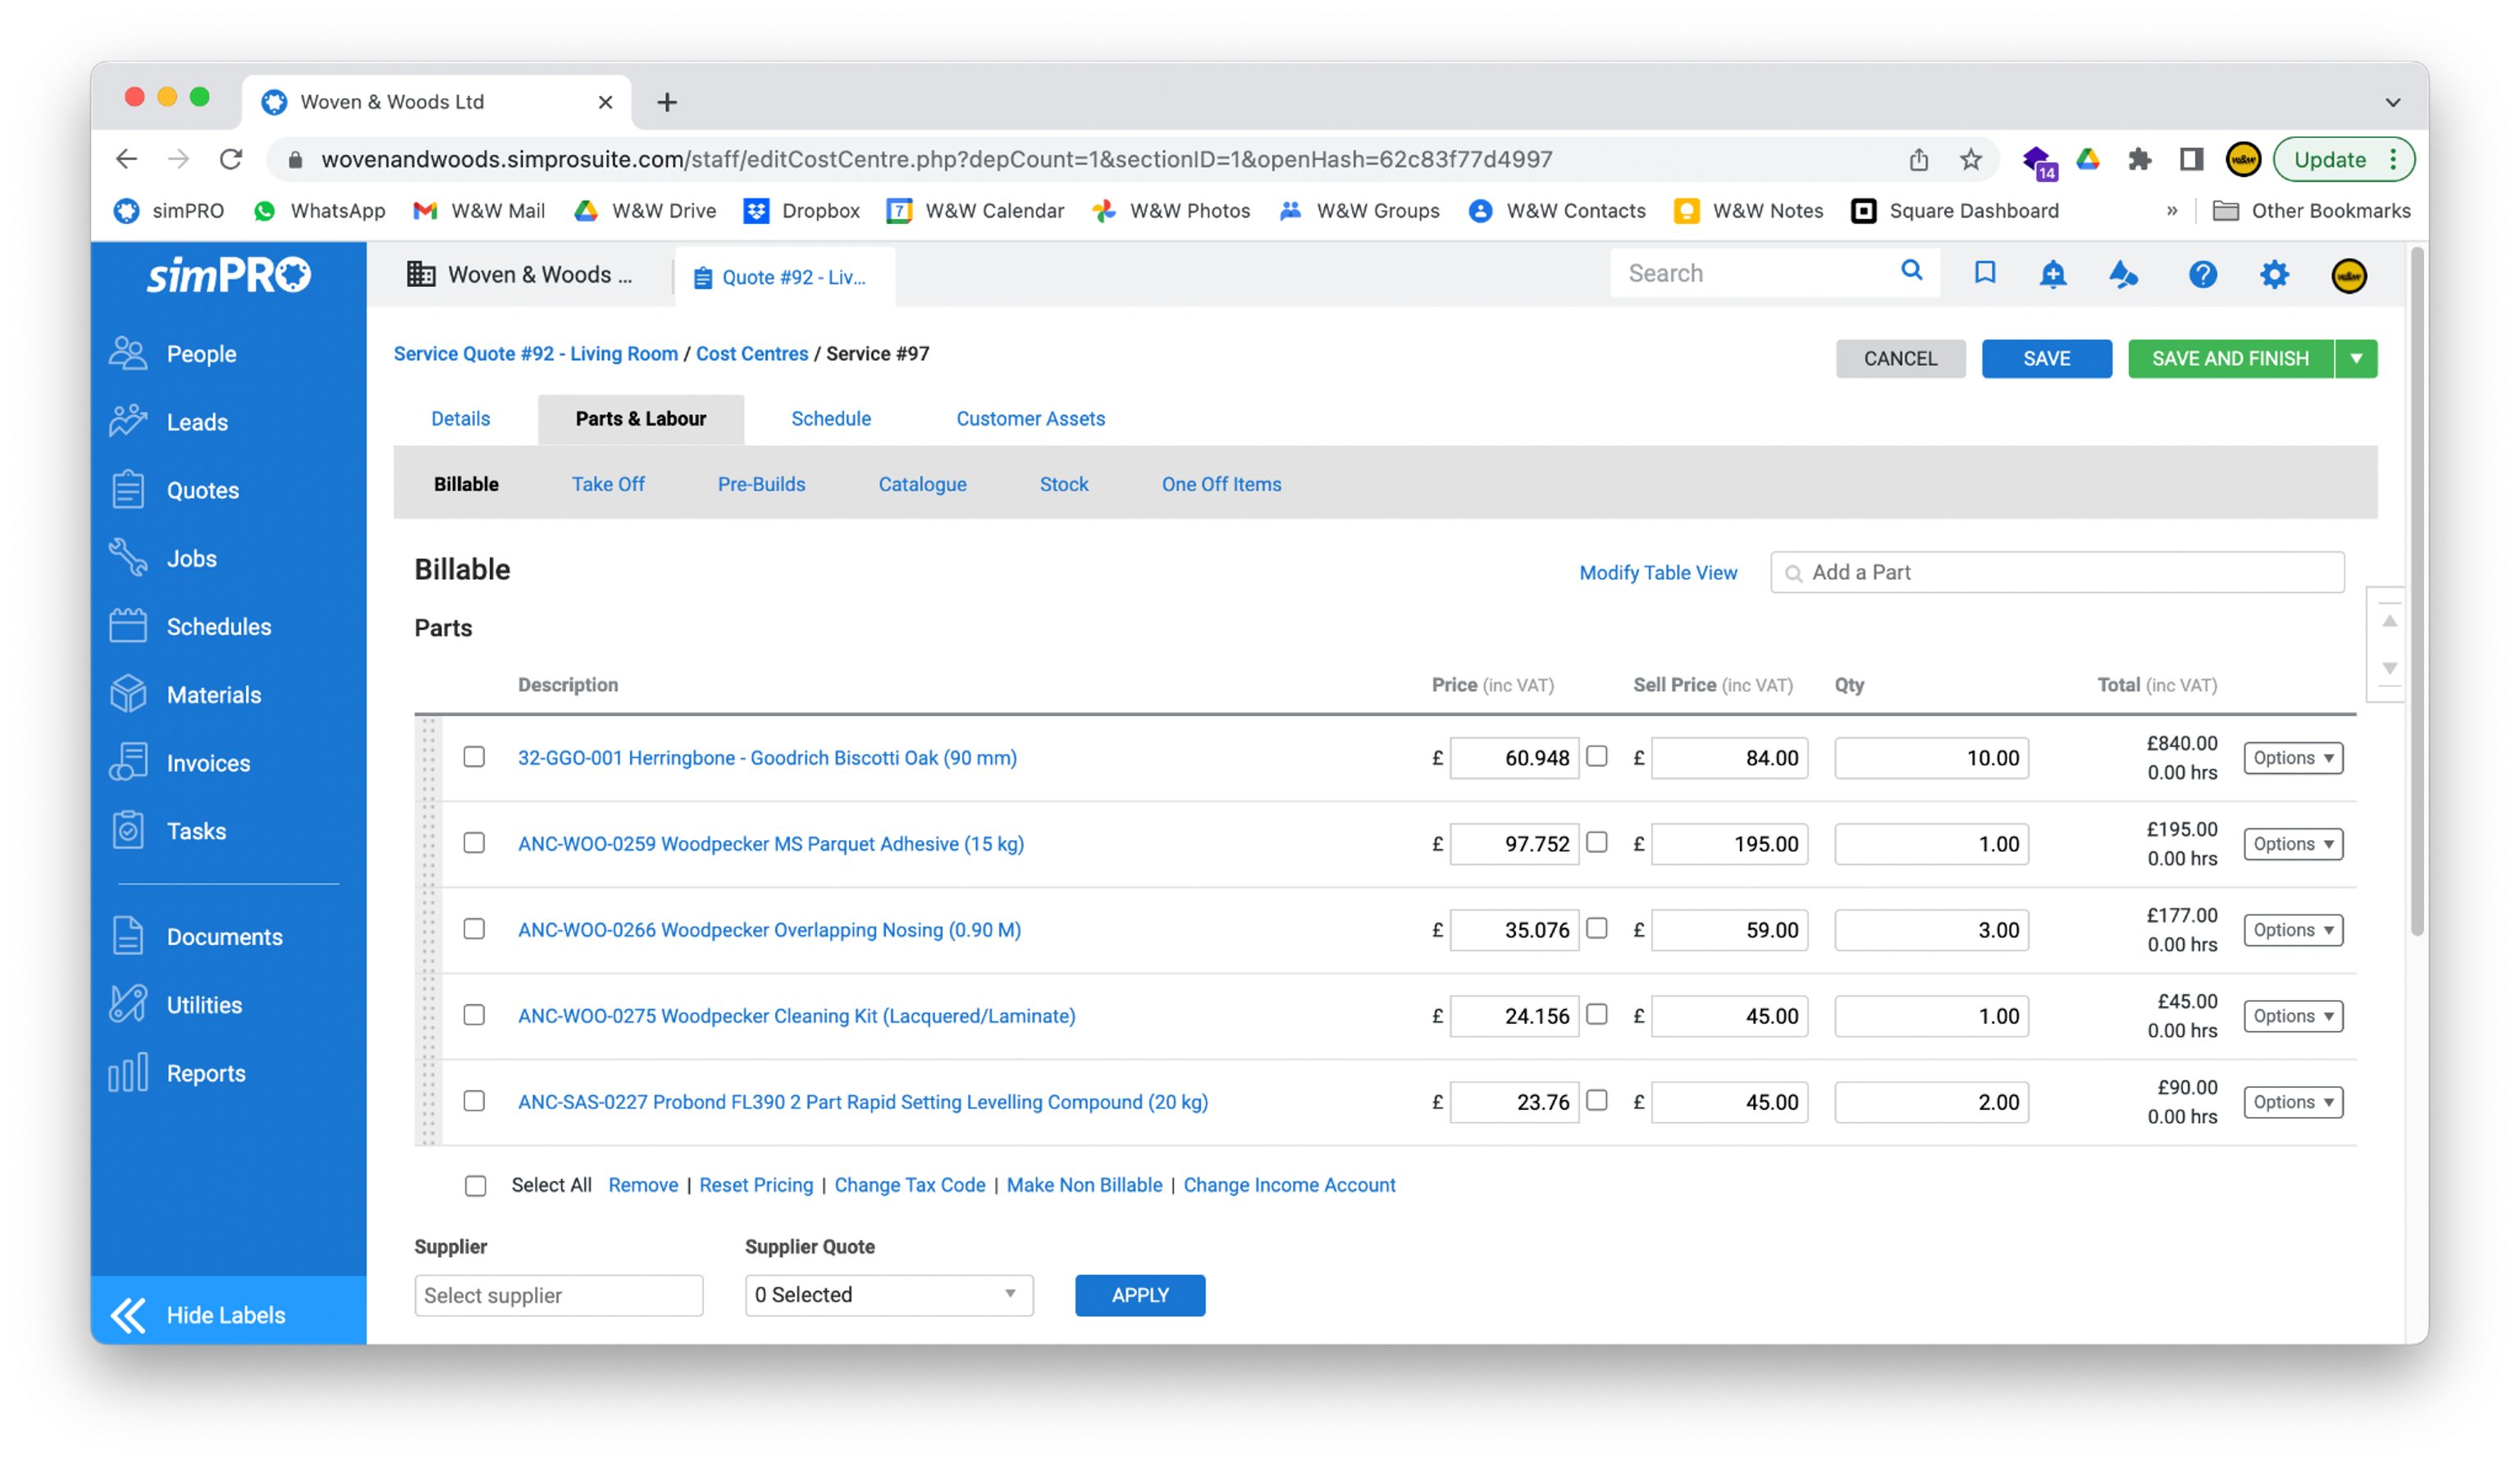
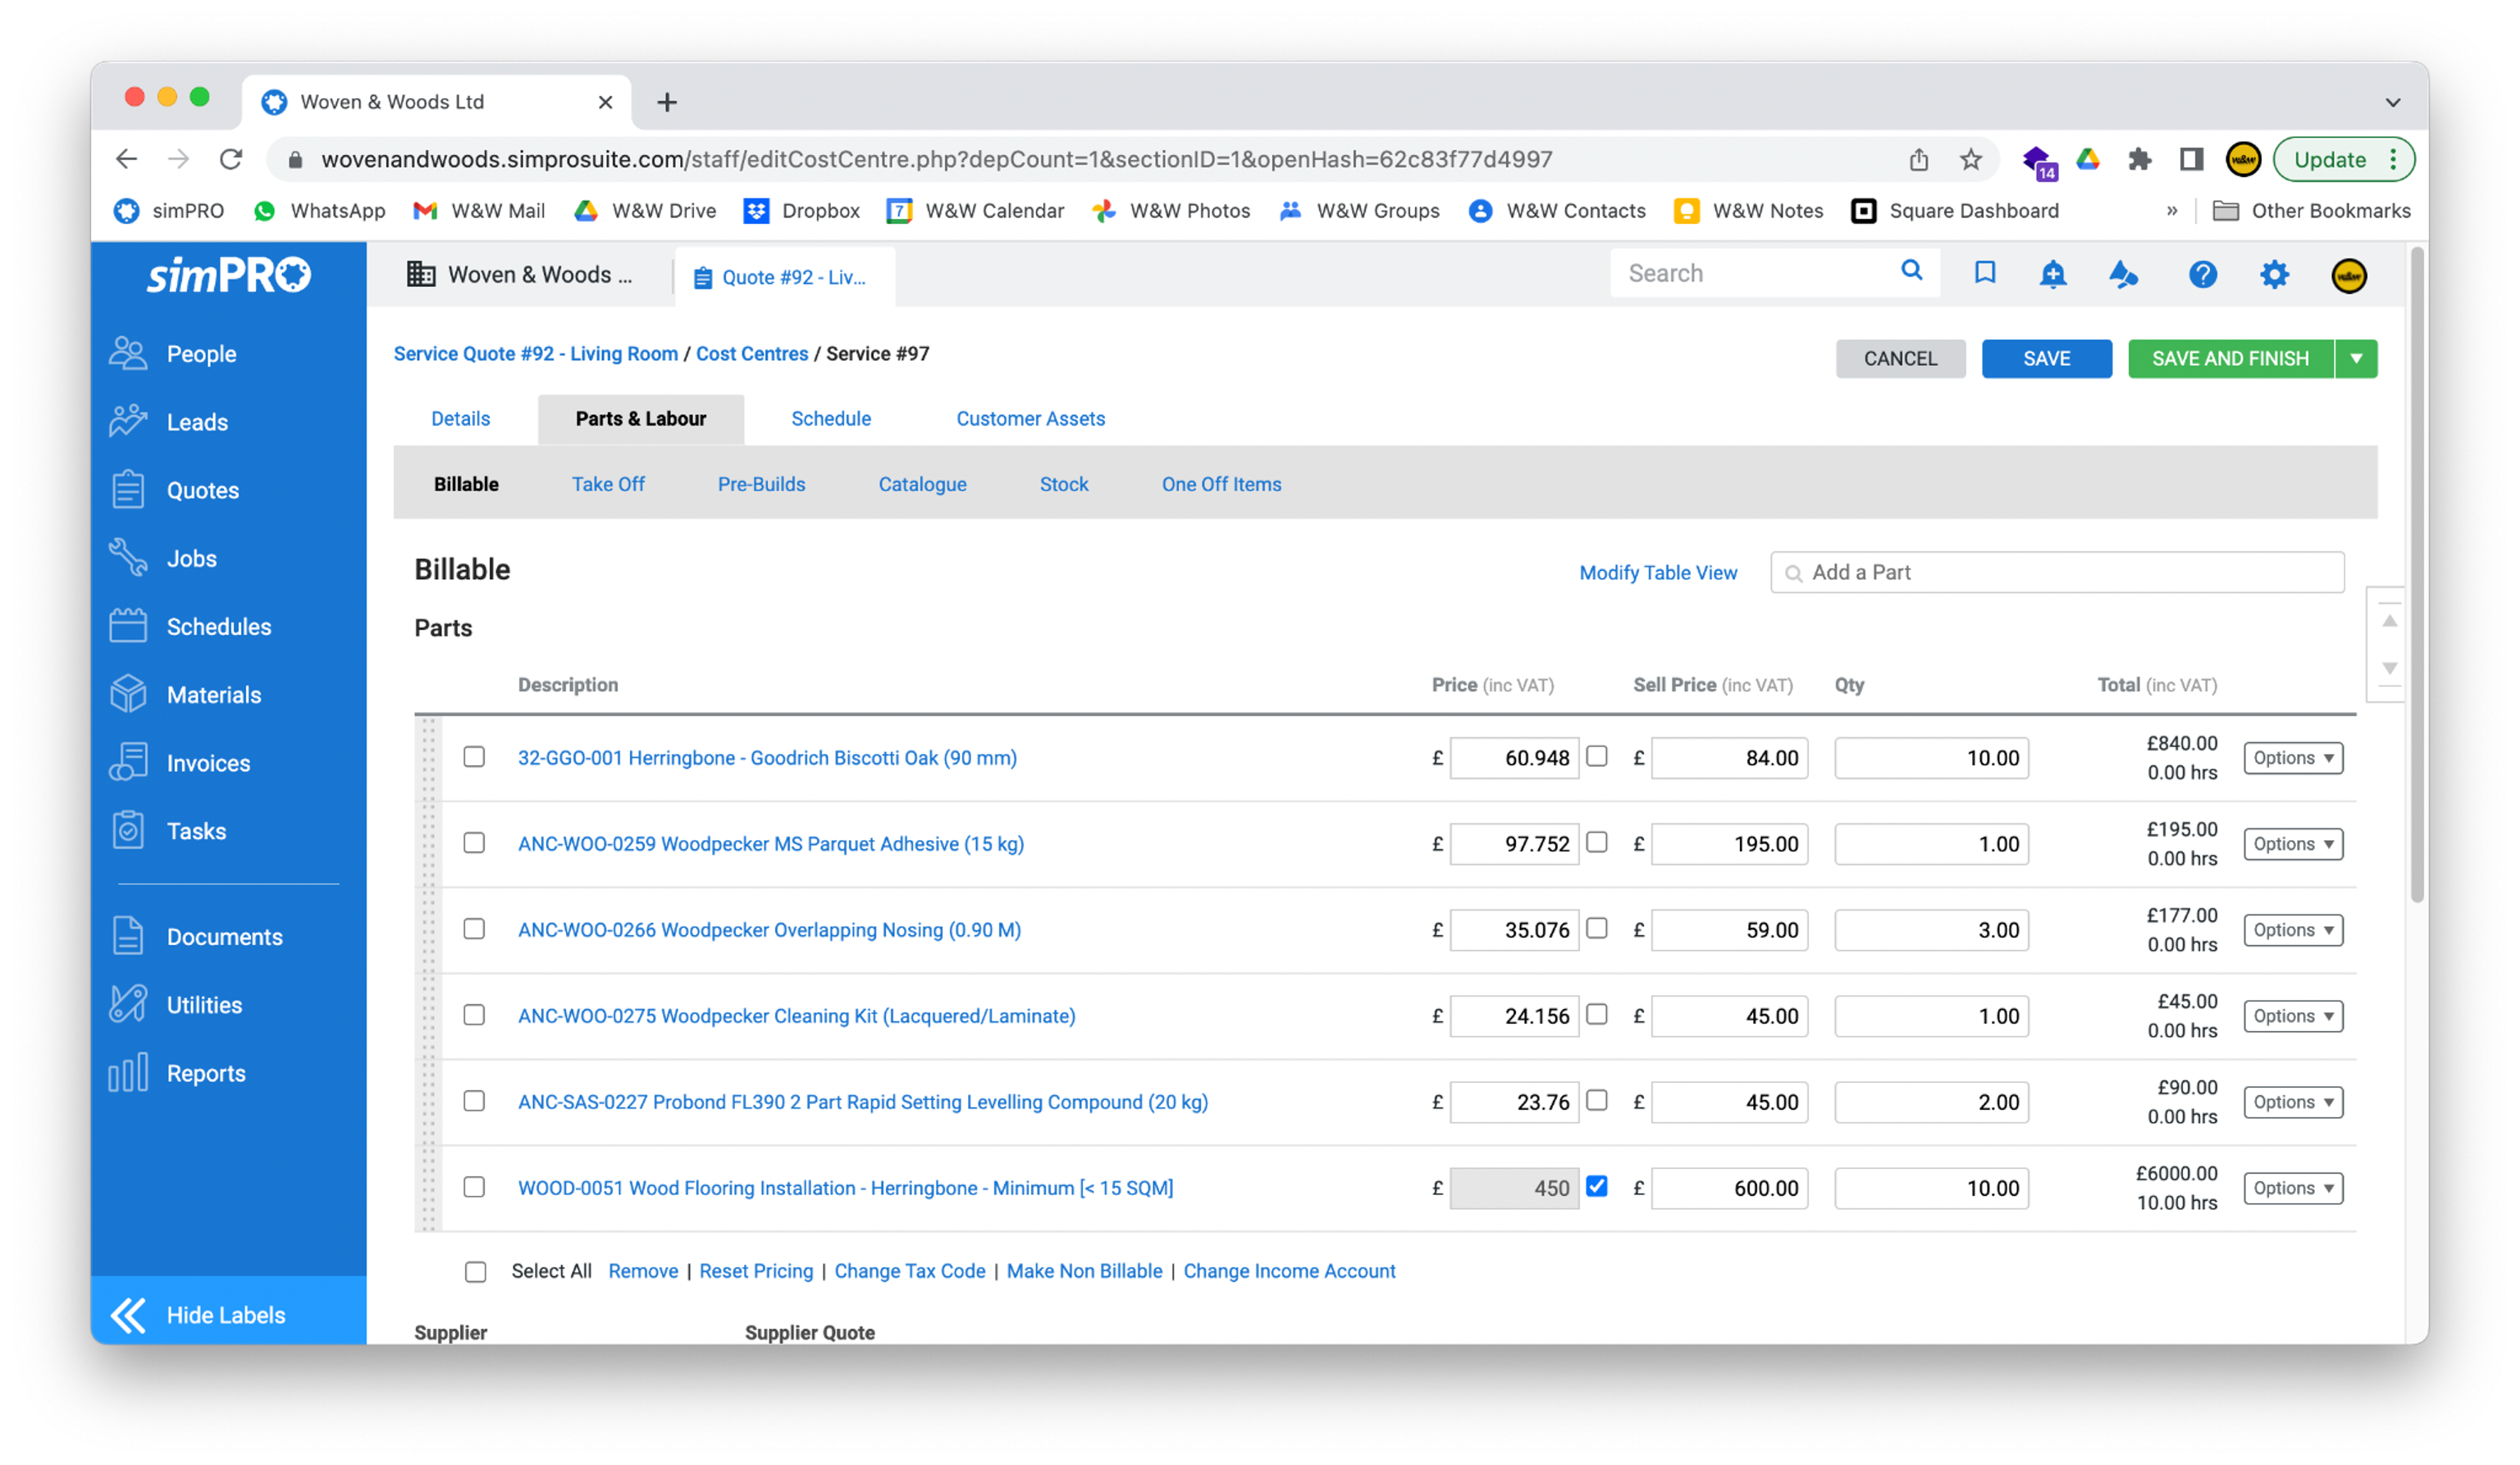
Section titled “Add Parts”- To add parts to the quote, click the Parts & Labour tab at the top of the screen, followed by Billable.
- In the Billable screen, add items to the quote using the search box in the top-right corner. Start typing the product name, range, or manufacturer, and it should appear in the drop-down box.
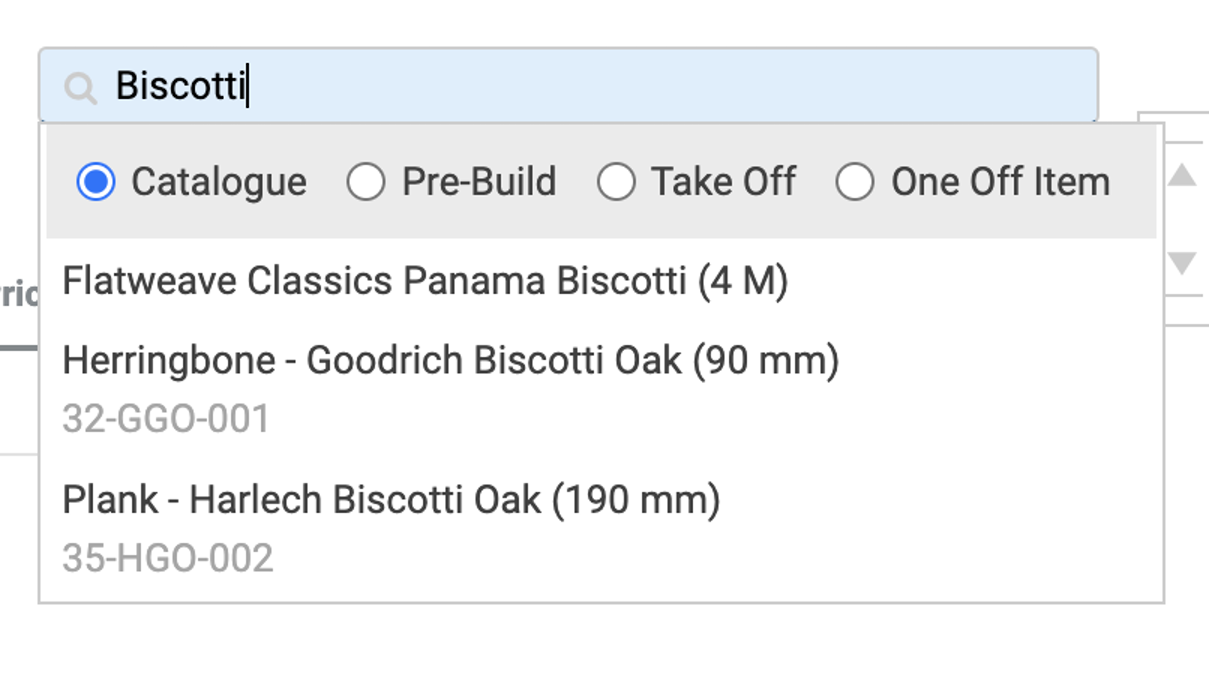
- Click the item name to add it to the quote. The item will appear as a new line under the Parts section, along with Price (inc VAT), Sell Price (inc VAT), Qty, and Total (inc VAT).
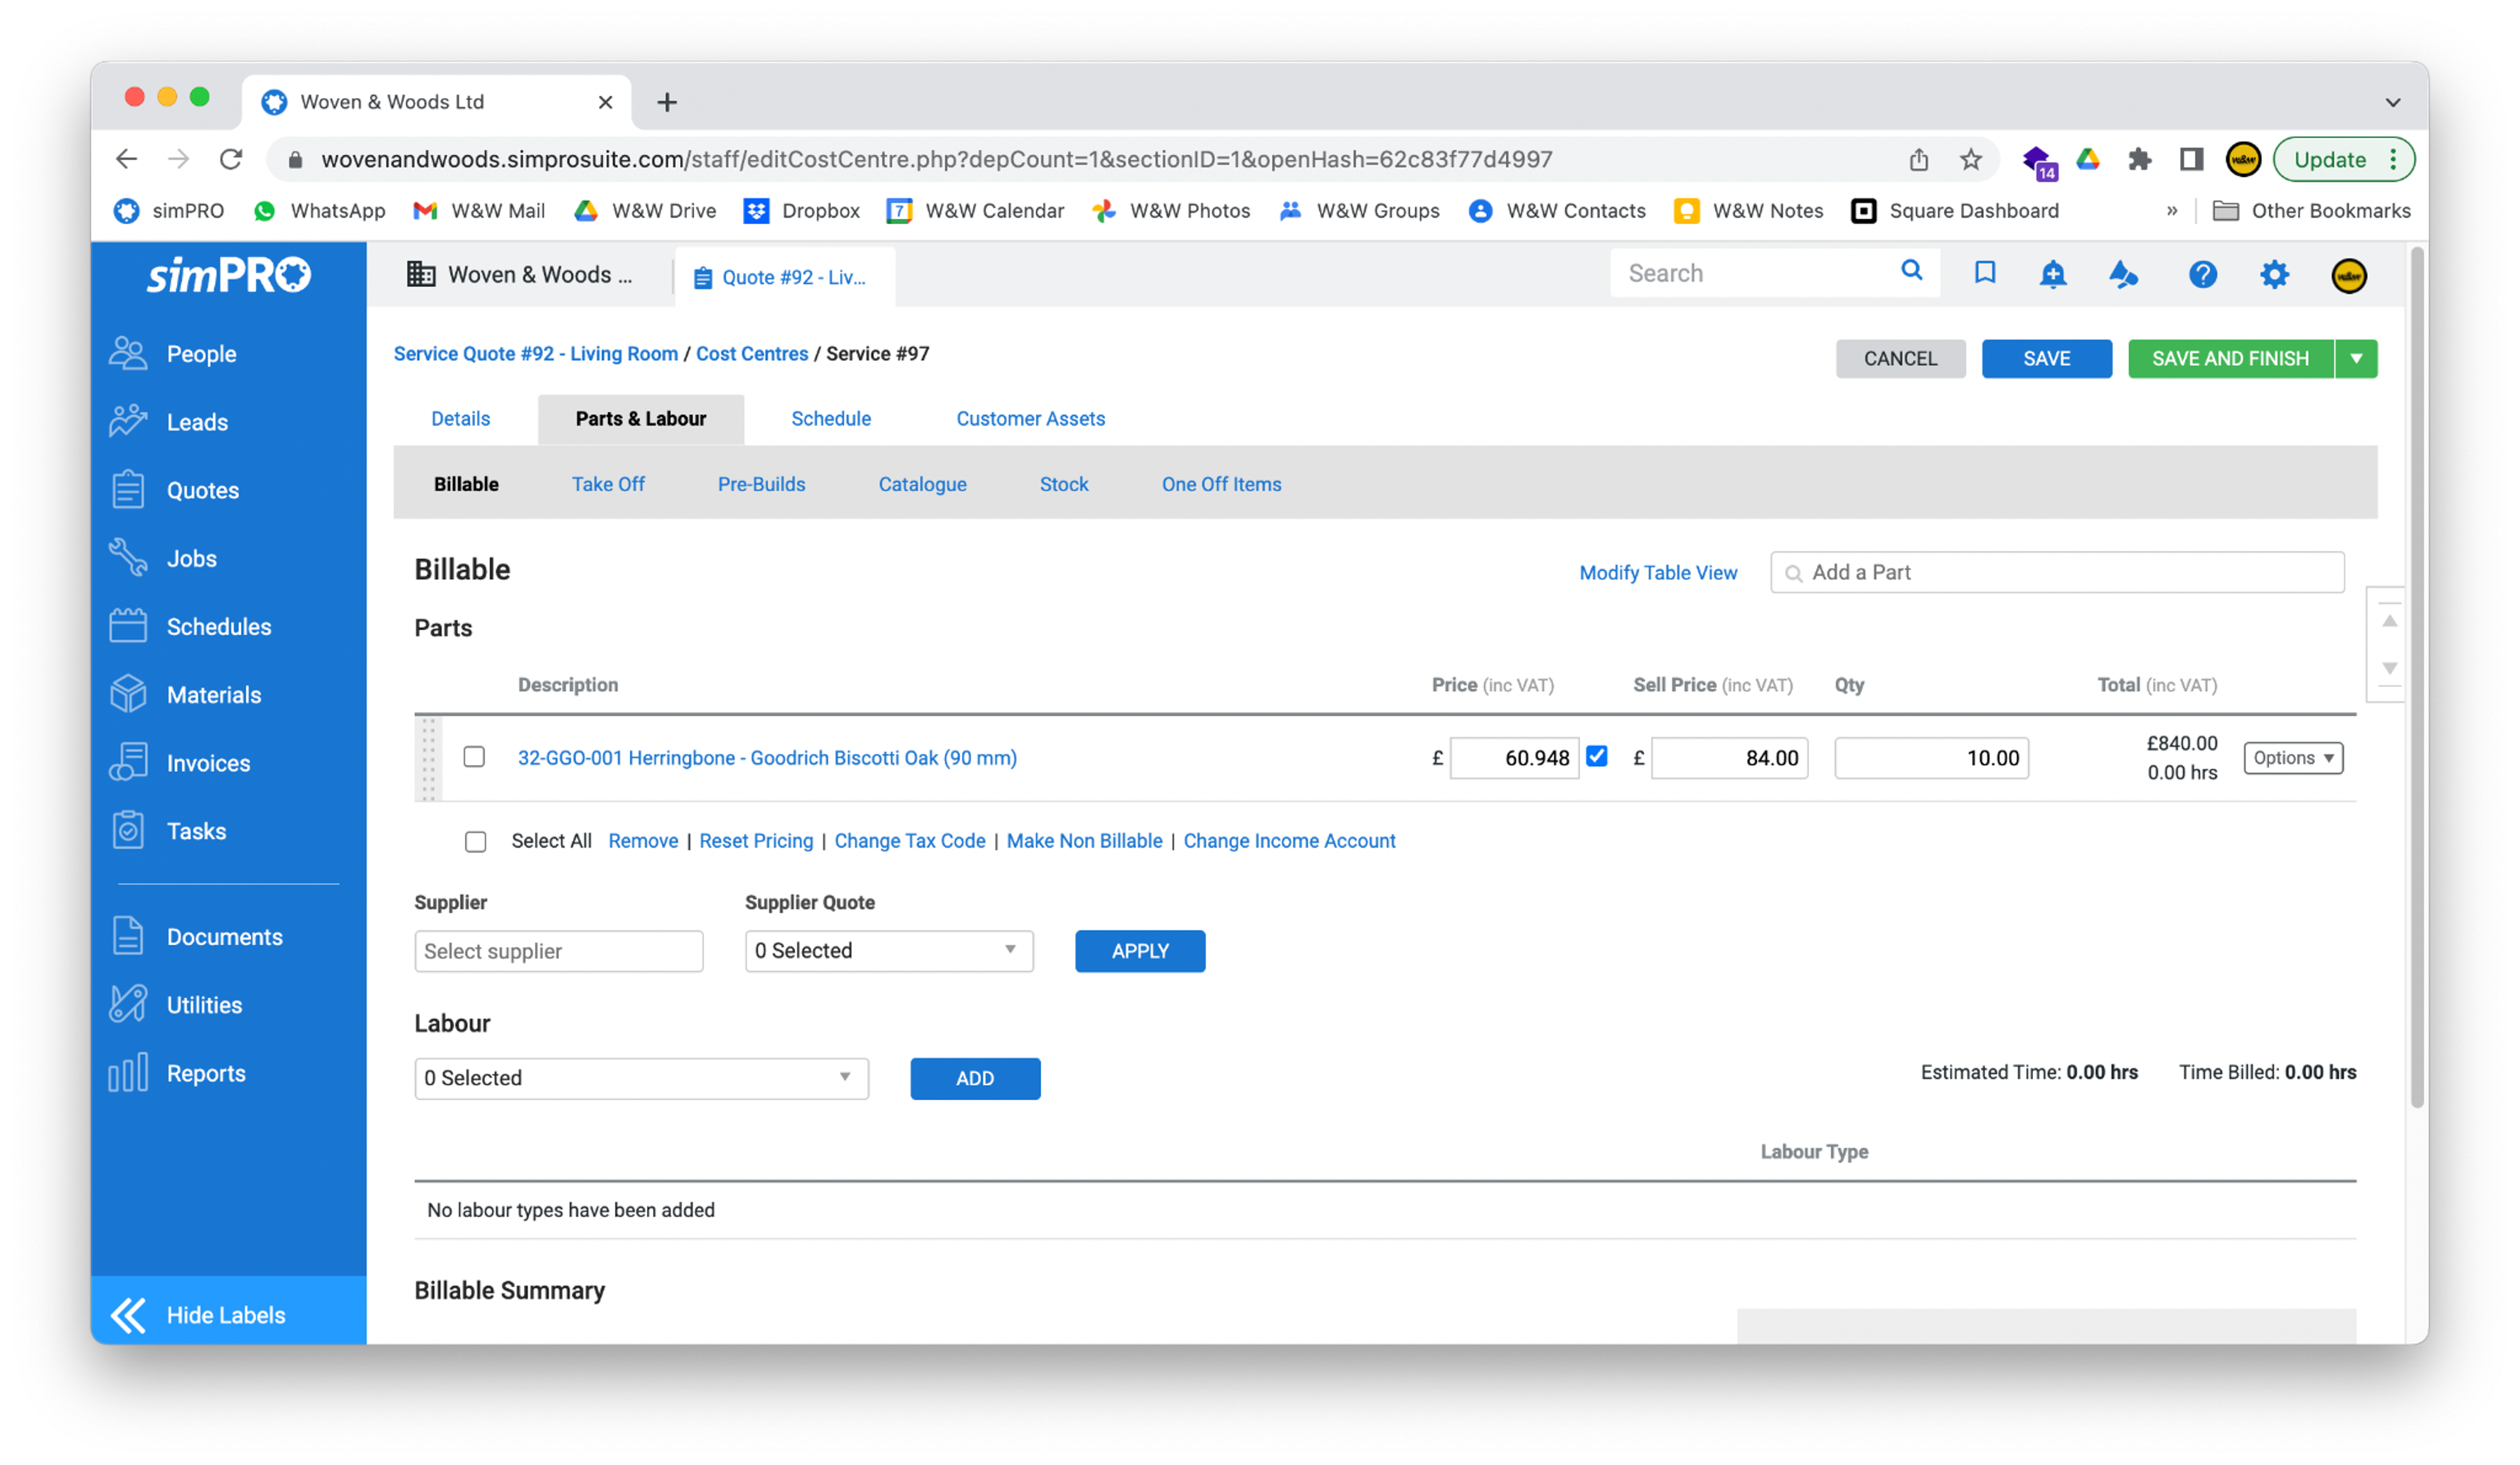
- Refer to the product pack size to work out the required square metres and enter that number into the Qty field, then press Tab. The Total field should now be updated.

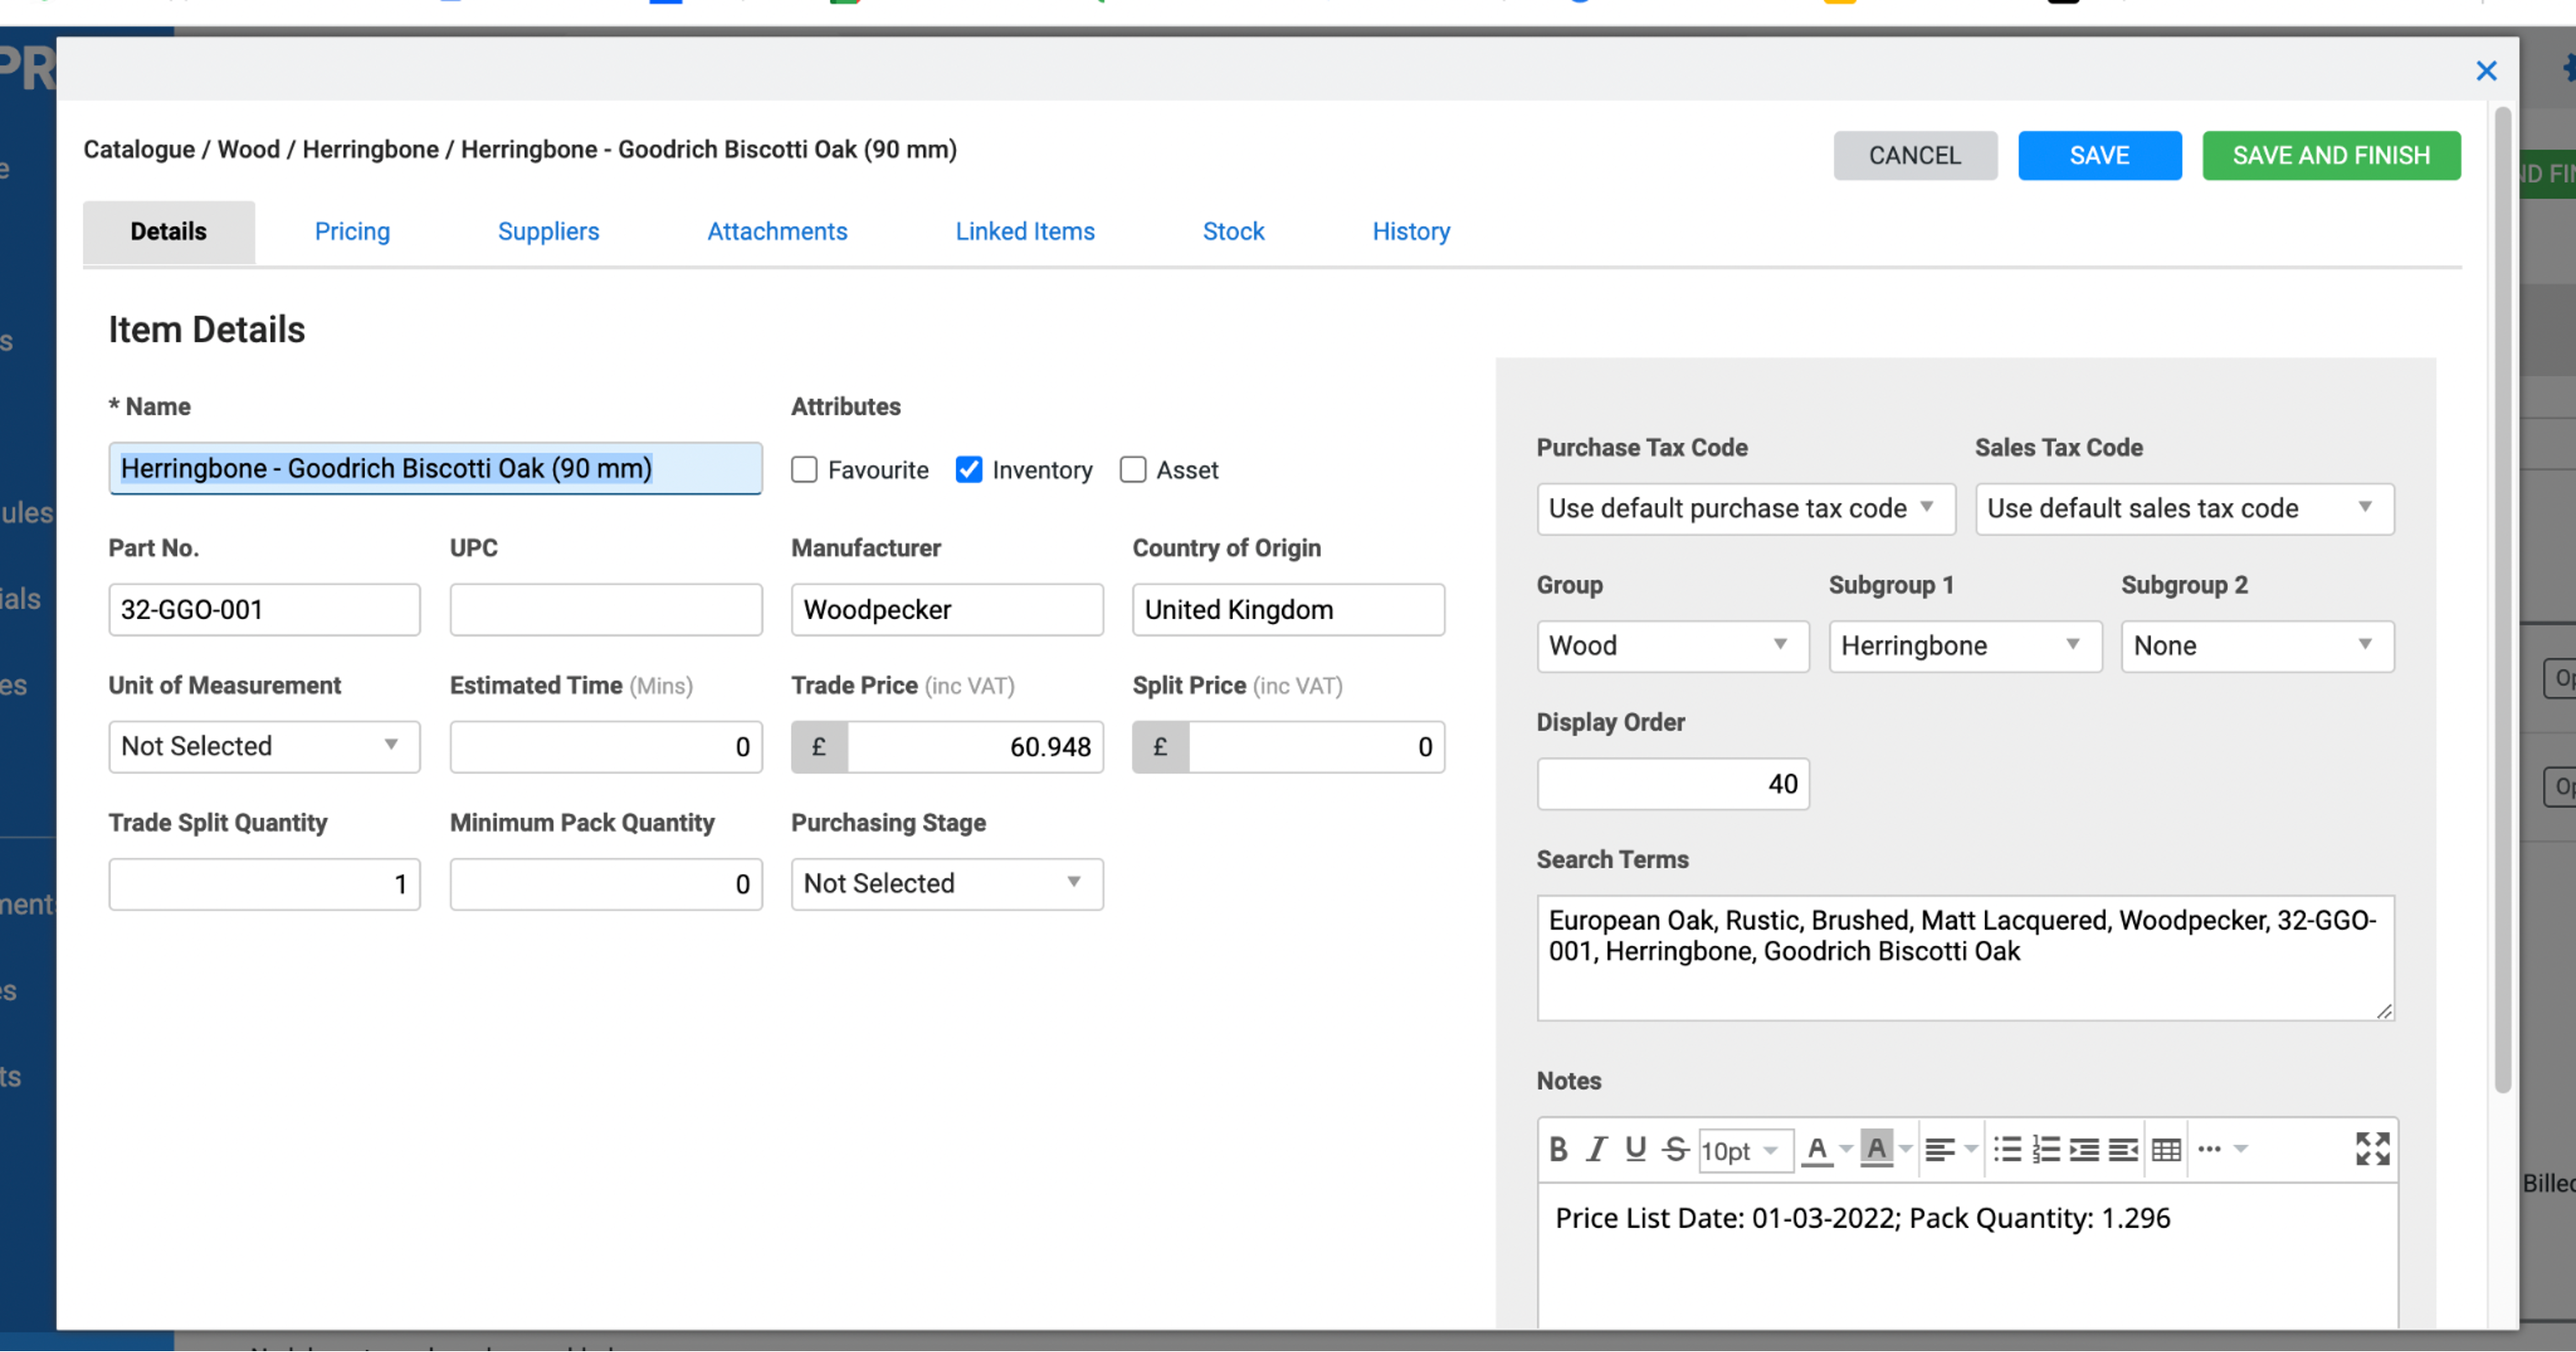
- You can find more information about a product (including pack size) by clicking its name.
- Do not change any information in the pop-up window, as this will affect all other quotes that include this item.
- If you need to amend any details for this specific quote (e.g., price), you must change this on the Billable screen, not the product page.
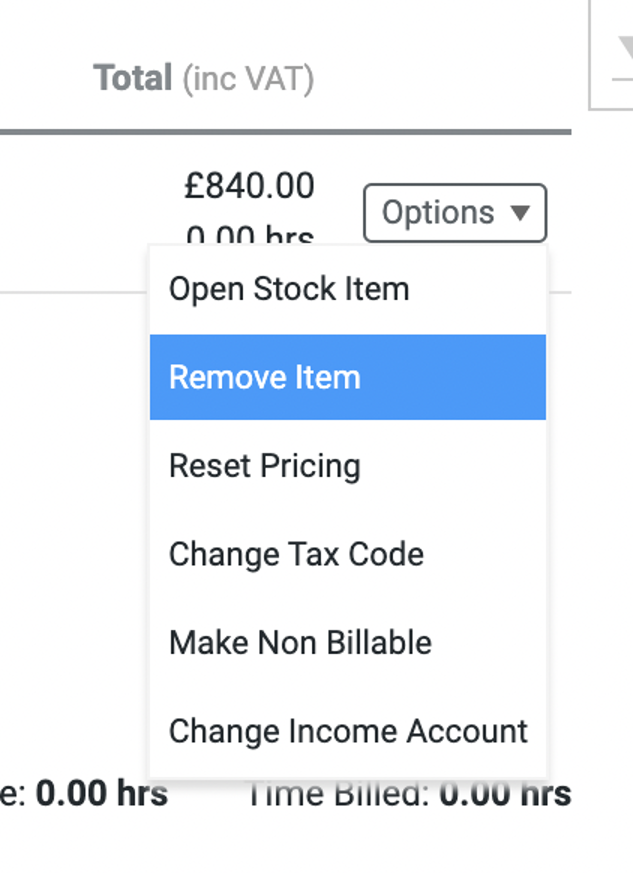
- If you have added an item by mistake, delete it by clicking the Options button on the far right and selecting Remove Item.
- Once you have added all items, click the blue Save button to save your work.
Reset Pricing
Section titled “Reset Pricing”- If you are returning to an old quote, you can update the prices to the current ones by clicking the Reset Pricing button at the bottom of the screen.
Add Labour
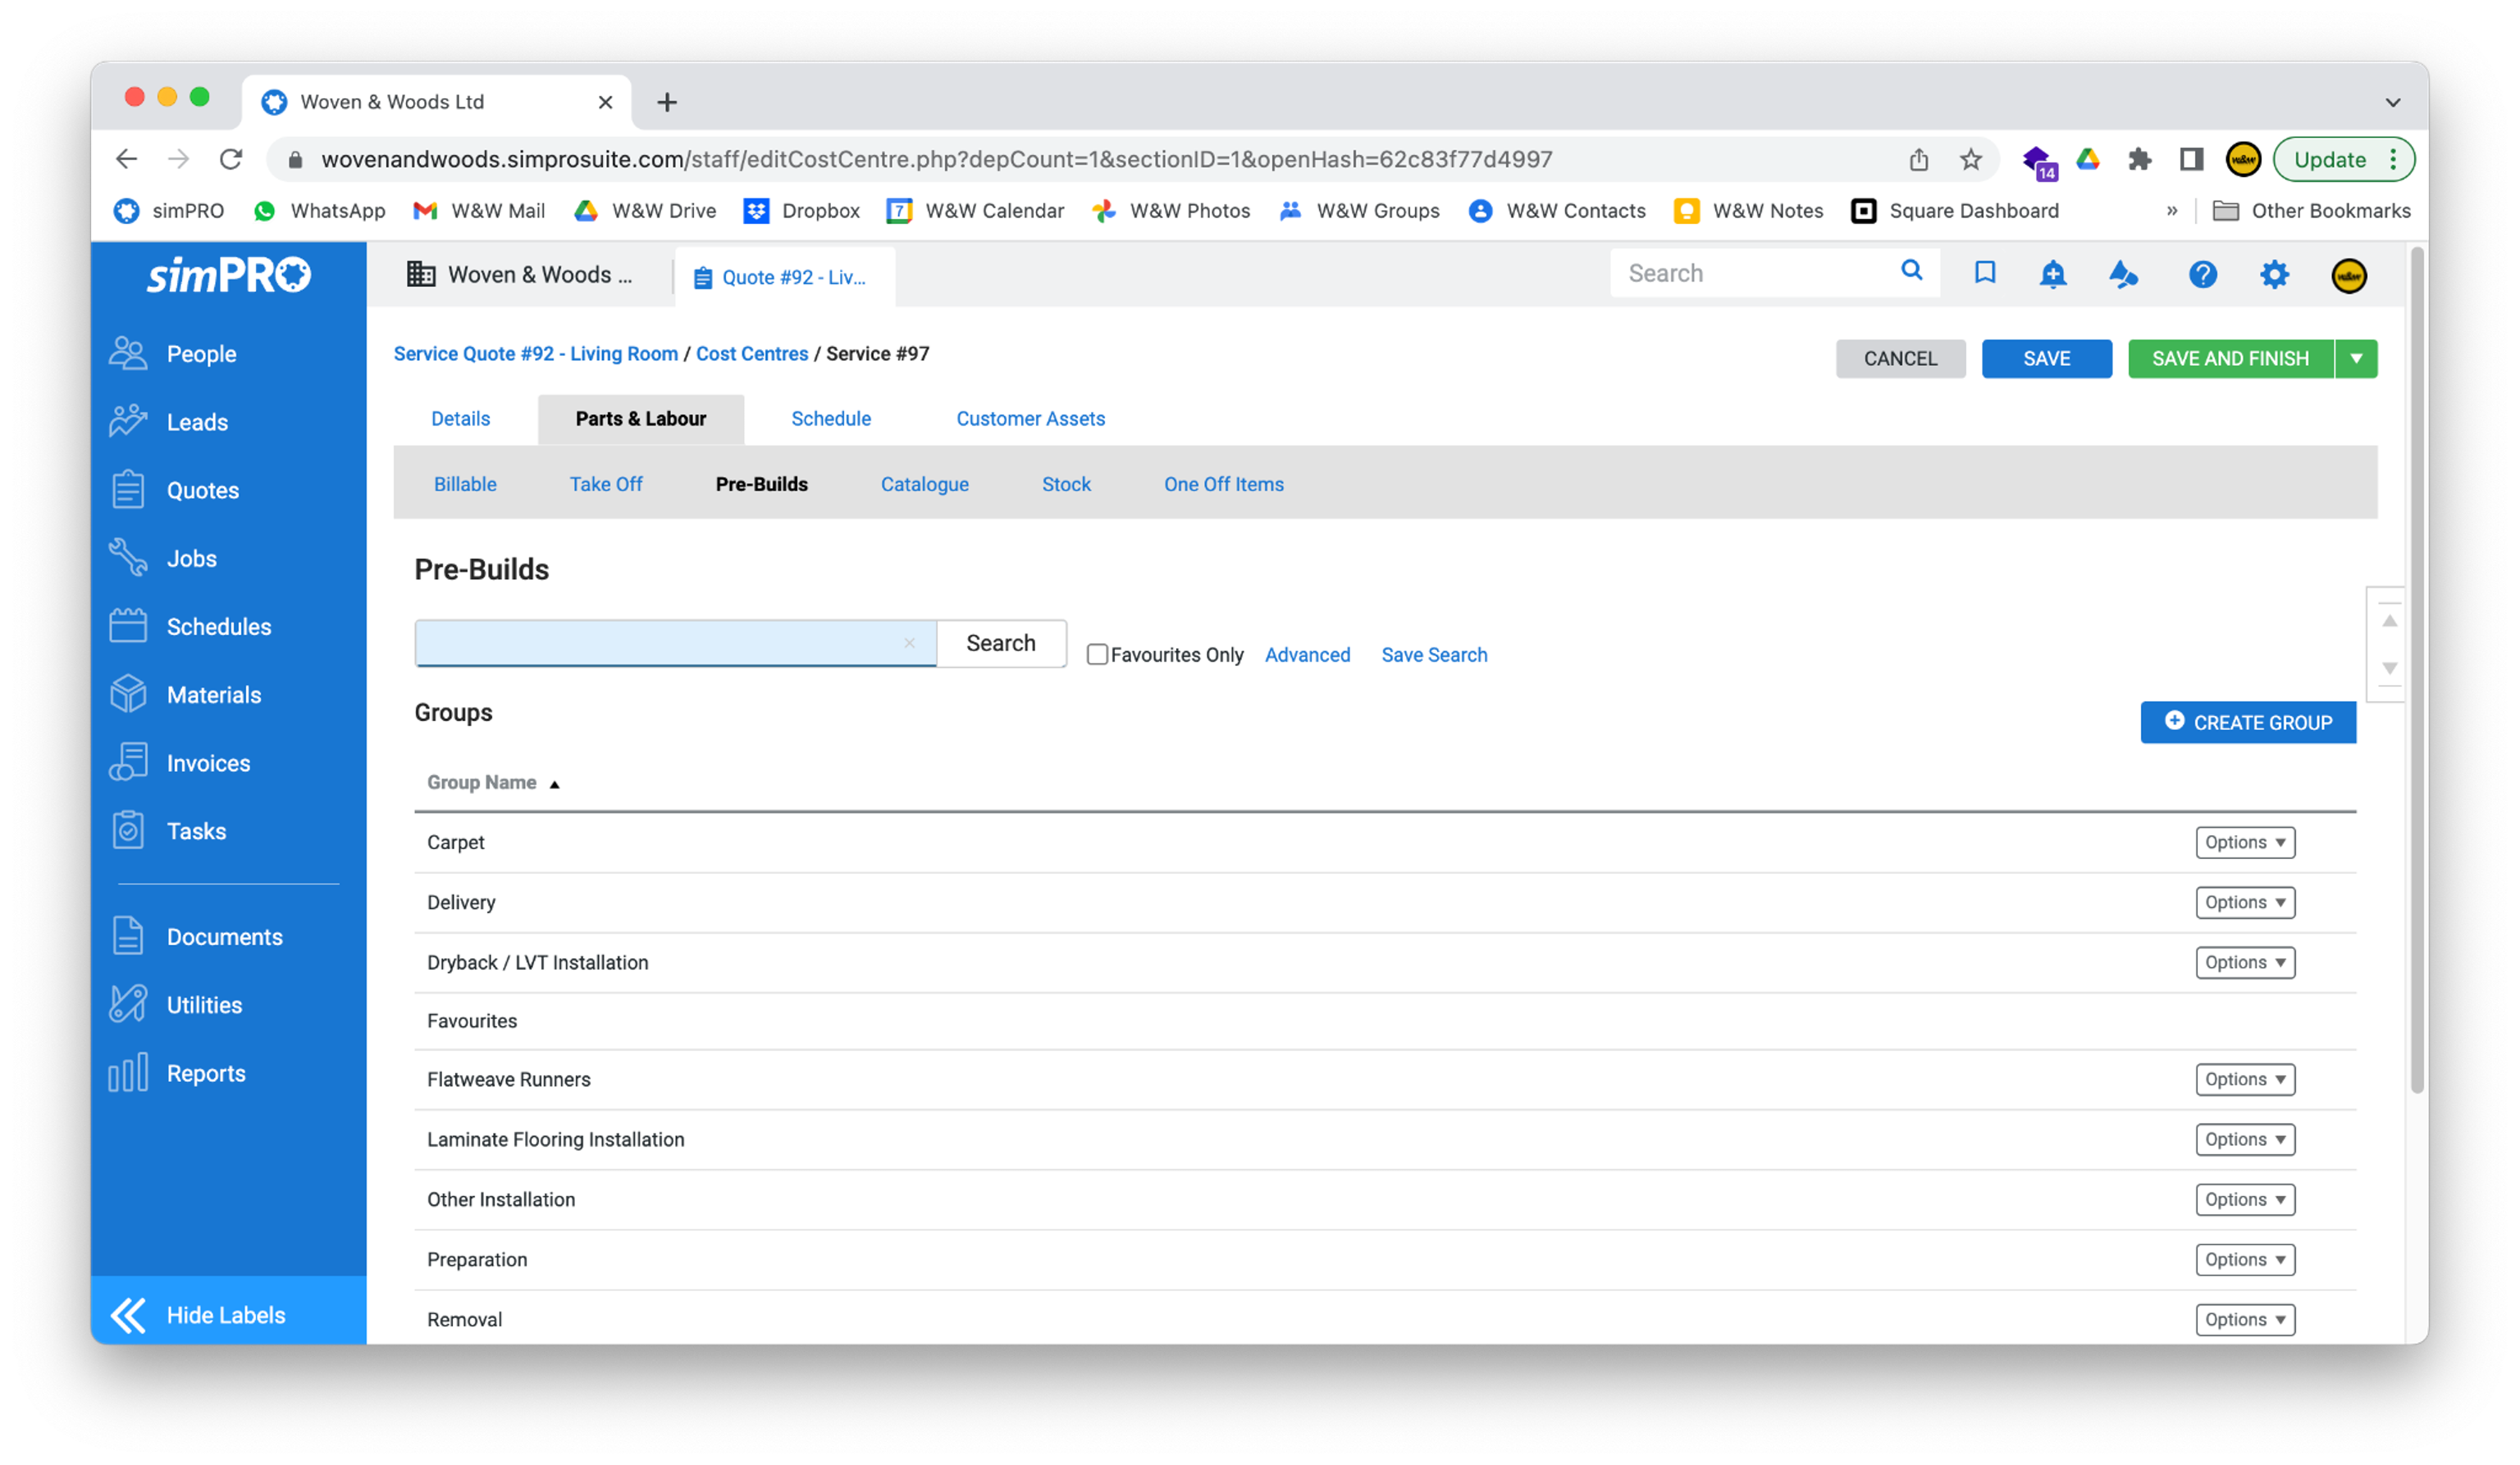
Section titled “Add Labour”- Labour items can be added in the Pre-Builds section. Access this by clicking the link in the grey bar.

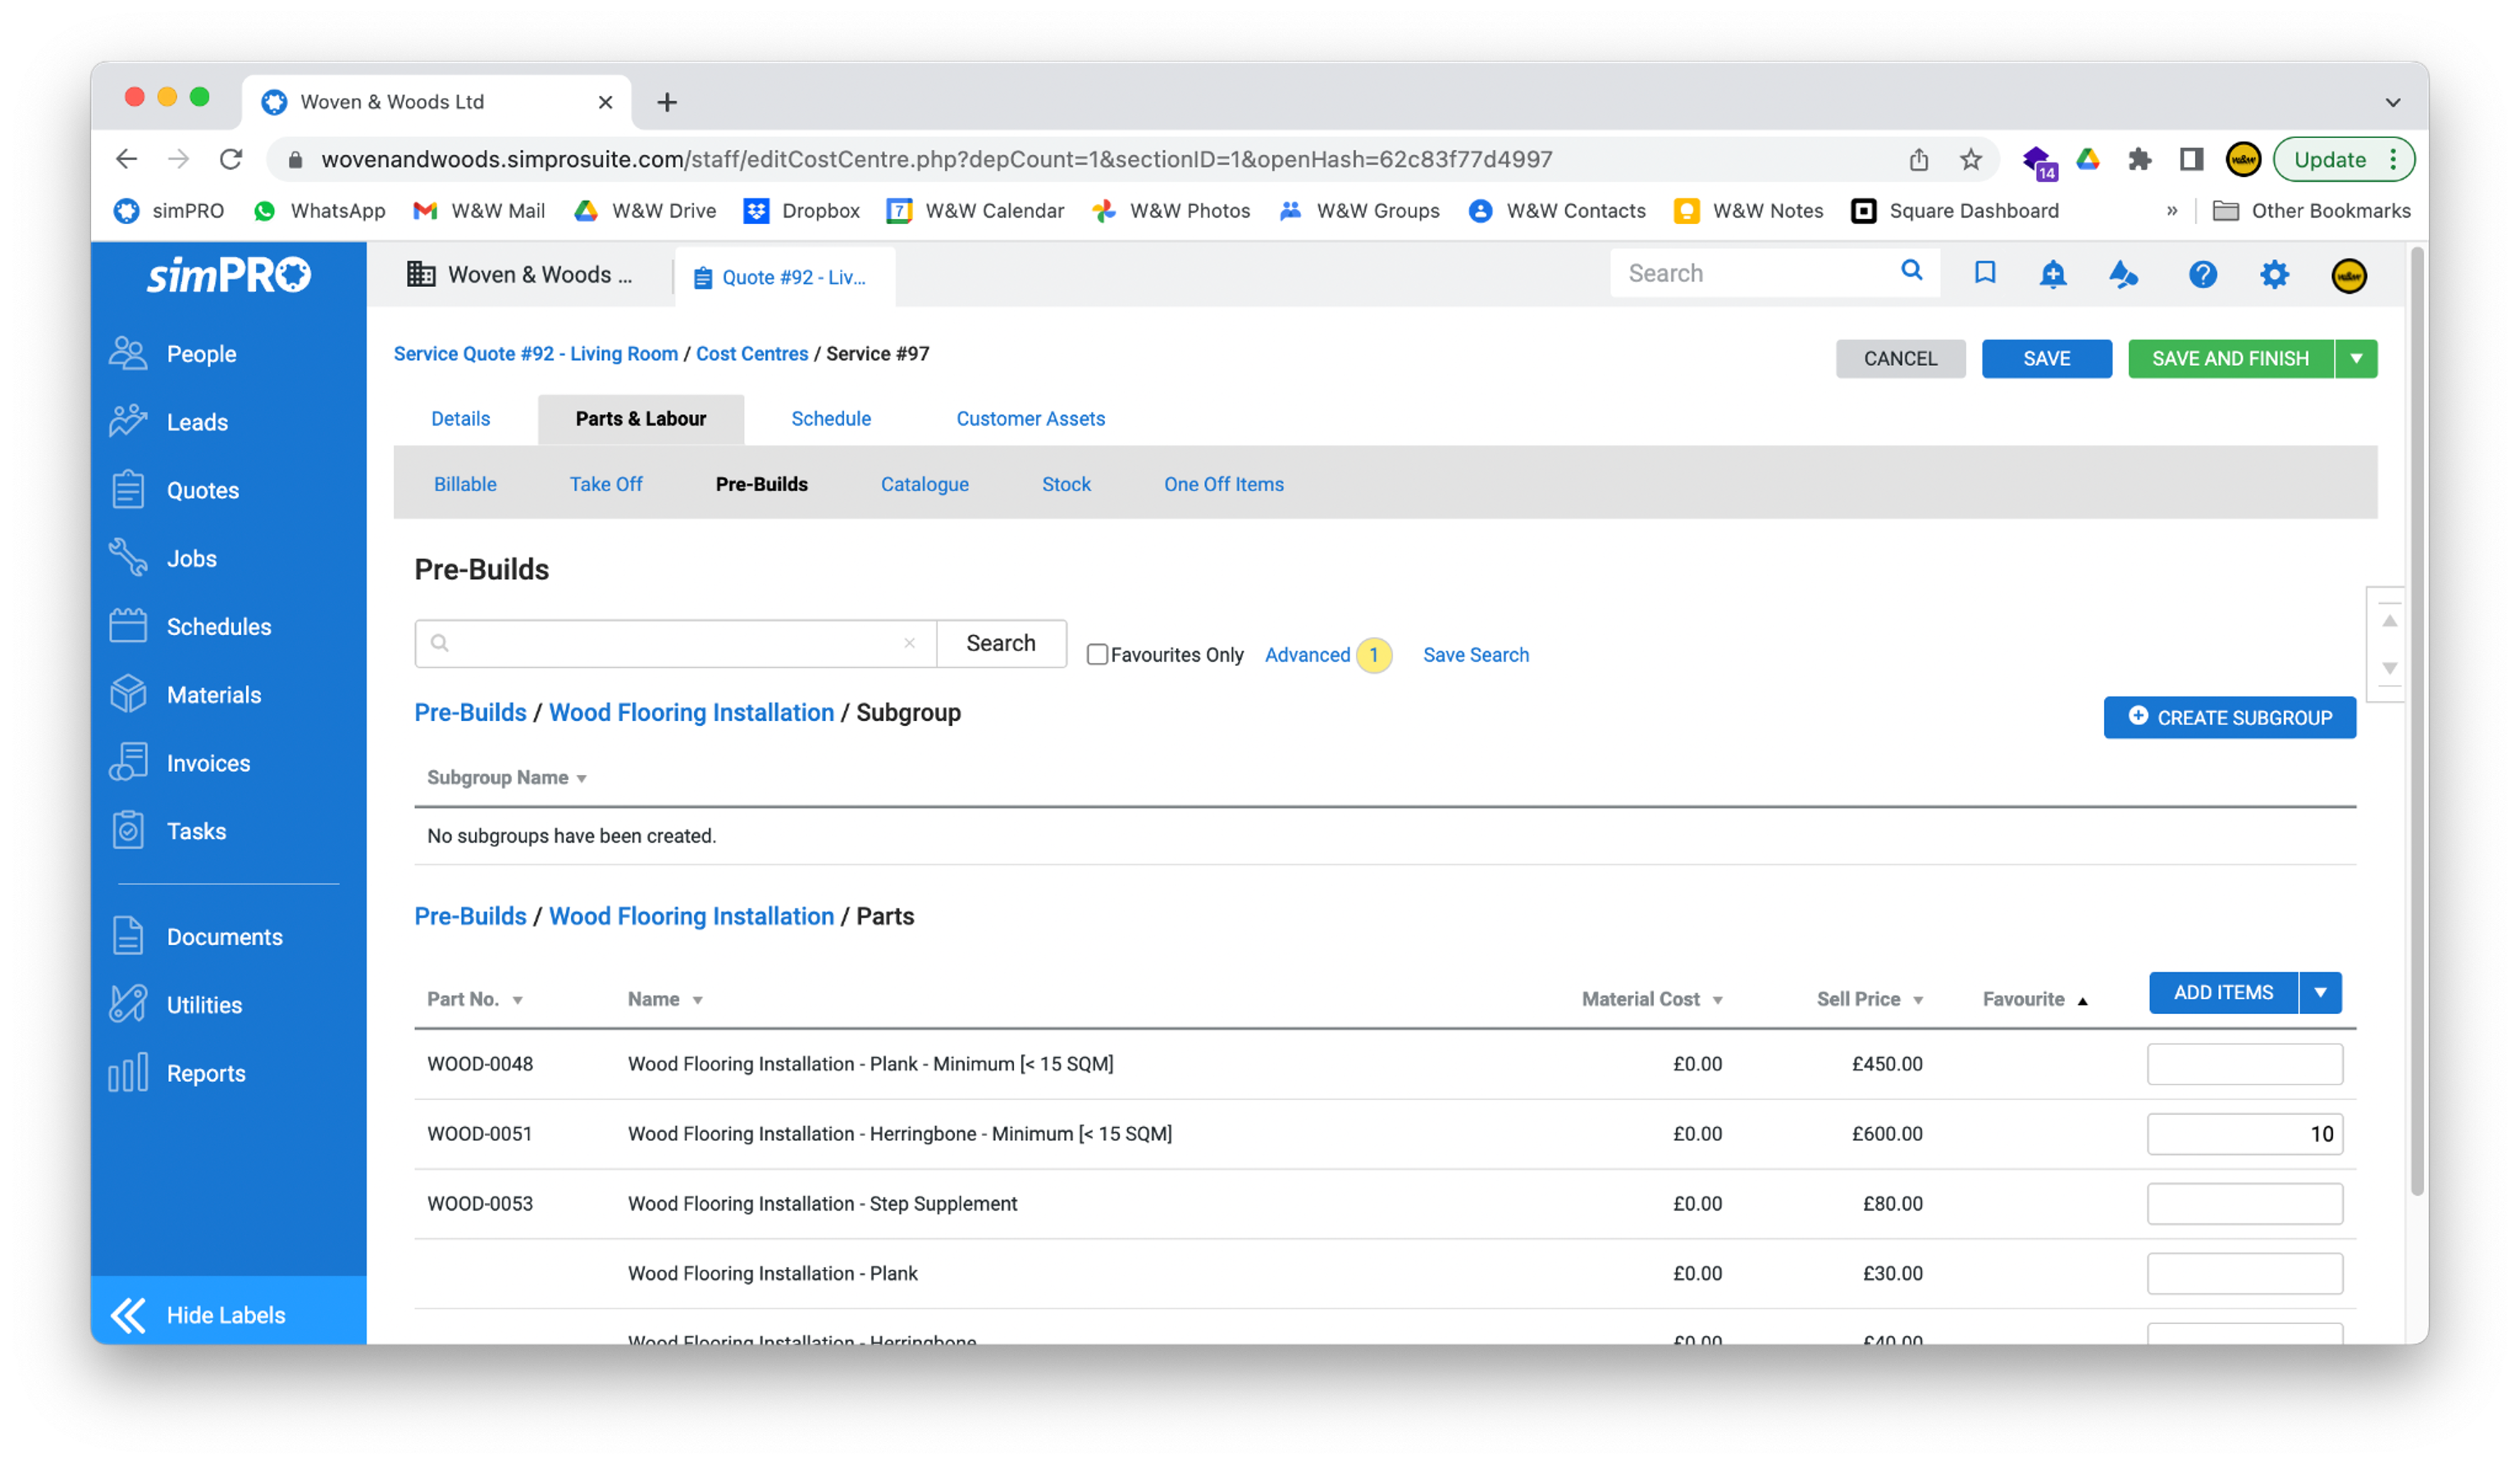
- You will be taken to the Pre-Build screen, which lists labour categories. To add a labour item, either:
A. Click the relevant category and then select the labour item; or
B. Use the search box above the category list to search for the labour item.
- When you have found the labour item, enter the amount of work to be done in the Qty field (usually in square metres, but check if unsure).
- Then click the blue Add Items button to add the labour item to the quote.
- Unlike normal items, you won’t see the labour item added immediately. To see all items added to the quote (or to delete a labour item), click the Billable button in the bar at the top of the page.
- You can now delete any labour items in the same way you would a normal item (using the Options menu on the right-hand side).
- You can also rearrange items on this screen using the dotted grab handles on the left-hand side of each row. Just click and drag. The order of items here will be reflected in the final quote, so ensure it’s correct.
- When you have finished adding items, click the blue Save button to save your work.
Apply a Discount
Section titled “Apply a Discount”-
To apply a discount, click into the cost centre and scroll down to the item labelled Discount/Fee. Enter the discount amount and click Update.
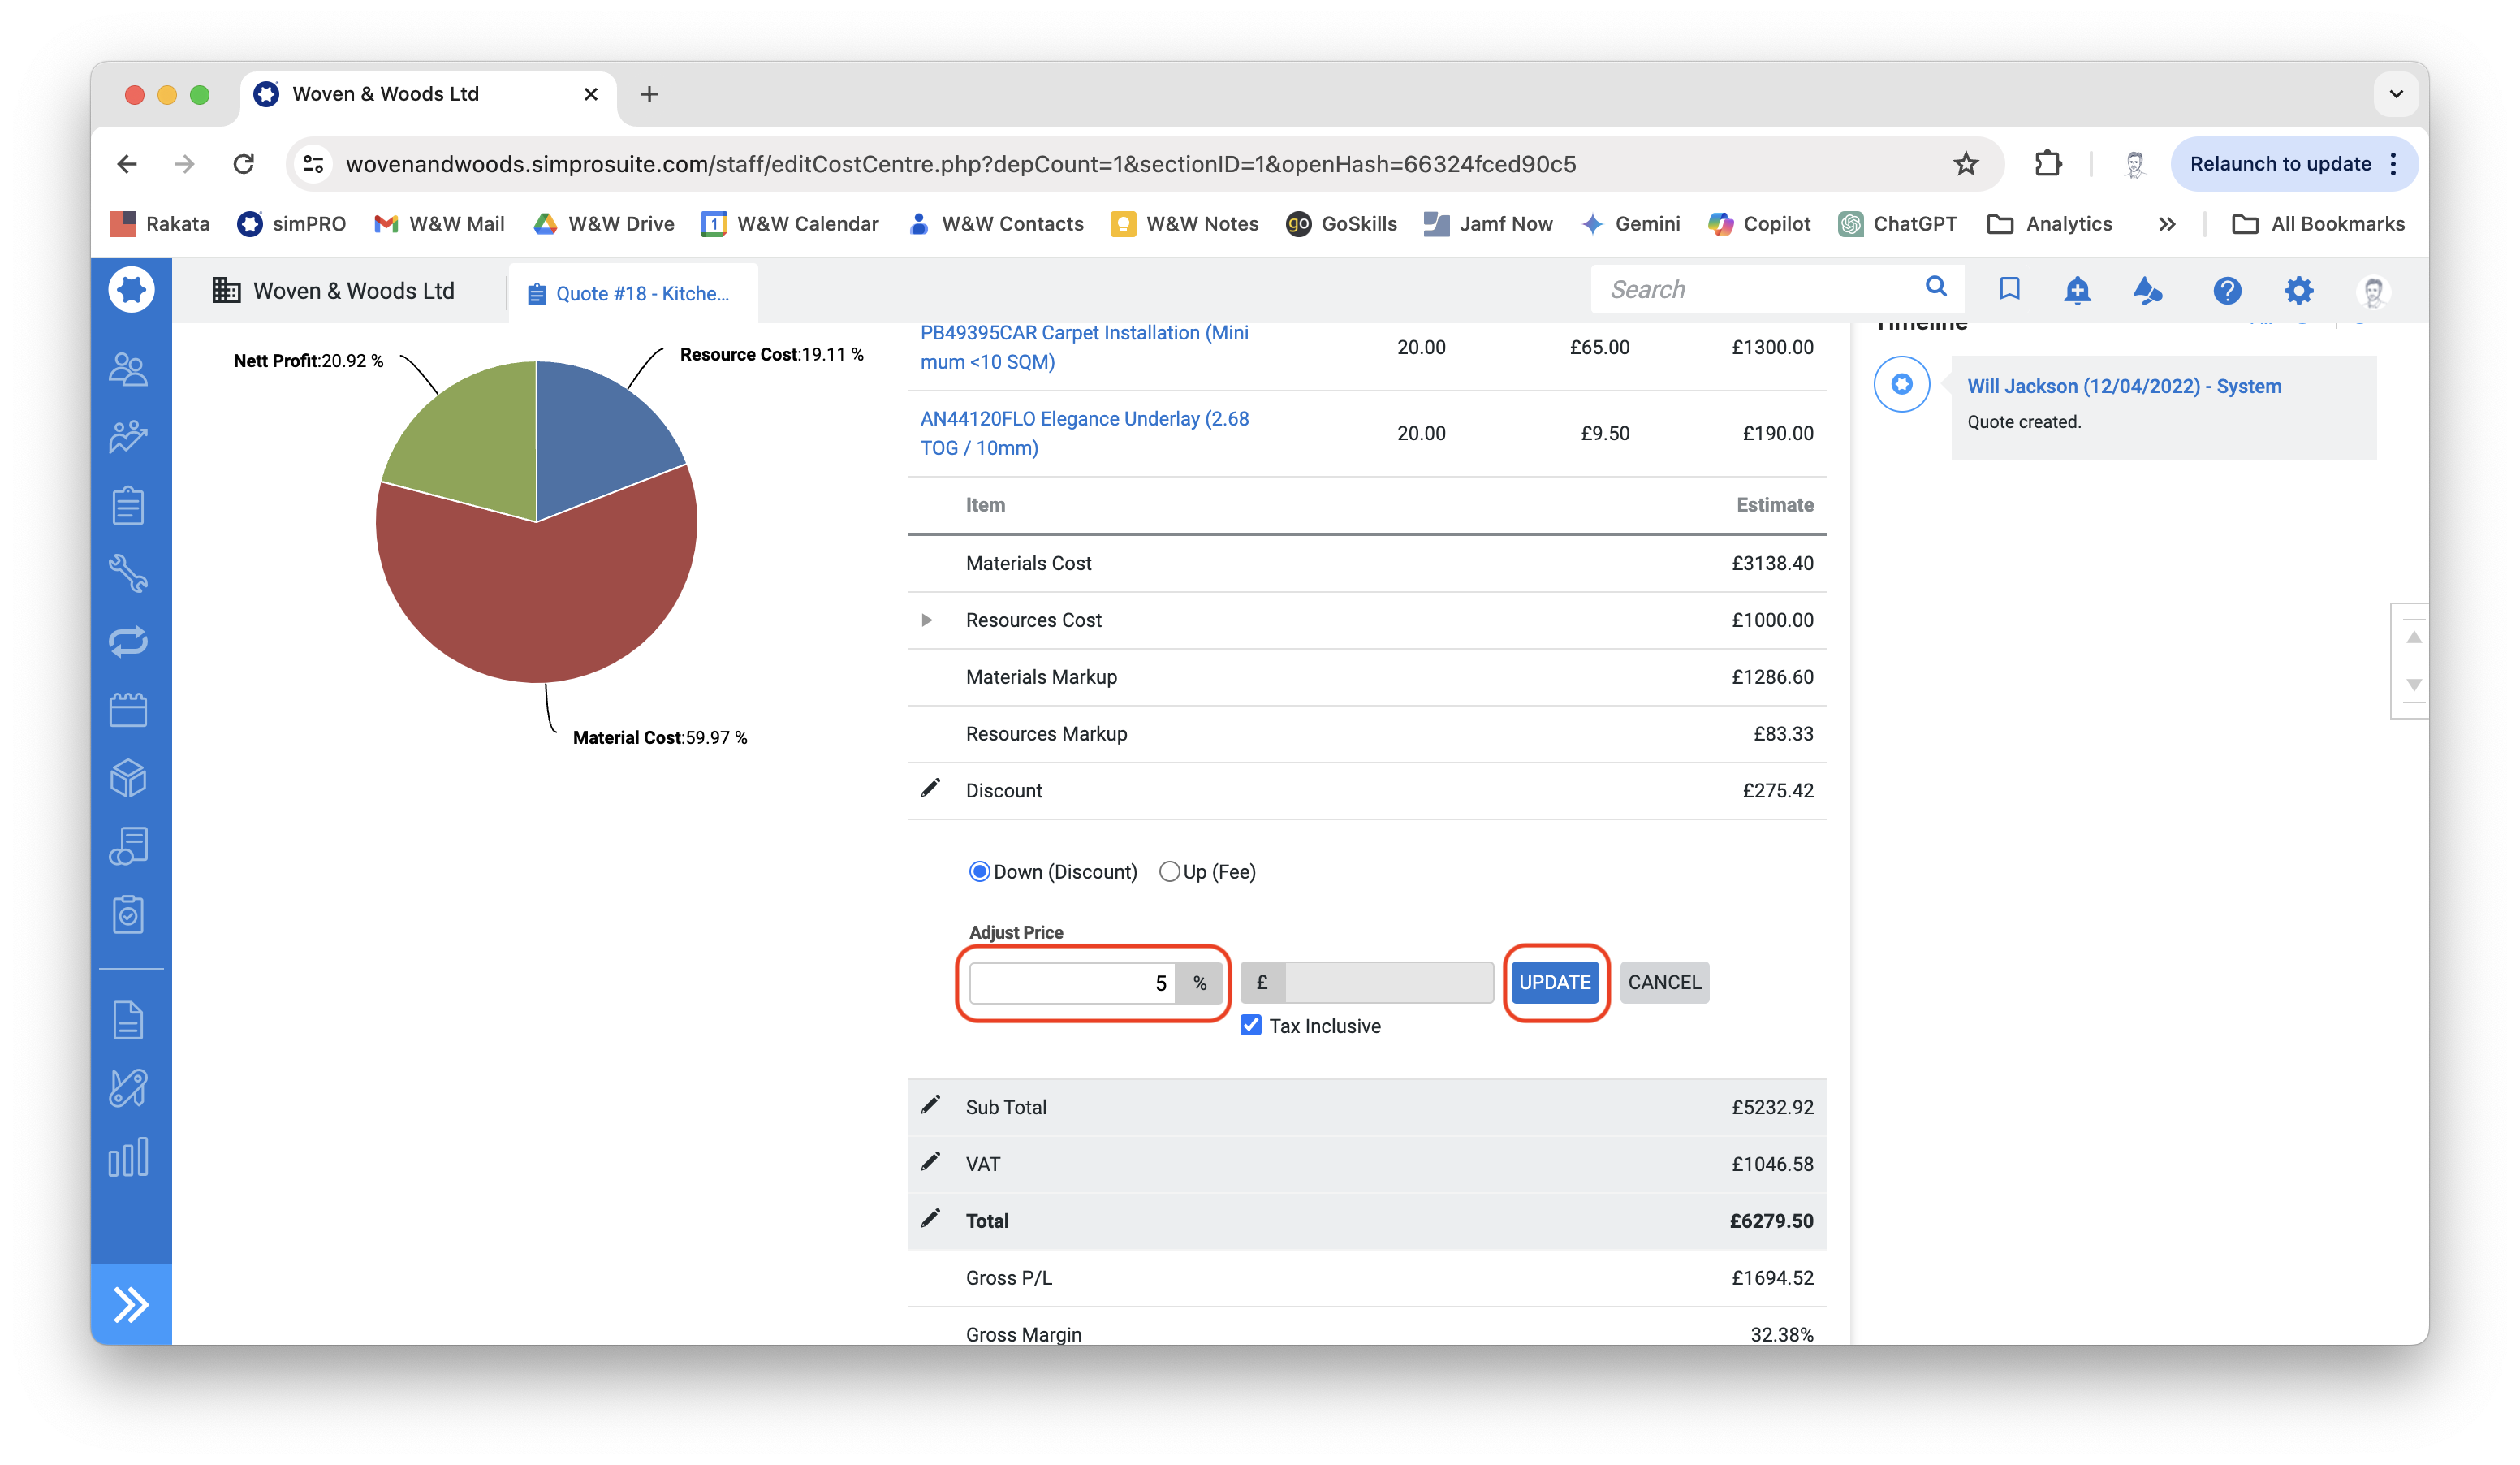
-
Our standard discounts are either 5% or 10%, at the discretion of the showroom manager.
-
Discount can only be applied to materials, not labour. Use the following formulas:
- For 5%: $(Material\ cost + Materials\ markups) \times 1.2 \times 0.05$
- For 10%: $(Material\ cost + Materials\ markups) \times 1.2 \times 0.1$
Send a Quote to the Customer
Section titled “Send a Quote to the Customer”- Staying in the quote section, click the Details tab at the top of the screen, followed by Forms.

- Click the Template drop-down box and find the item named after your showroom followed by Quote and a date. Ensure you choose the correct showroom and the newest date.

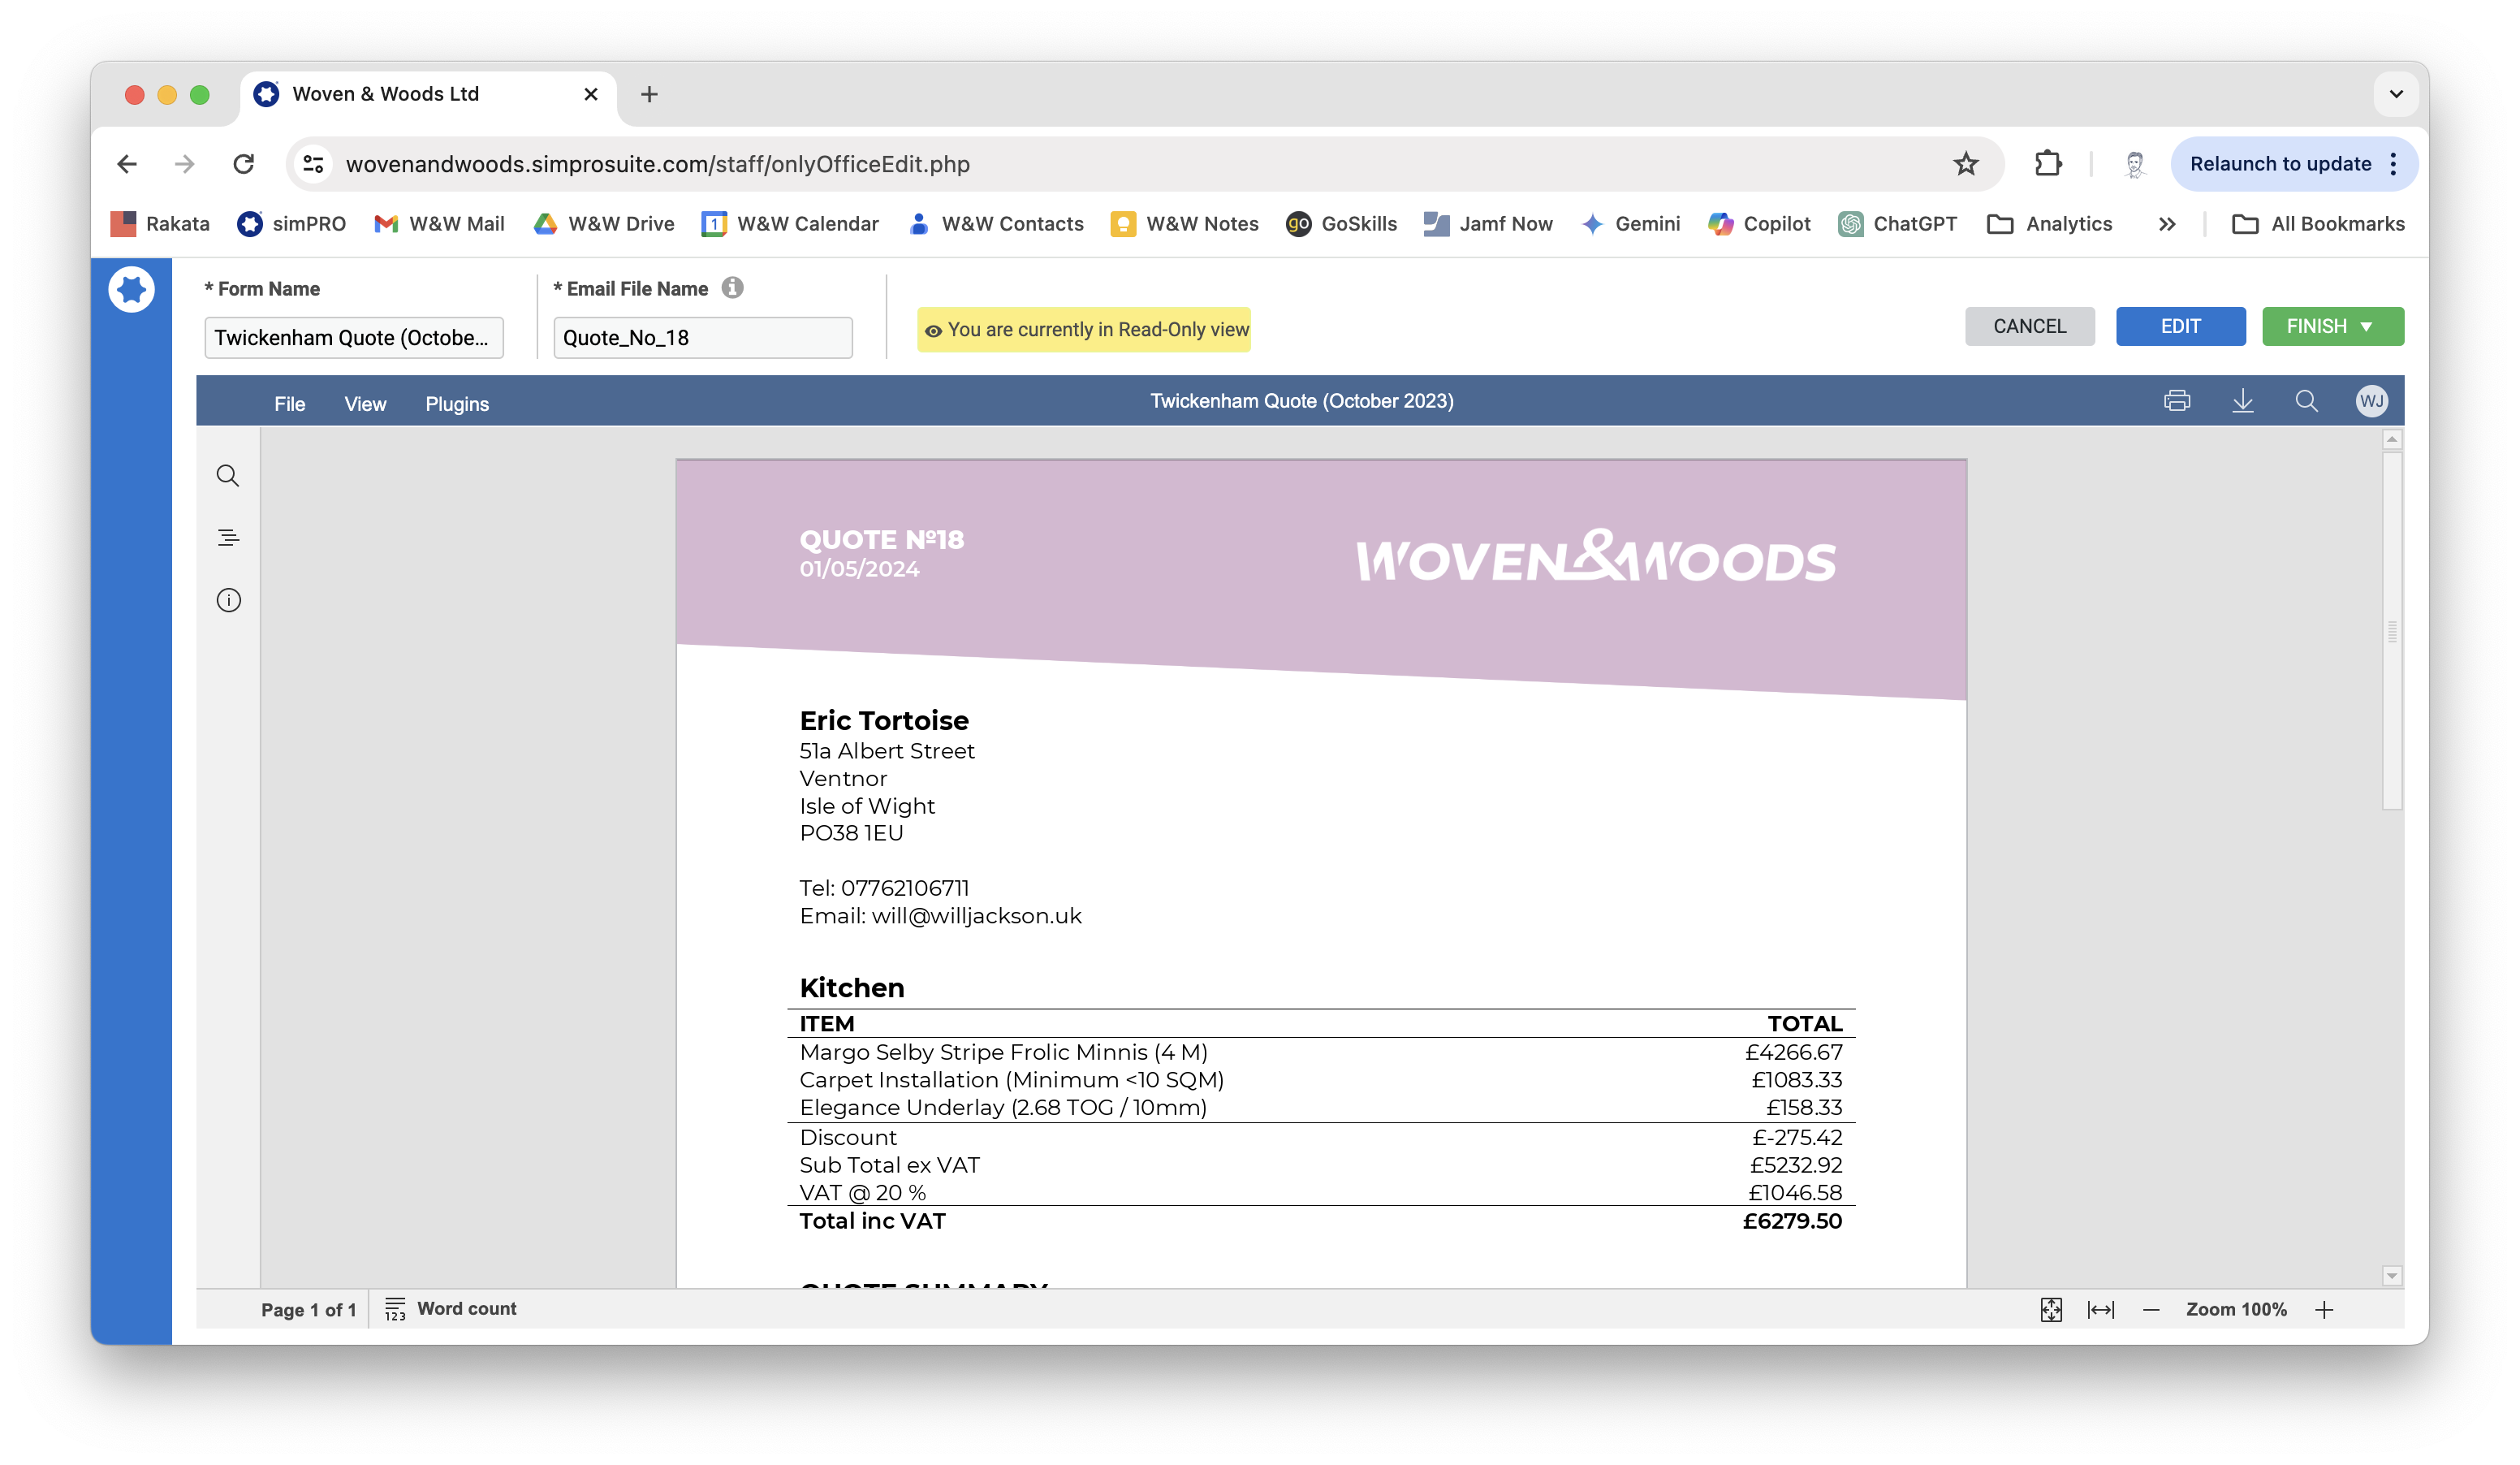
- To preview the quote that will be sent to the customer, click the View link next to the blue eyeball icon.
- A preview of the quote will appear as the customer will see it. This is your last chance to ensure all information is correct and spelled properly. All names and titles should be capitalized.
Edit Quote Layout
Section titled “Edit Quote Layout”- If the quote looks a bit messy (e.g., tables split across lines), you can edit the layout by clicking the blue Edit button at the top of the screen.

- The edit interface is similar to Microsoft Word but is for very minor edits only.
- When you have made any changes, click the green Finish button in the top-right corner of the screen.
Email Quote to Customer
Section titled “Email Quote to Customer”- When you are ready to email the quote to the customer, click Attach next to the blue folder icon on the Forms page.

- The quote will take a few seconds to generate, after which it will appear in the Select Attachments section at the bottom of the page.
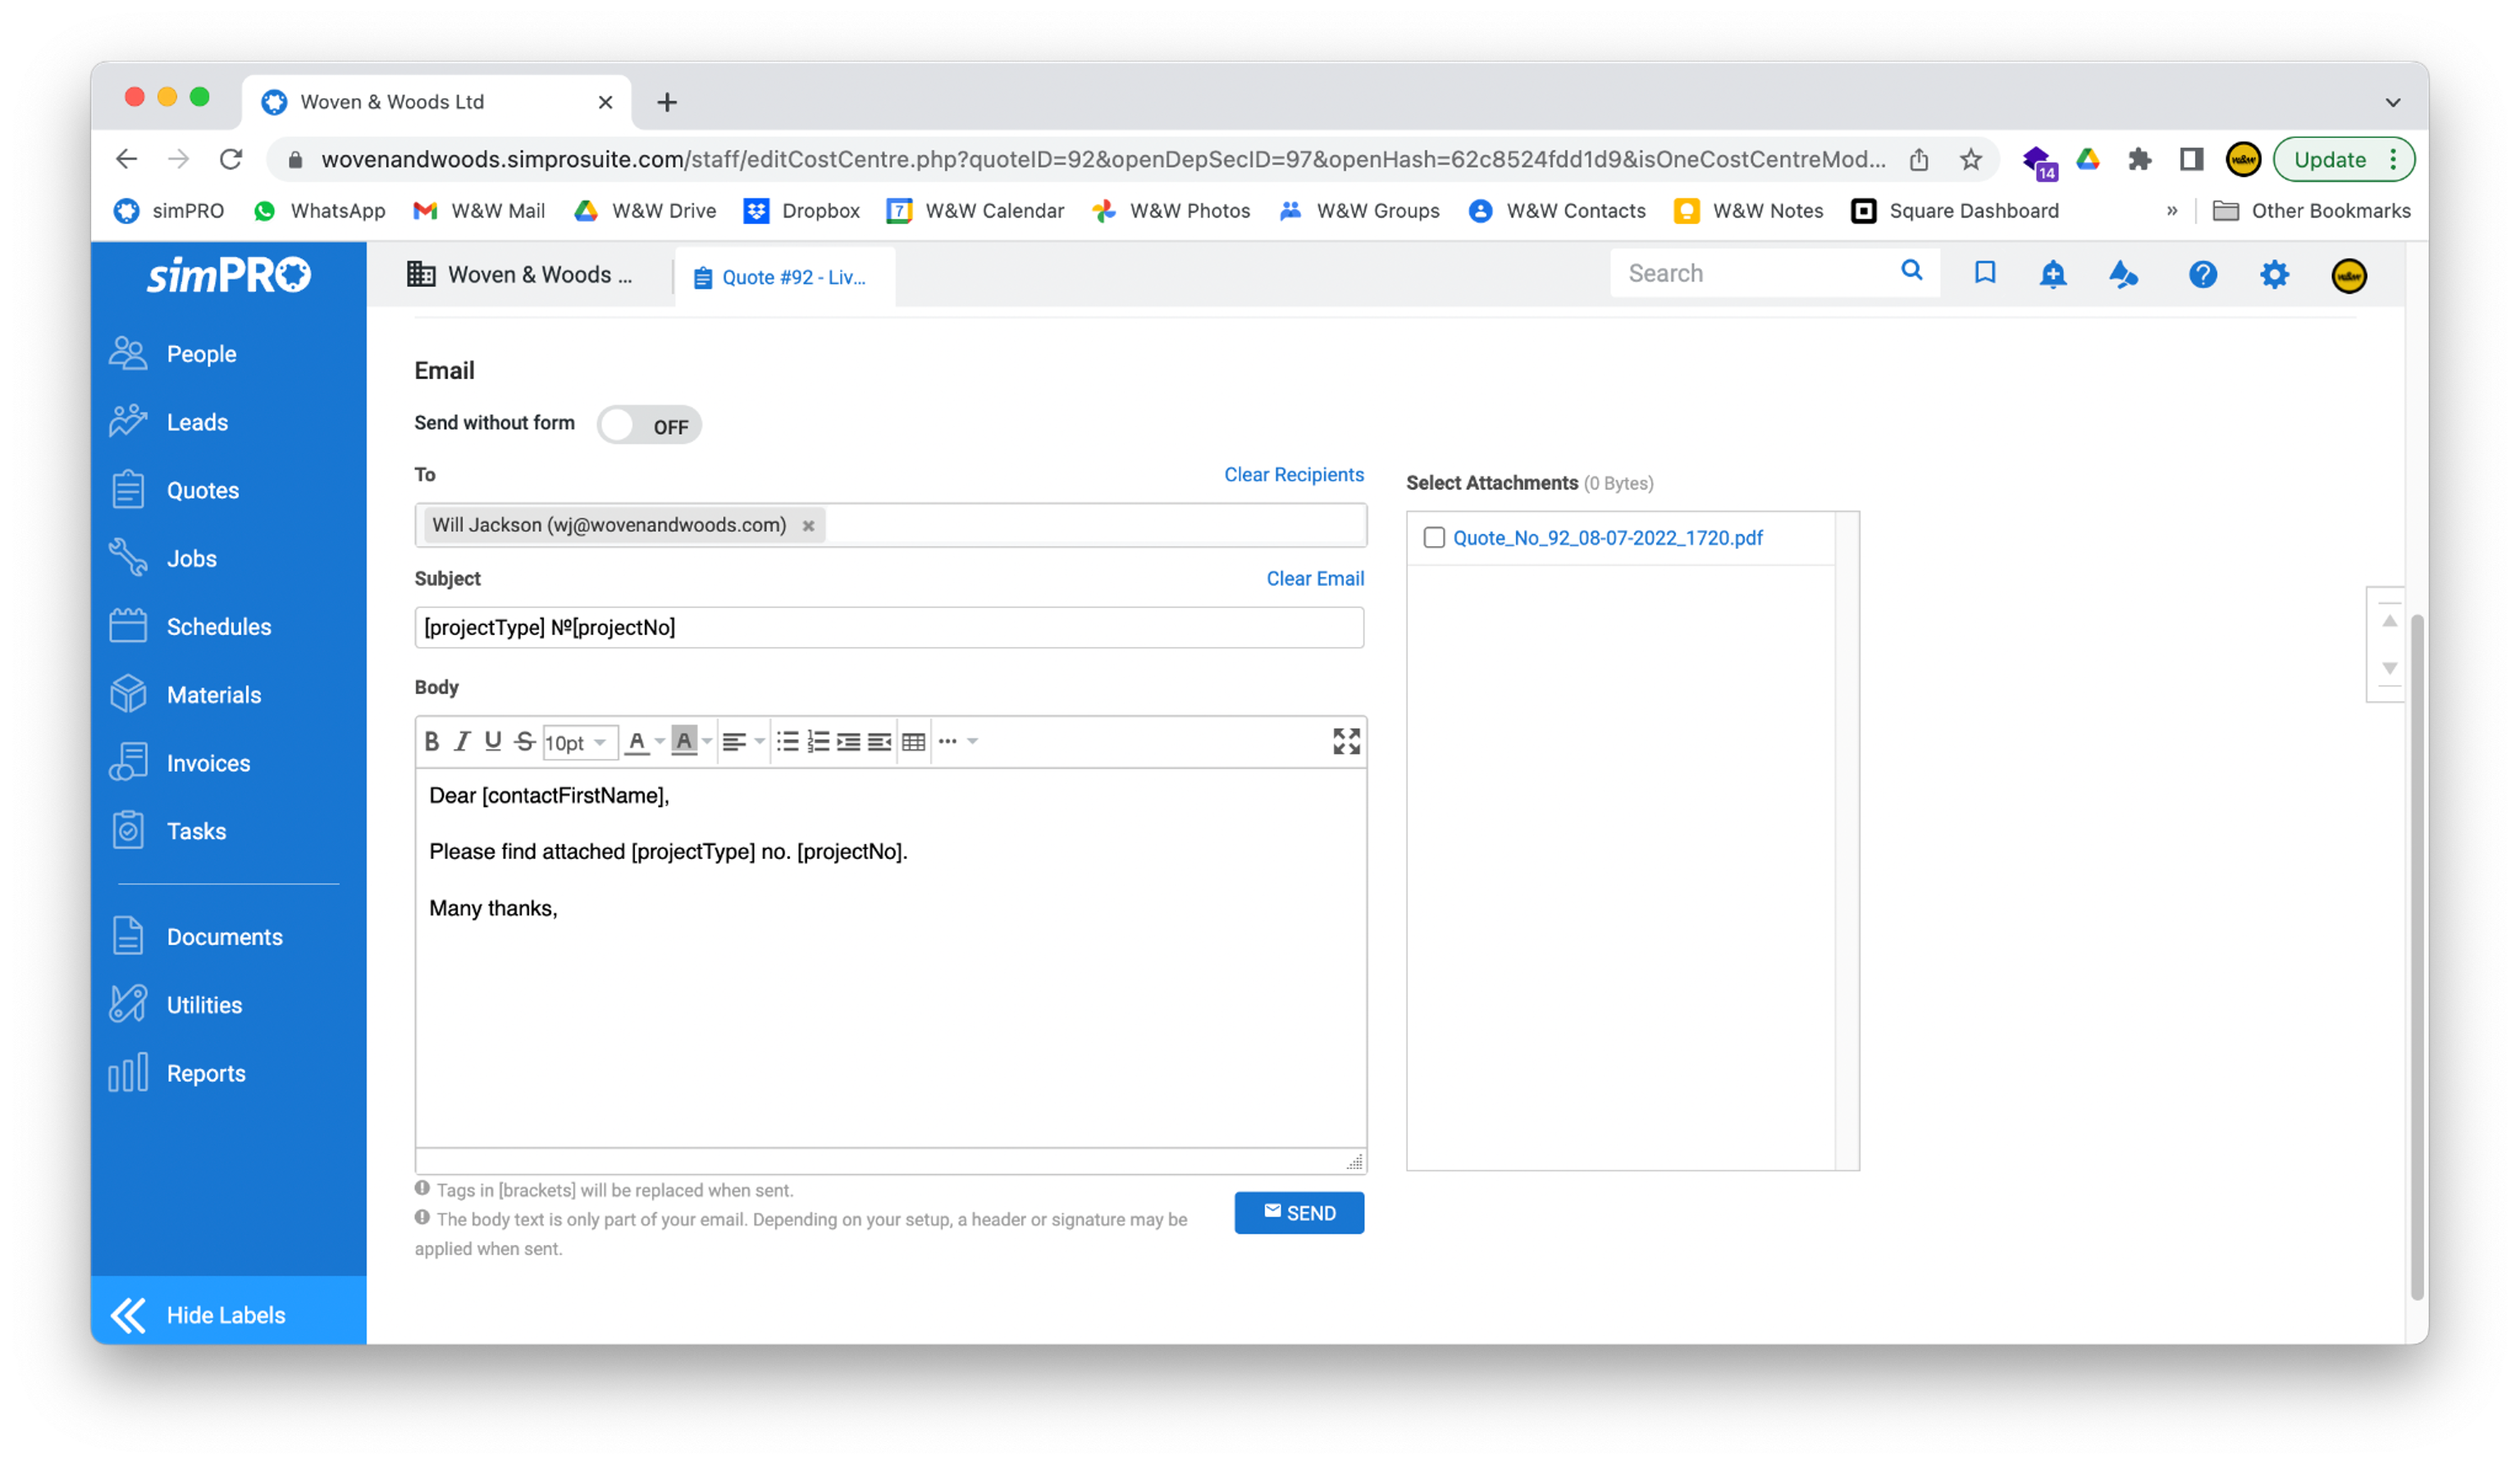
- The customer’s email address and the body of the email will be automatically inserted by simPRO, along with your email signature. You generally won’t need to make changes unless you have something specific to include. All text inside
[square brackets]will be replaced when the email is sent. - When you are happy with the quote and email, click the blue Send button to send it. Copies will be sent to the customer and to your own email address for your records.
Convert a Quote to a Job
Section titled “Convert a Quote to a Job”- To convert a quote to a job, use the blue bar on the left-hand side of the screen to navigate to Quotes > Open Quotes.
- Find the quote you want to convert in the list and click the Options button. Hover the mouse cursor over Convert To, and a new sub-menu should appear. Now select Job.
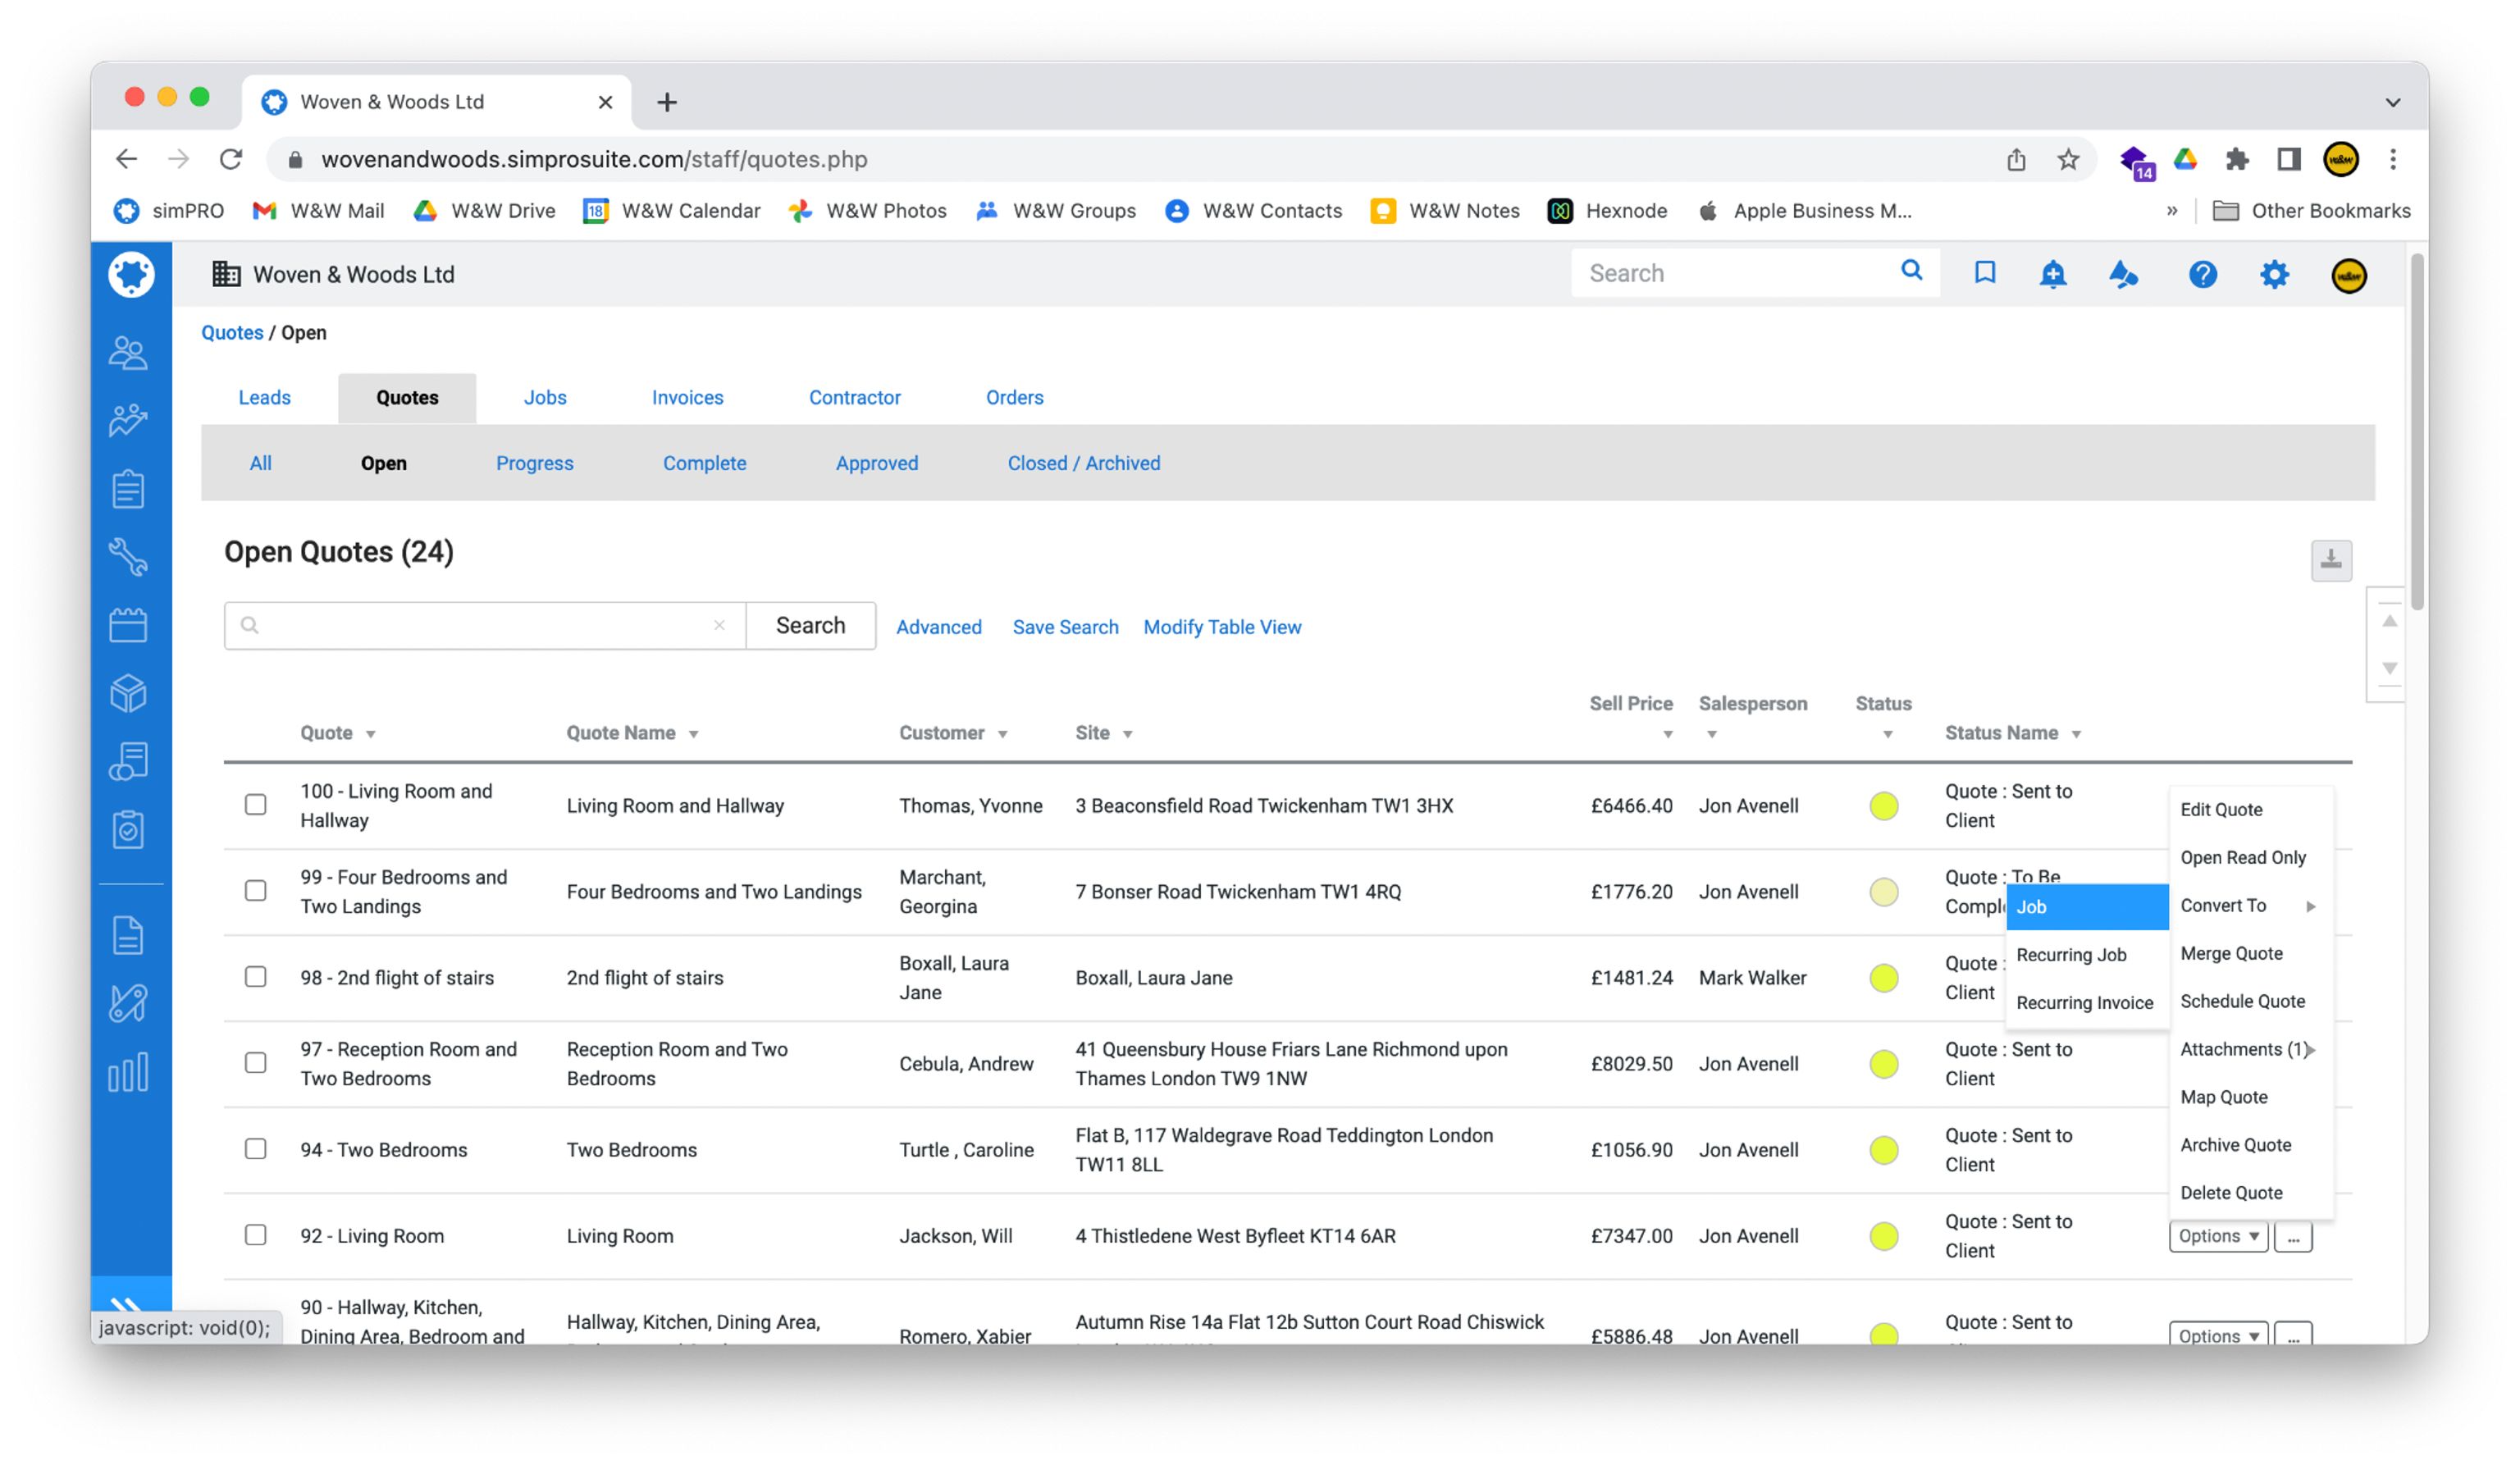
- Click OK to confirm.

- When simPRO has finished the conversion, you will be taken to the new Job page. Click Save and Finish in the top-right of the screen to return to the list of current jobs.
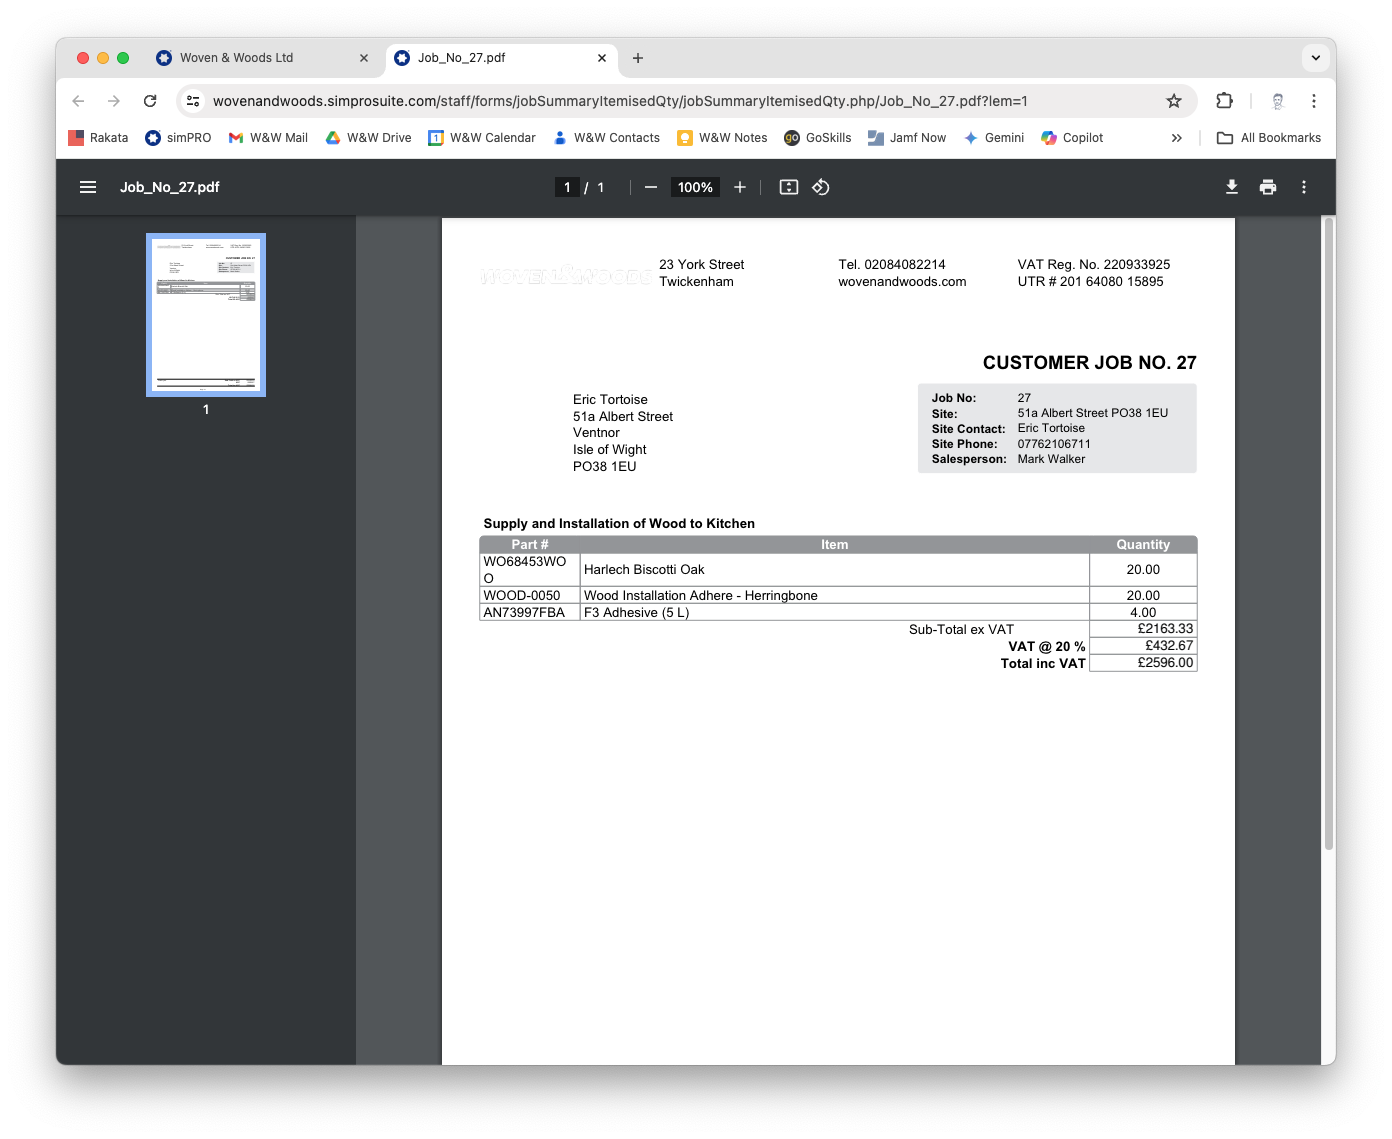
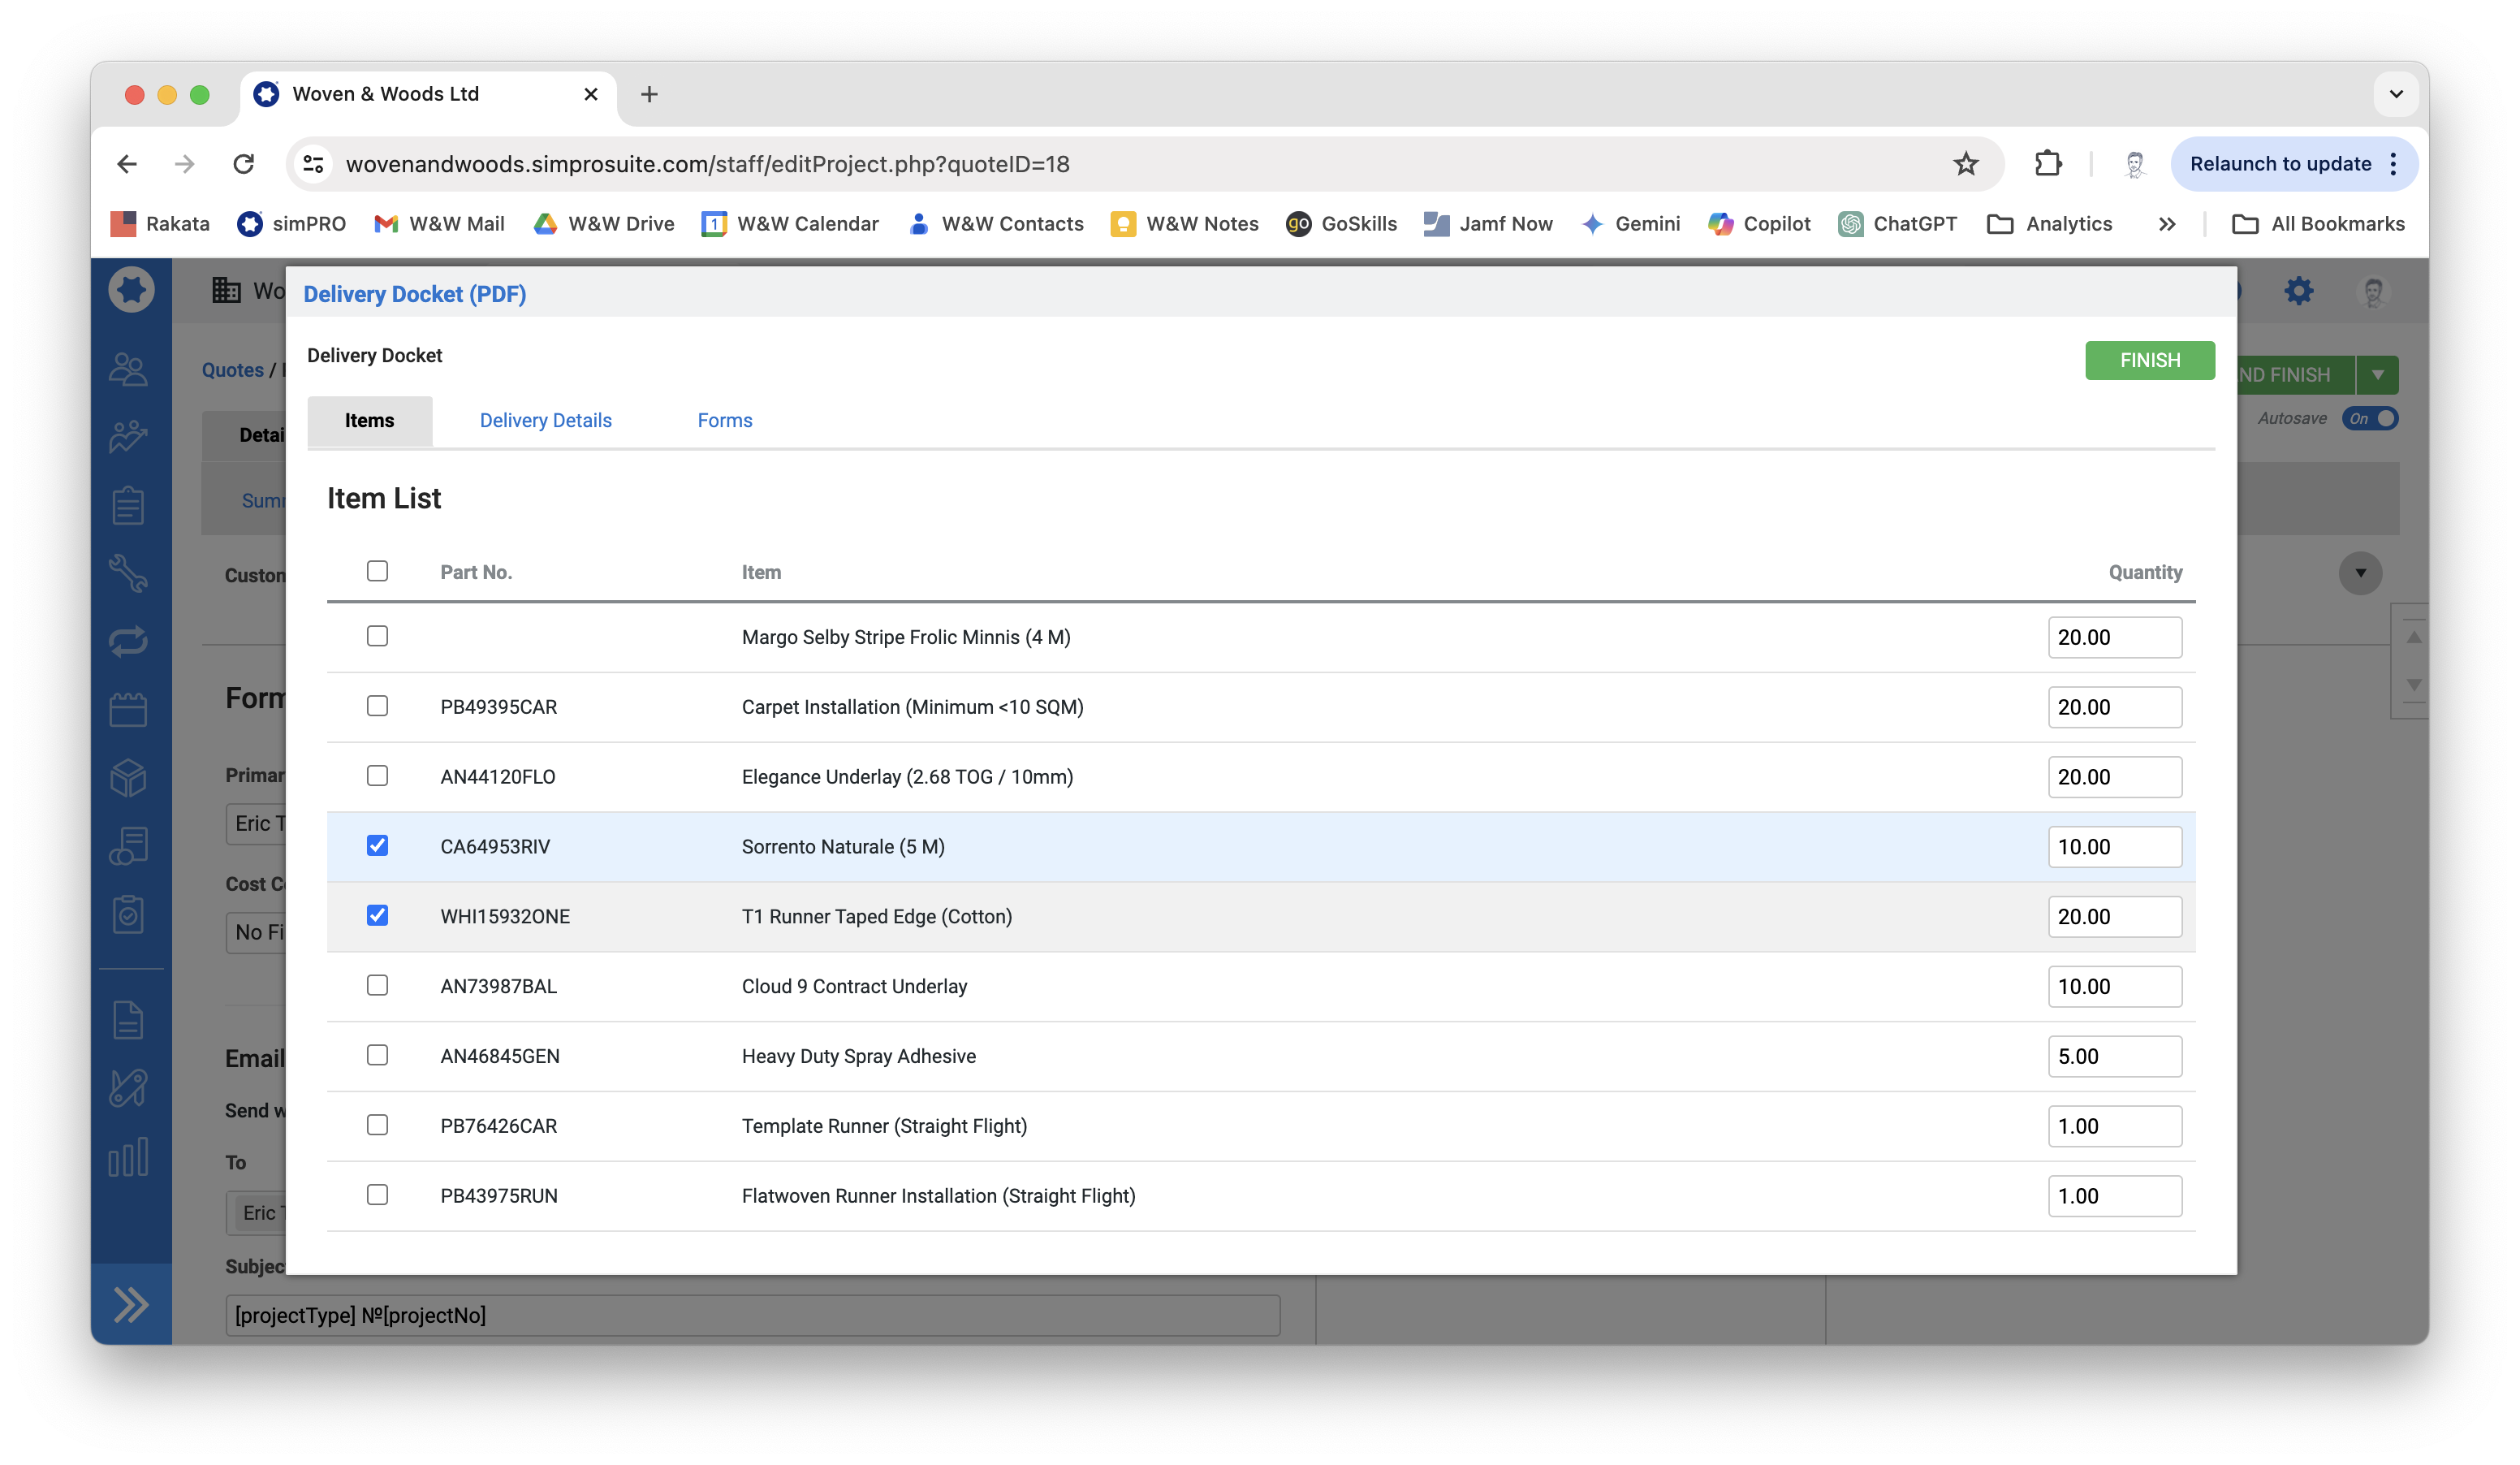
Create a Delivery Docket (Taping or Whipping)
Section titled “Create a Delivery Docket (Taping or Whipping)”If the job involves a custom taped or whipped rug or runner, you will need to raise a delivery docket for the finishing company.
- With the job screen open, click the Details tab and then Form.
- In the dropdown menu under the Template heading, select Delivery Docket (PDF).
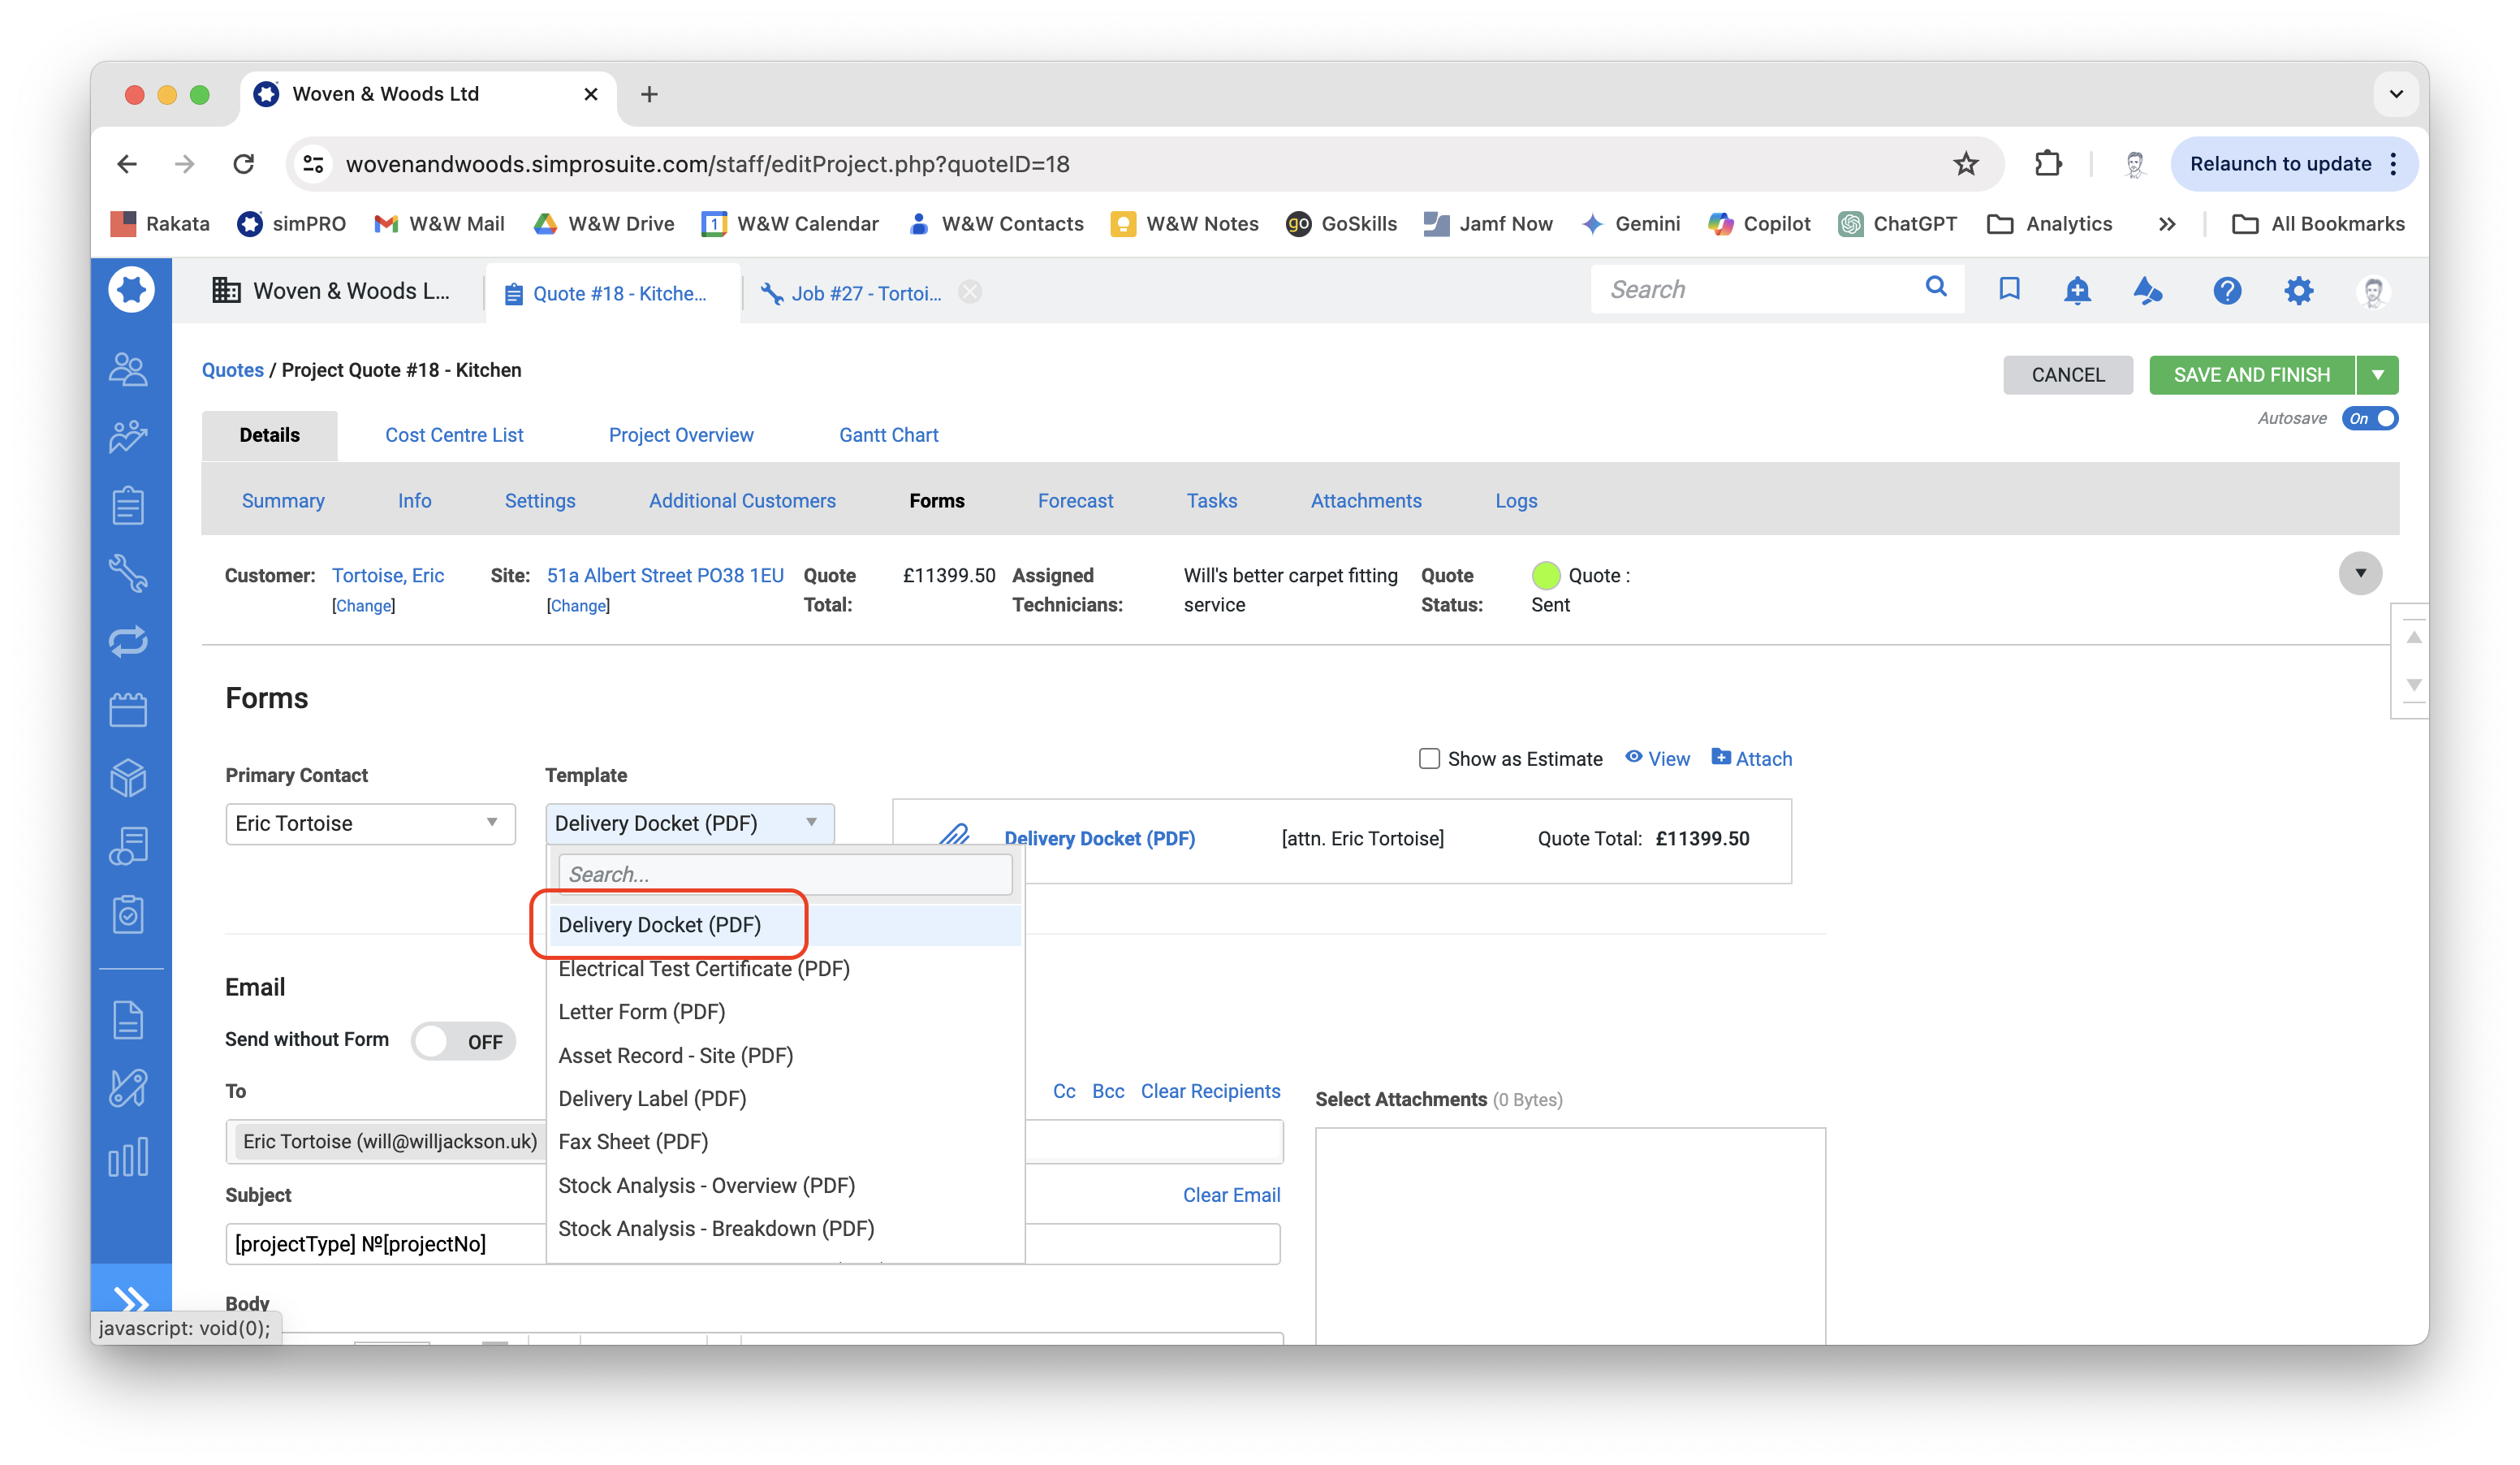
- A window will appear with a list of all items required for the job. Untick everything apart from the runner carpet and taped edge (if relevant).
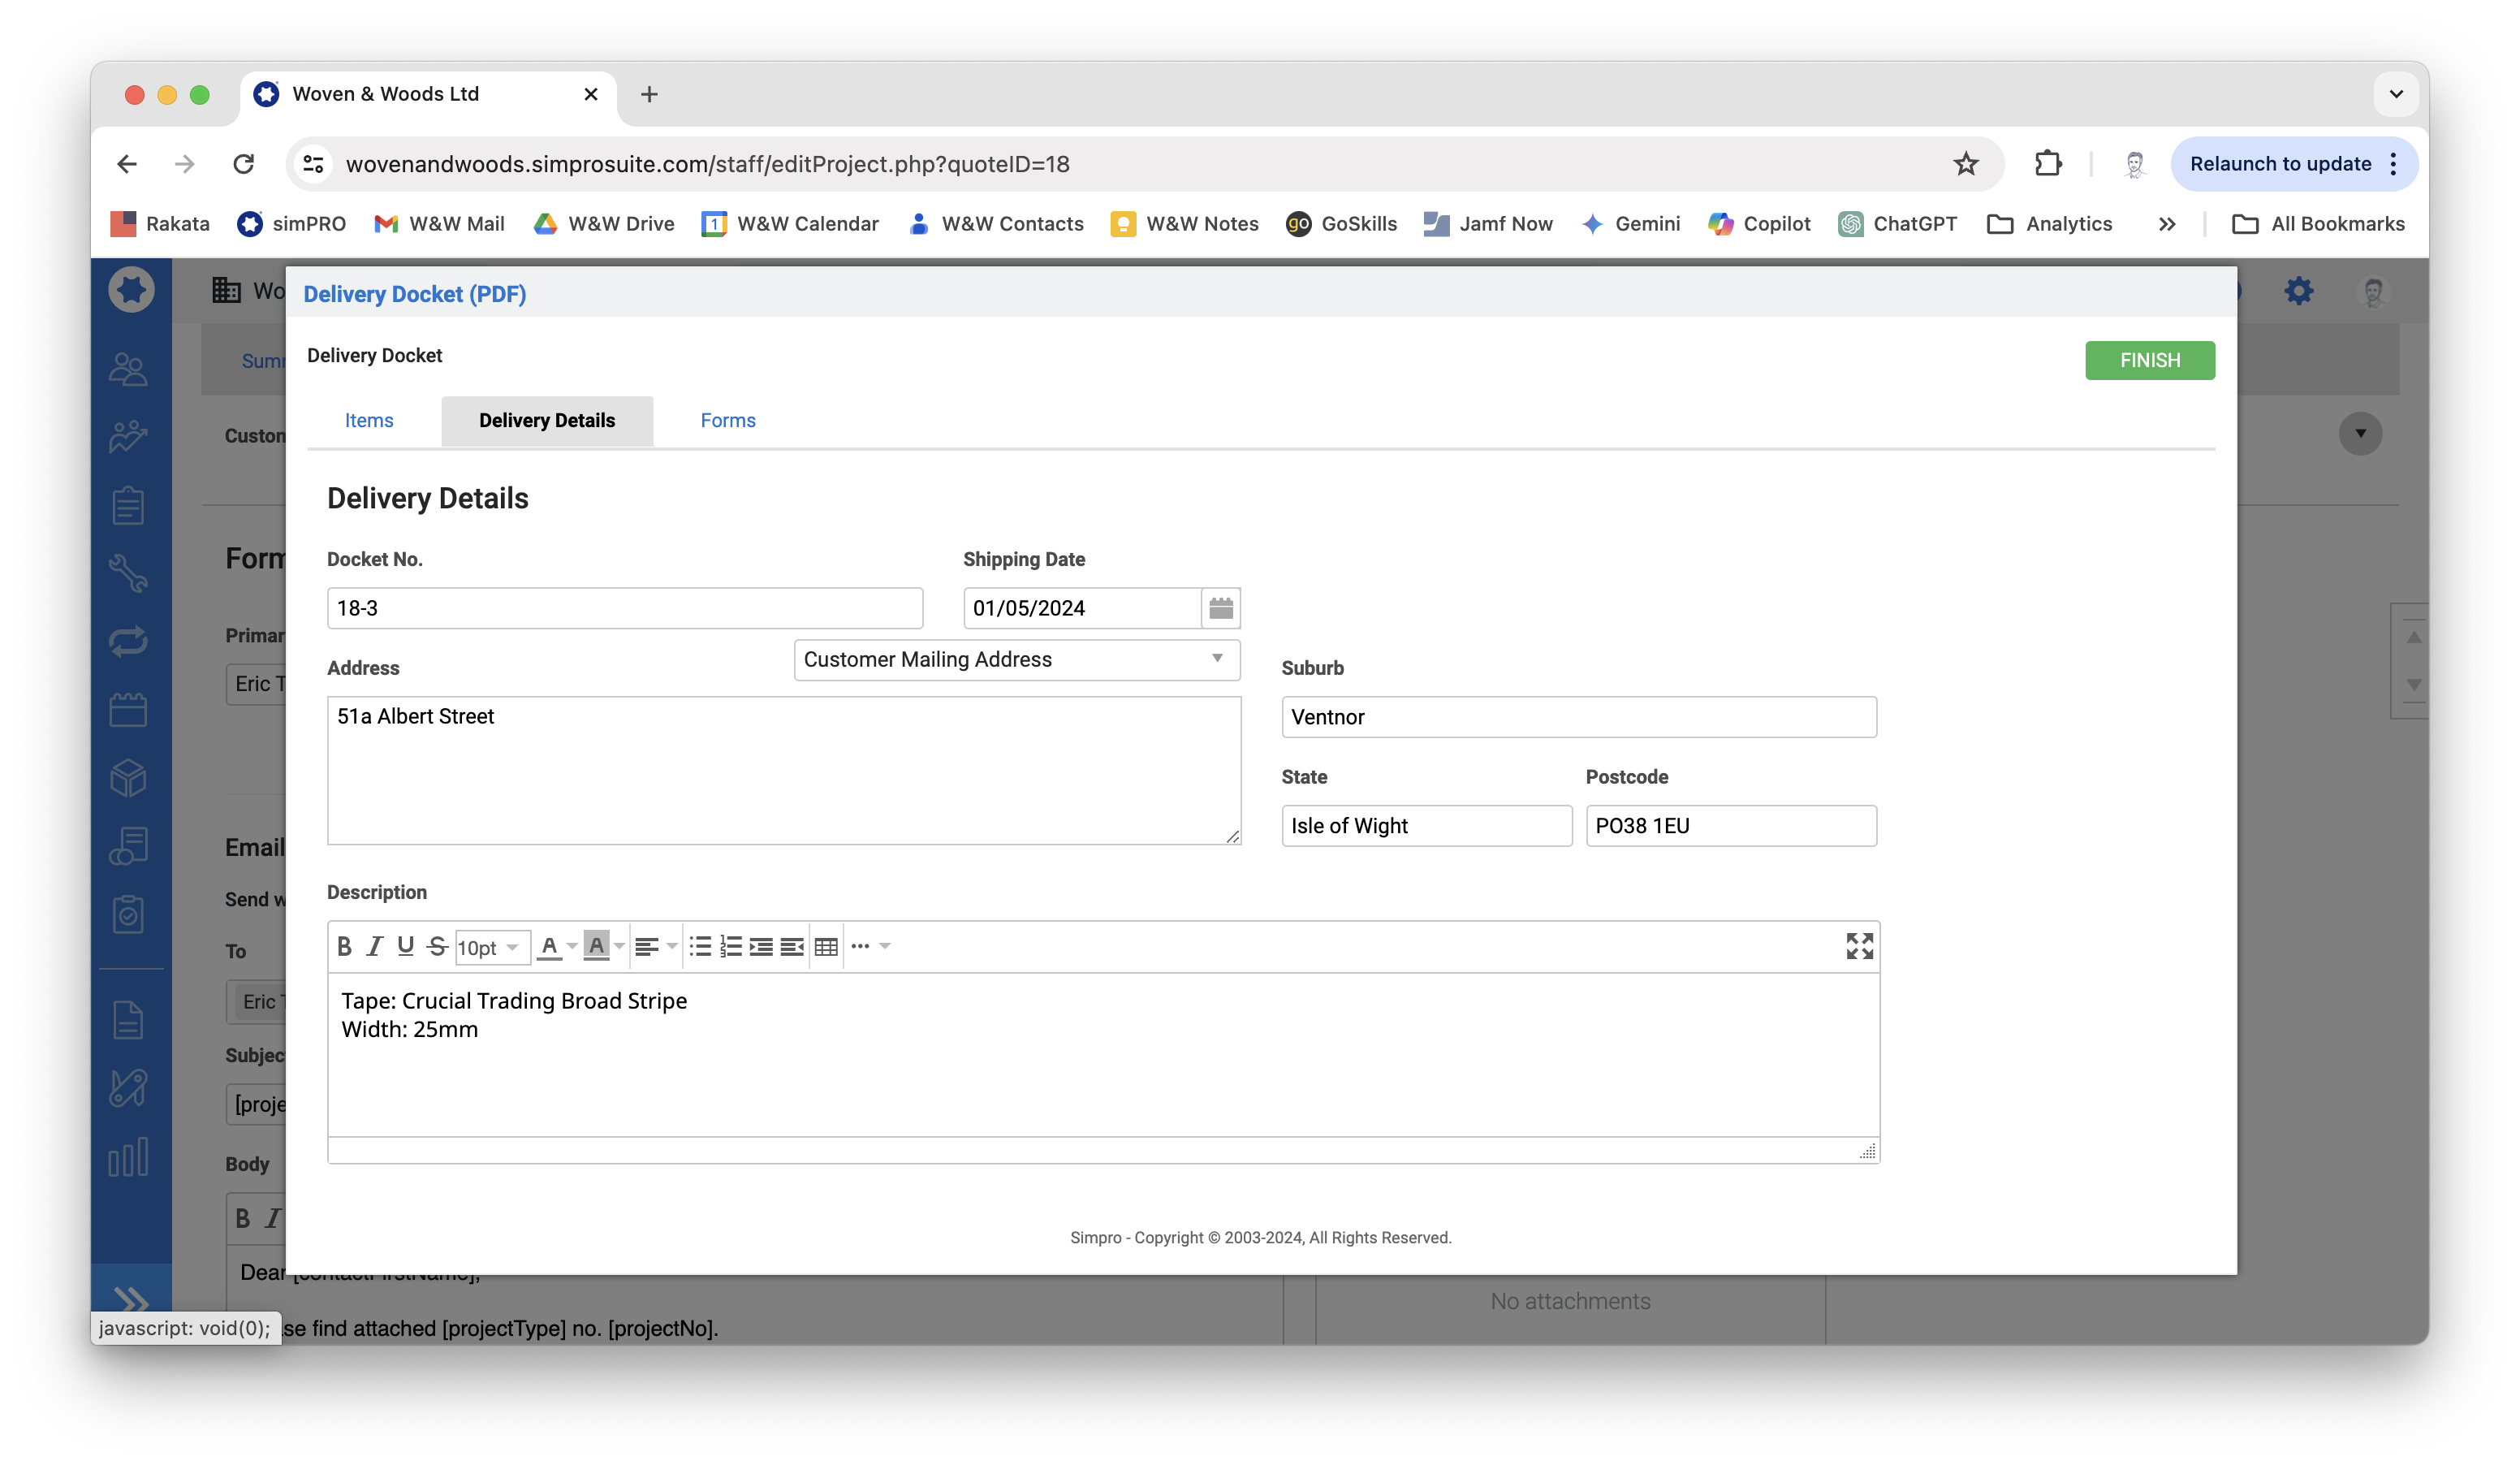
- Click the Delivery Details tab and enter the width and color of the relevant tape or whipping in the Description field.
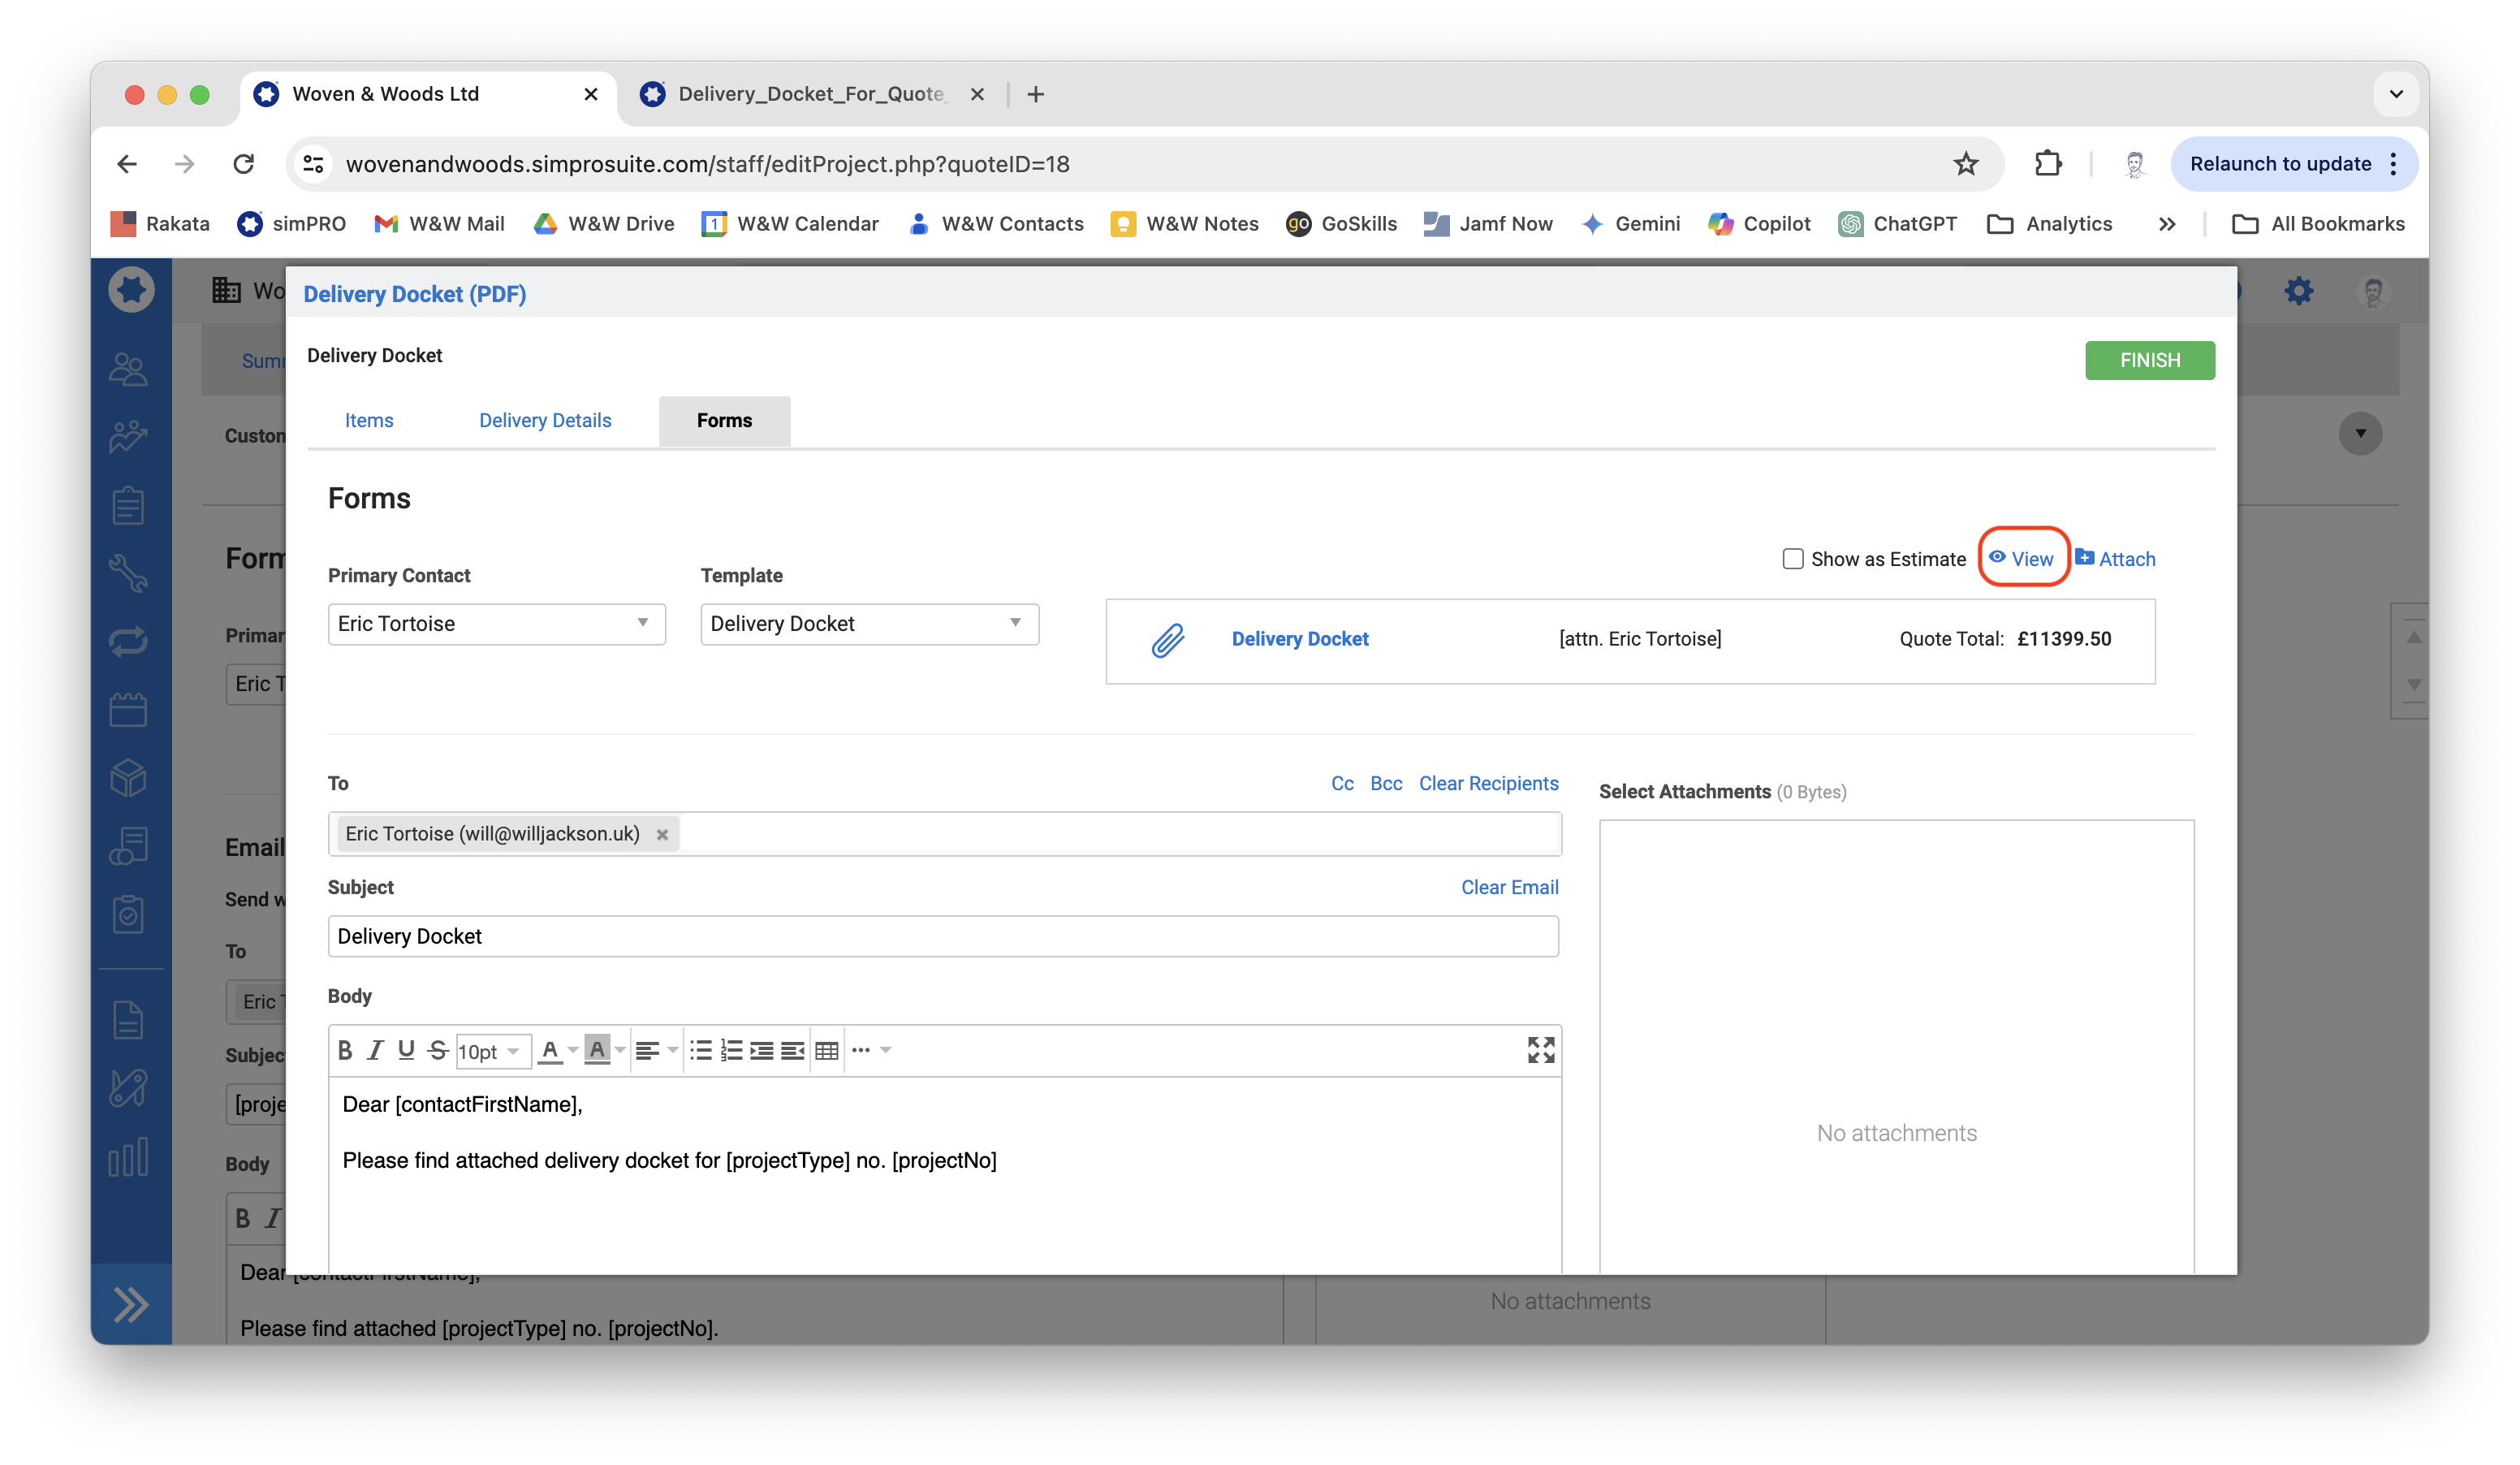
- Click the Forms tab and click the View icon to generate the docket.
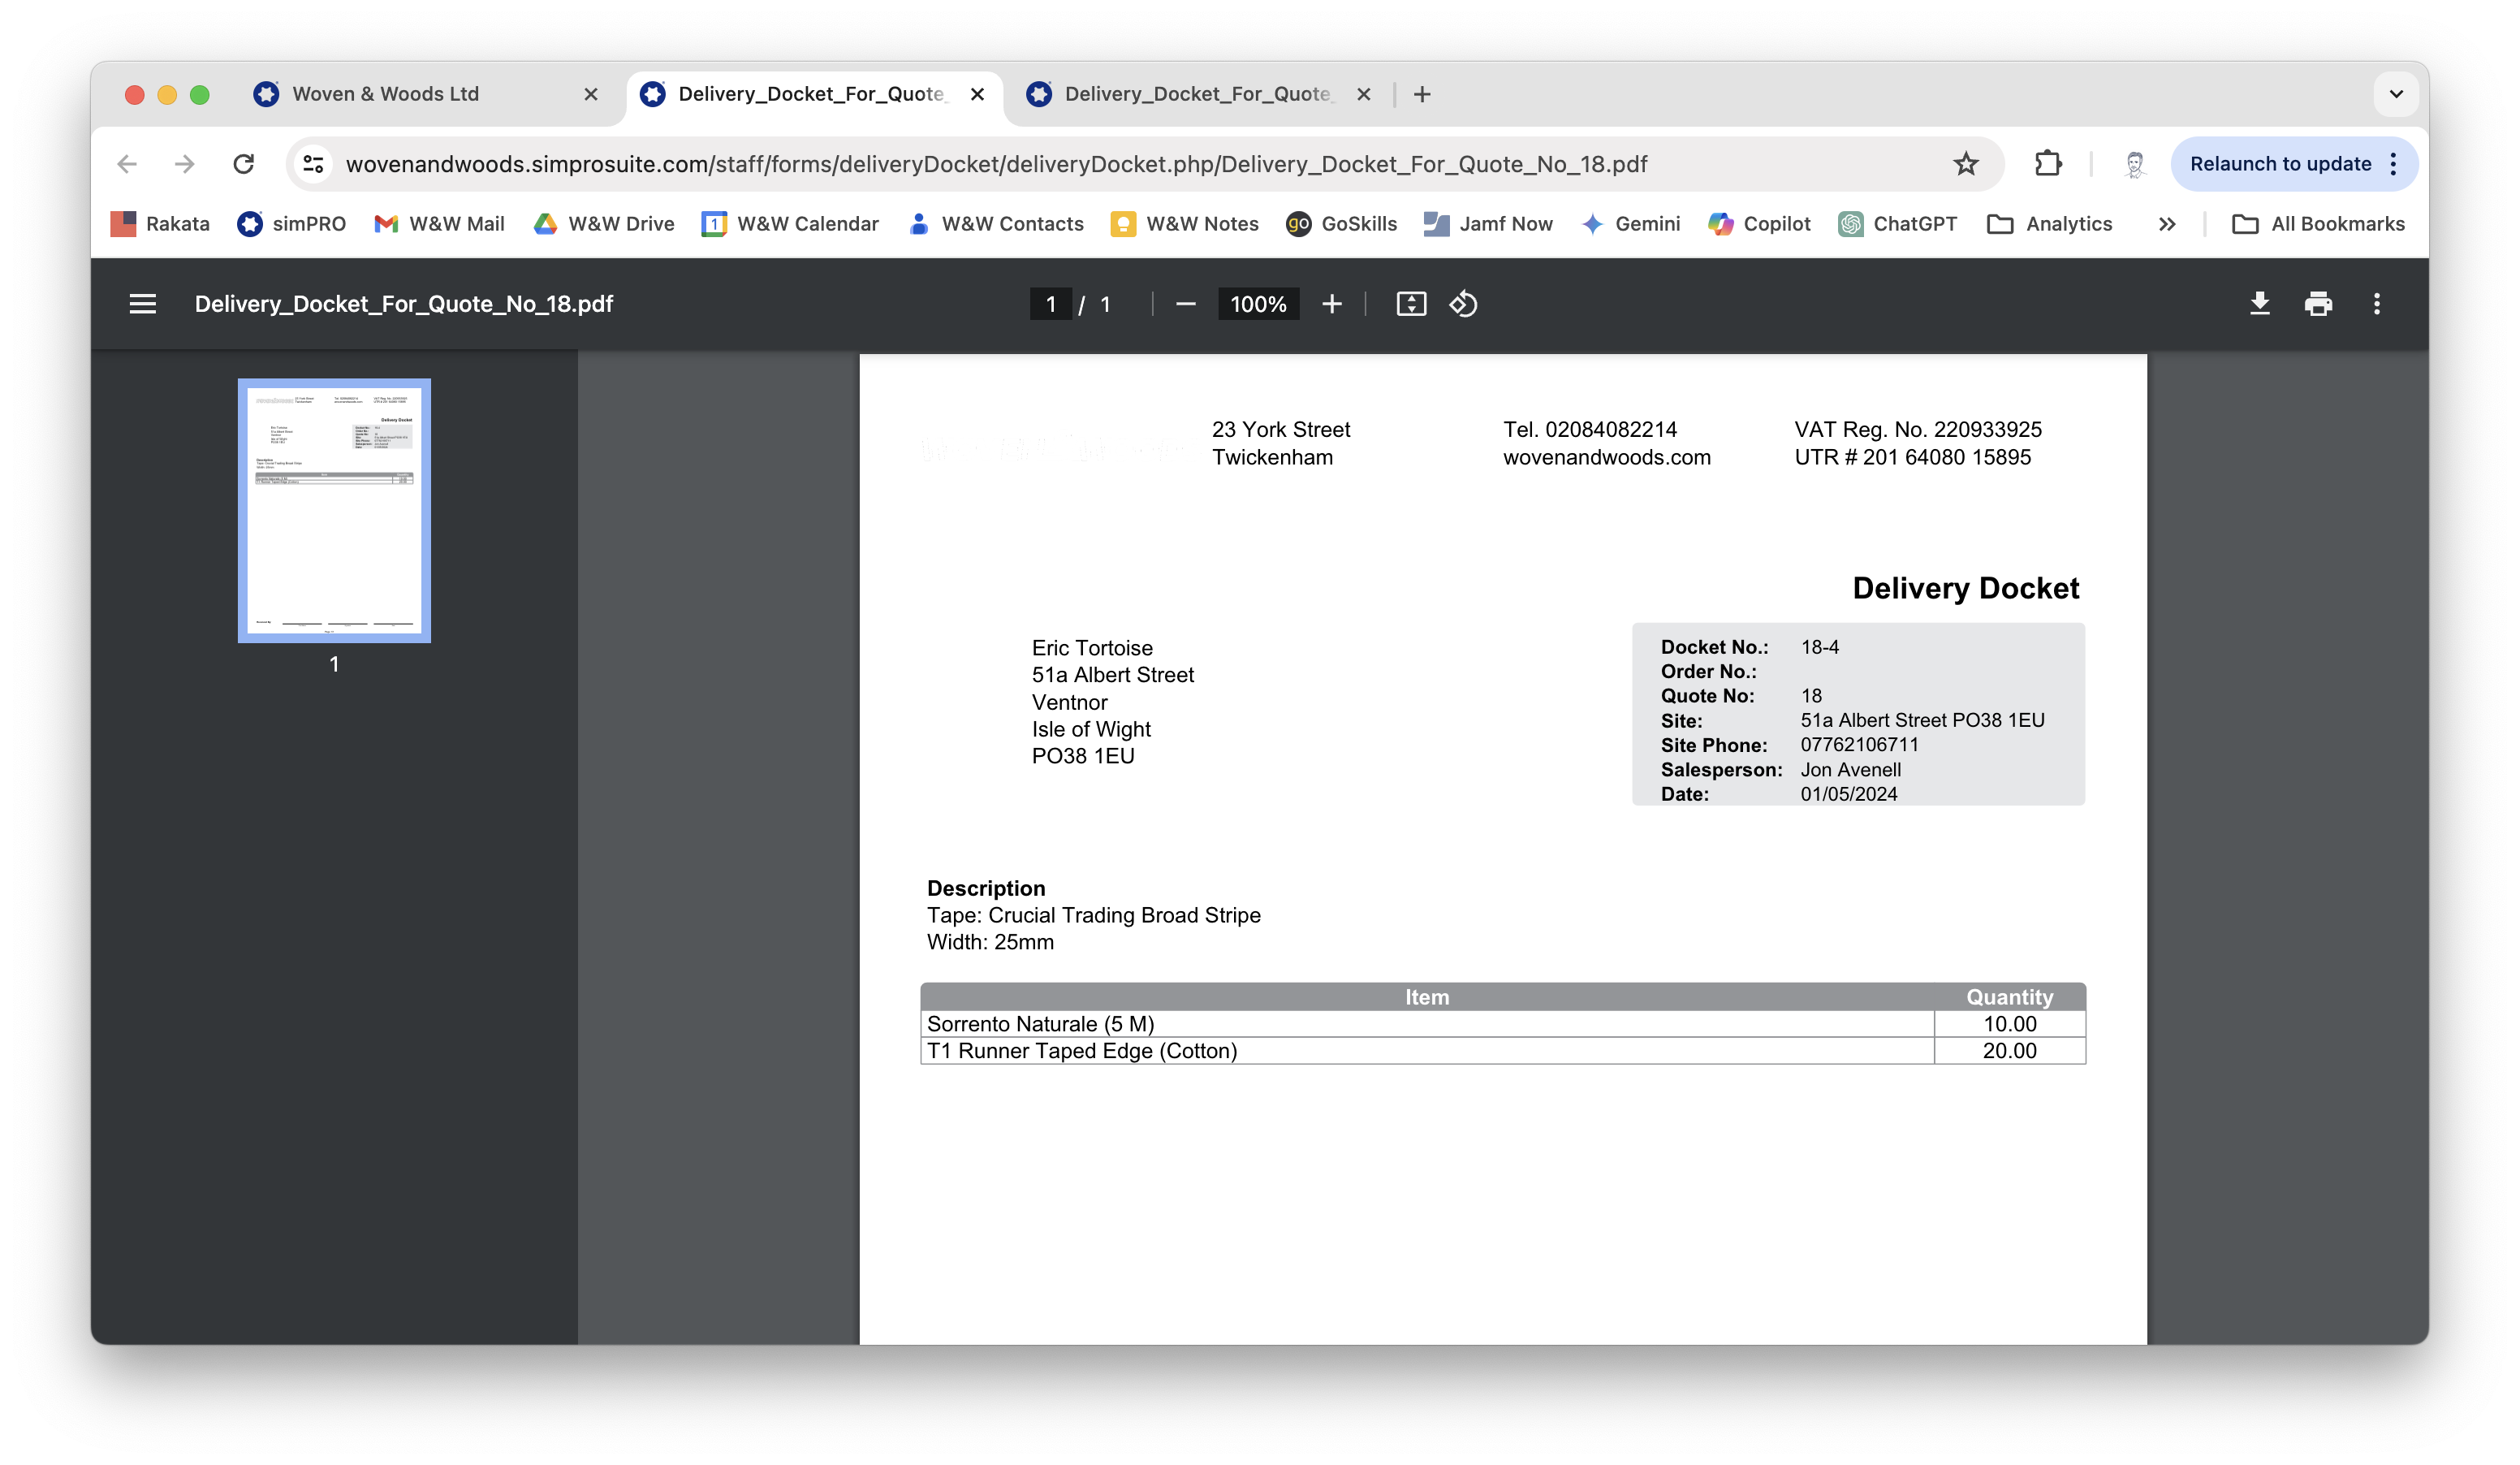
- The docket will open in a new tab as a PDF. You can now print or save it to the Customer drive.
Raise Deposit Invoice
Section titled “Raise Deposit Invoice”- To raise a new deposit invoice, use the blue bar on the left-hand side of the screen to navigate to Jobs > Pending Jobs.
- Find the job you want to invoice in the list and click the Options button. Hover the mouse cursor over Create Invoice.
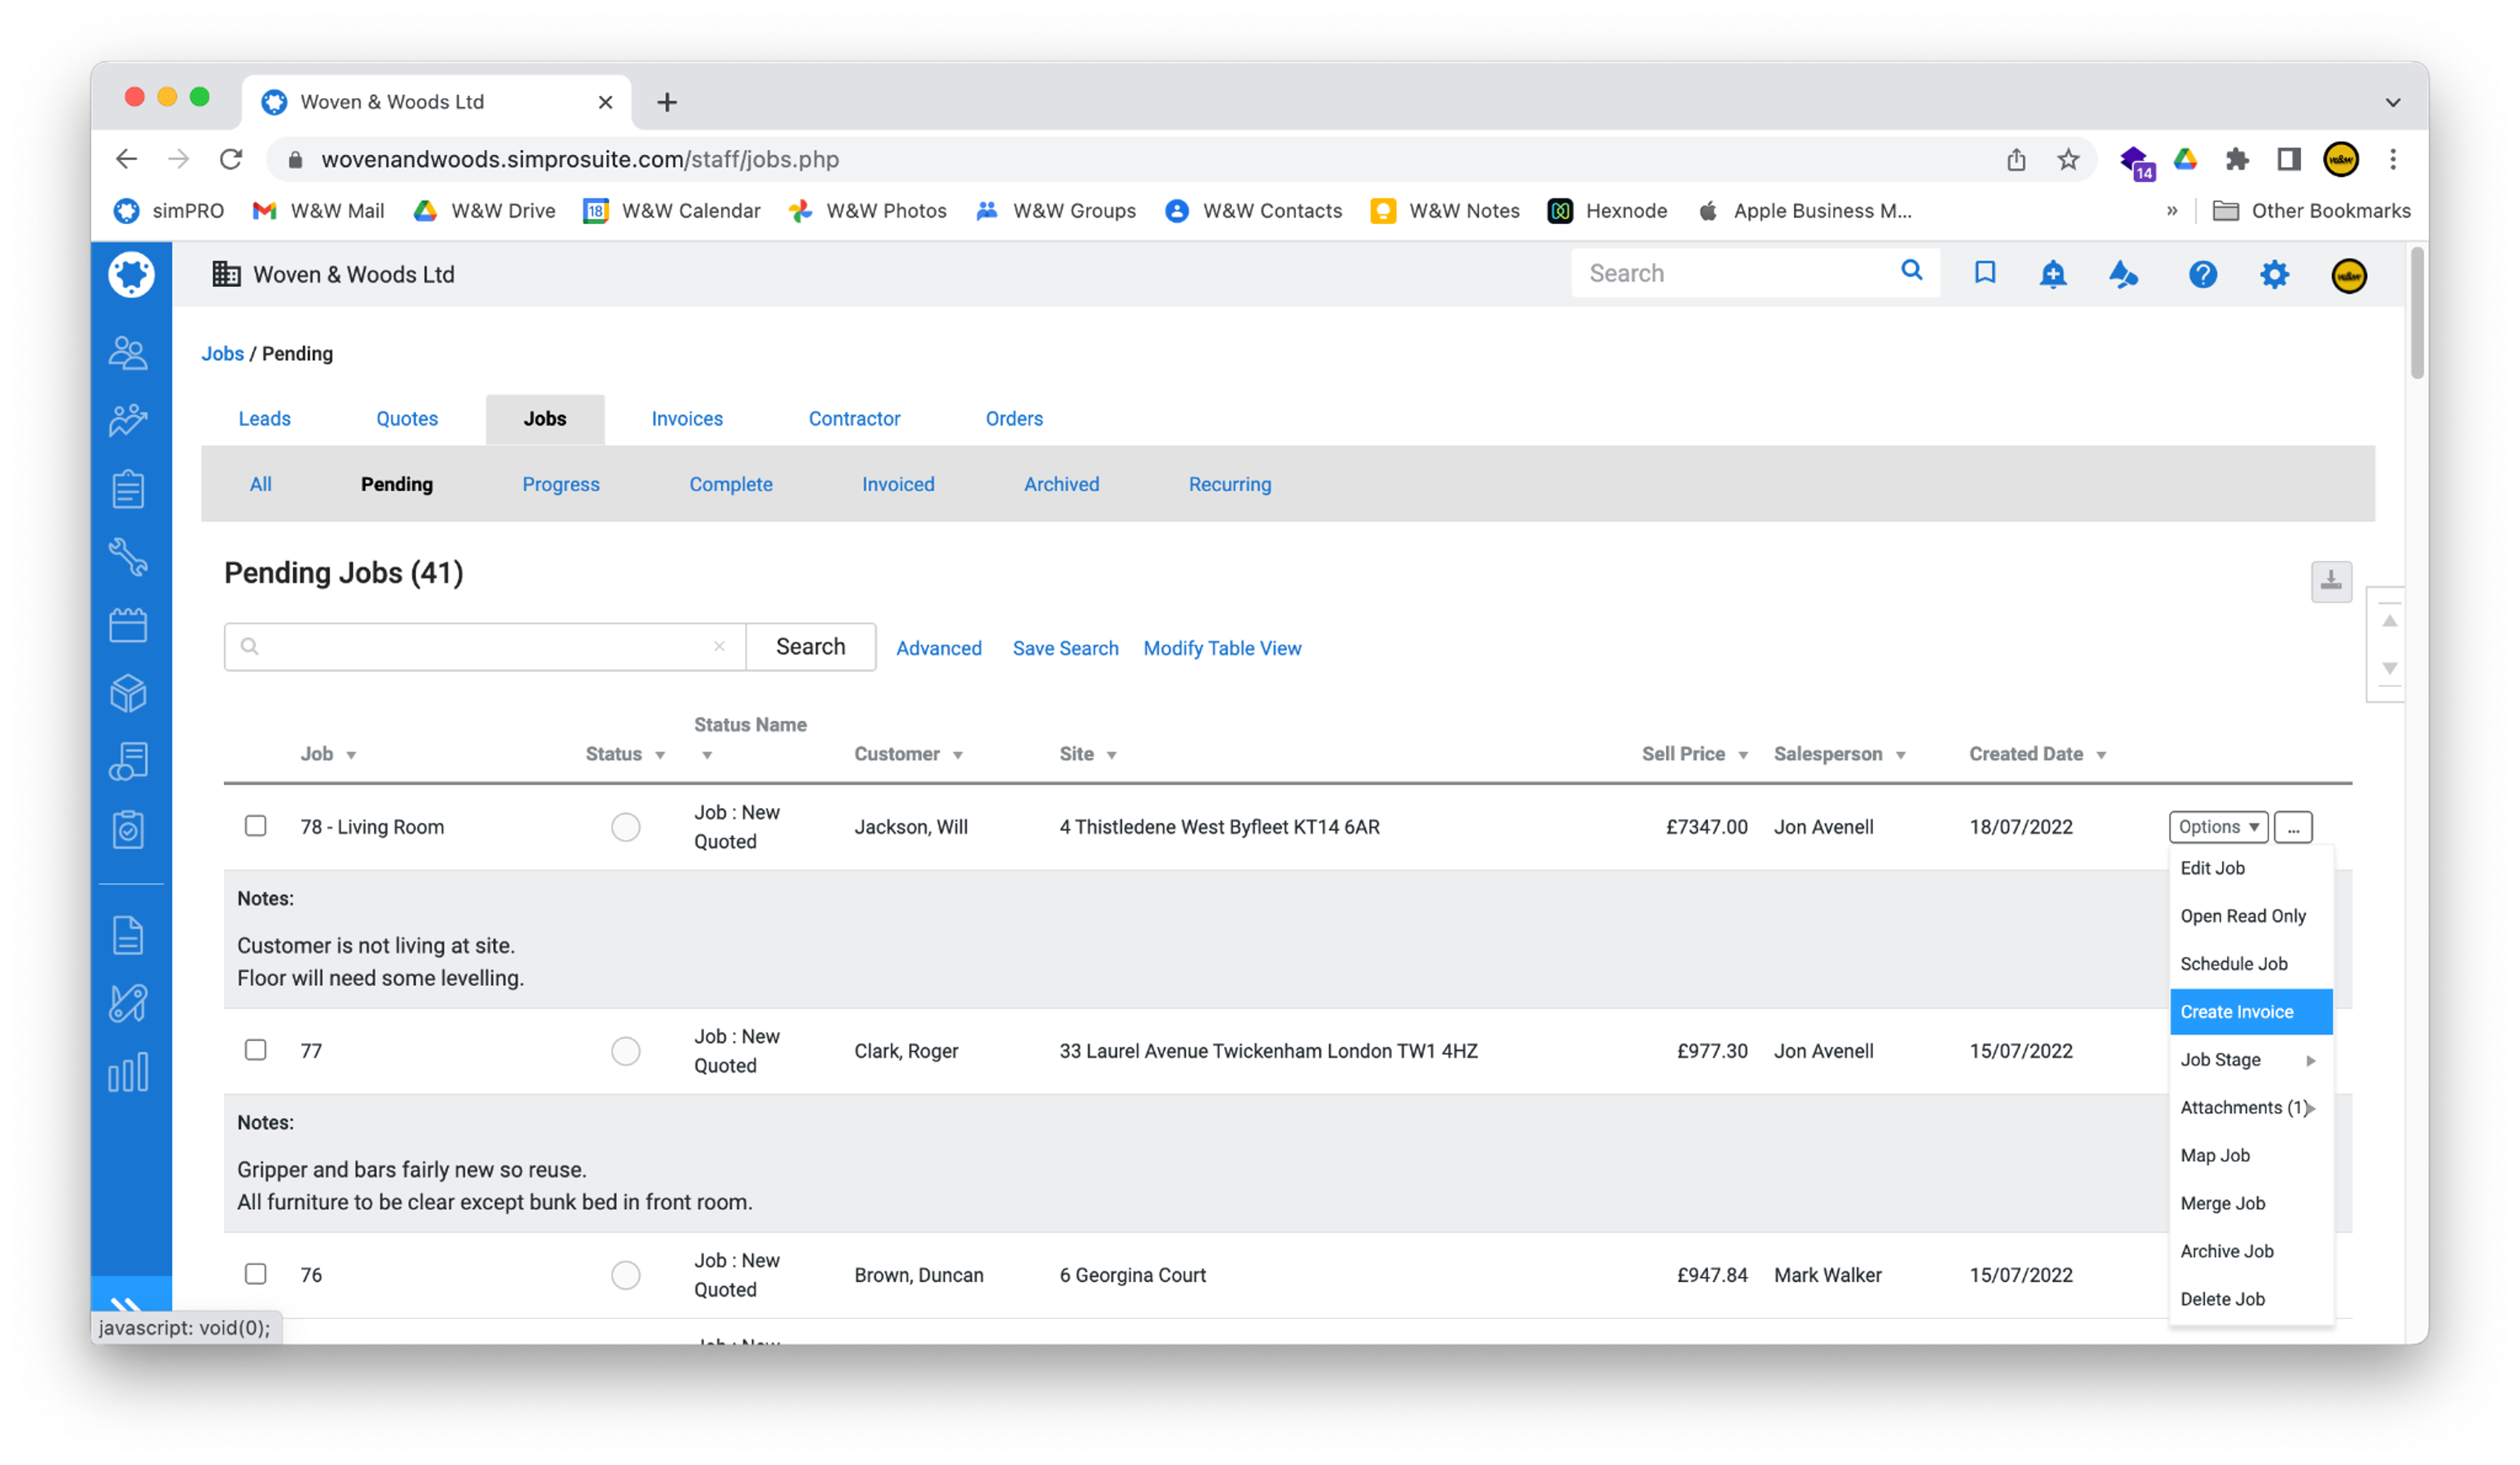
- You should be redirected to the New Invoice screen.
- First, select Deposit from the Invoice Type drop-down box in the top-right of the screen.
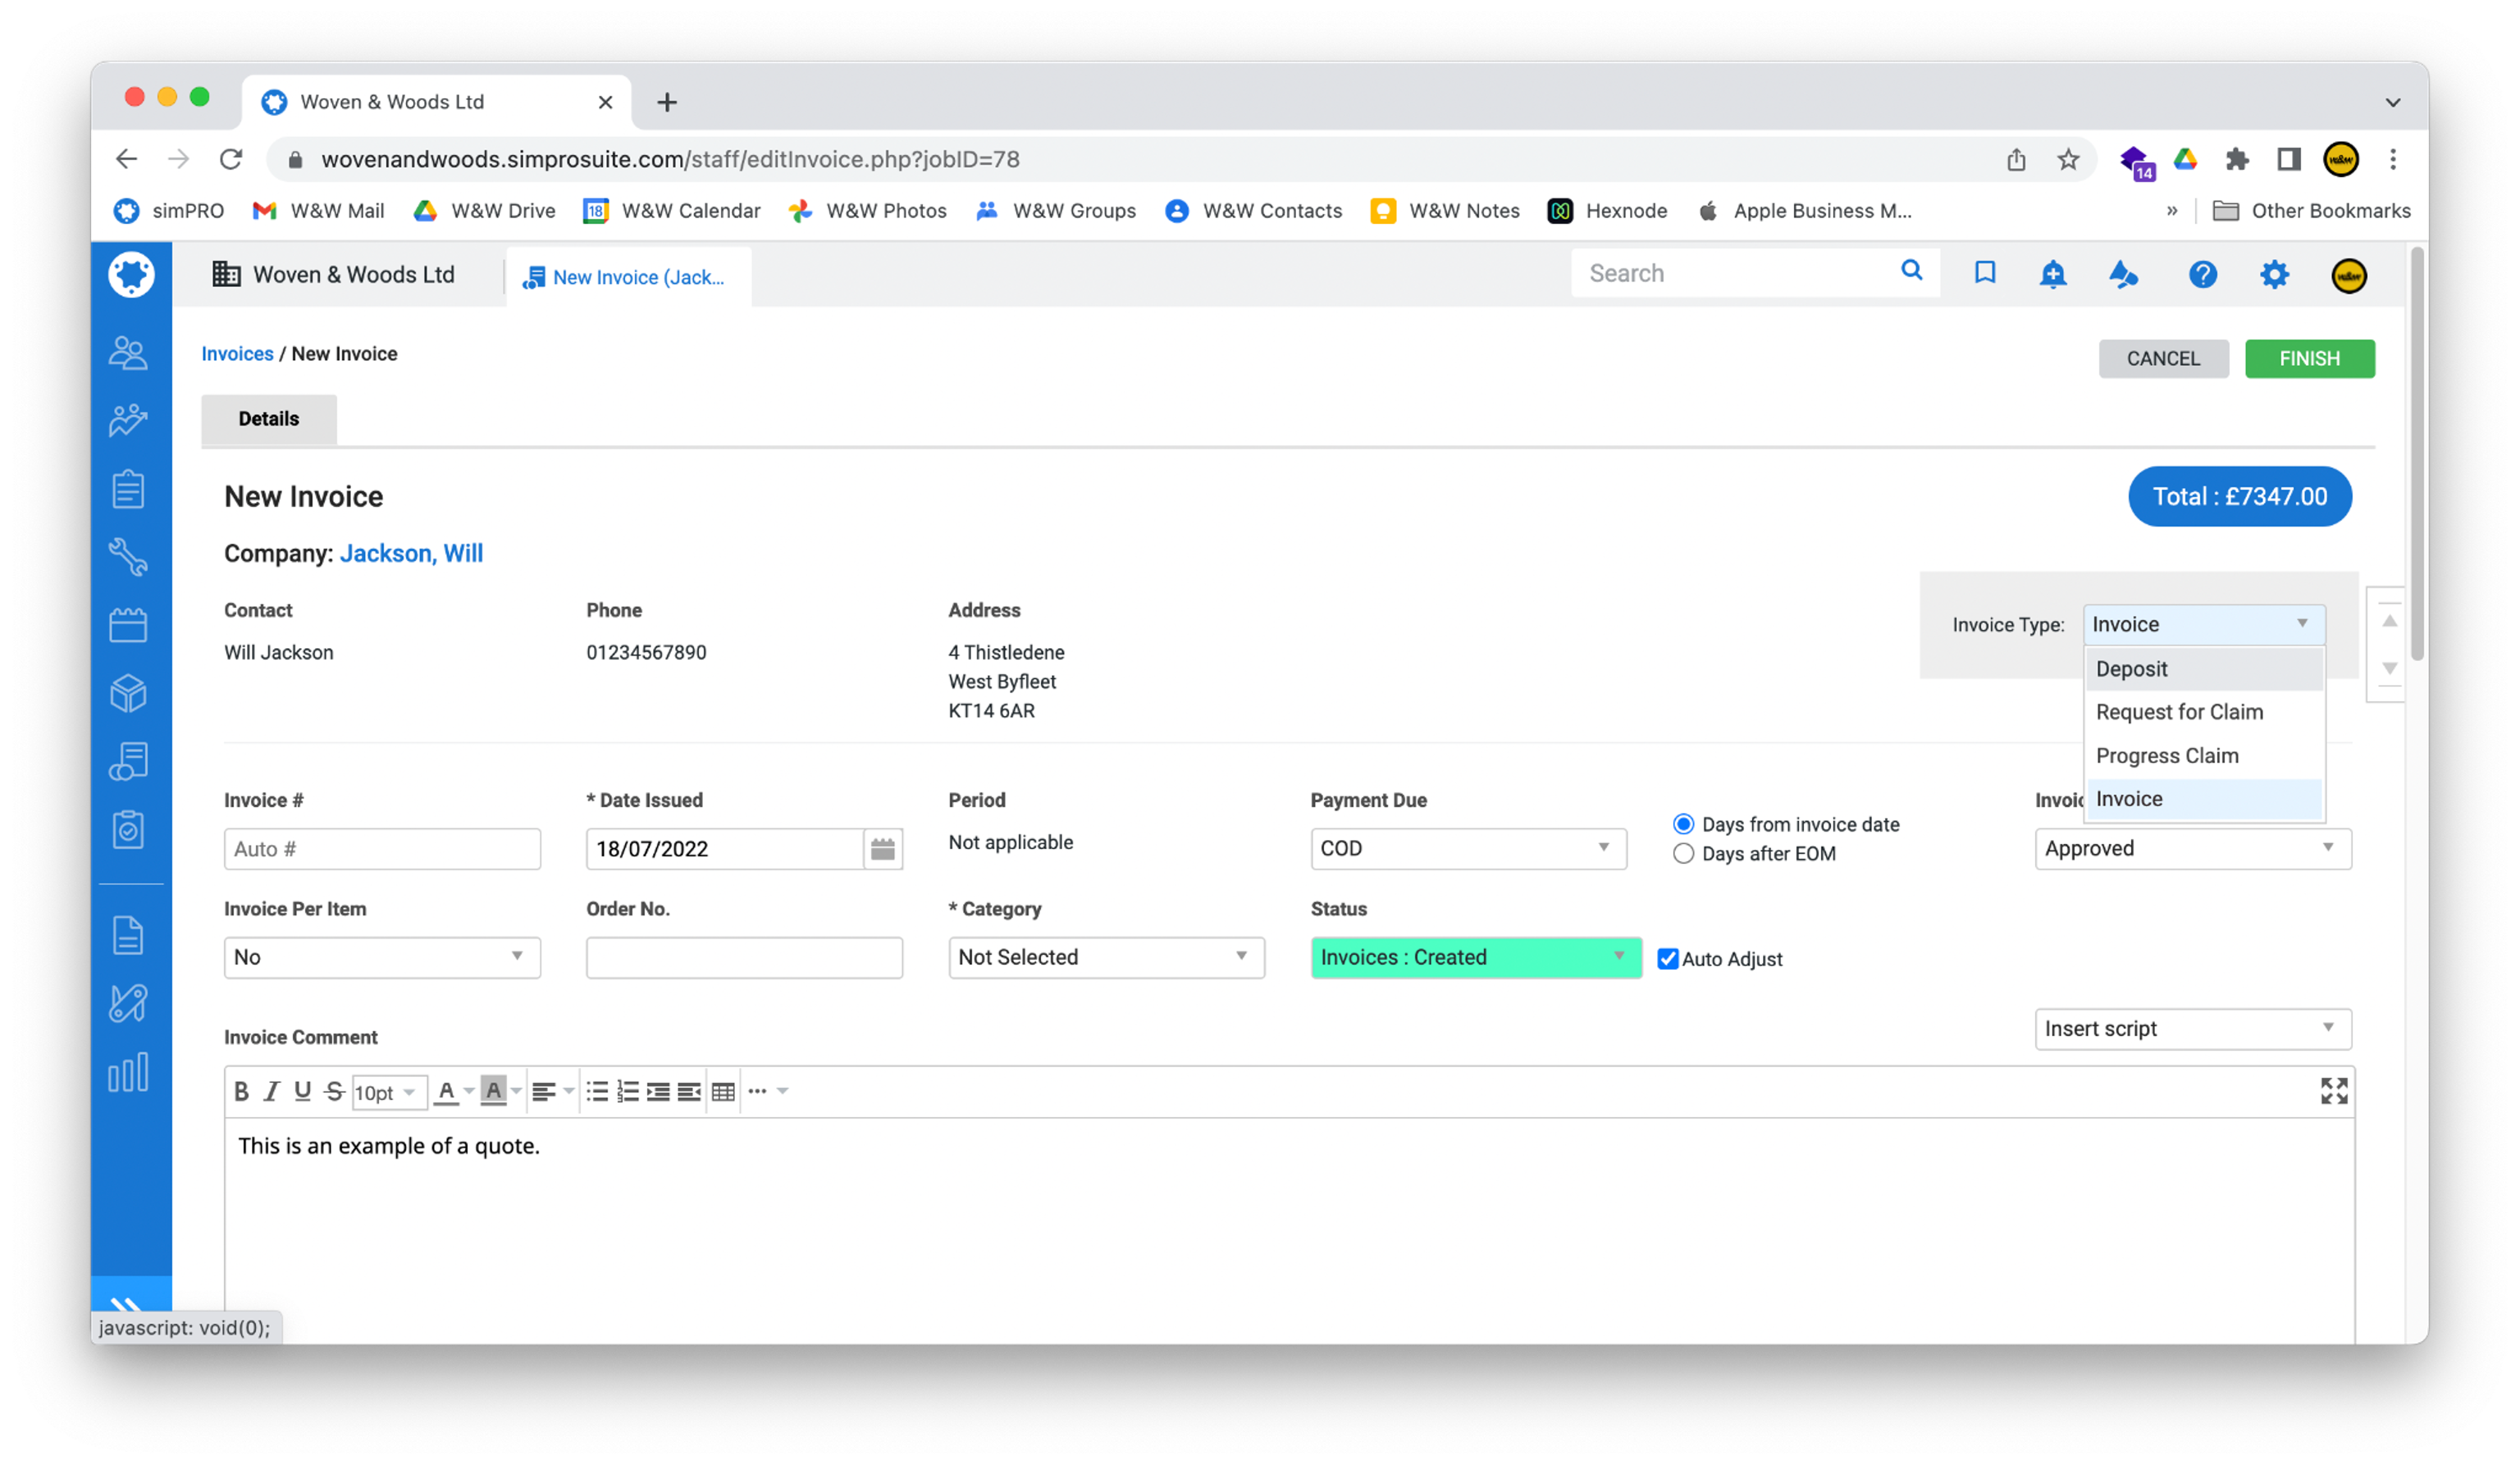
- Next, select the appropriate option from the Category drop-down box.
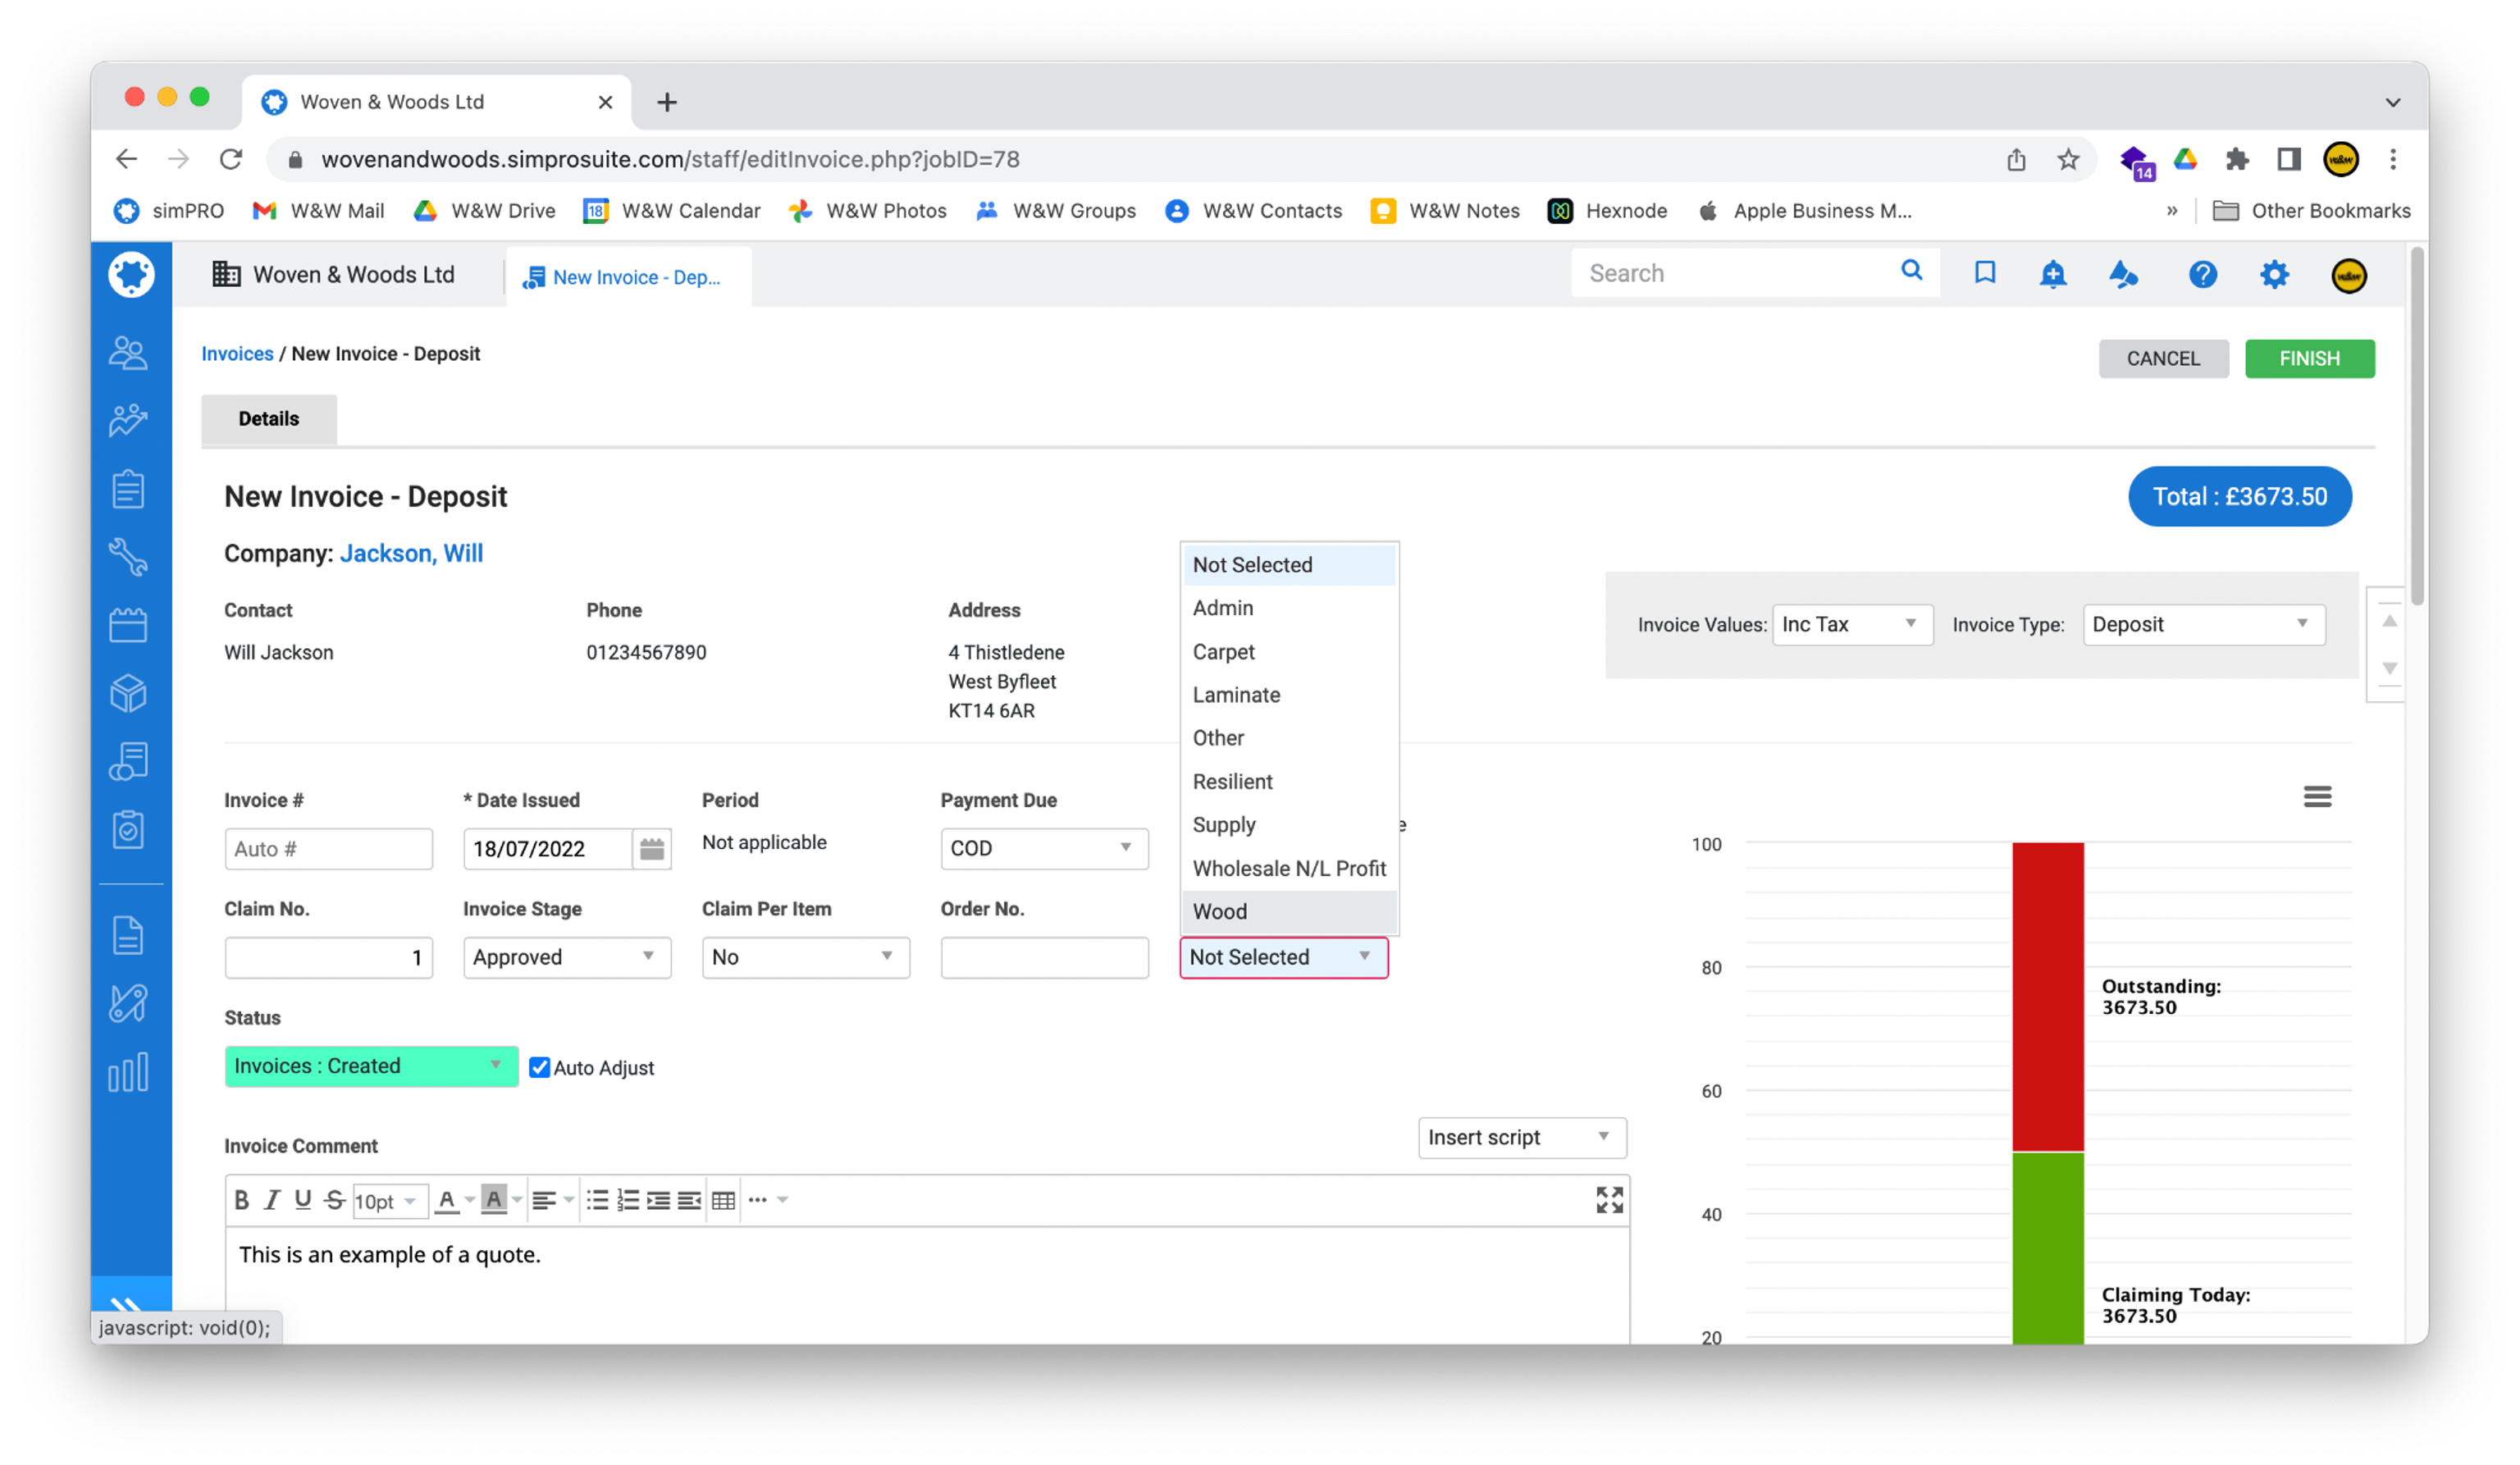
- When the screen has updated, scroll to the bottom of the page to set the amount you want to request from the customer. Usually, this will be 50%, but check if you are unsure.
- Type the amount in either the % or £ box and press Tab to update the table.
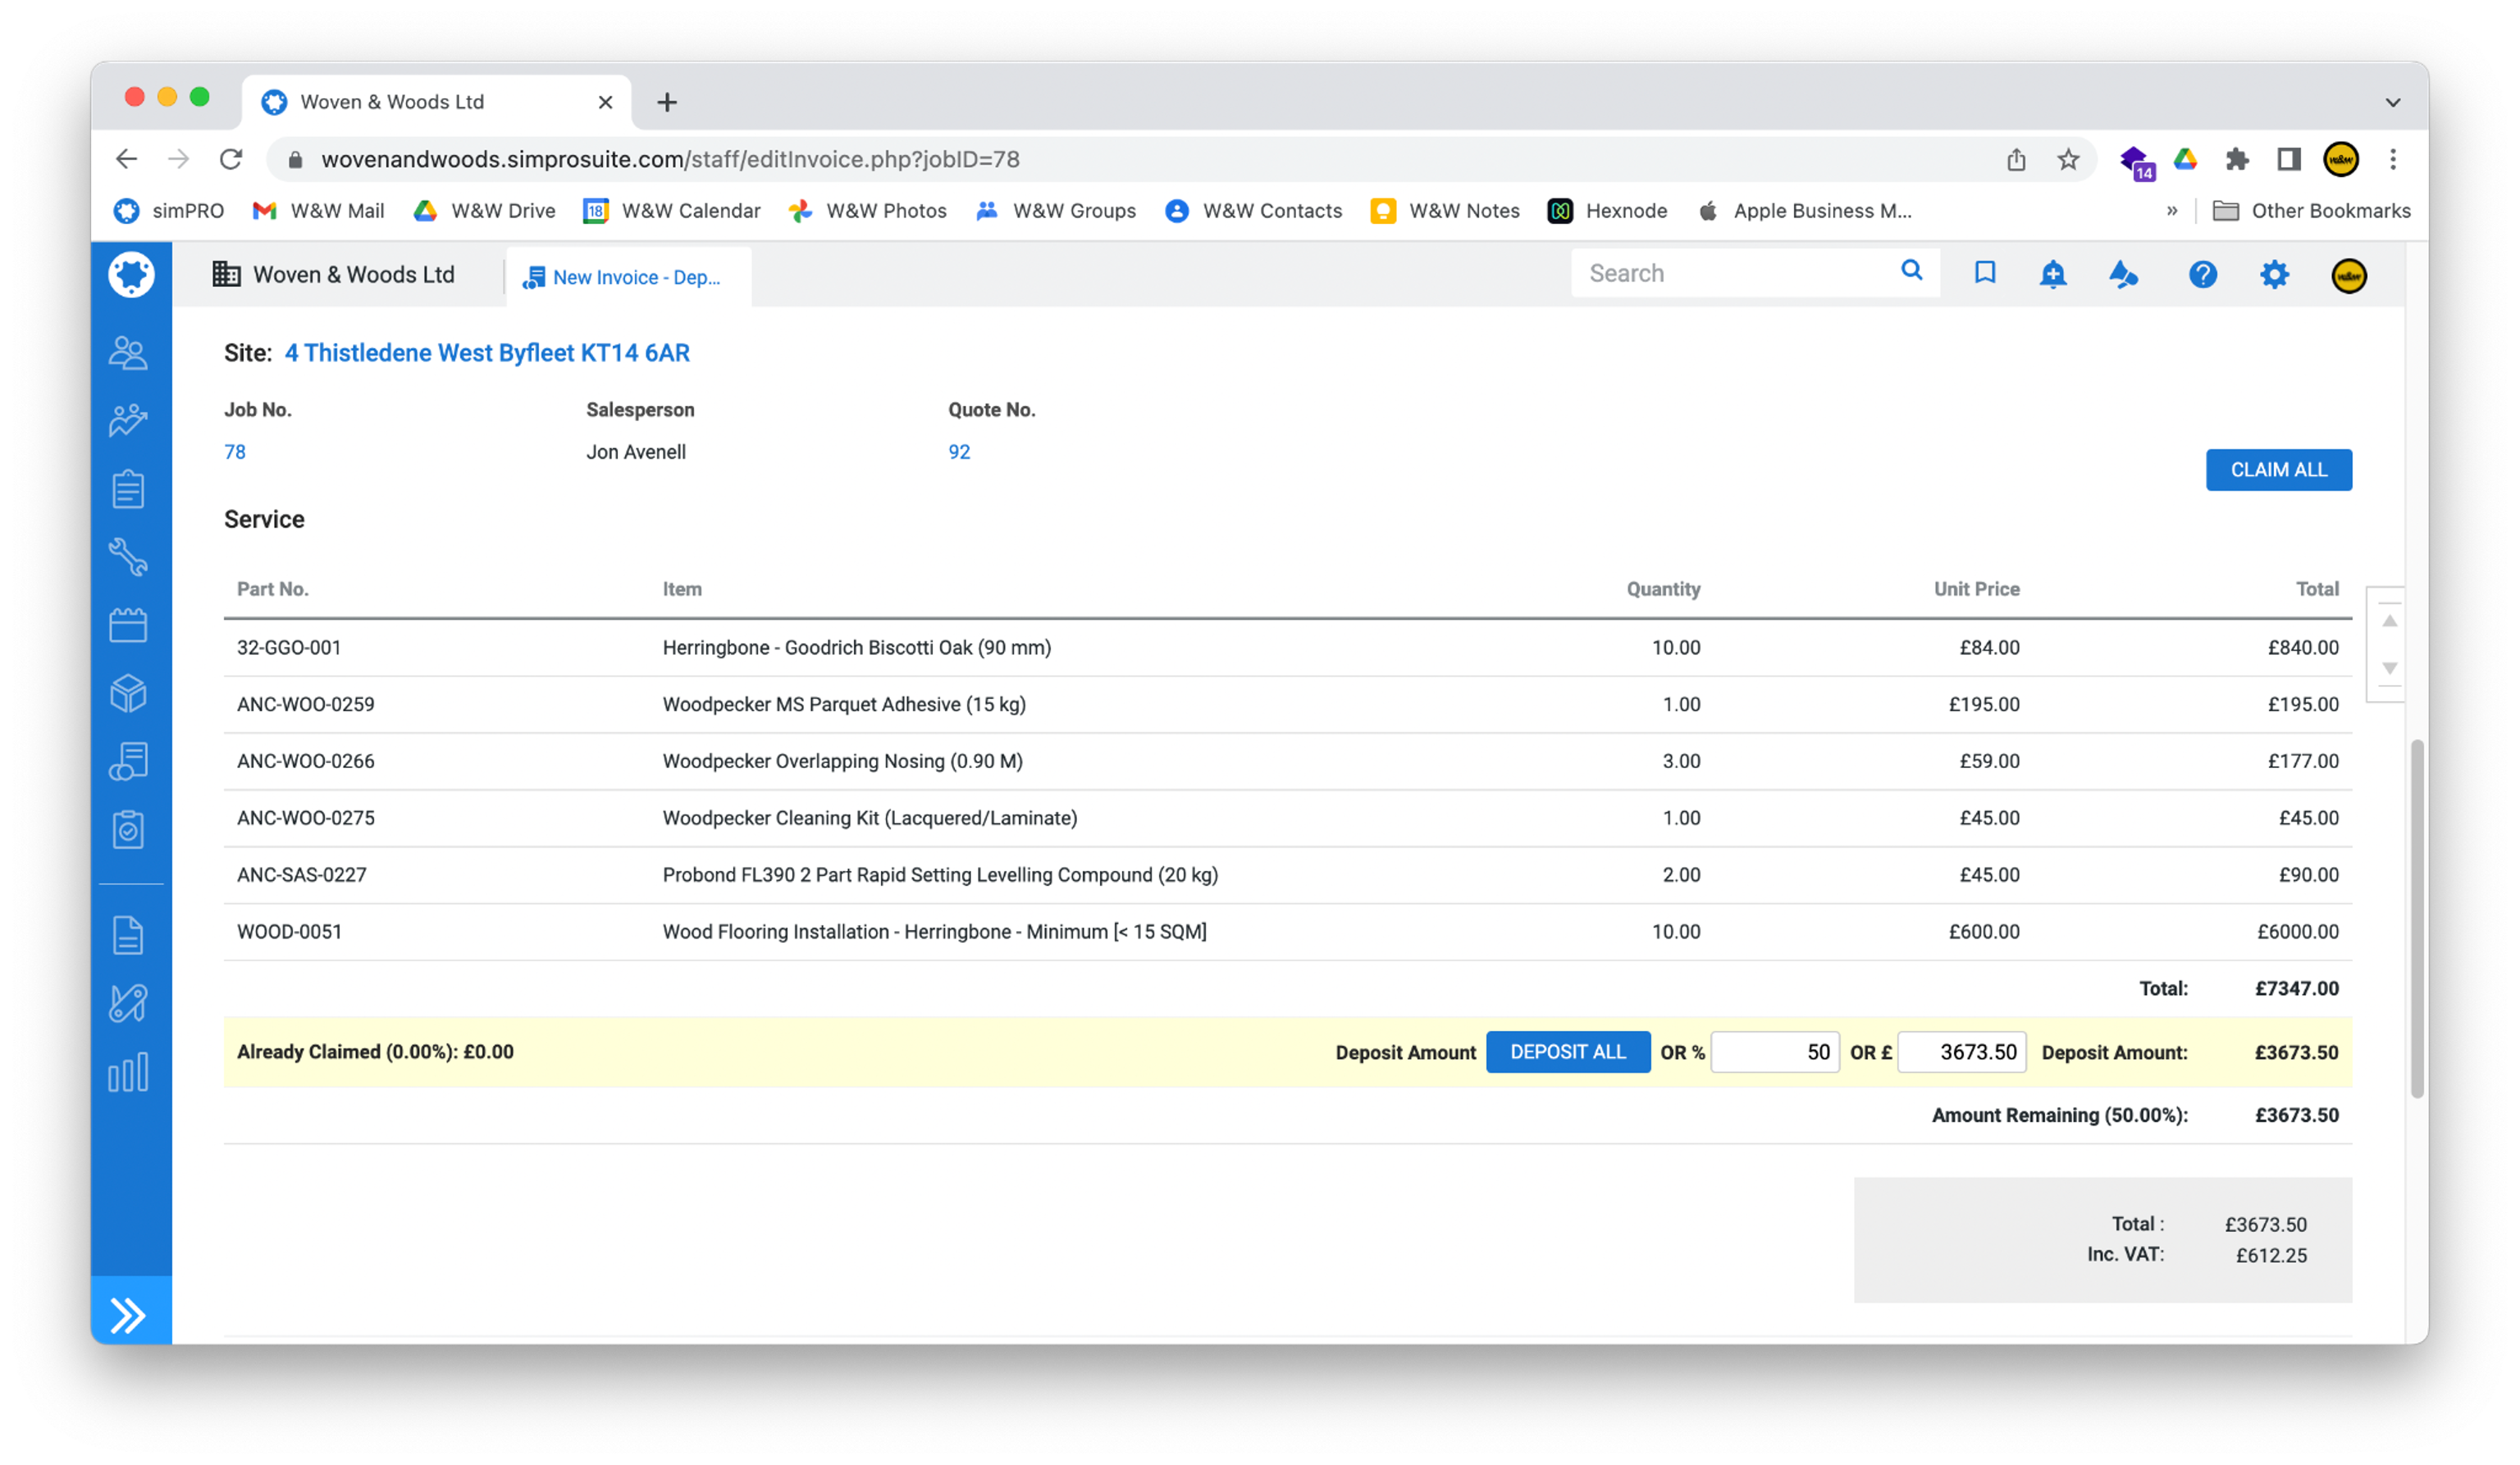
- Once you’ve checked that the figures are correct, scroll back to the top of the screen and click the green Finish button.

- You will automatically be redirected to the Forms page.
- Click the Template drop-down box and select the template name composed of the showroom name dealing with this matter and the words Deposit Invoice followed by a month. Ensure you select the correct showroom and the latest date.
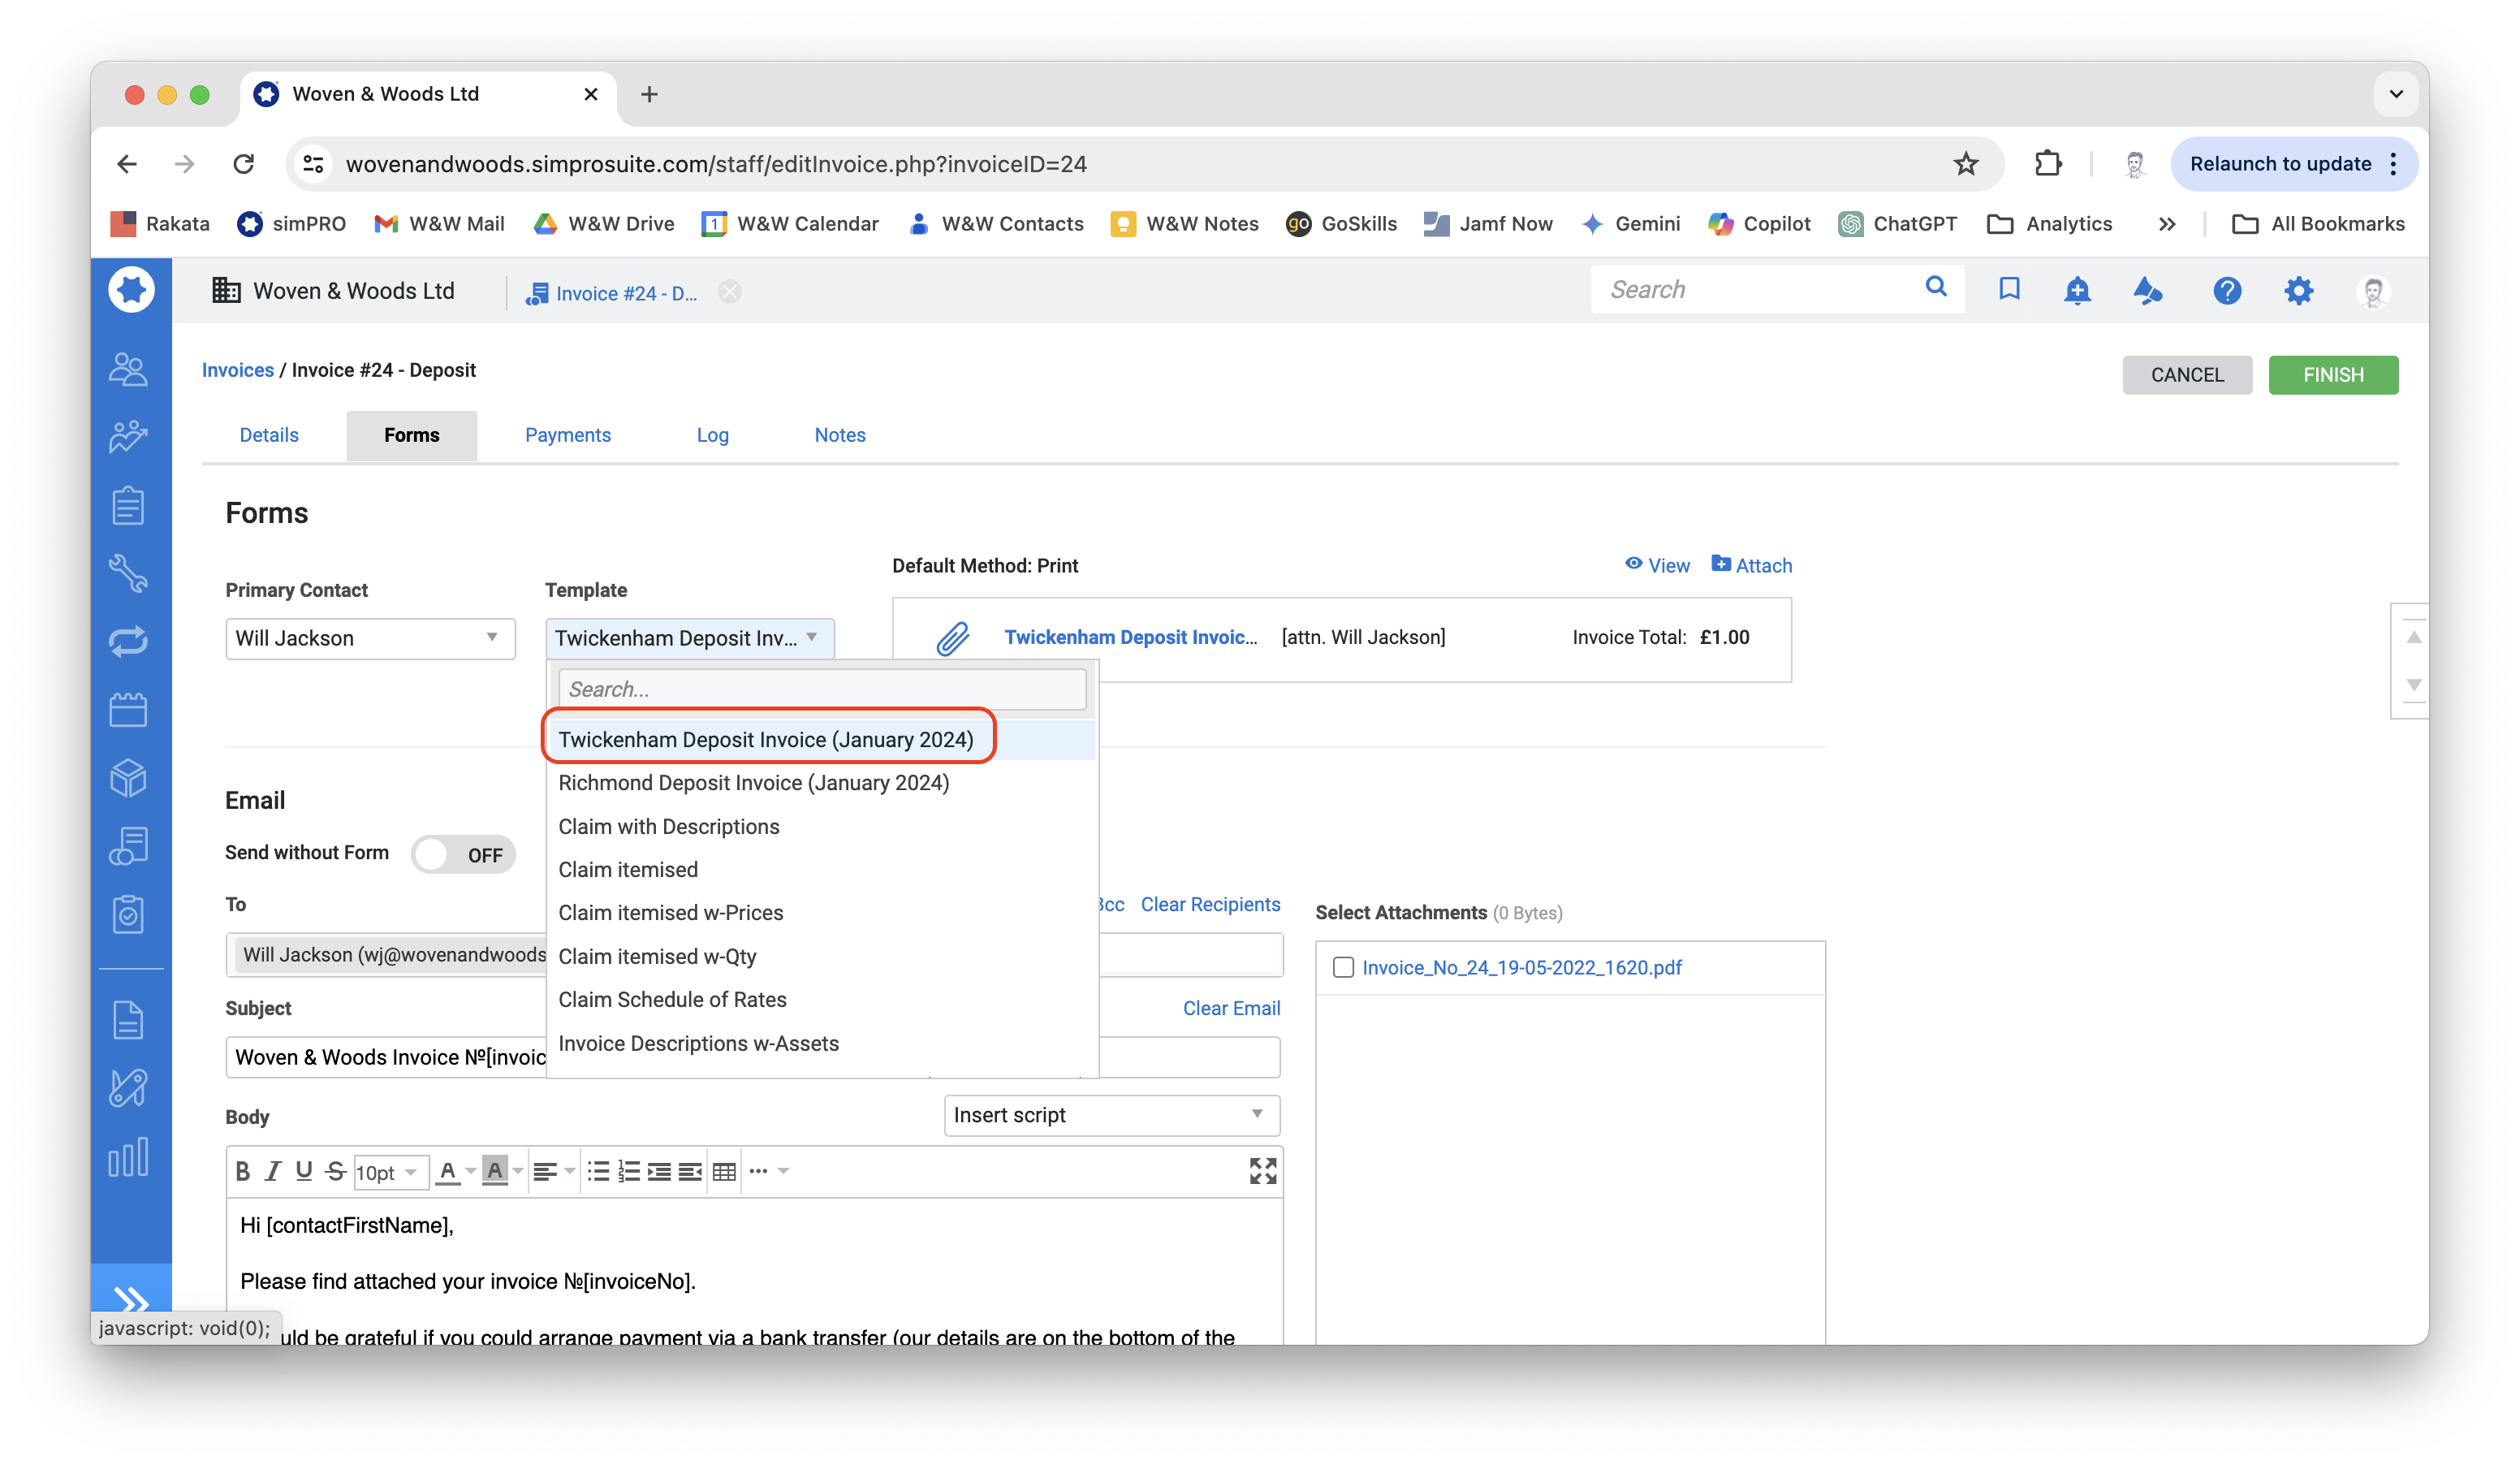
- Once the correct template has been selected, click the View link next to the blue eye icon to preview the invoice.
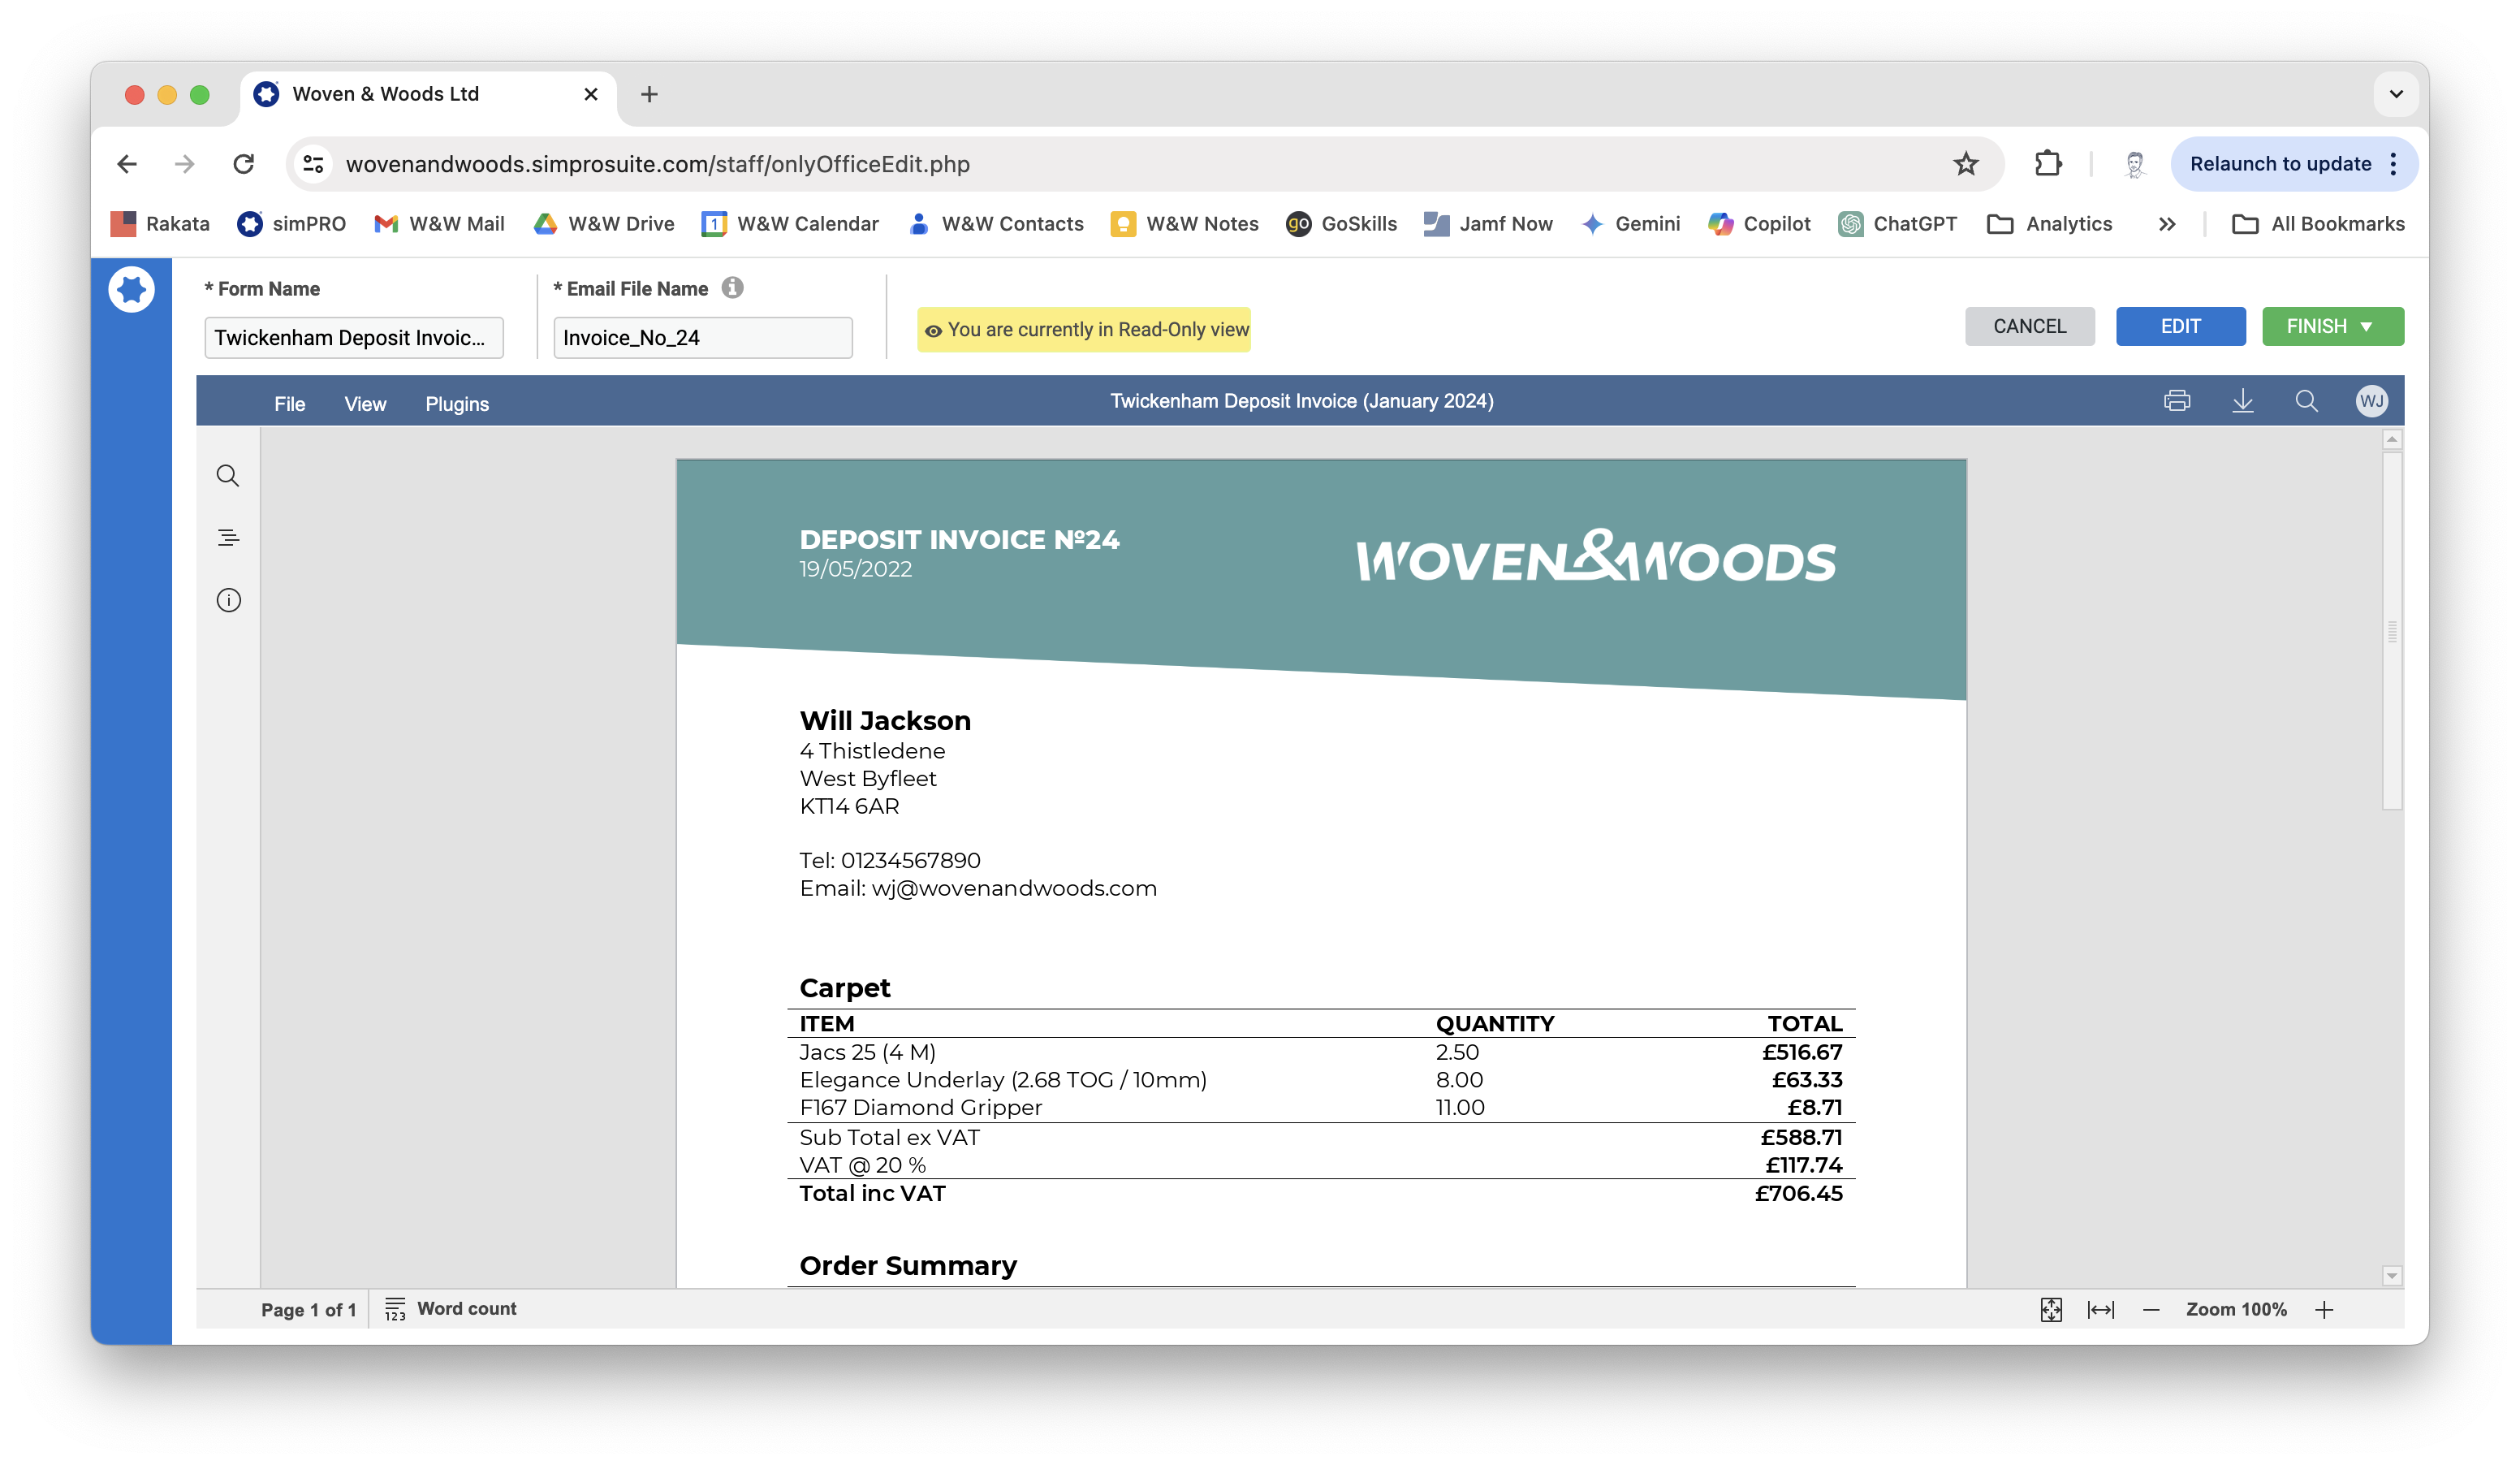
- This preview will show you the invoice as the customer will receive it. Check that everything is correct and the formatting is neat before proceeding.
- If you need to make any minor formatting changes, you can do so by clicking the blue Edit button.
- When you are happy that the form is ready to send to the customer, hover over the green Finish button and click Finish and Close to save your work and return to the Forms screen.

- When you are back on the Forms page, click the Attach link next to the blue folder icon to convert the invoice to PDF and prepare the email to the customer.
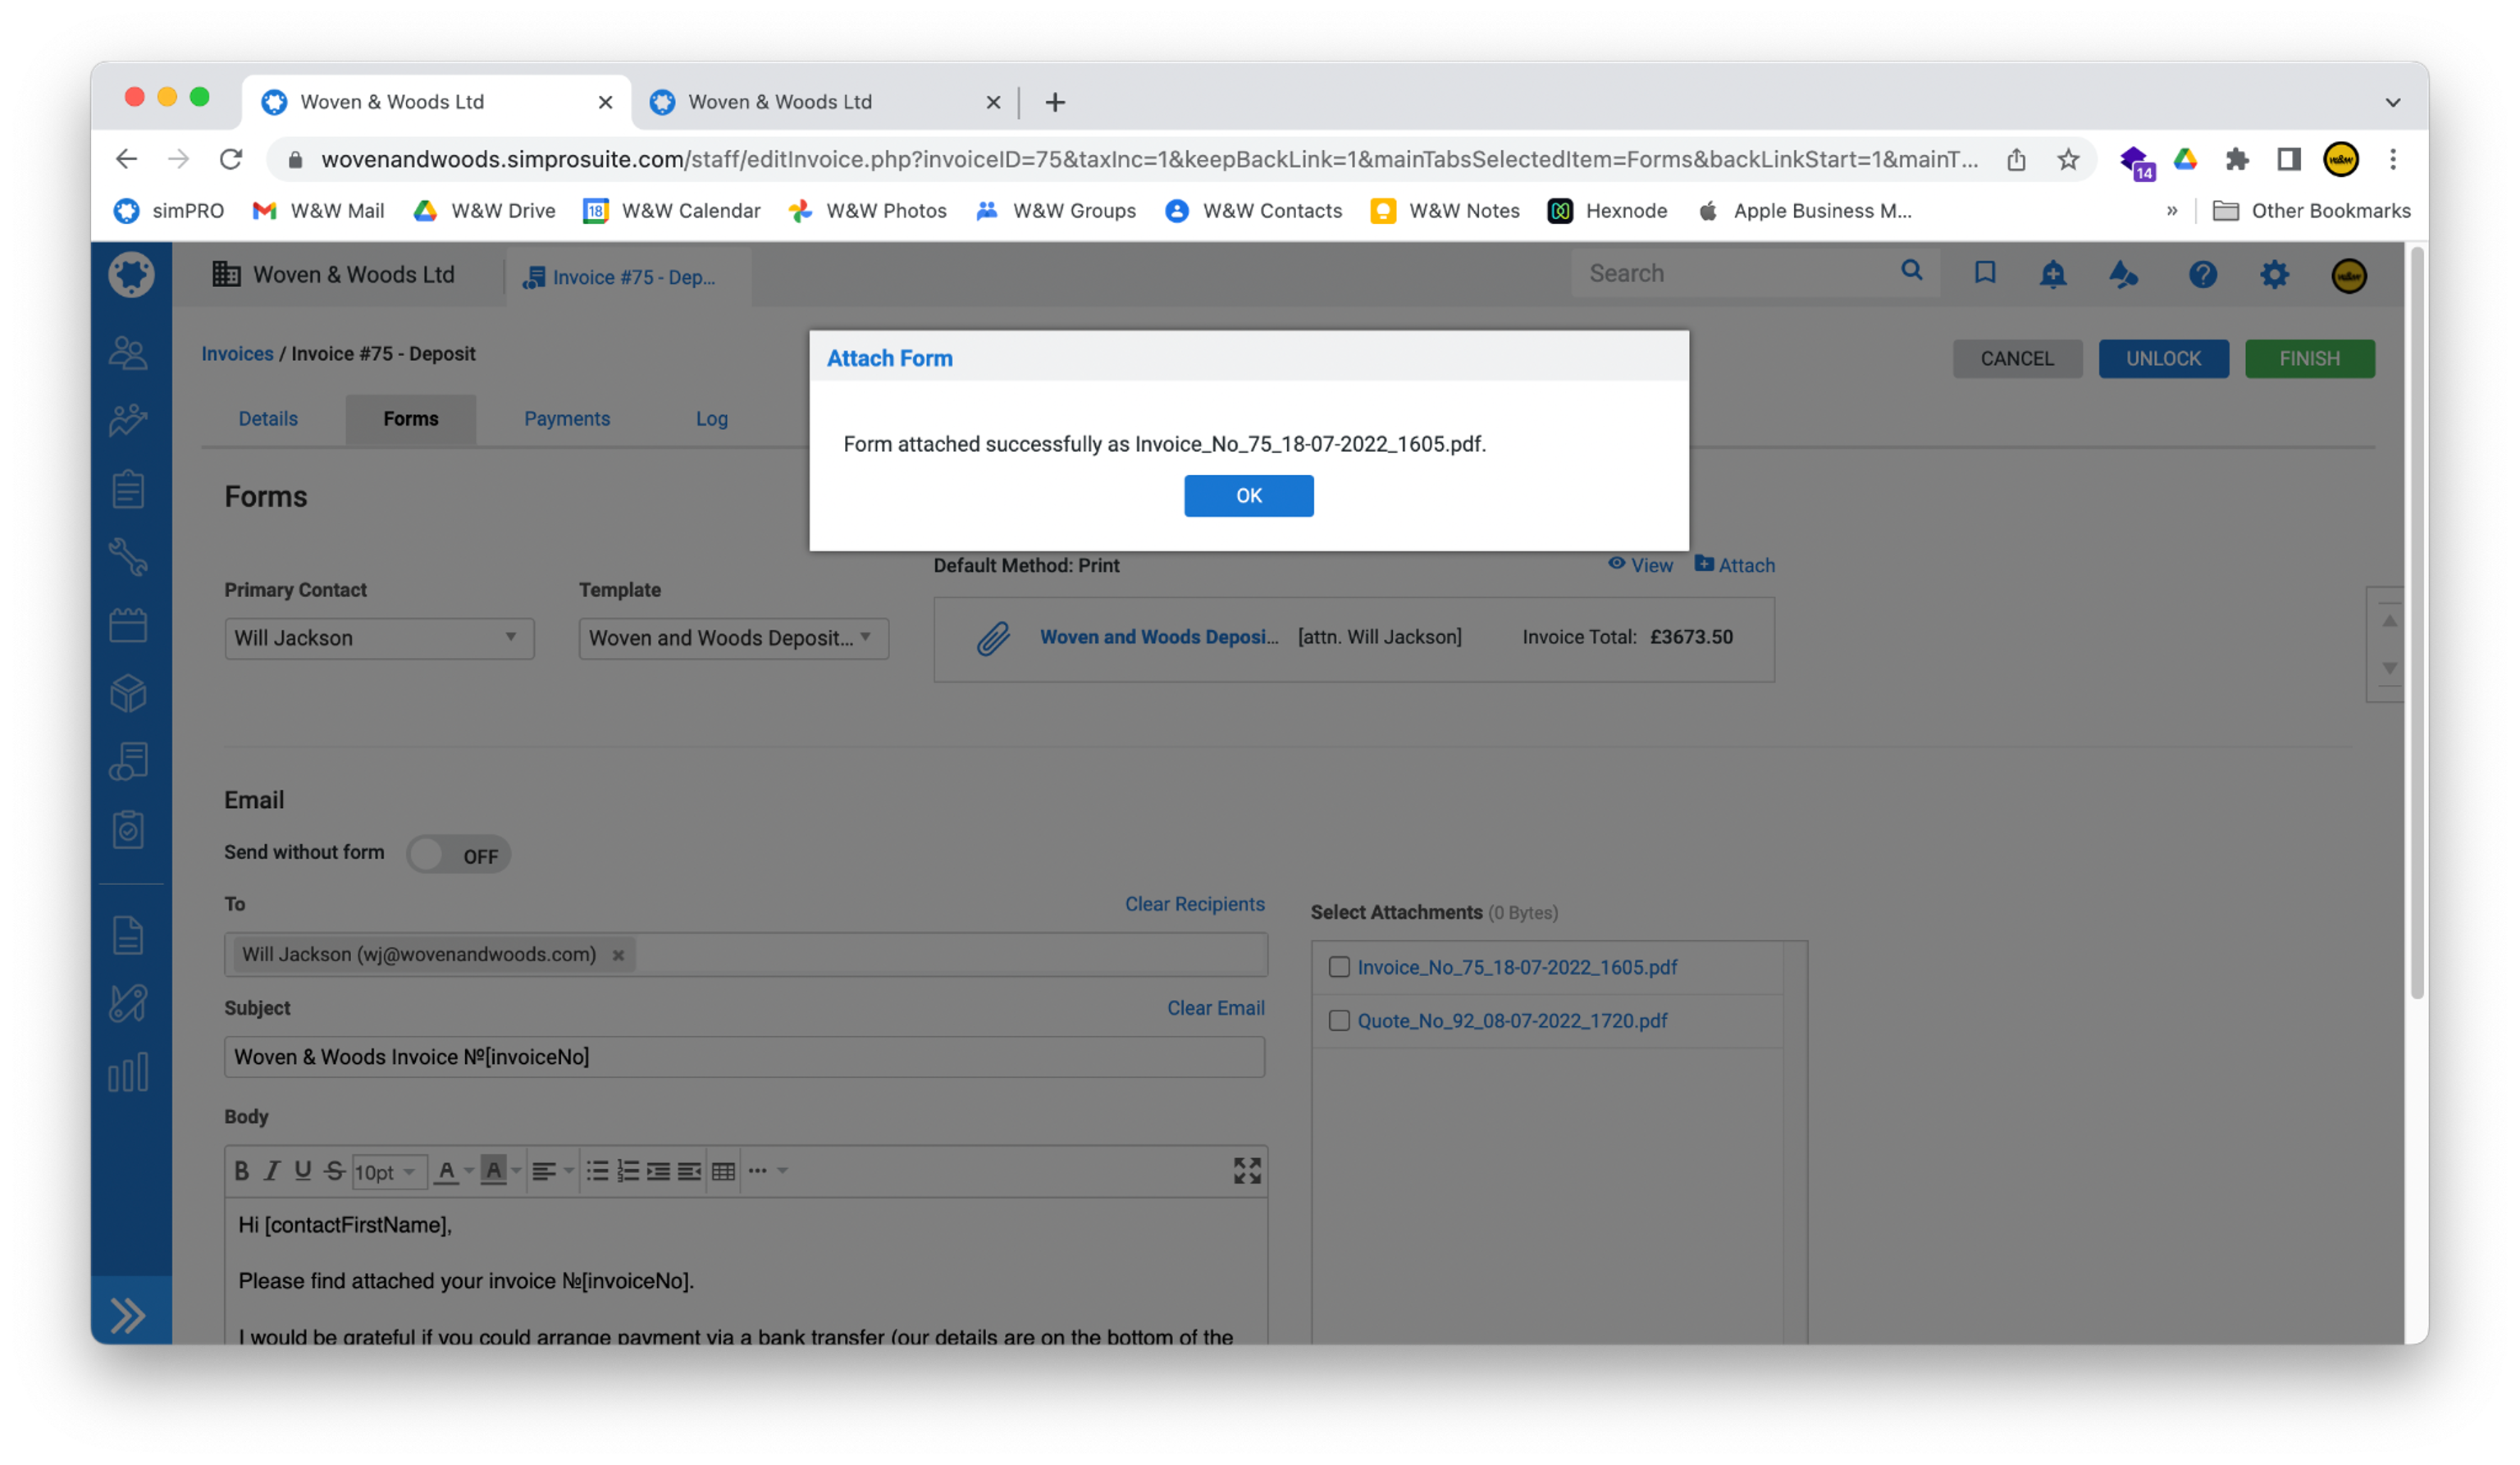
- When simPRO has finished processing the document, scroll to the bottom of the Forms page to generate the email to the customer. All details should be automatically inserted, so you generally won’t need to do anything here. Anything in
[square brackets]will be replaced by simPRO with the relevant details.
- When you are happy that everything is correct, click the blue Send button to send the email to the customer. A copy will also be sent to your email address as well as accounts.
Assign a Payment
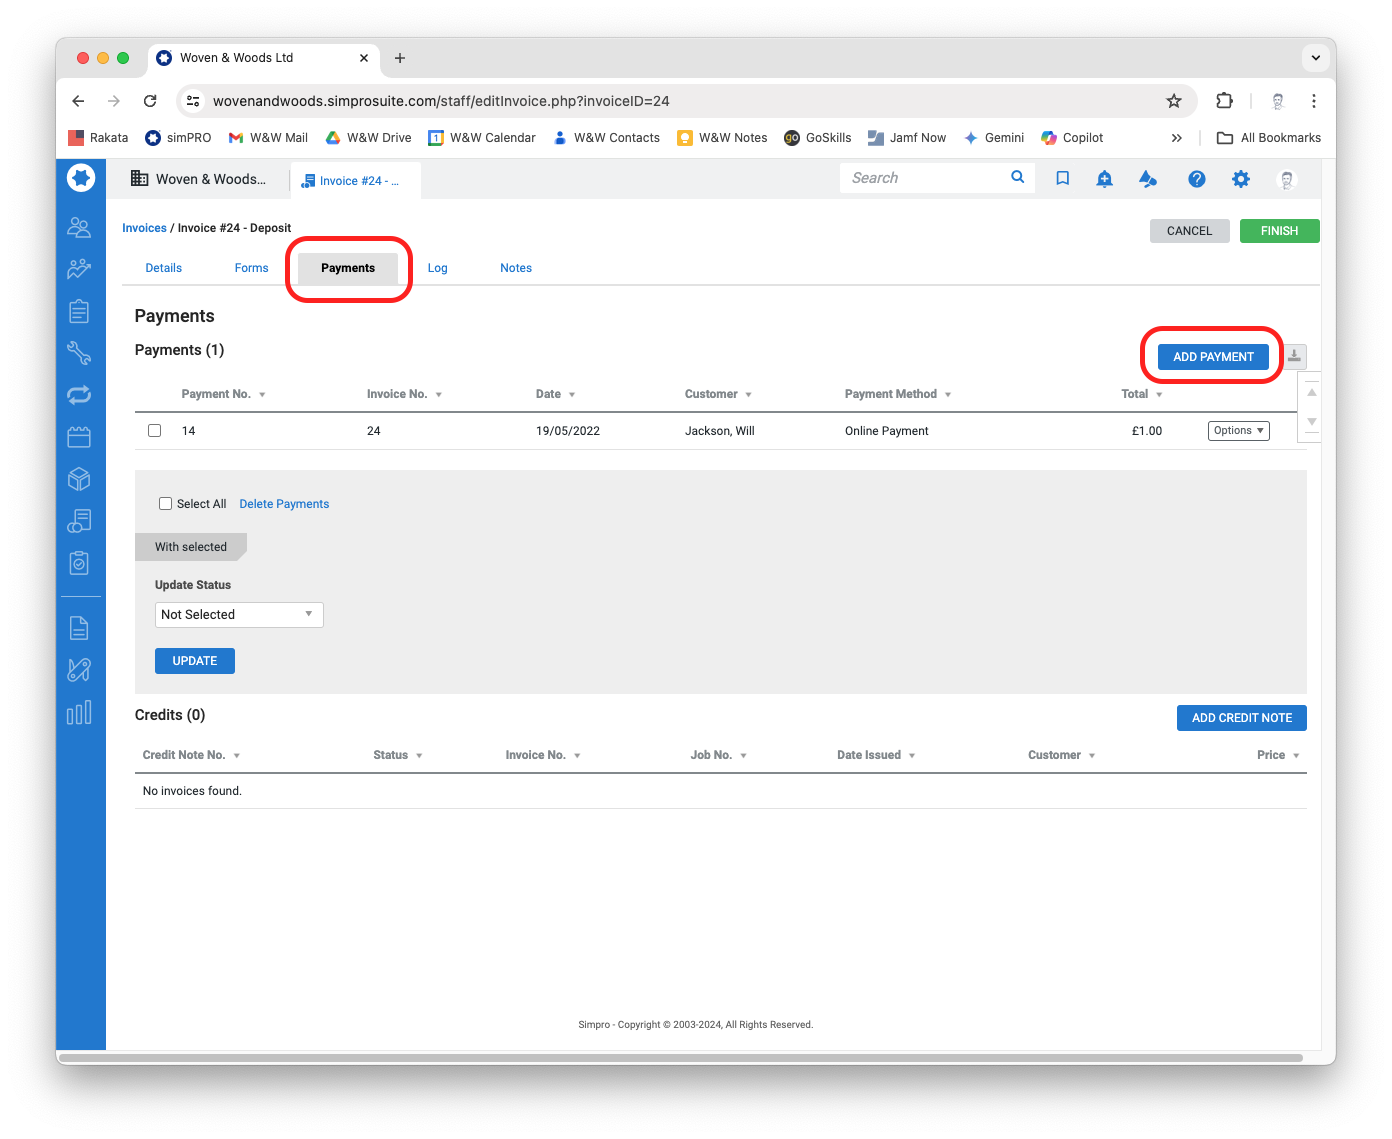
Section titled “Assign a Payment”If the customer pays using the online portal, the payment will be automatically assigned to the invoice. However, if they pay in person or over the phone, you will need to manually assign the payment.
-
To assign a payment, open the relevant invoice in simPRO and click the Payments tab, followed by the Add Payment button.
-
The New Payment screen will open. Enter the following information into the fields:
- Method: If the customer paid by card (in person or over the phone), select the type of card used. If unsure, check the record on Square. If payment was by cheque or cash, select either of these instead.
- Deposit Account: General
- Date: The date payment was received. This should be the same date that appears on the Square record.
-
The rest of the fields can be left blank. If you have any comments, you can add them in the Notes box.
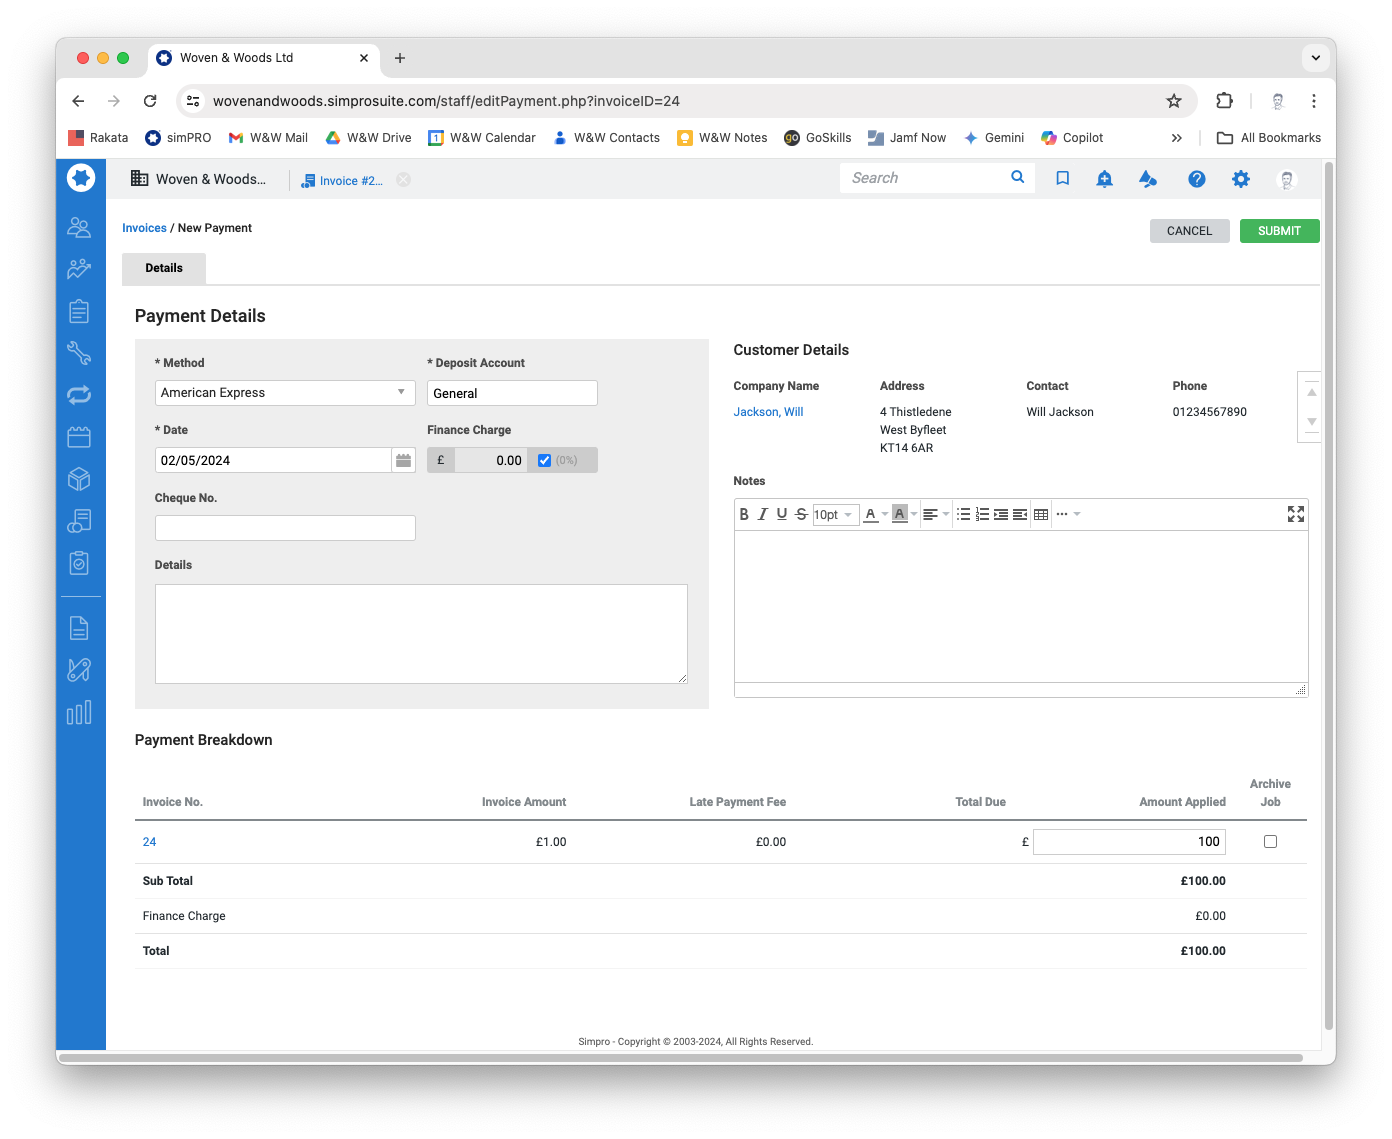
-
Scroll to the bottom of the page and enter the amount that has been paid. Then click Submit.
Arranging Installation
Section titled “Arranging Installation”Raise a Work Order
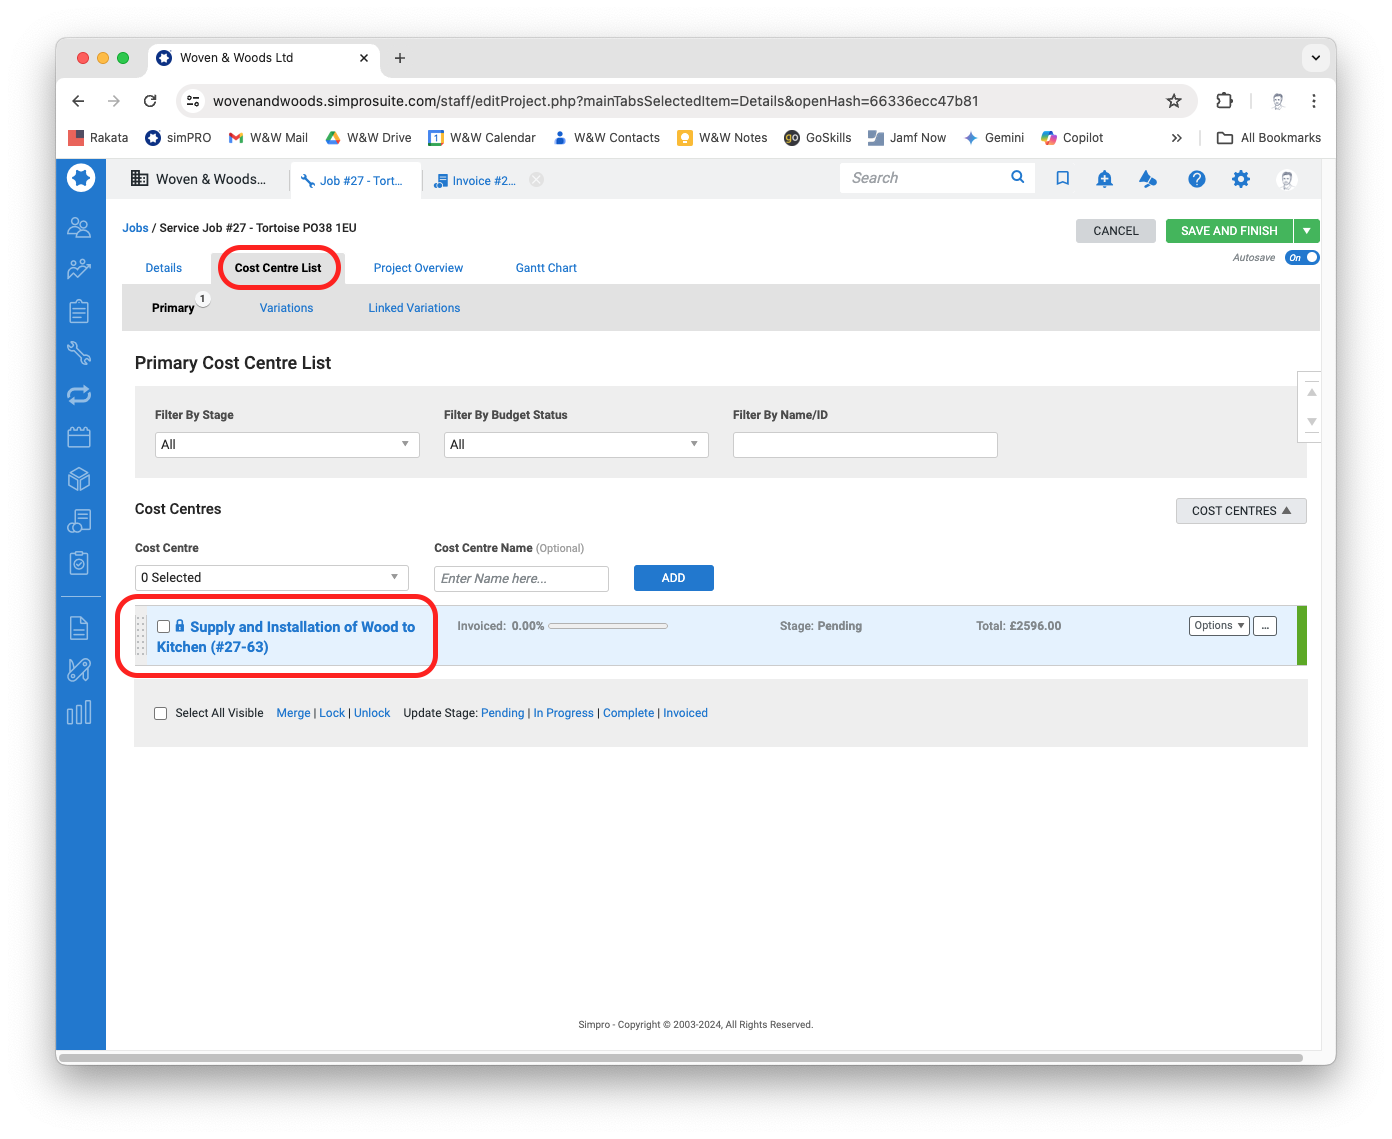
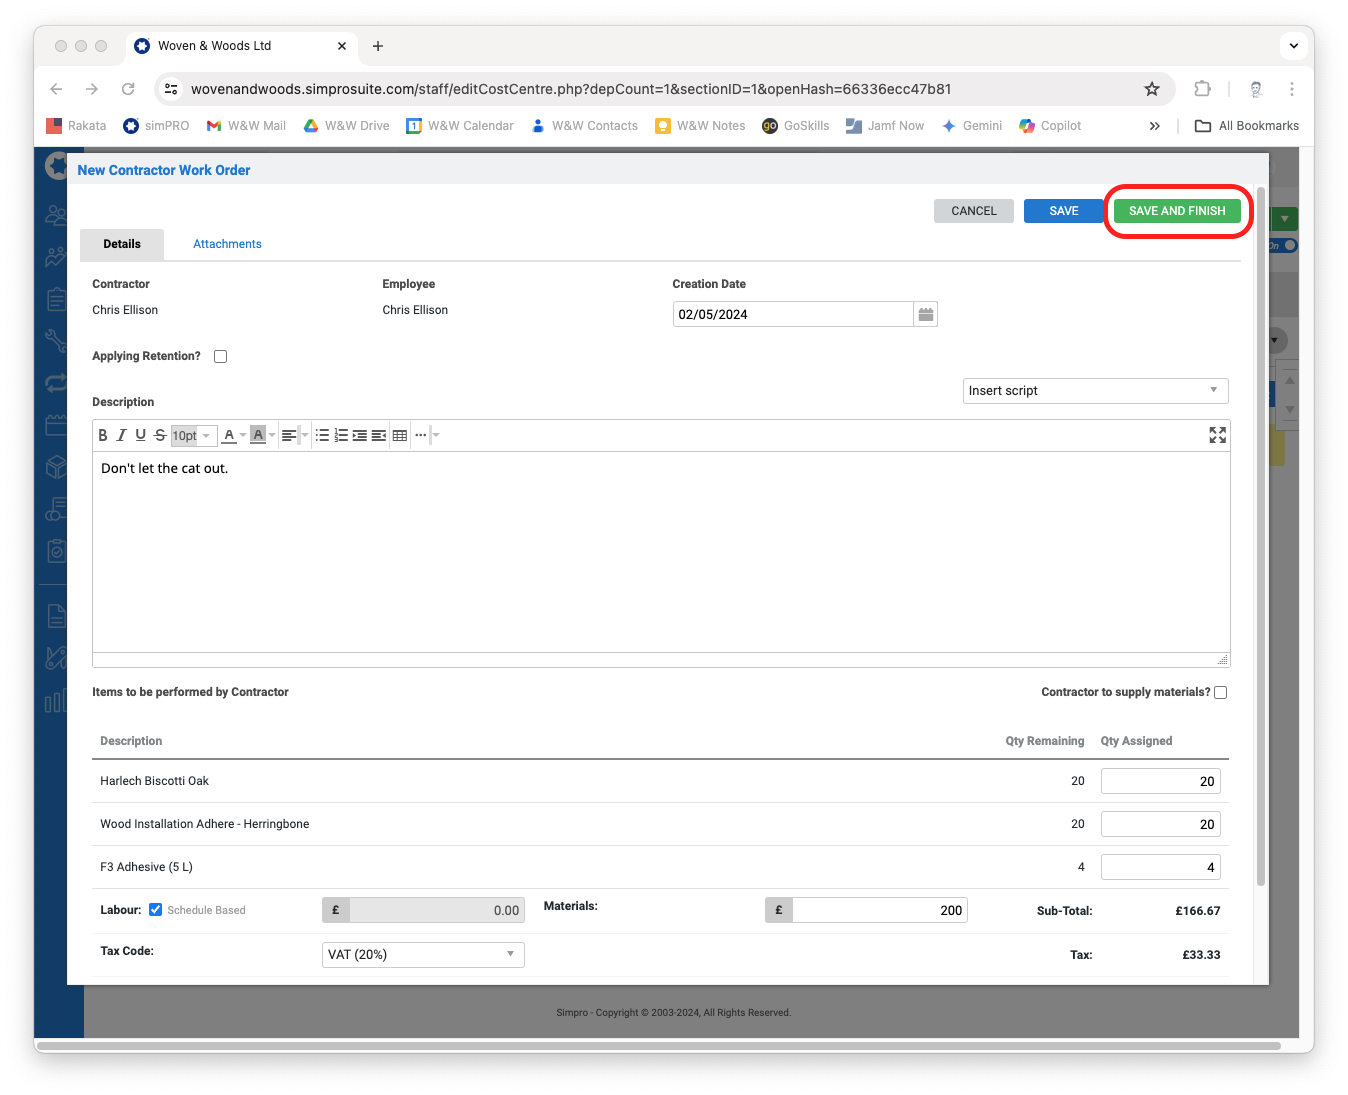
Section titled “Raise a Work Order”- With the job page open in simPRO, select the Cost Centre List tab and then click on the relevant cost centre.
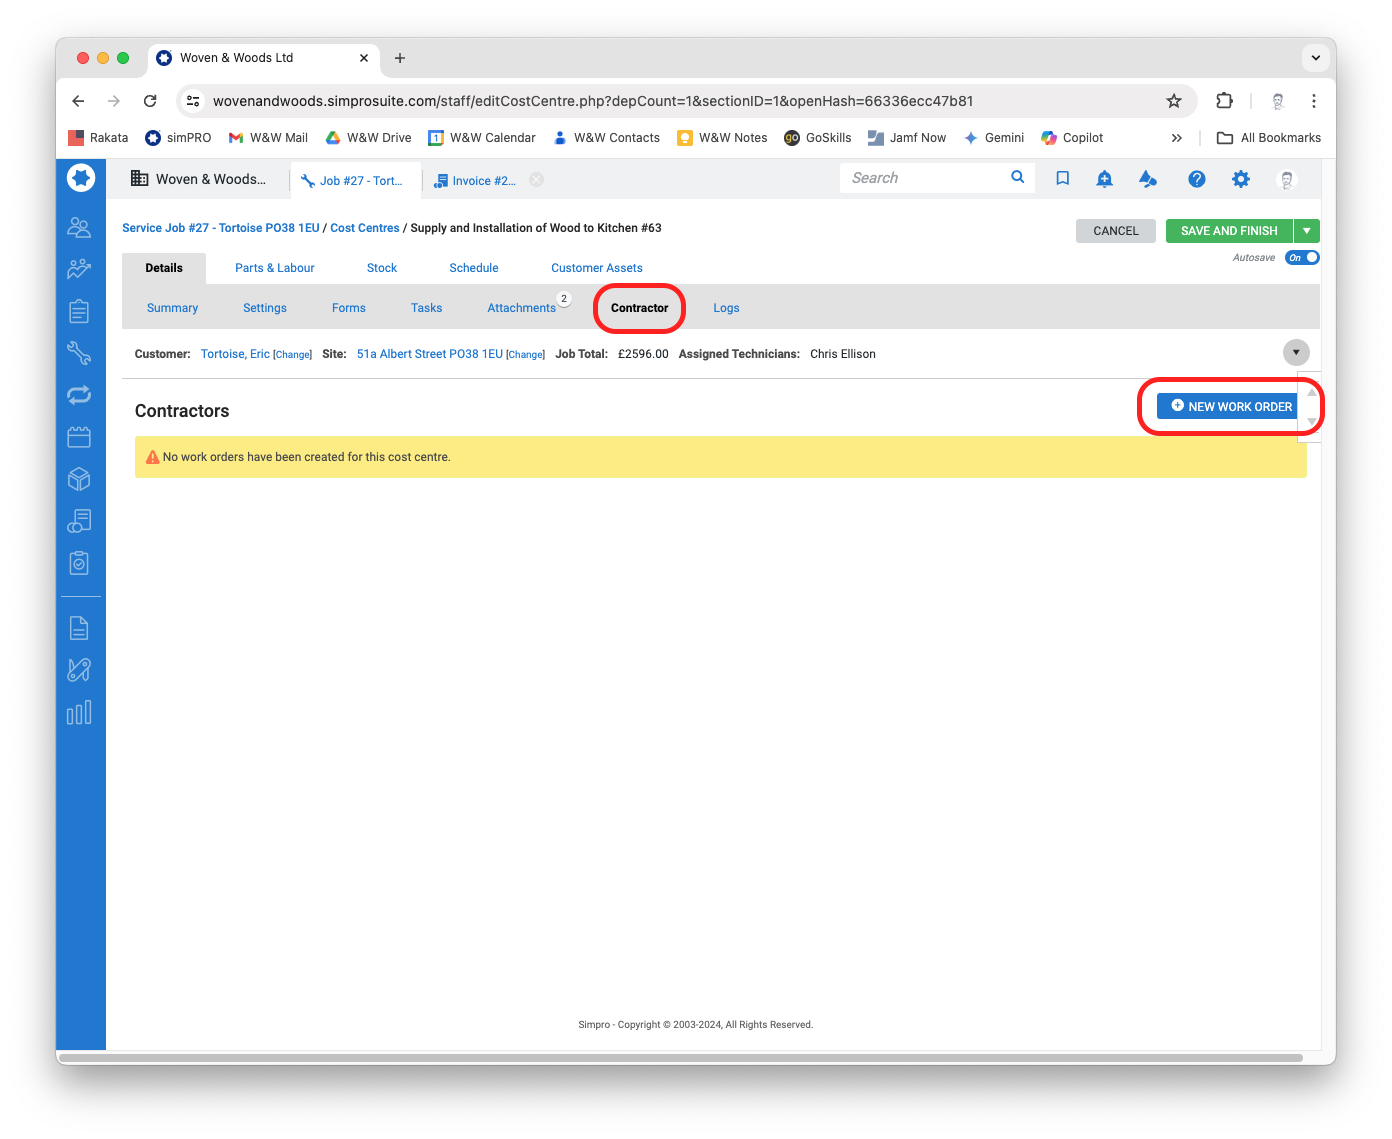
- Click the Contractor tab and then select the New Work Order button.
- Select an installer from the Contractor dropdown list, and then select an Employee.
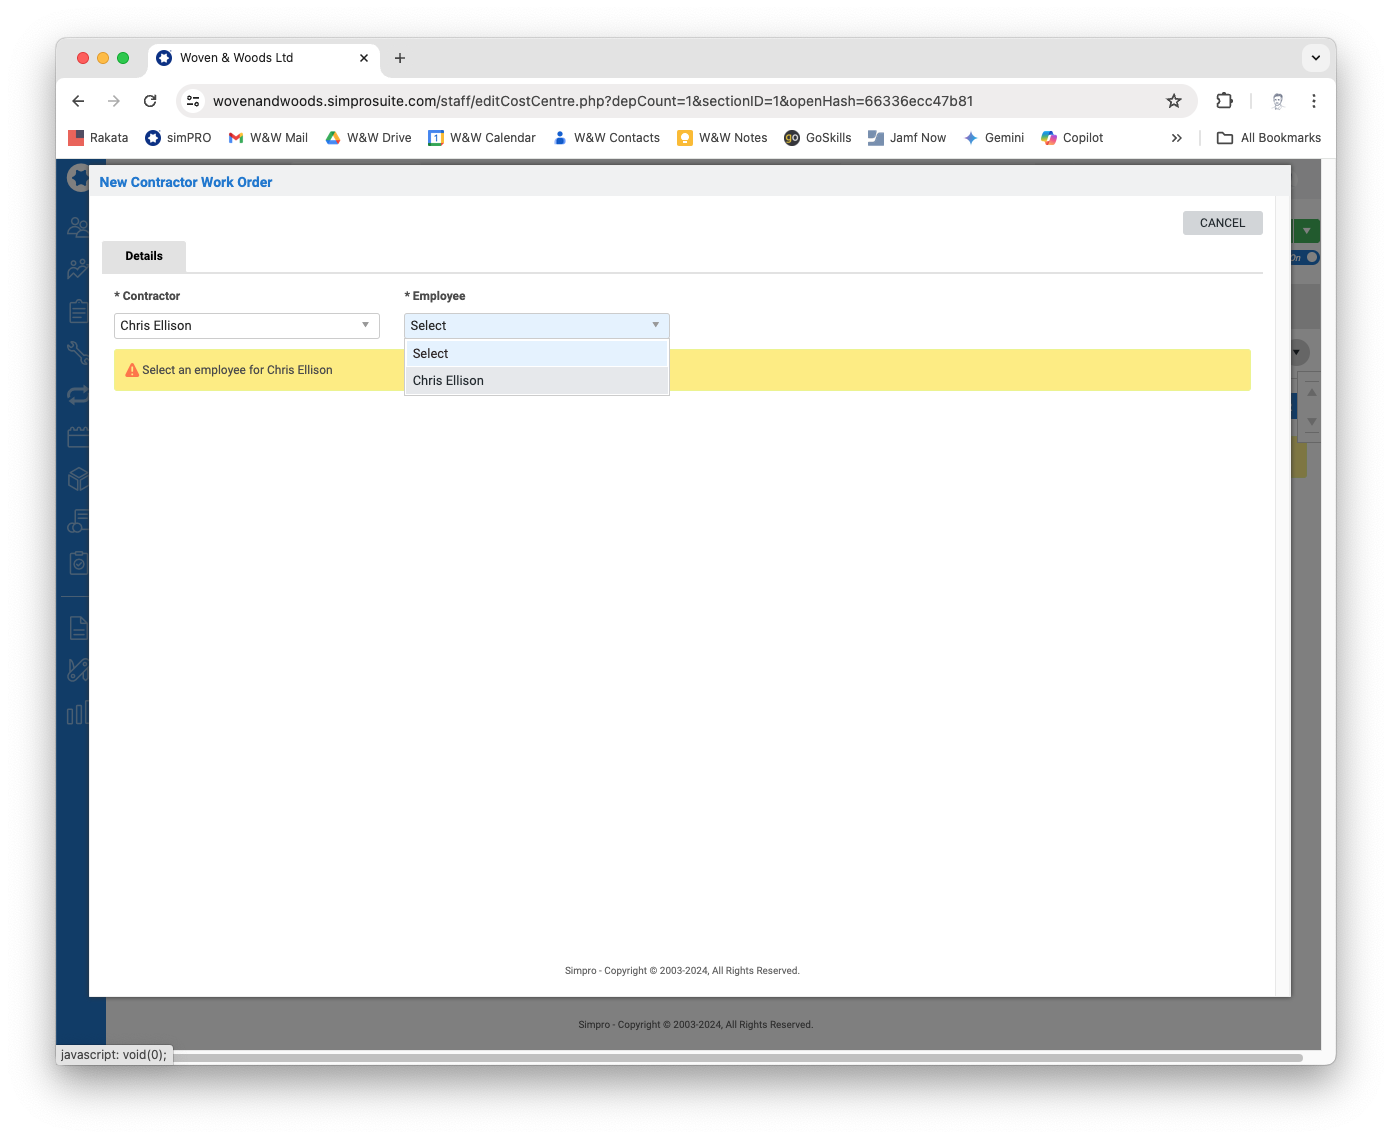
- Enter the relevant data and then click the green Save and Finish button.
- Back in the Cost Centre screen, click the Forms tab. From the Template dropdown menu, select Job - Itemised (PDF) and click the View button.
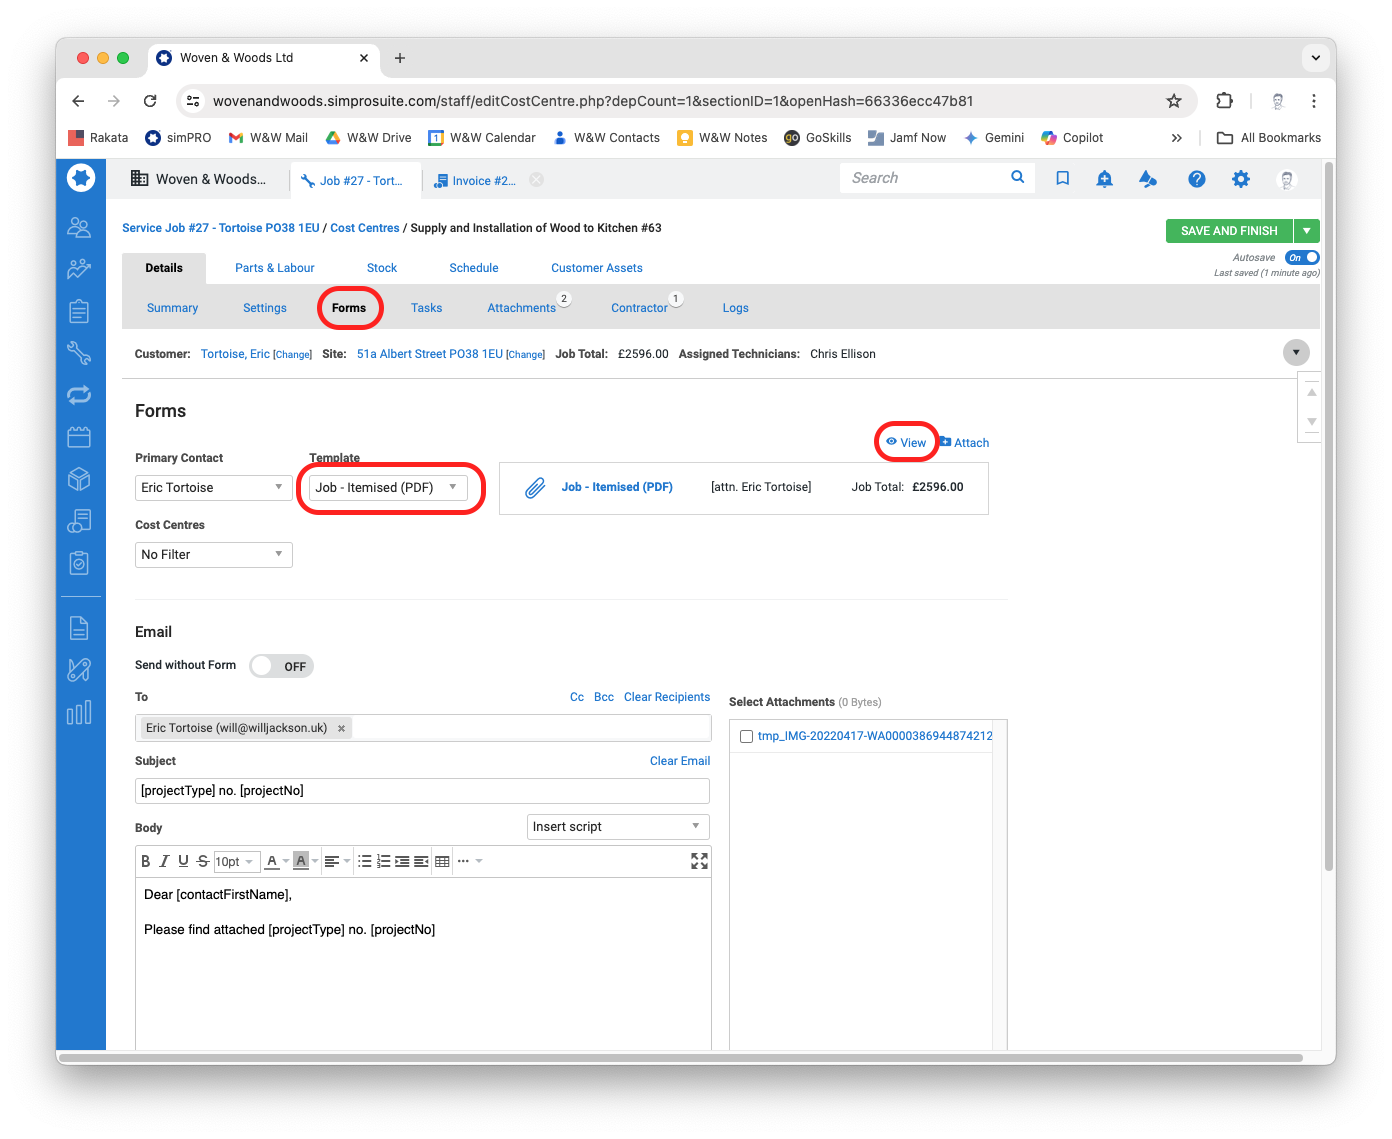
- The work order will be generated as a PDF, which you can then save to Google Drive.