Tickets
Prerequisites
Section titled “Prerequisites”In order to generate labels, you’ll need to make sure you have the following installed:
- Google Drive
- Jost font
- Brother P-Touch Editor
Your computer should have been set up with the above before it was issued.
Install Google Drive
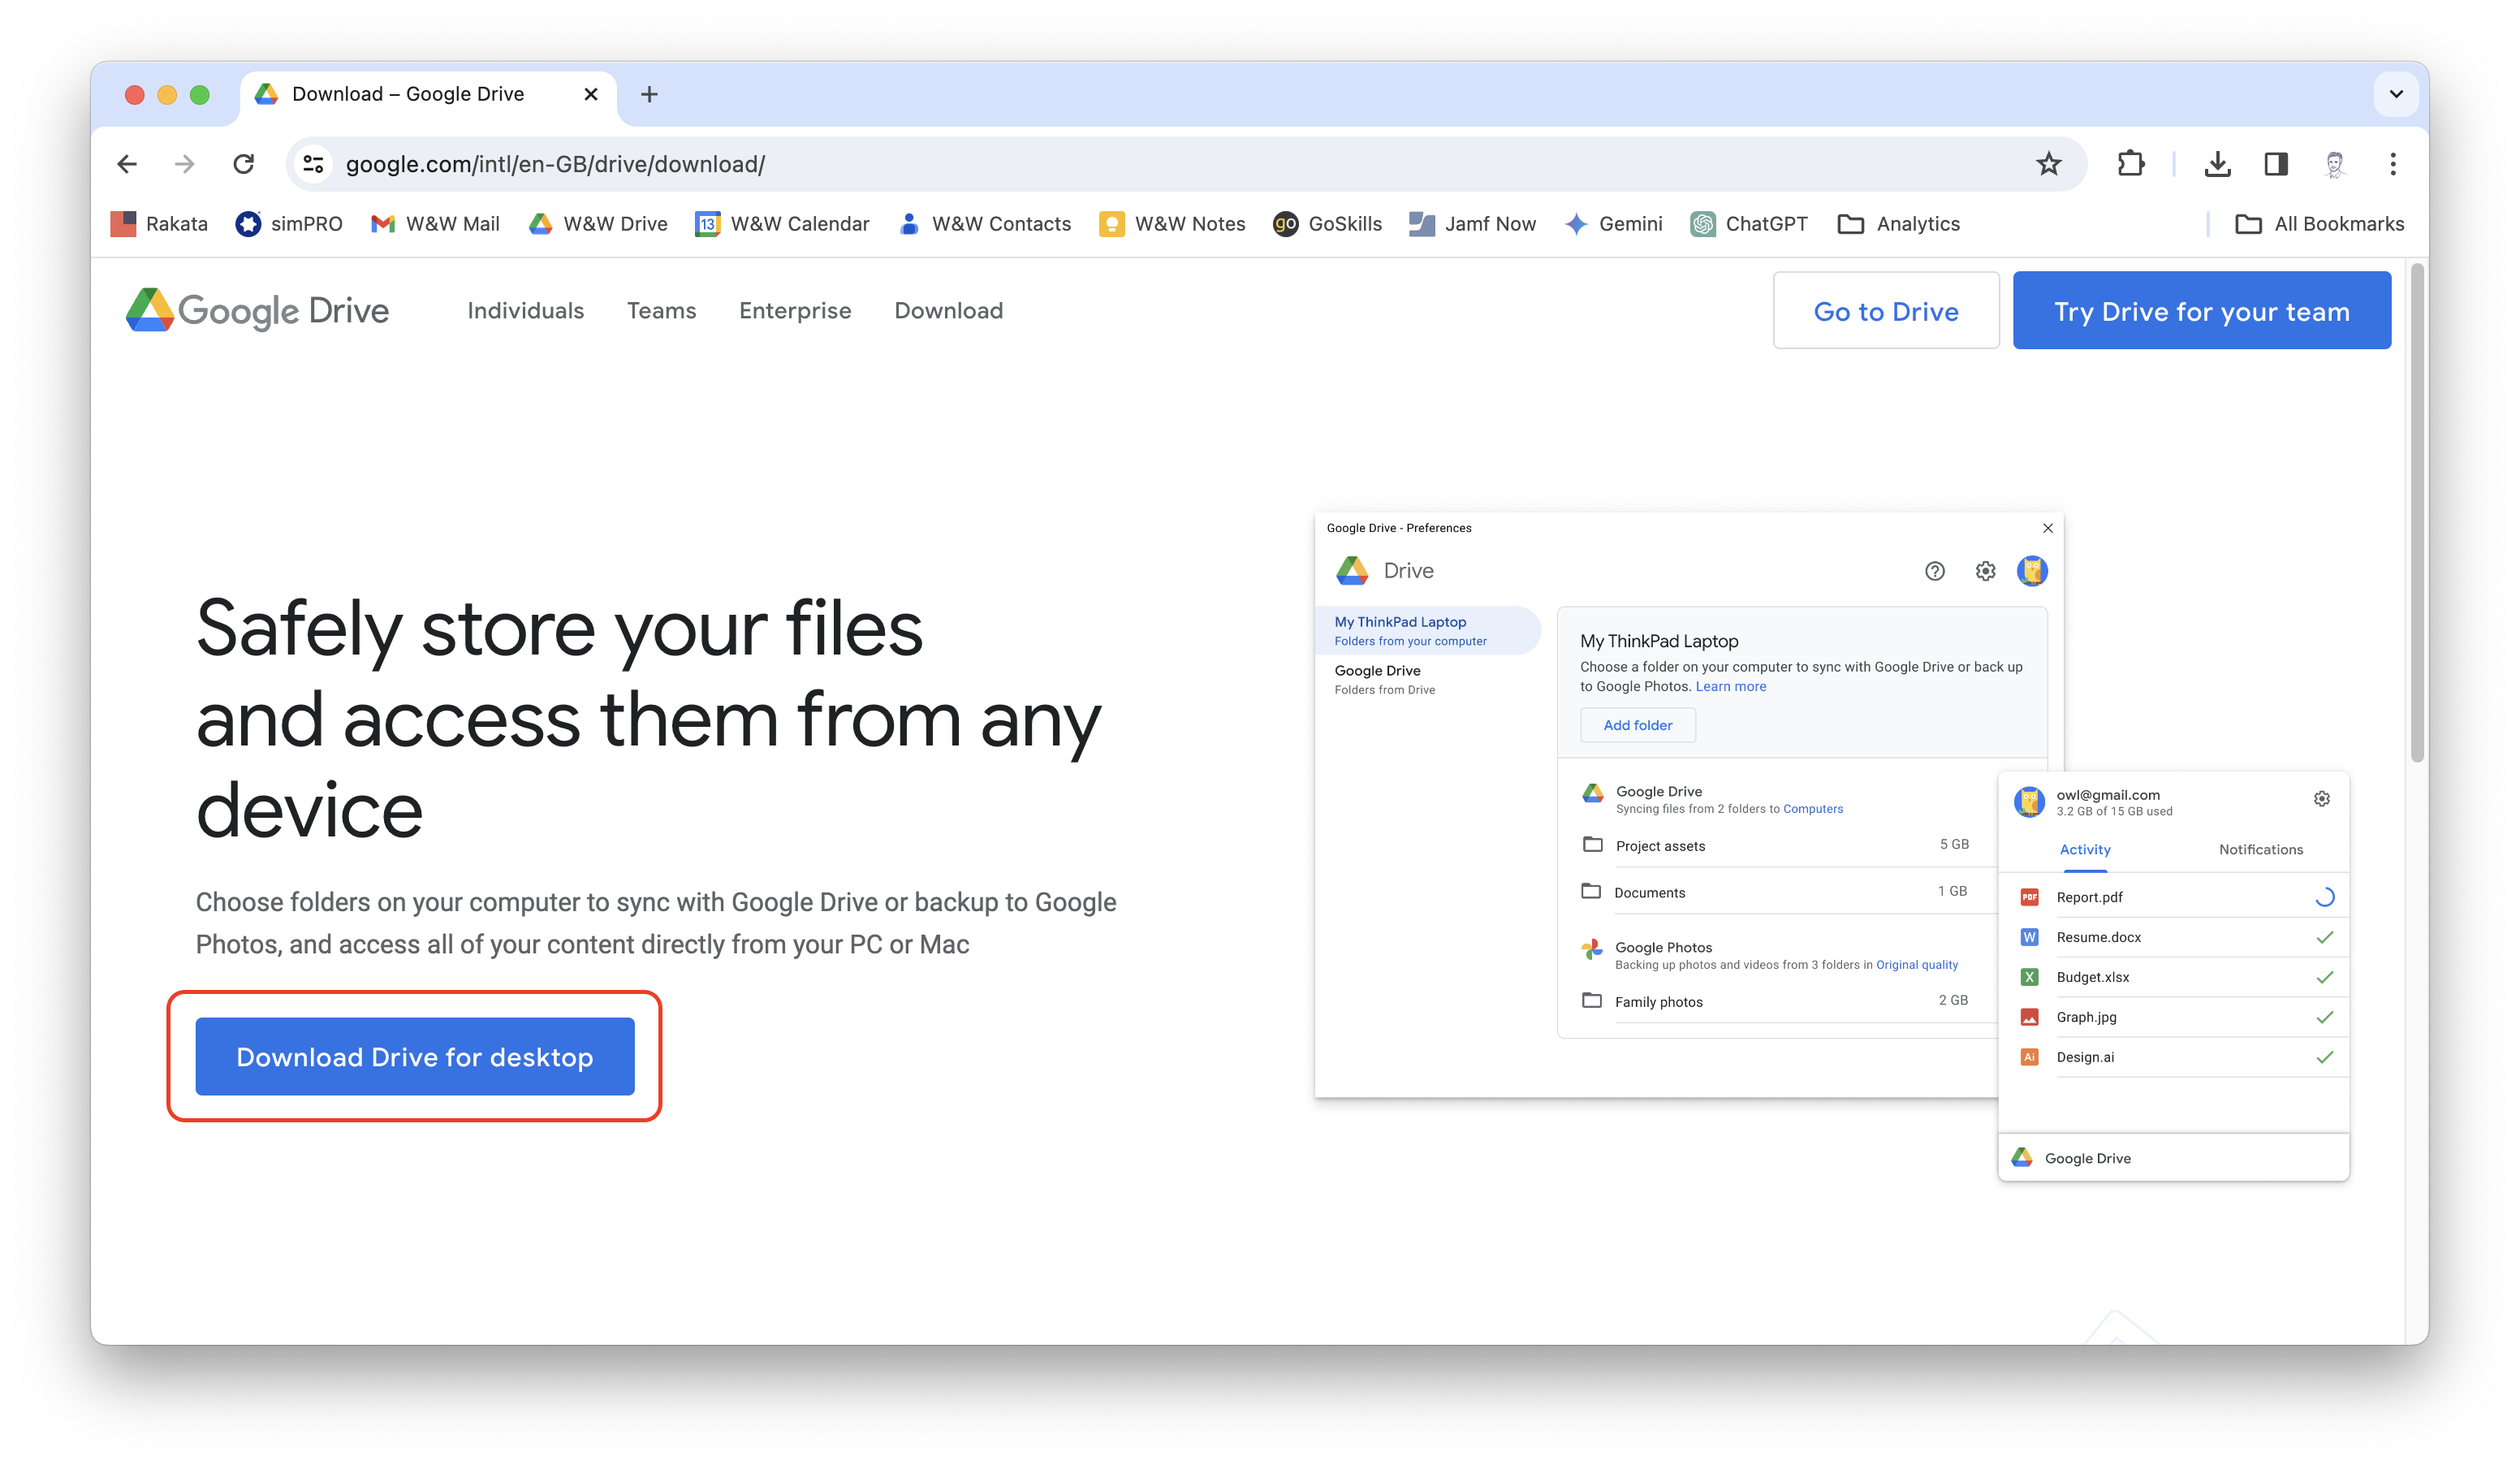
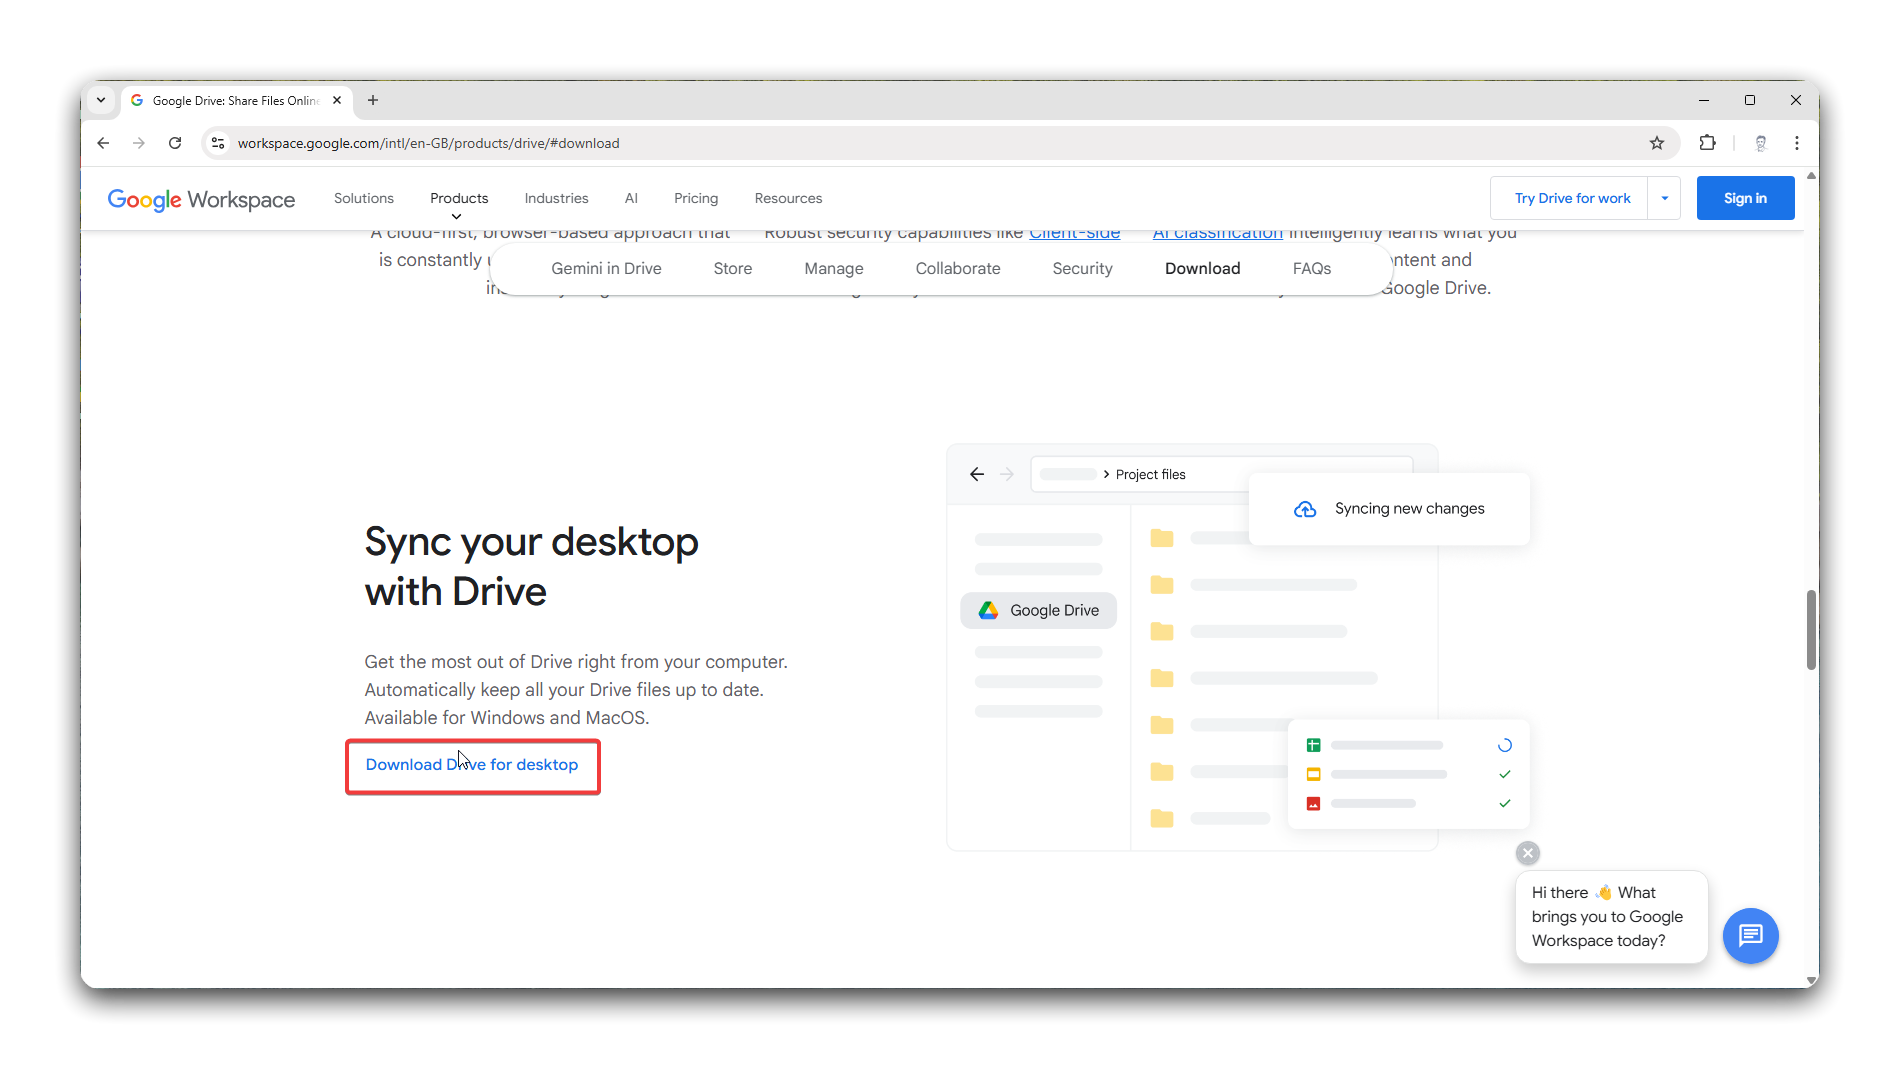
Section titled “Install Google Drive”- Open Google Chrome and navigate to the Google Drive download page.
- Click the Download Drive for Desktop button.
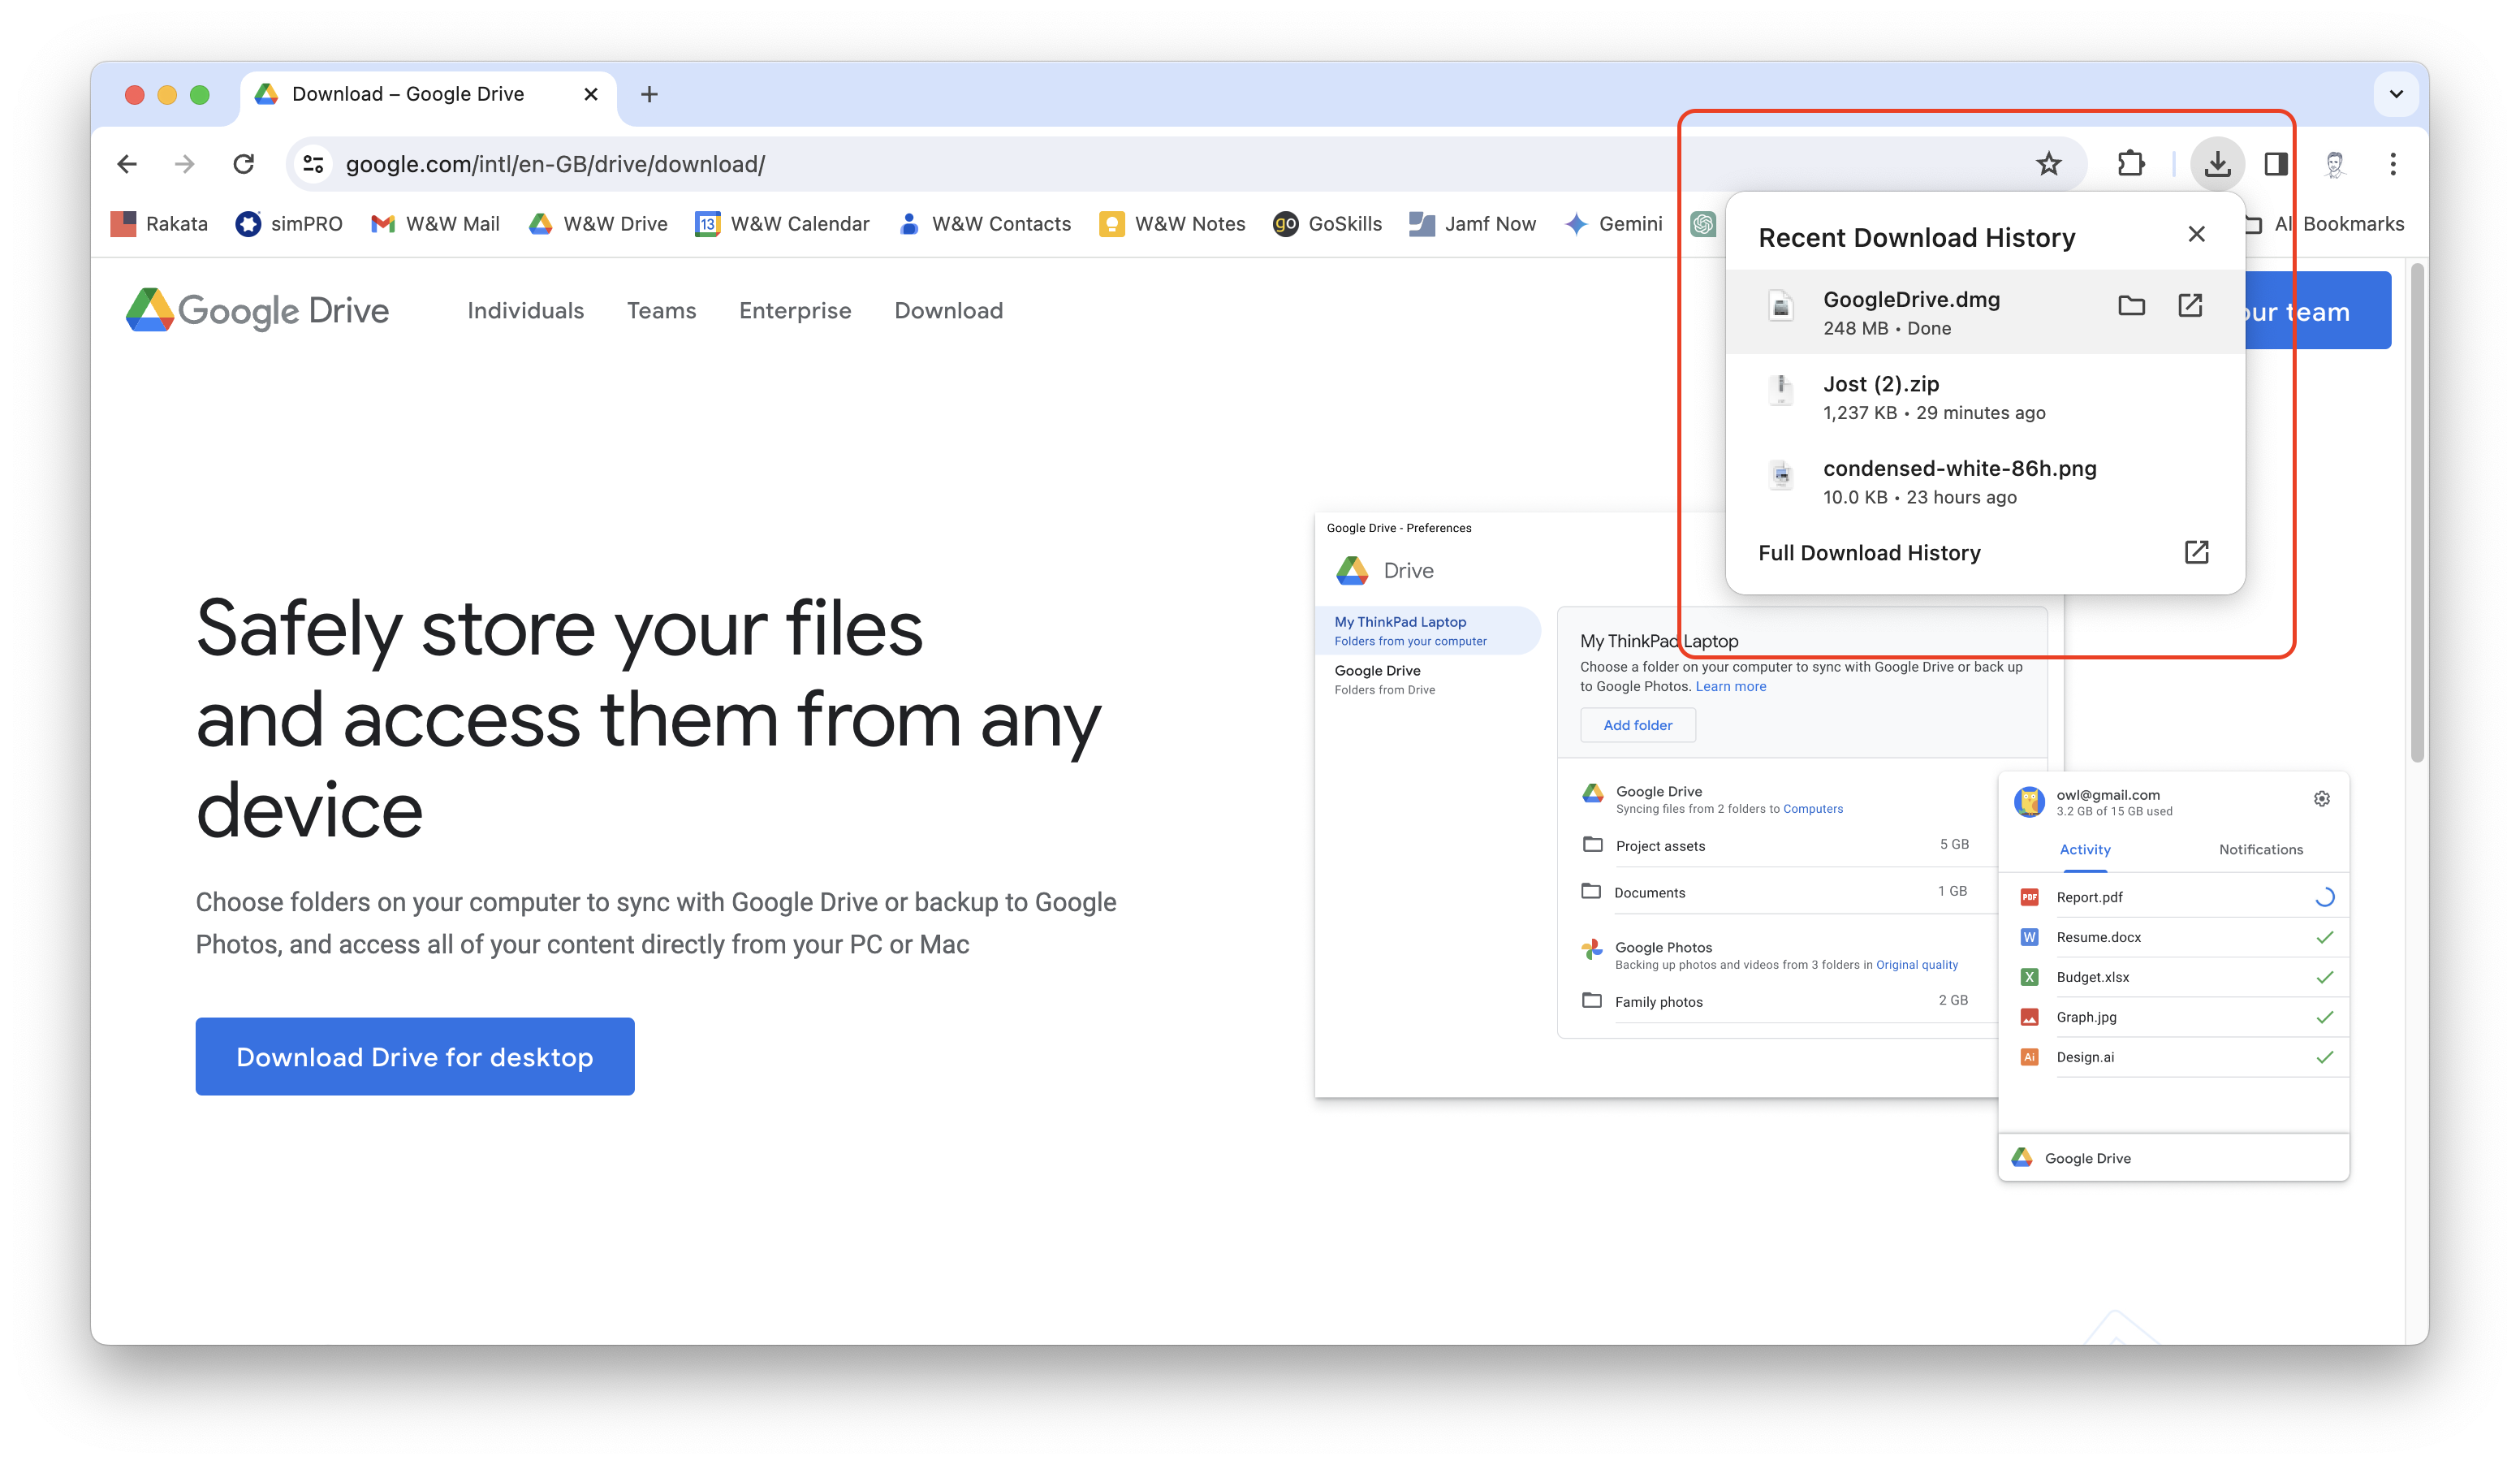
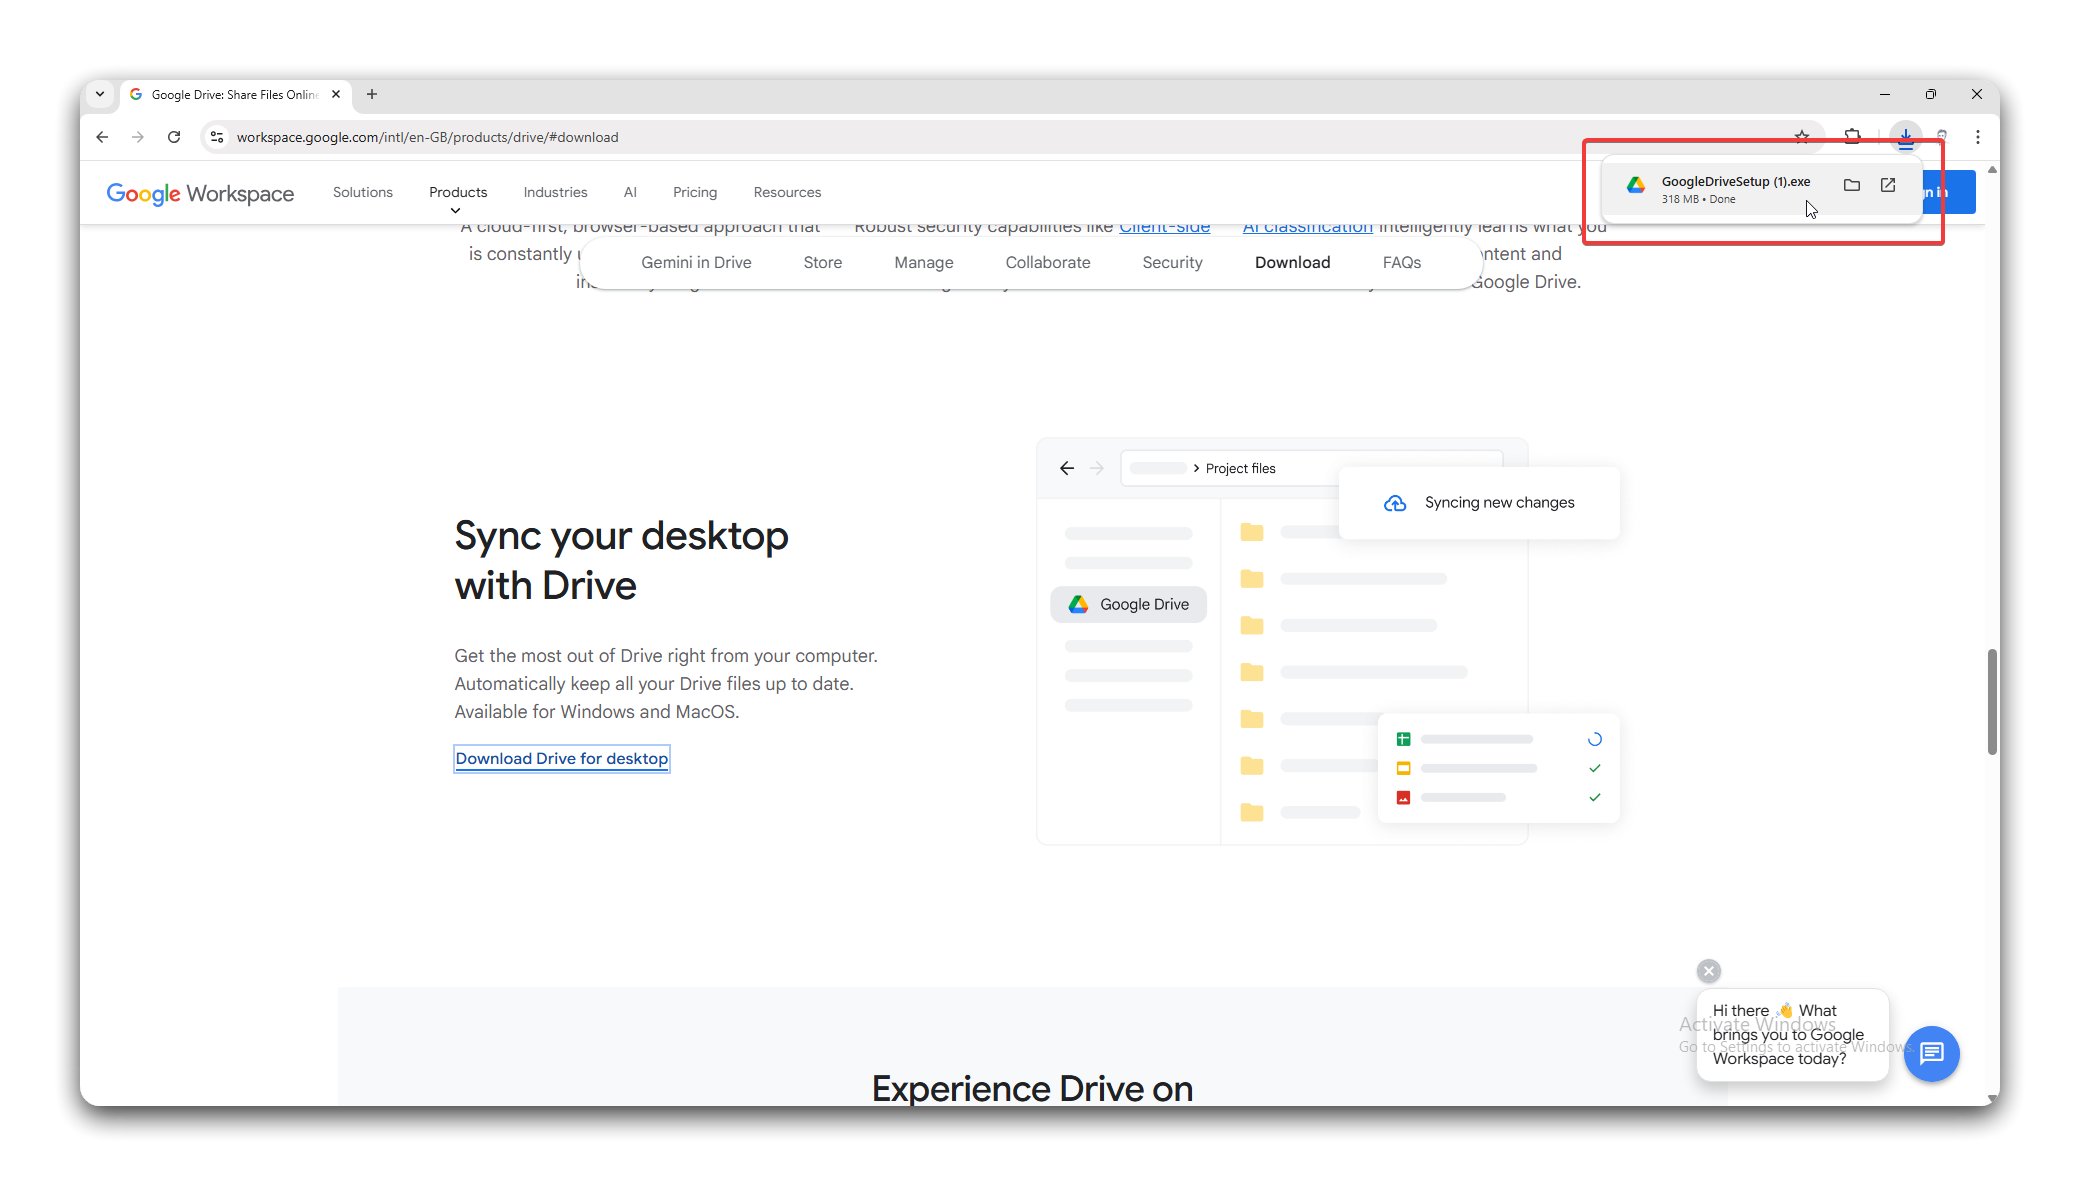
- When the download has completed, click the download icon in the top right corner; then double click the file to mount the file.
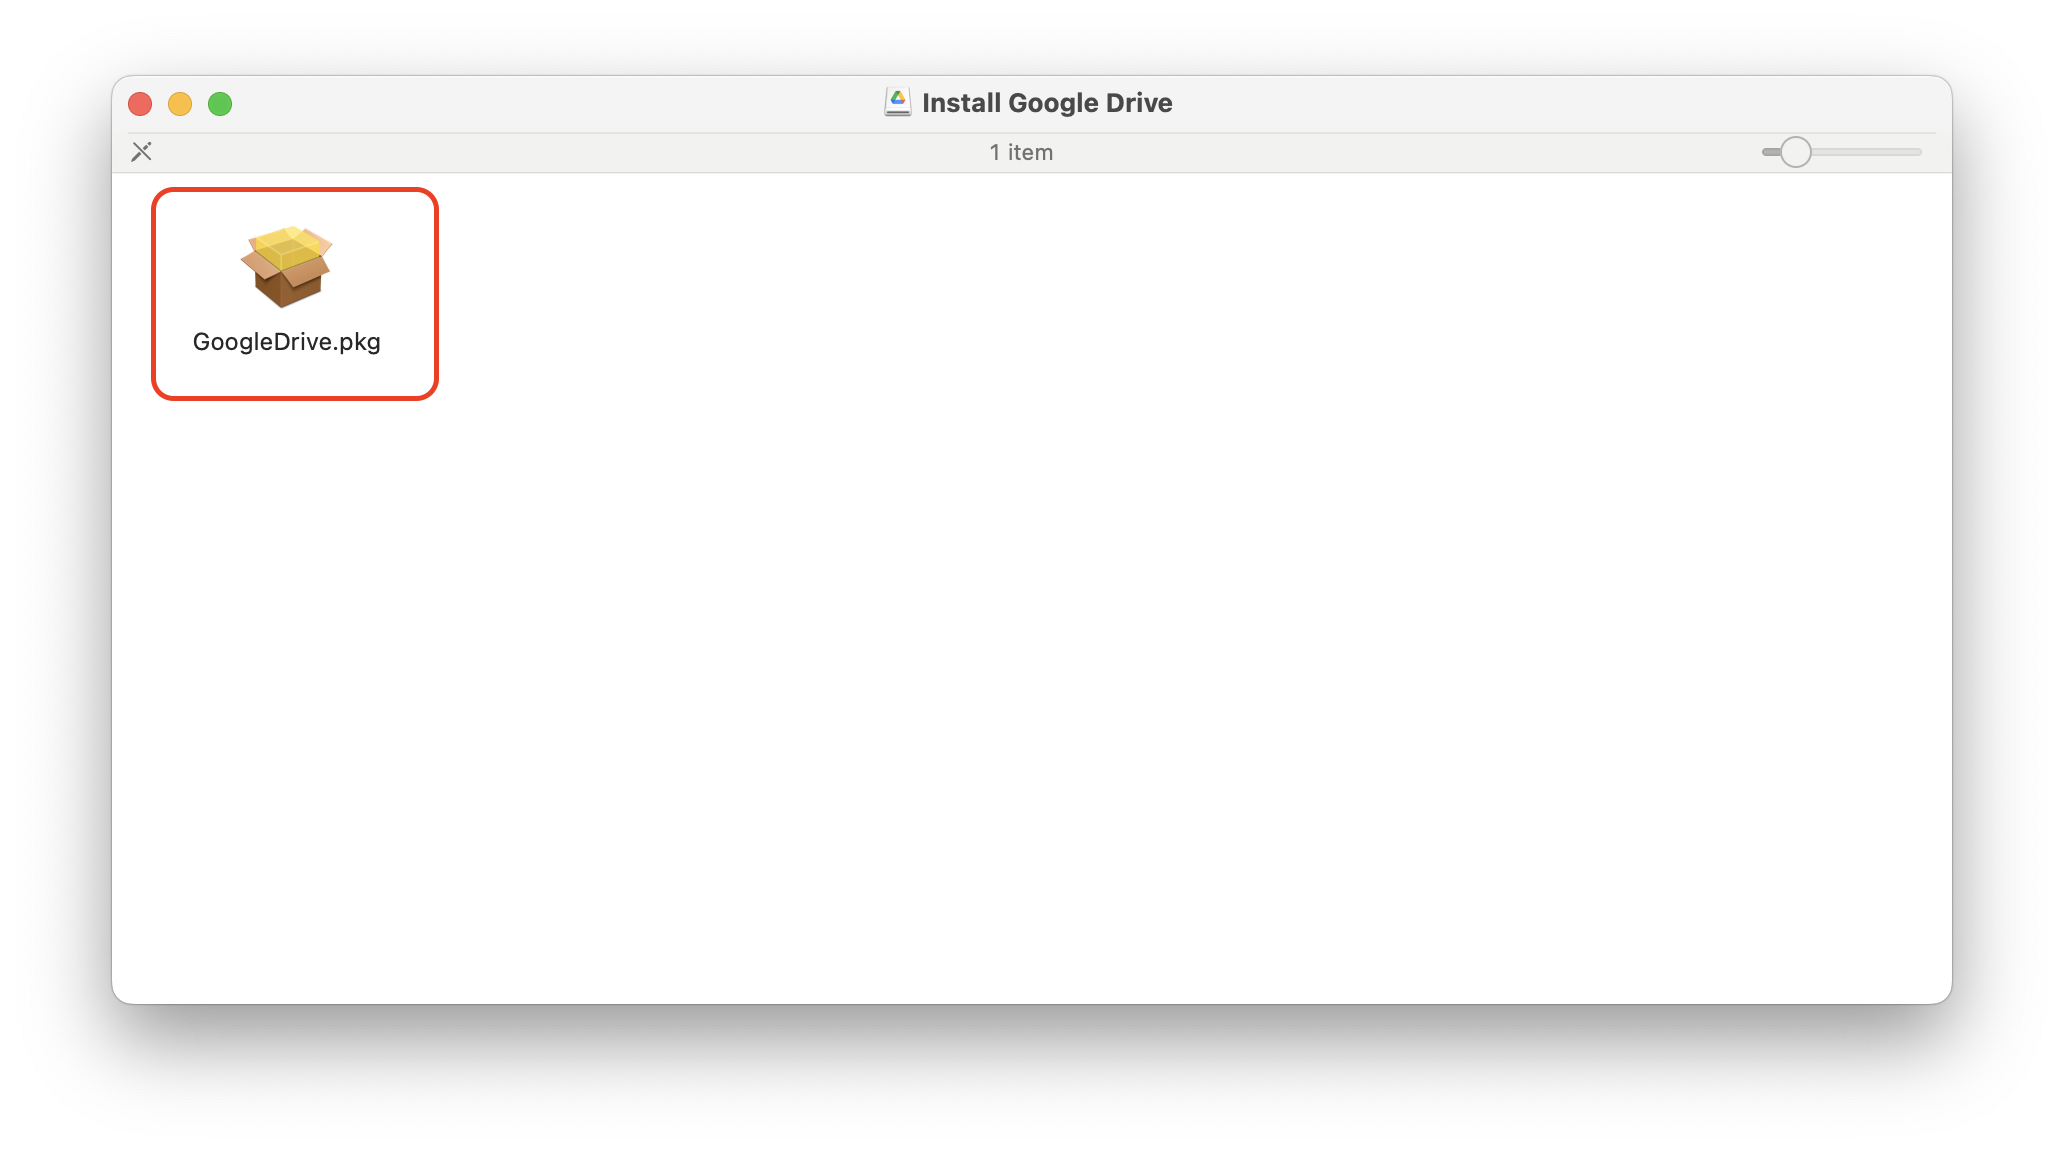
- A new Finder window will open with the installer file in it. Double click GoogleDrive.pkg to begin the installation.
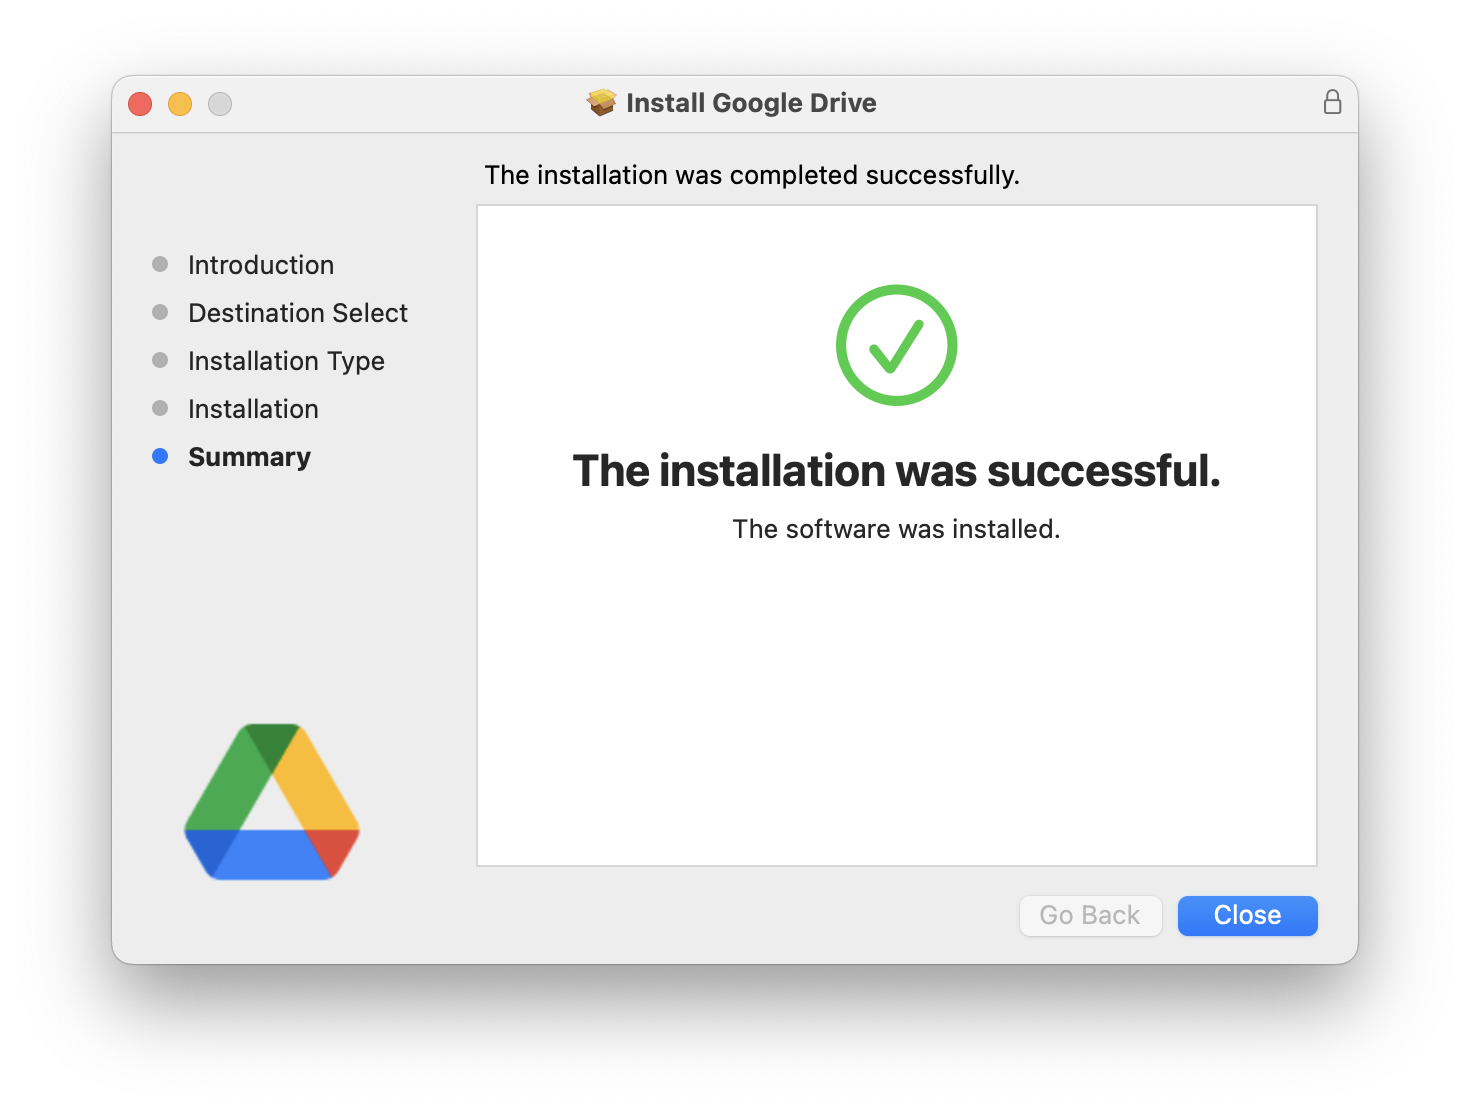
- Follow the steps and enter your password when asked. If you see the following screen, then Google Drive has been successfully installed.
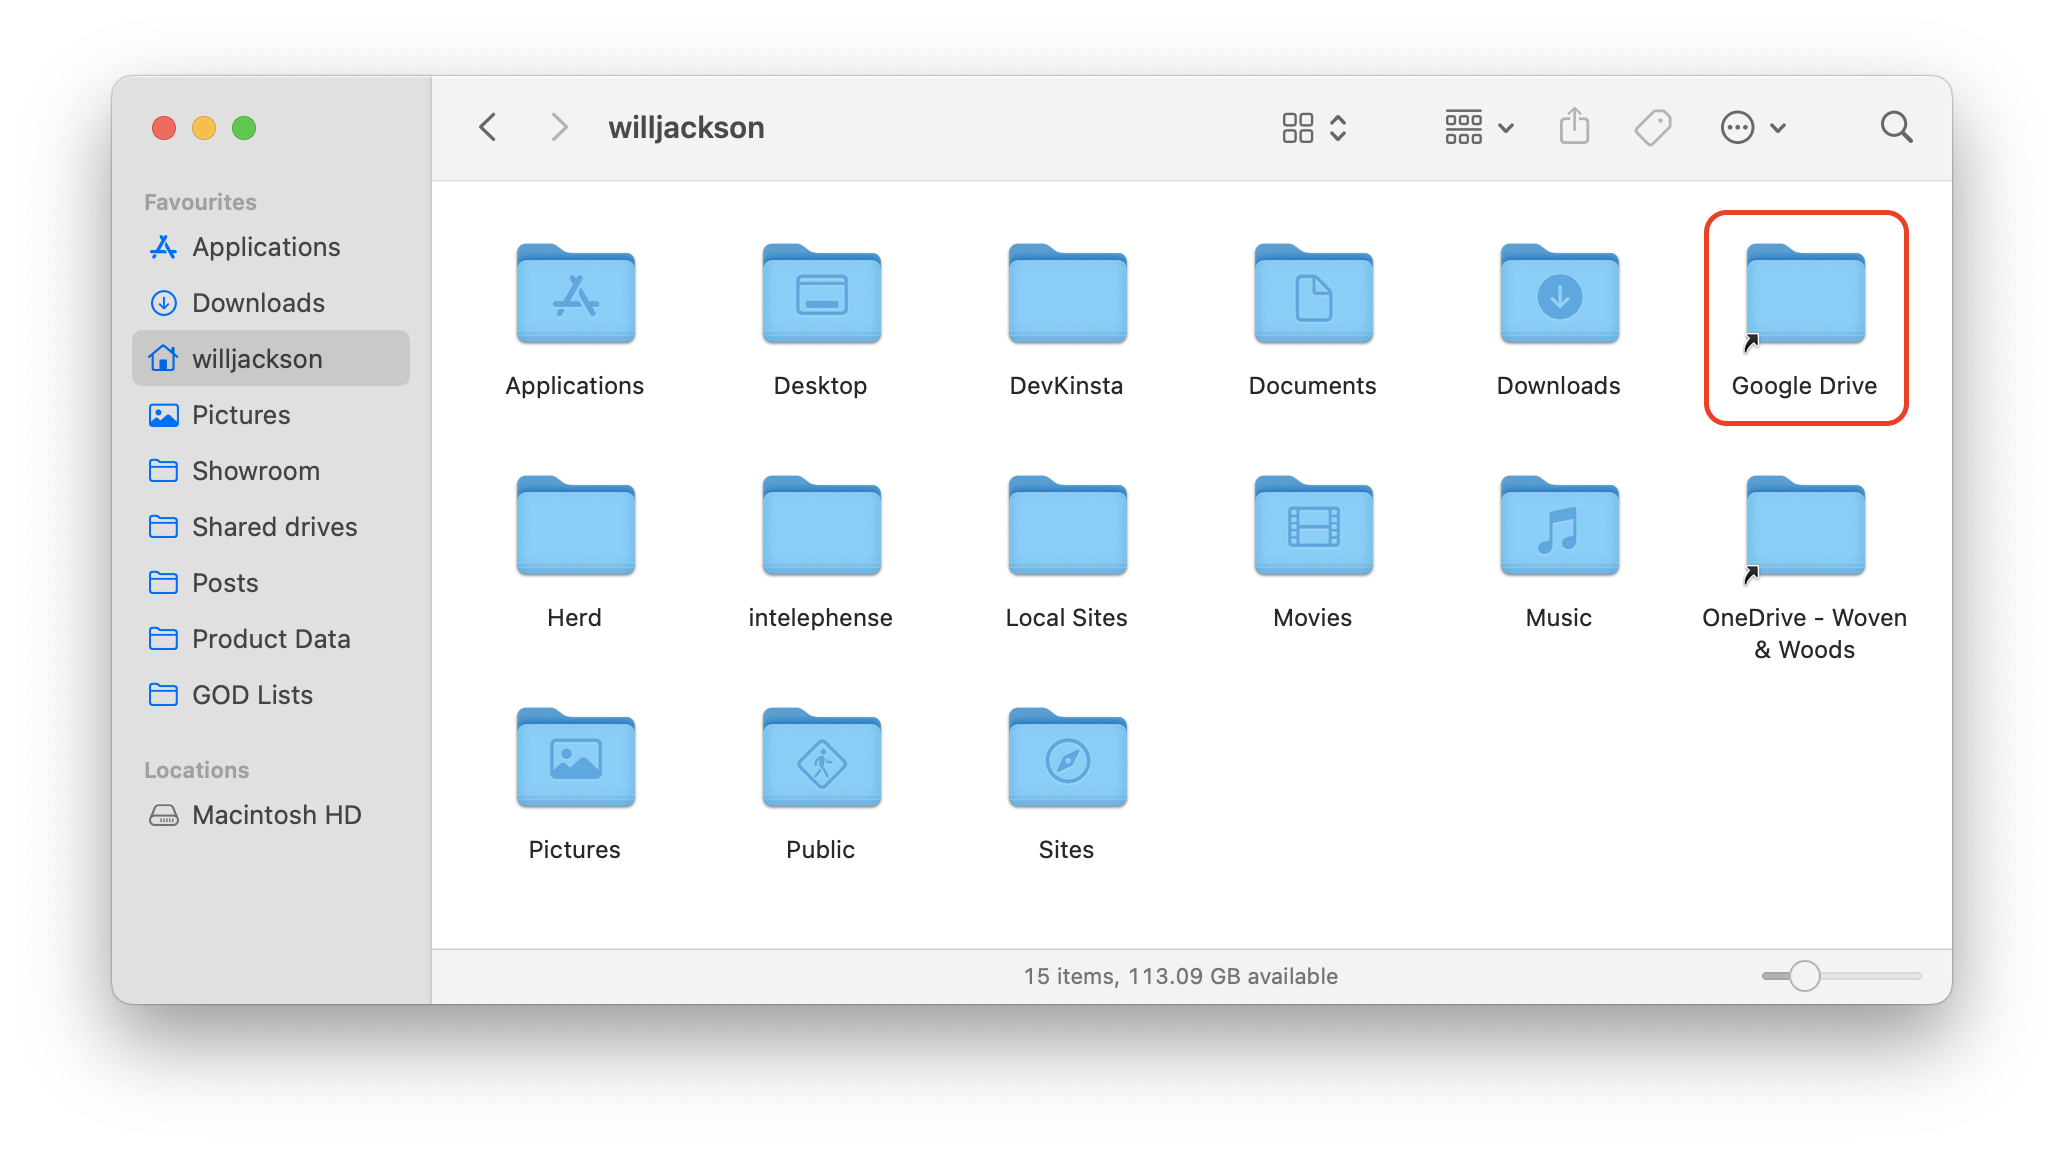
- The Google Drive setup screen should appear. Follow the steps and login with your Woven & Woods Google Workspace details. If asked whether you want to backup an local folder, click skip.
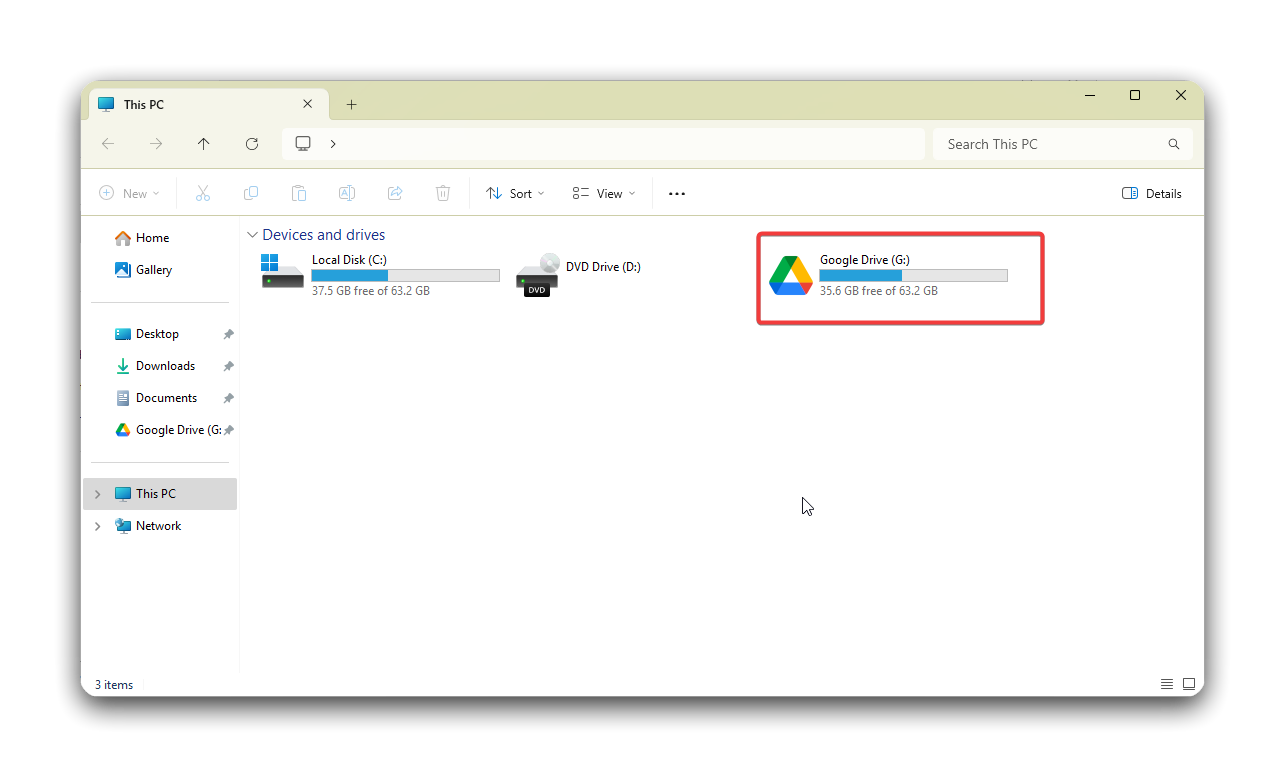
- After a few seconds, you should now see a Google Drive folder in your Home folder.
Install Jost Font
Section titled “Install Jost Font”- Open Finder, navigate to the Applications folder and open Font Book.
- In the left-hand panel, click My Fonts.
- Return to Finder and navigate to:
Google Drive/Shared Drives/Showroom/Fonts/Jost.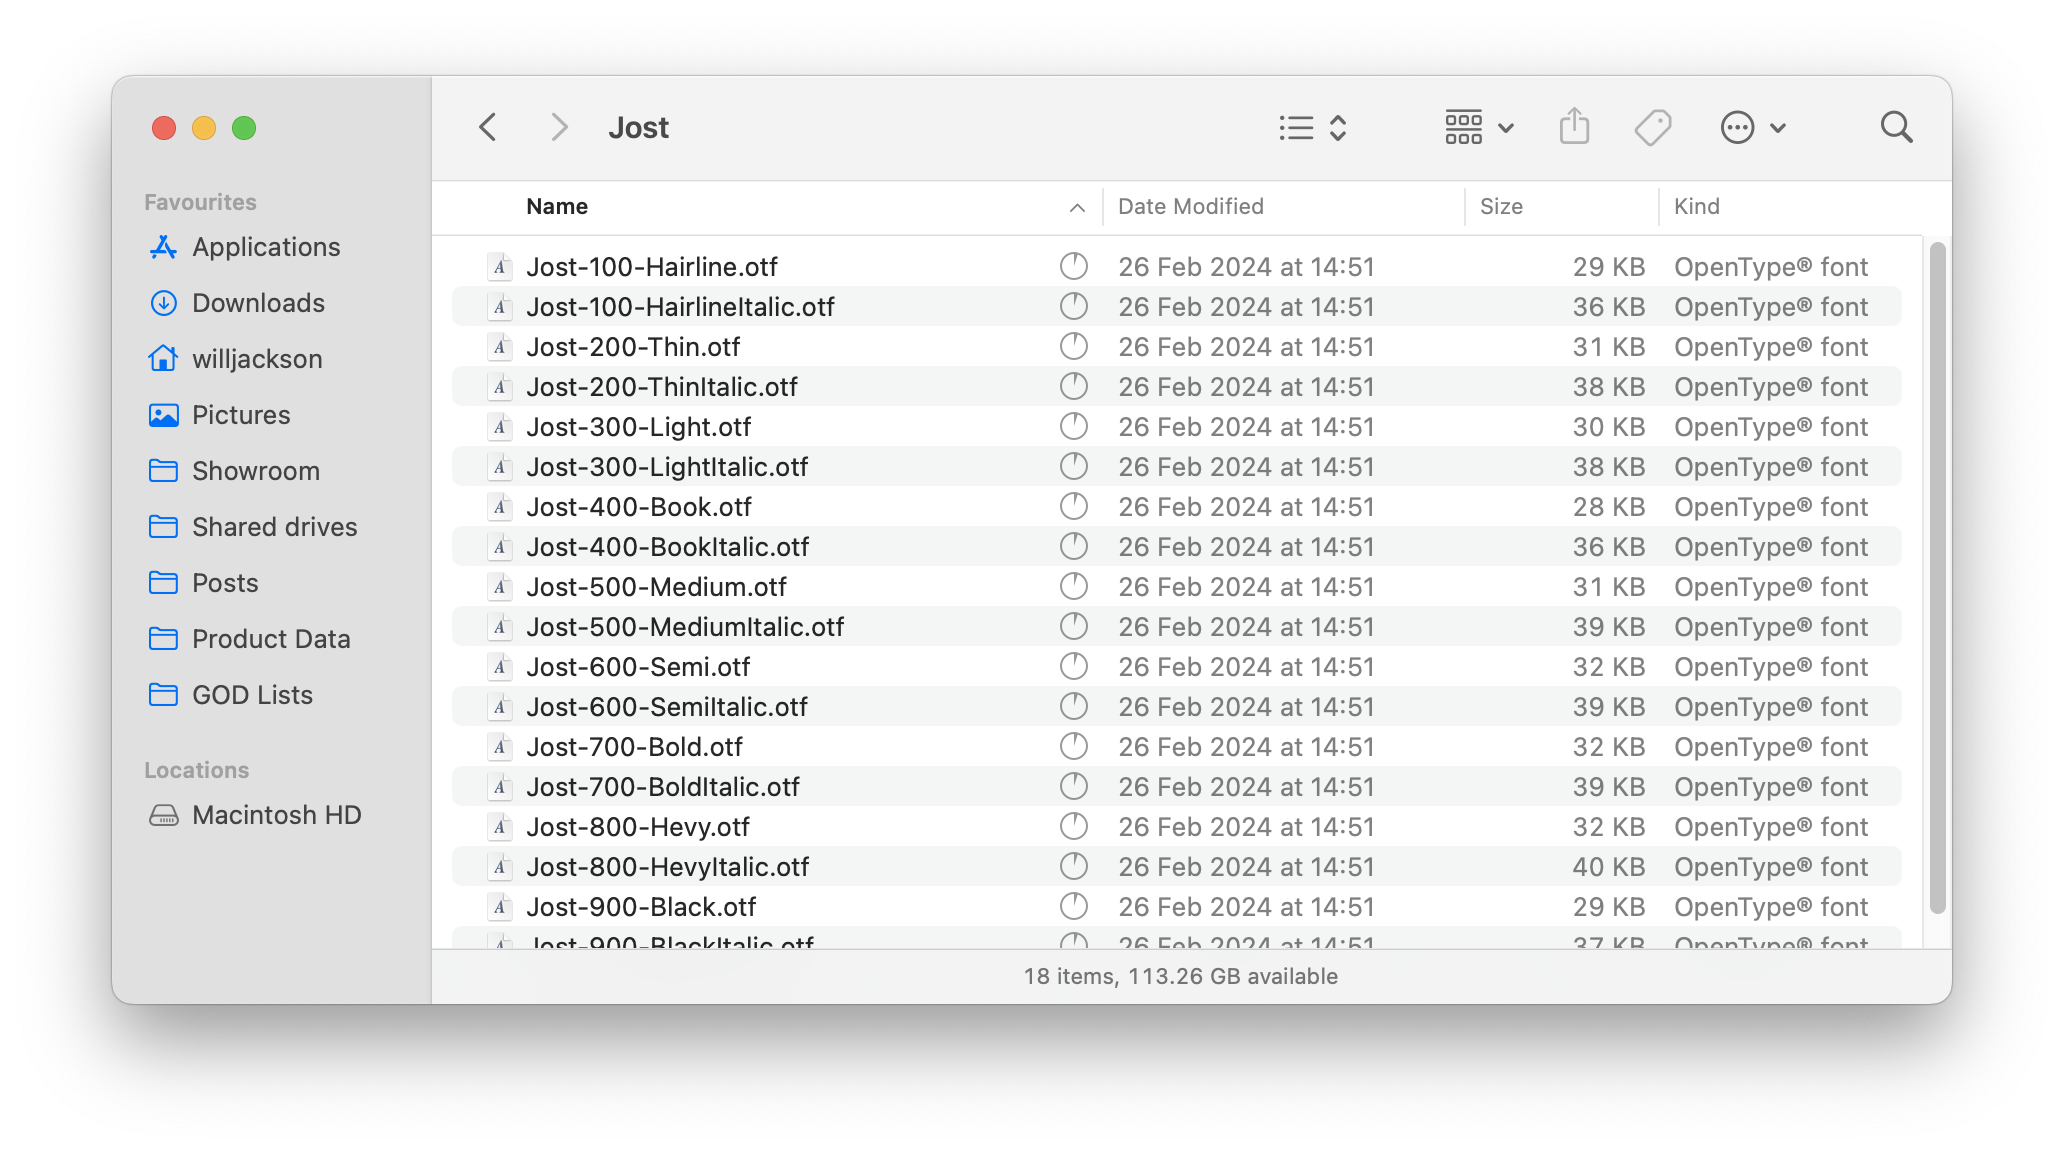
- Select all of the files in the folder (Cmd+A) and drag them into the Font Book window.
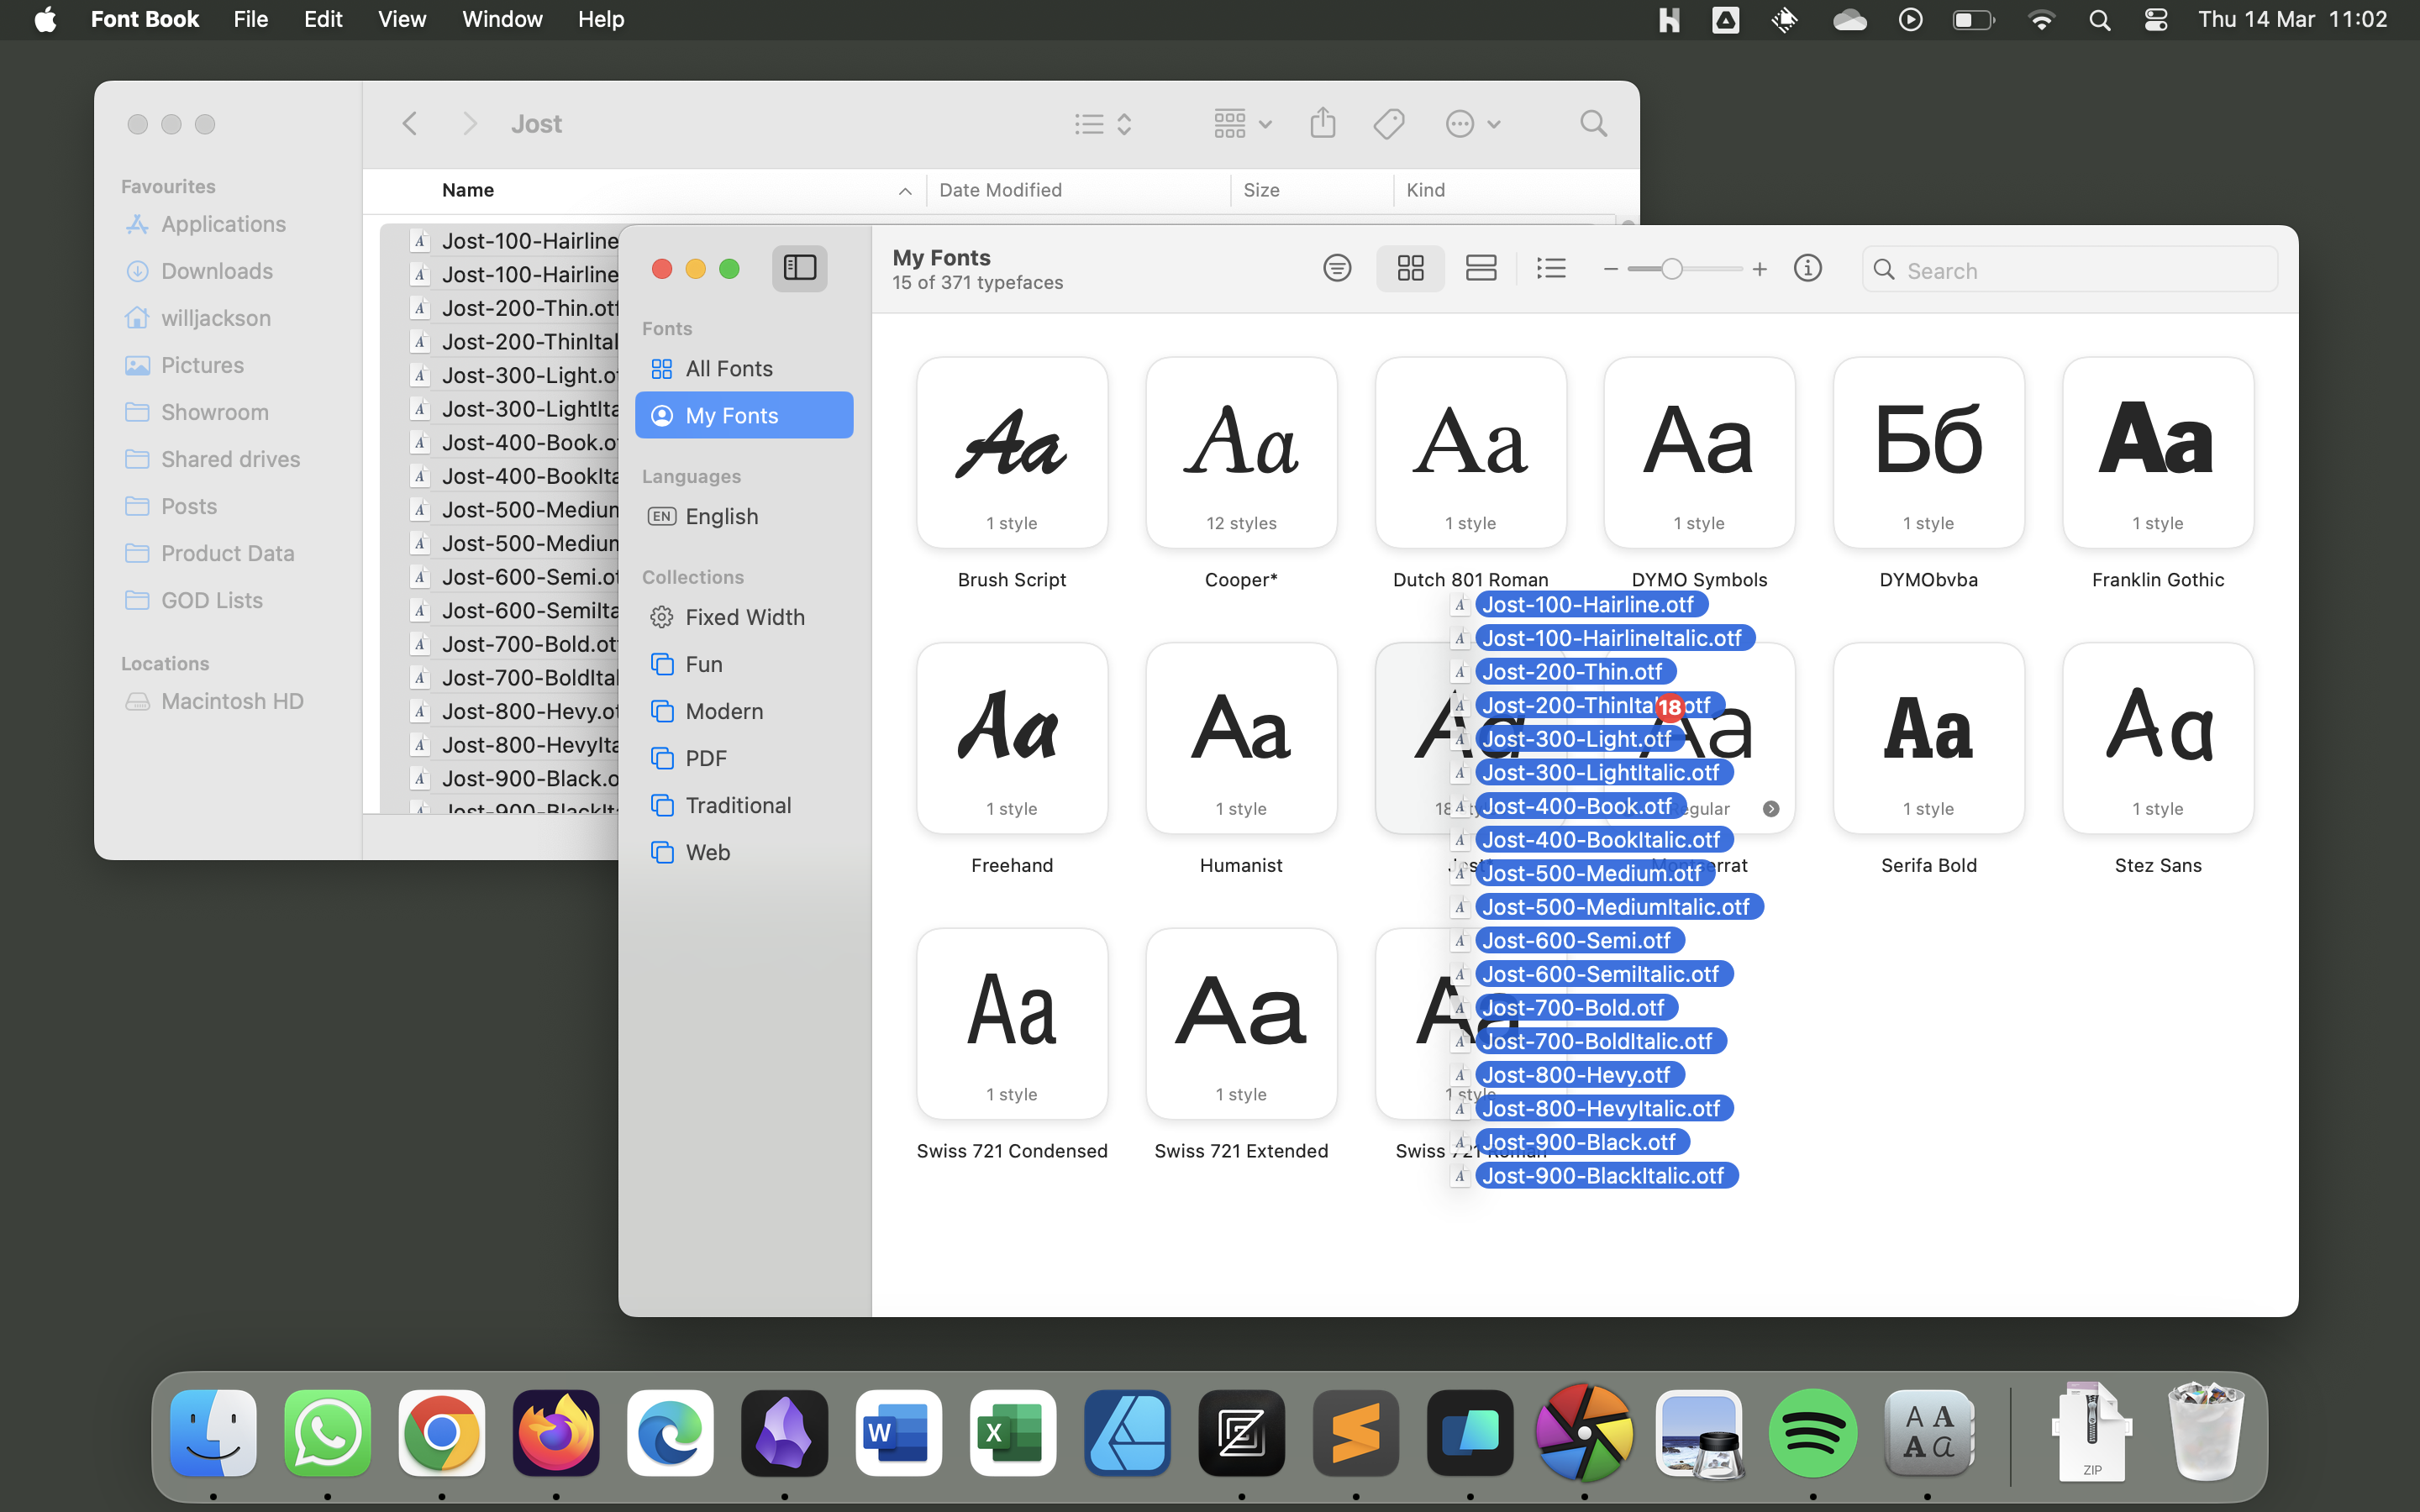
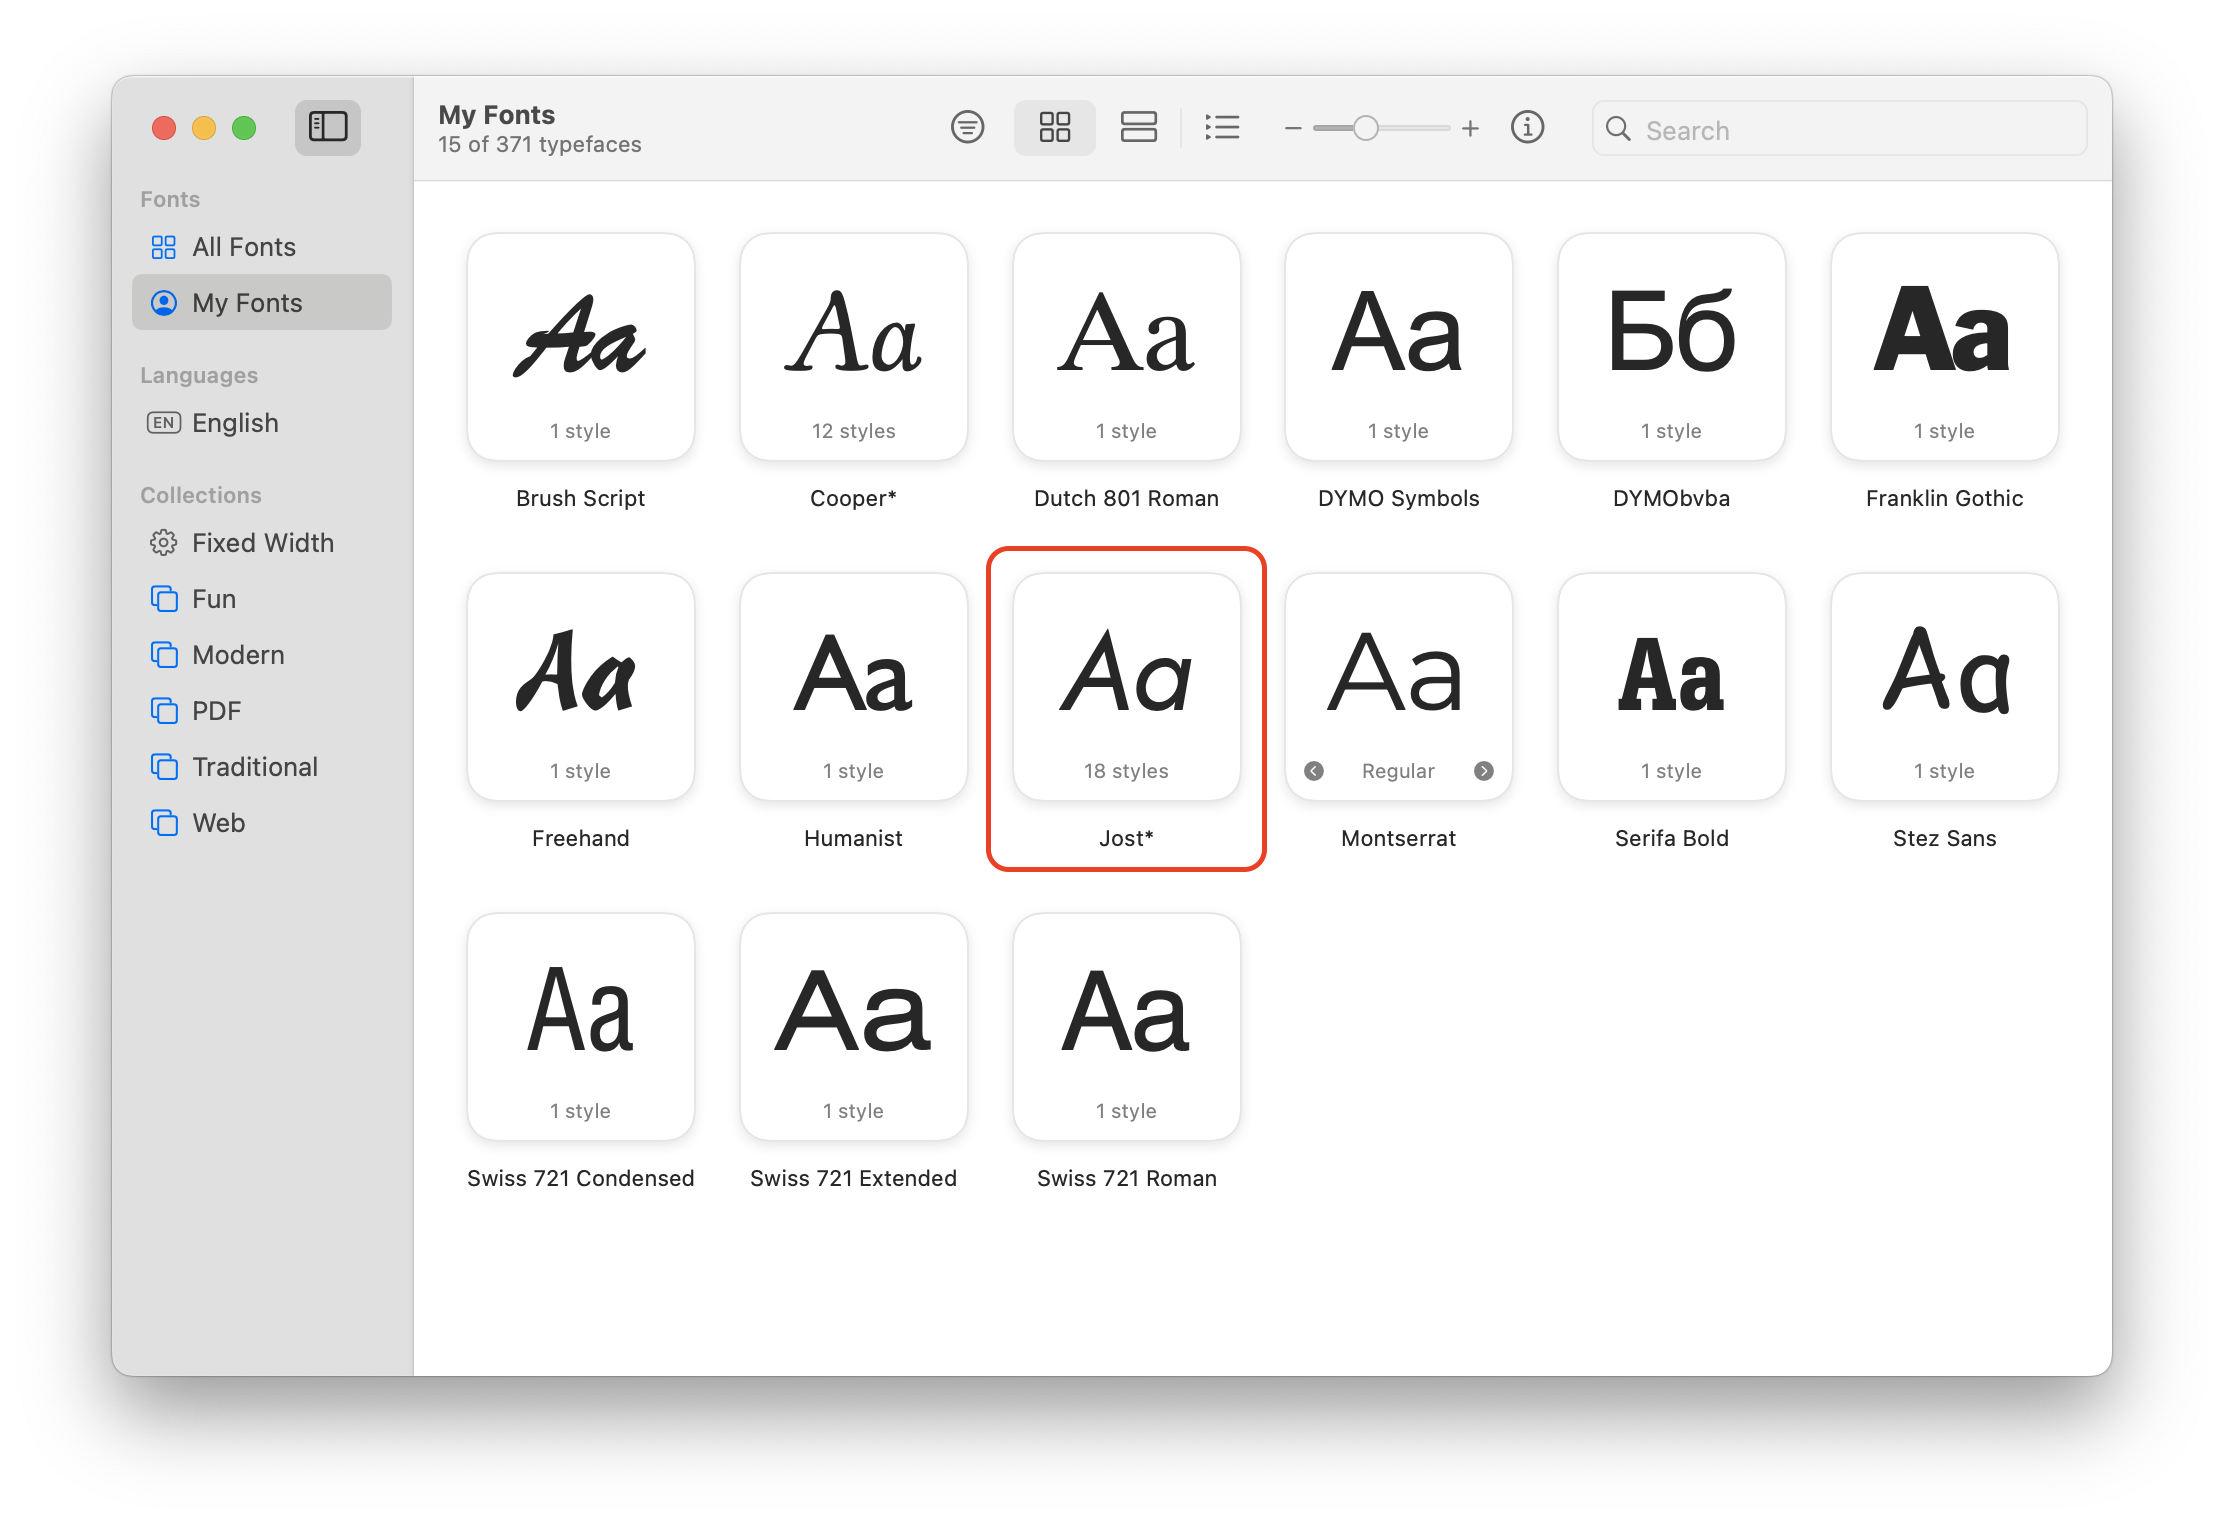
- The font should now be installed. Check that Jost appears in the My Fonts section to confirm.
- If you have the Brother P-touch Editor open, you will need to close it completely and re-open it to use the new font. You can close an application completely in macOS by either:
- Right-clicking the icon in the dock and selecting Quit;
- Clicking the application name in the task bar and selecting Quit; or
- Pressing Cmd+Q while the application window is active.
Install Brother P-touch Editor
Section titled “Install Brother P-touch Editor”Due to restrictions from Apple, Brother P-Touch Editor can only be installed on computers running macOS by an admin.
Install Label Printer
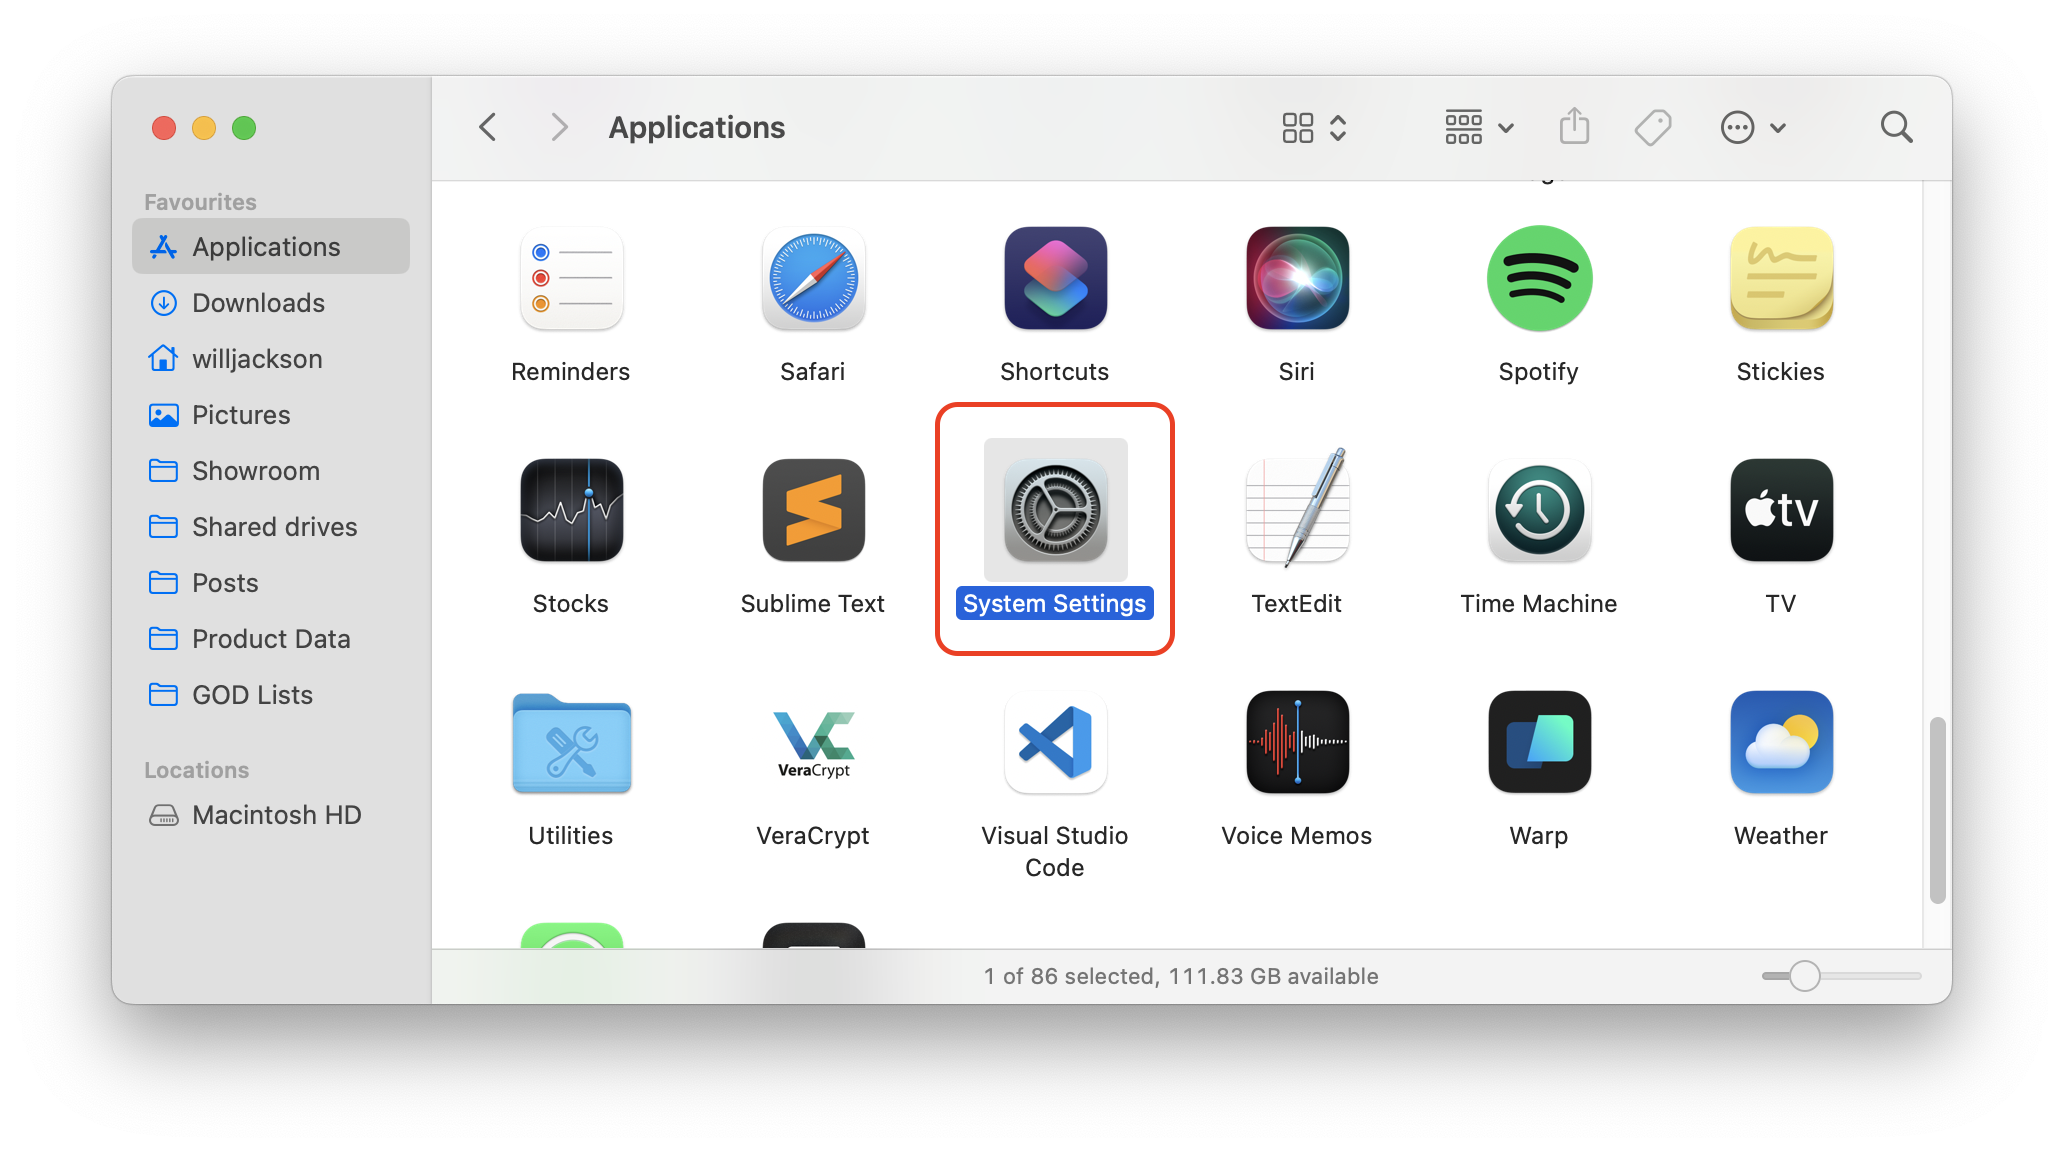
Section titled “Install Label Printer”- Open Finder, navigate to the Applications folder and double-click System Settings.
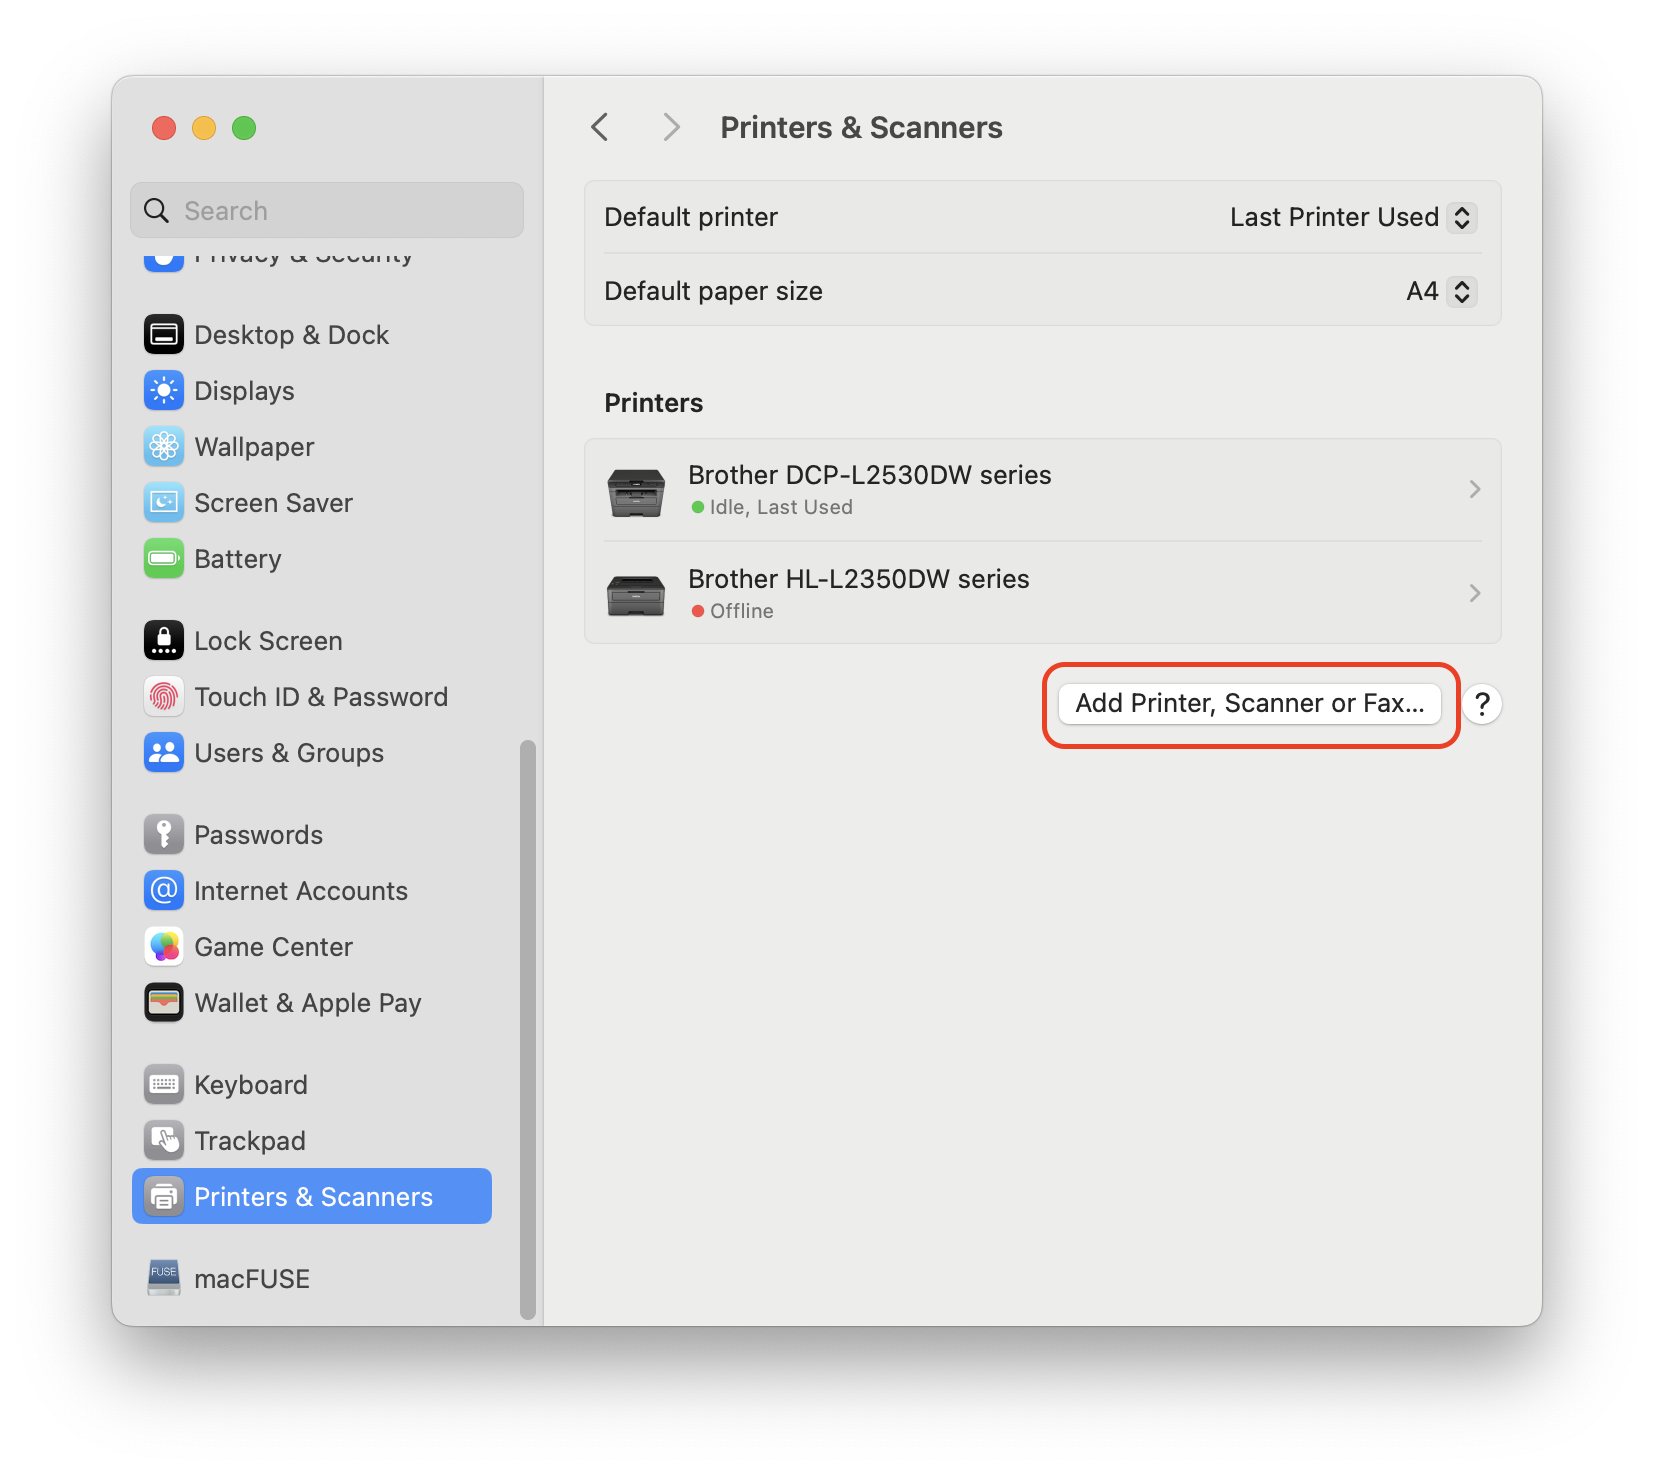
- In the left hand panel, scroll down and select Printers & Scanners.

- Click the Add Printer, Scanner or Fax… button.
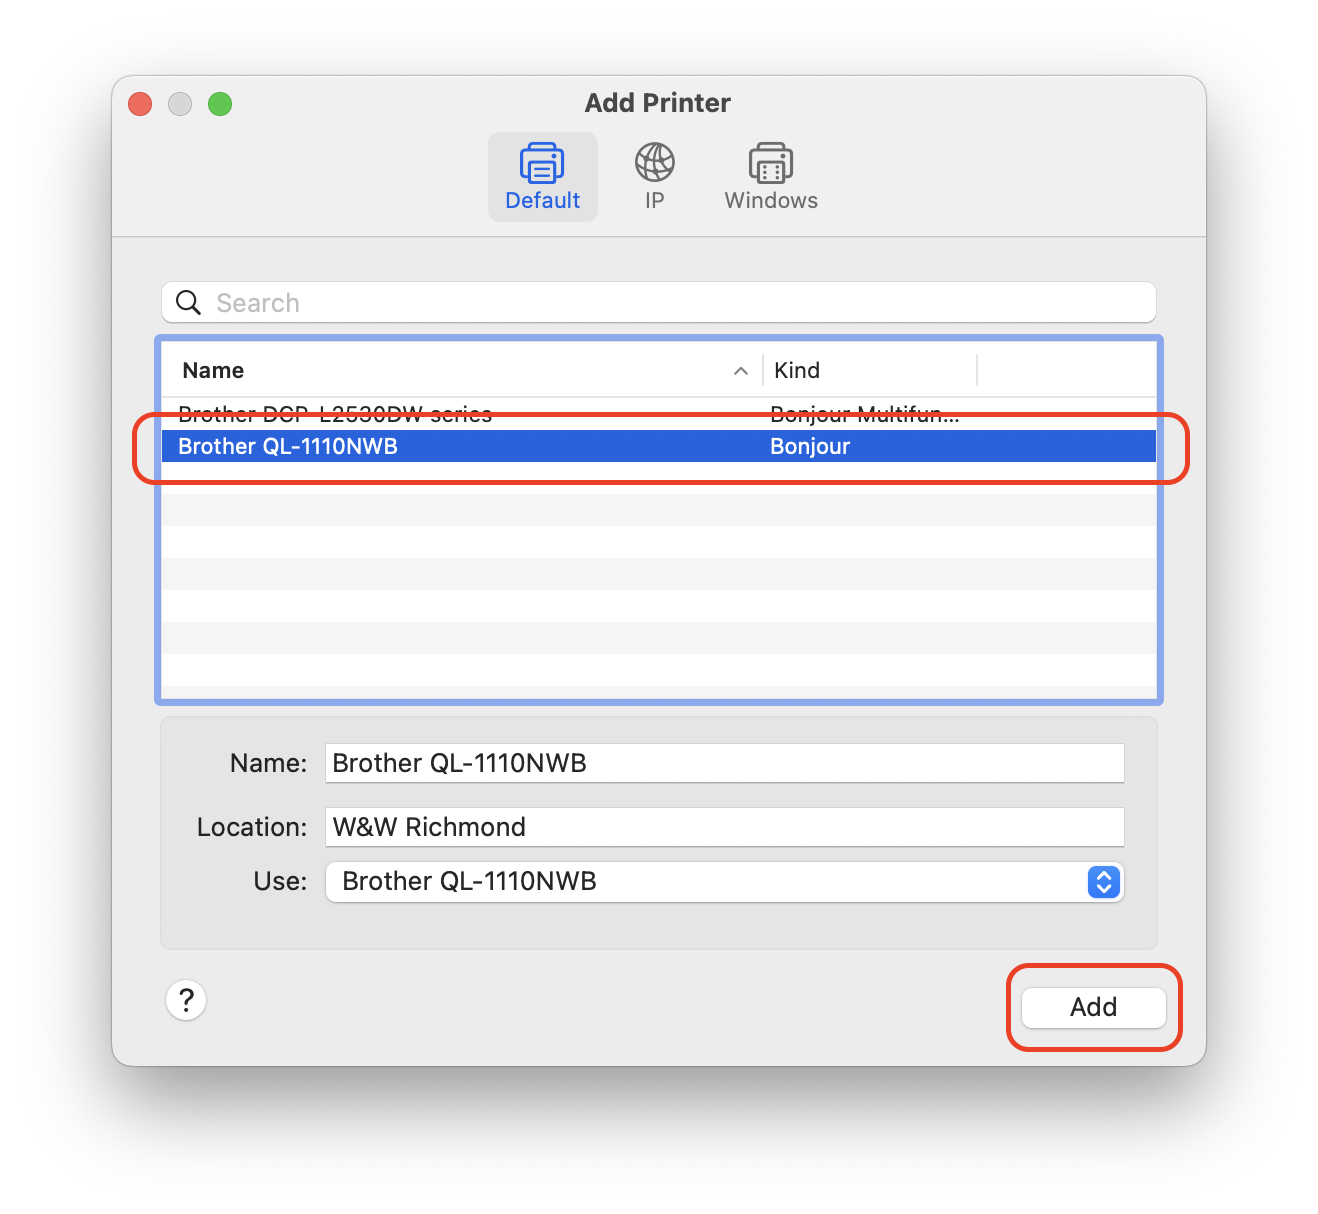
- Select the printer called Brother QL-1110NWB and click the Add button.
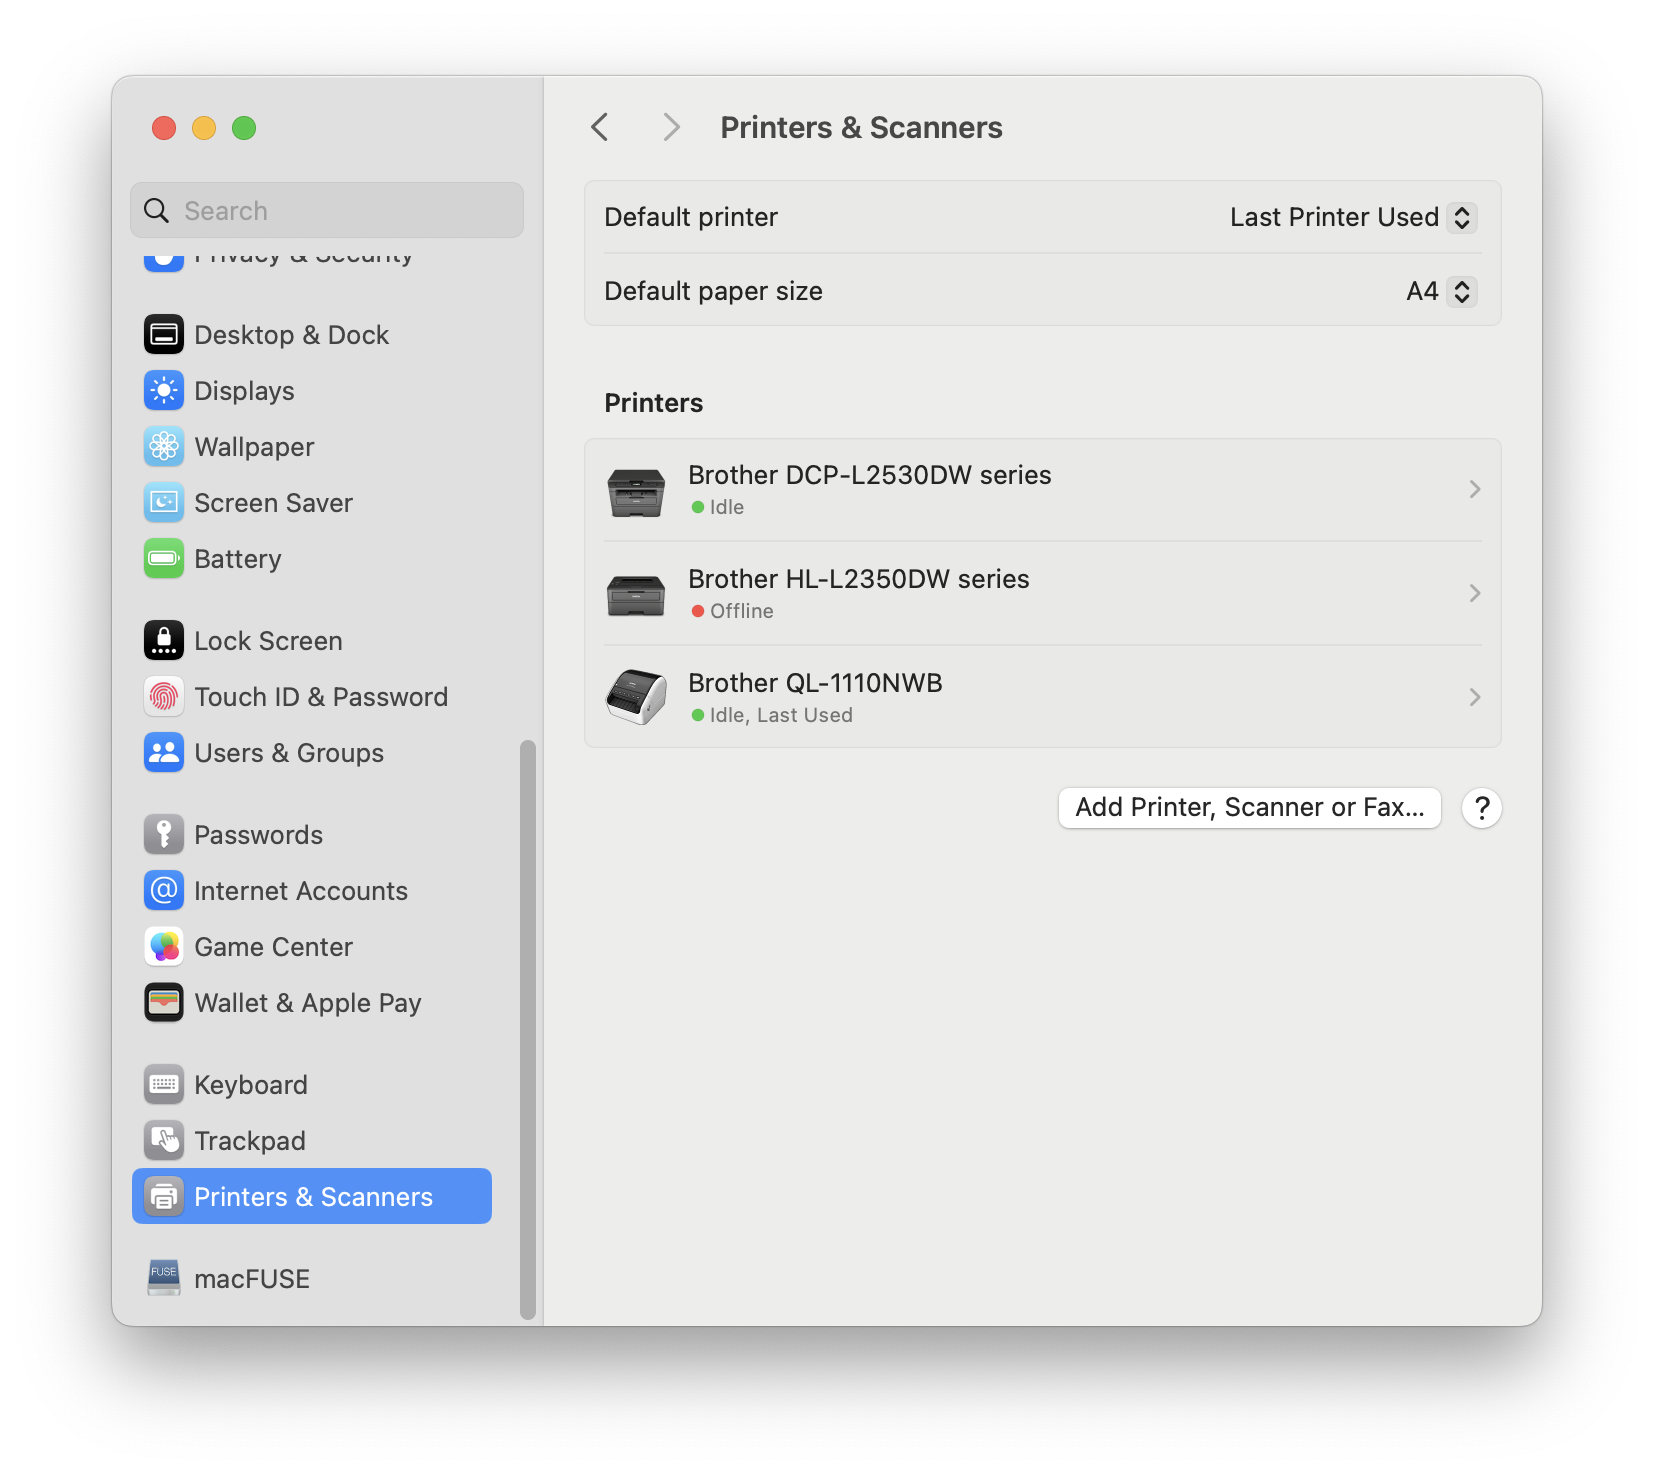
- A dialogue box will appear saying that the printer is being installed. You’ll know if it was successful if the printer appears in the list with a green circle.
Generate Tickets
Section titled “Generate Tickets”Open the template
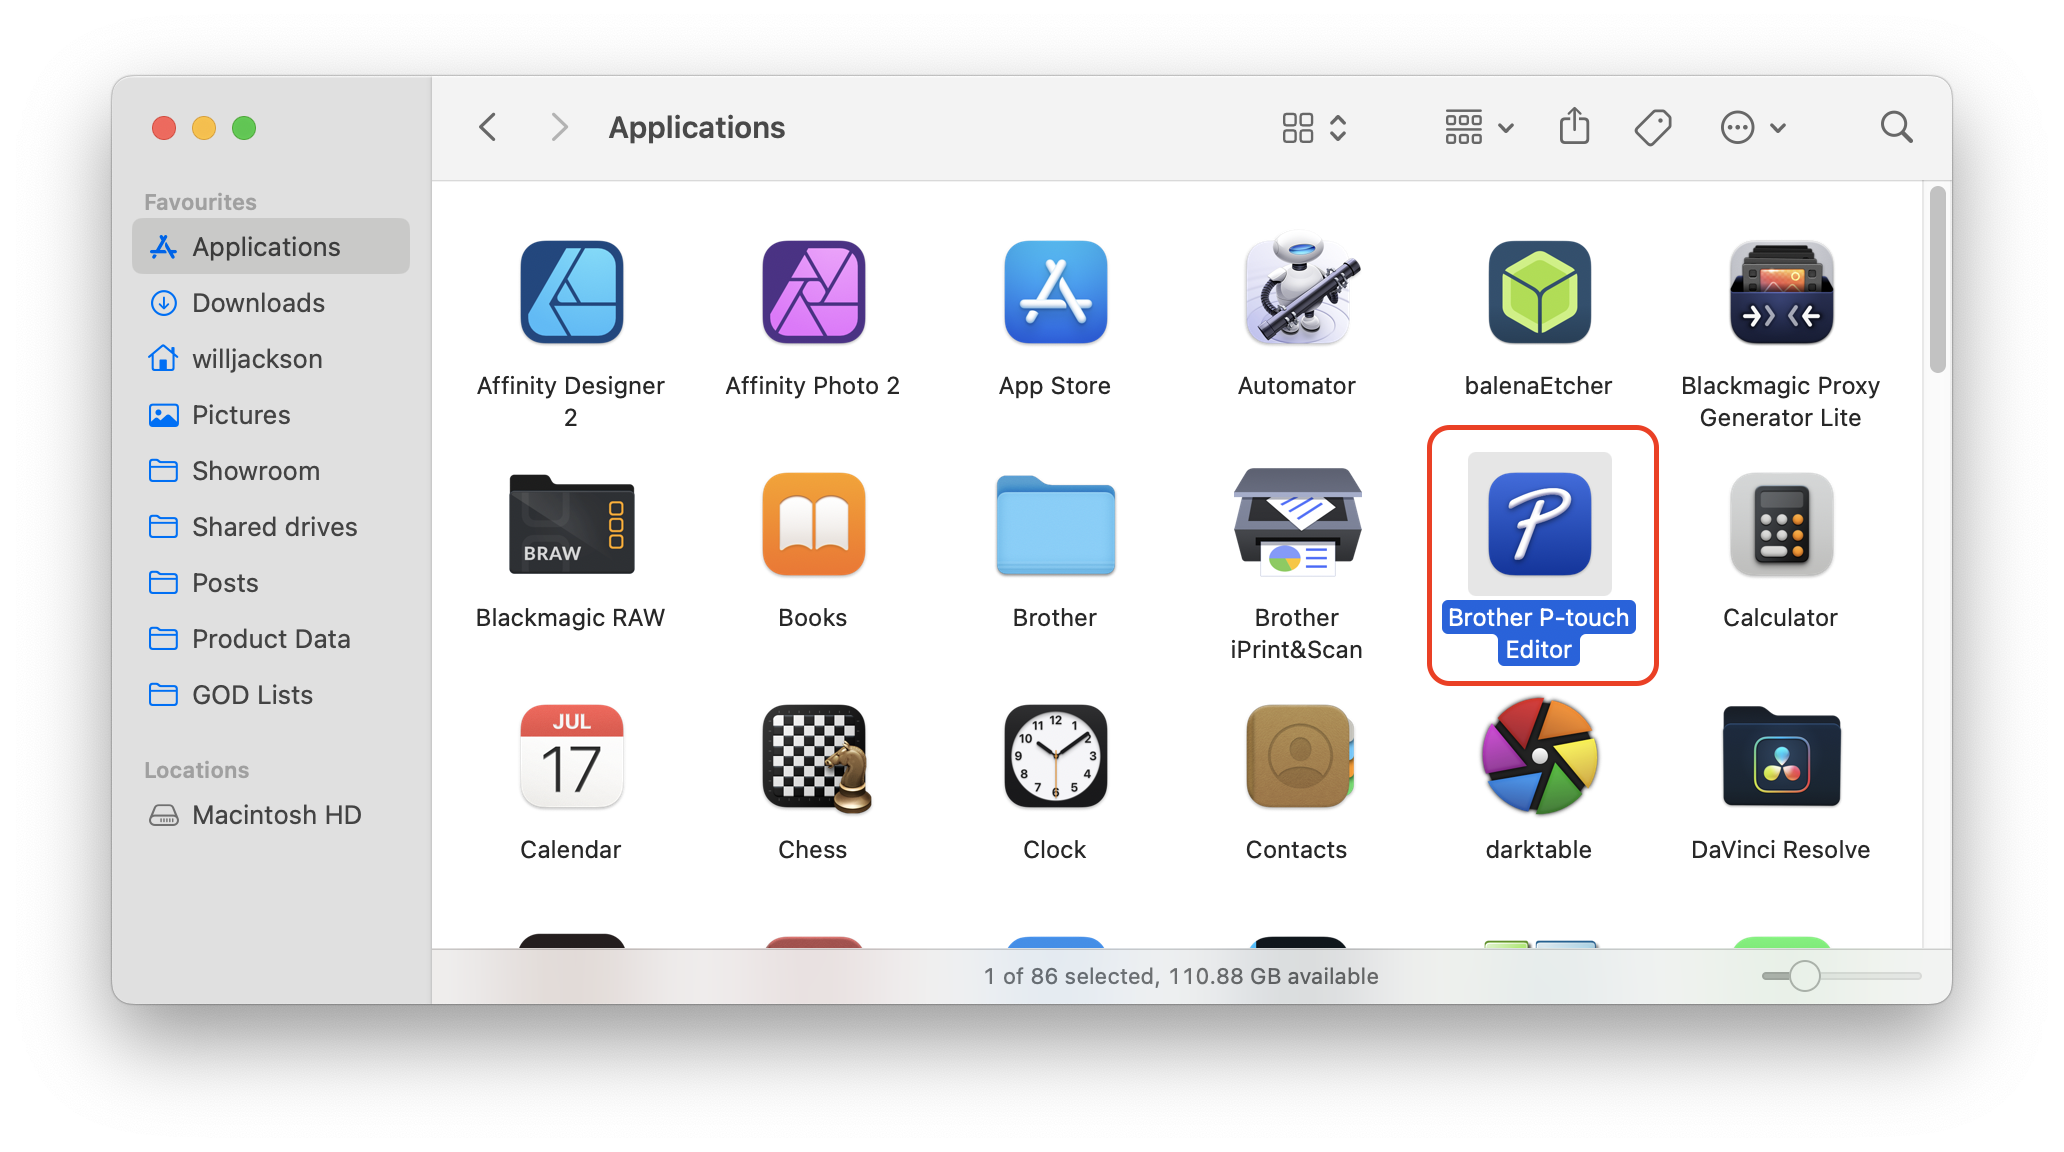
Section titled “Open the template”- Open a new Finder, navigate to Applications and open the application called Brother P-touch Editor. If it doesn’t appear, follow the steps in the Prerequisite section to install it.
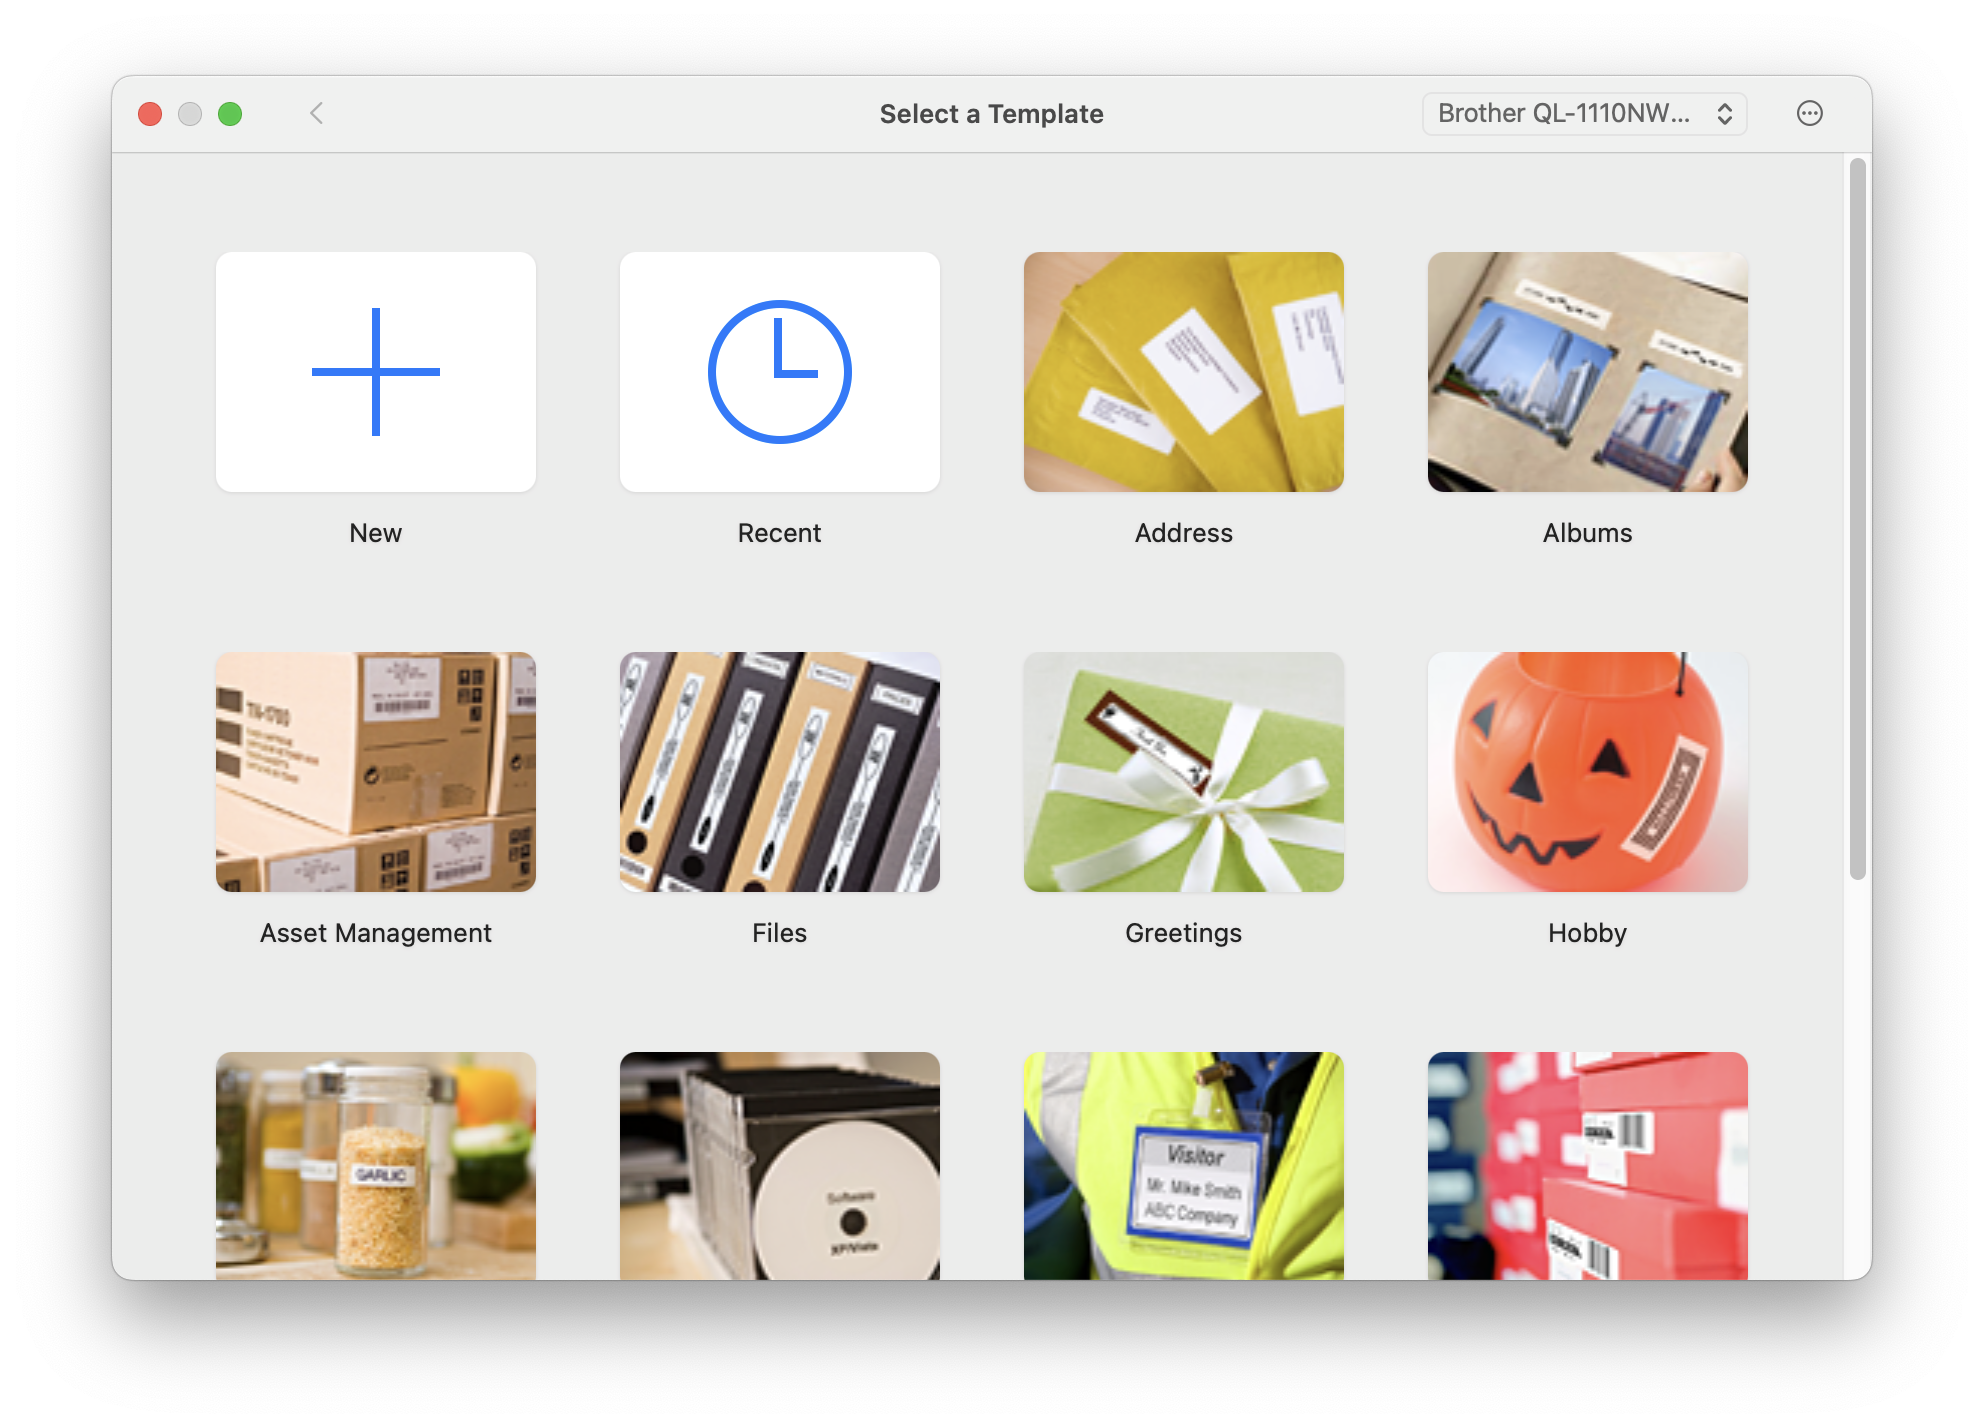
- Double-click the application to open it. You will be shown the Select a Template screen.
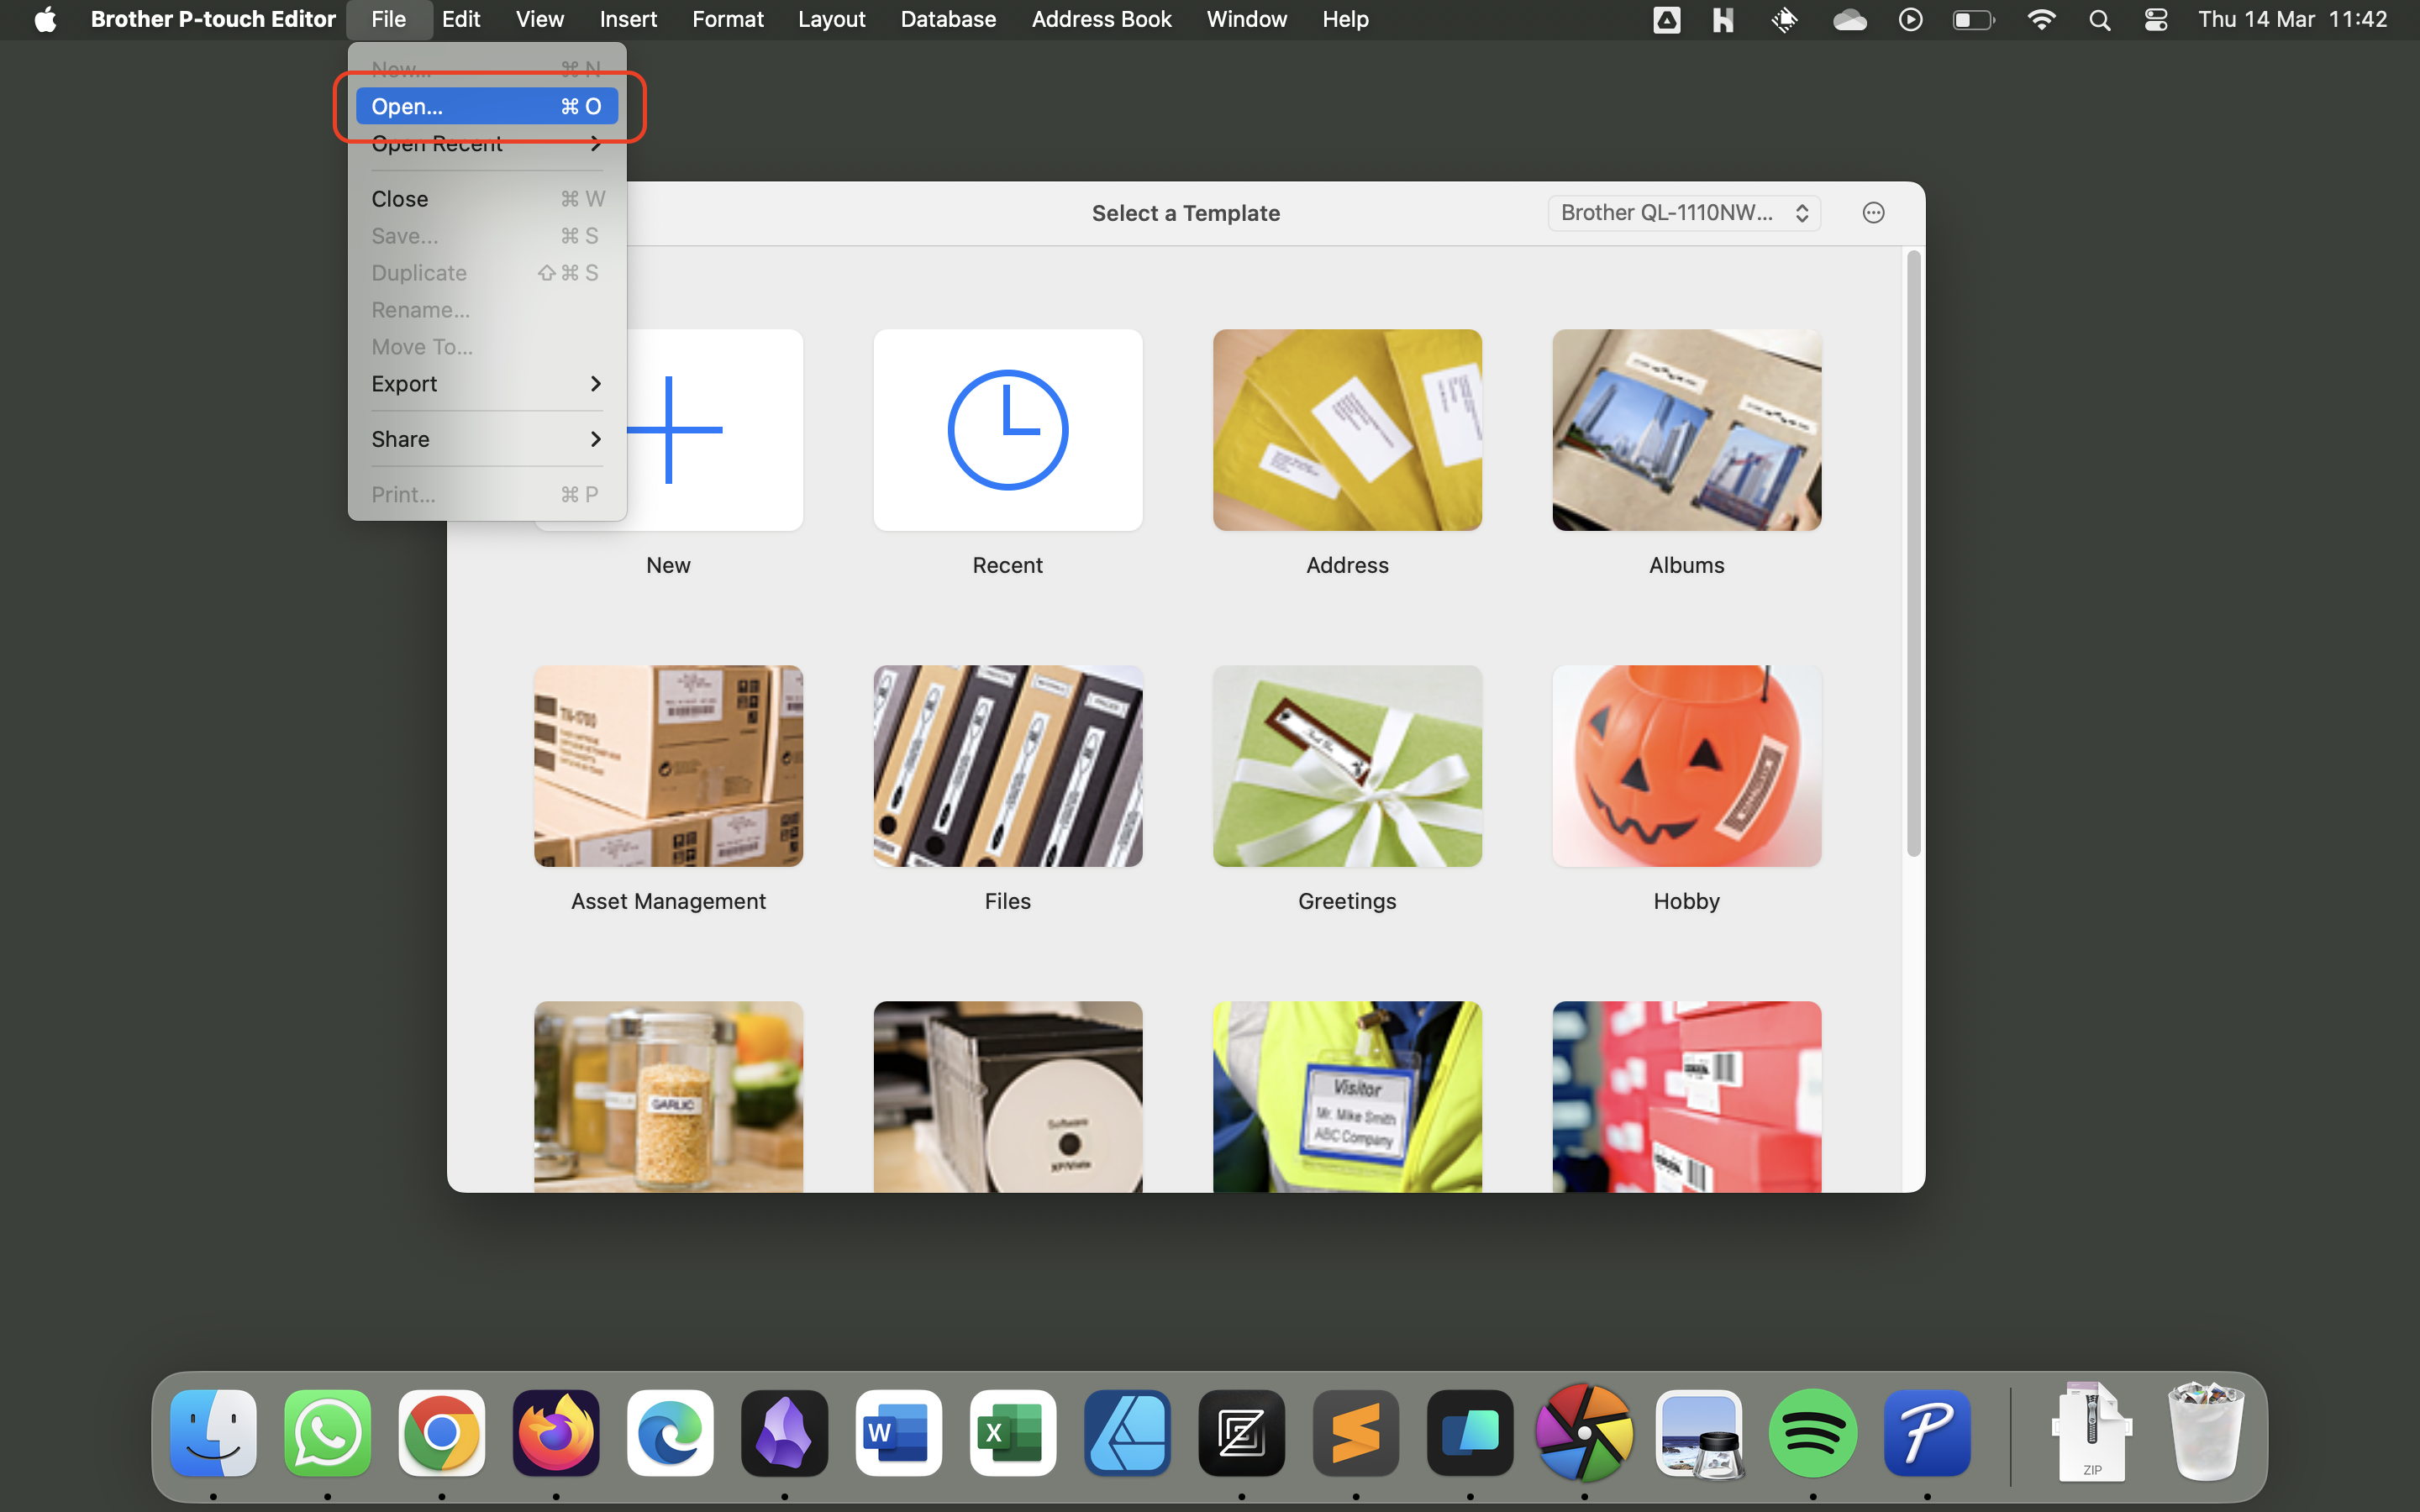
- Click the File menu in the taskbar at the top of the screen - then select Open.
- In the dialogue box that opens, navigate to
Google Drive/Shared Drives/Showroom/Tickets & Labels/Label Templates. Then select the relevant template and click Open.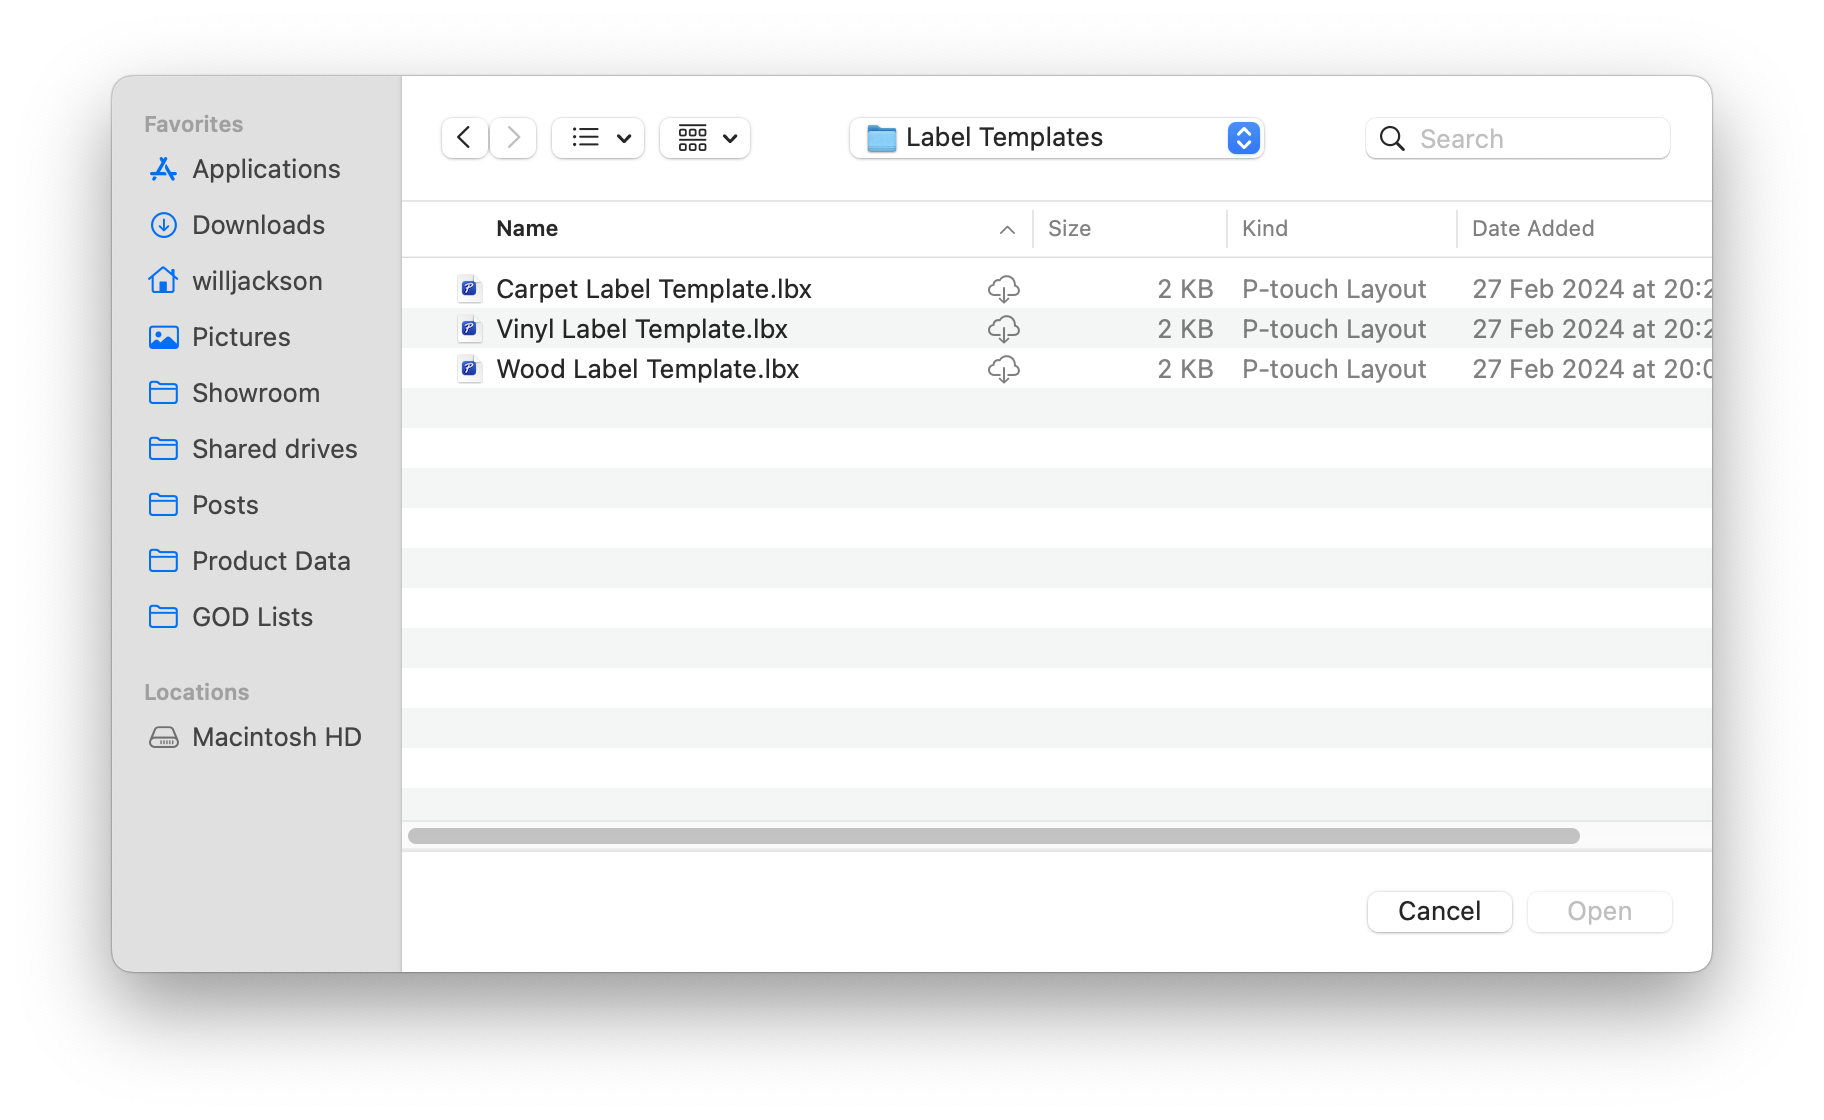
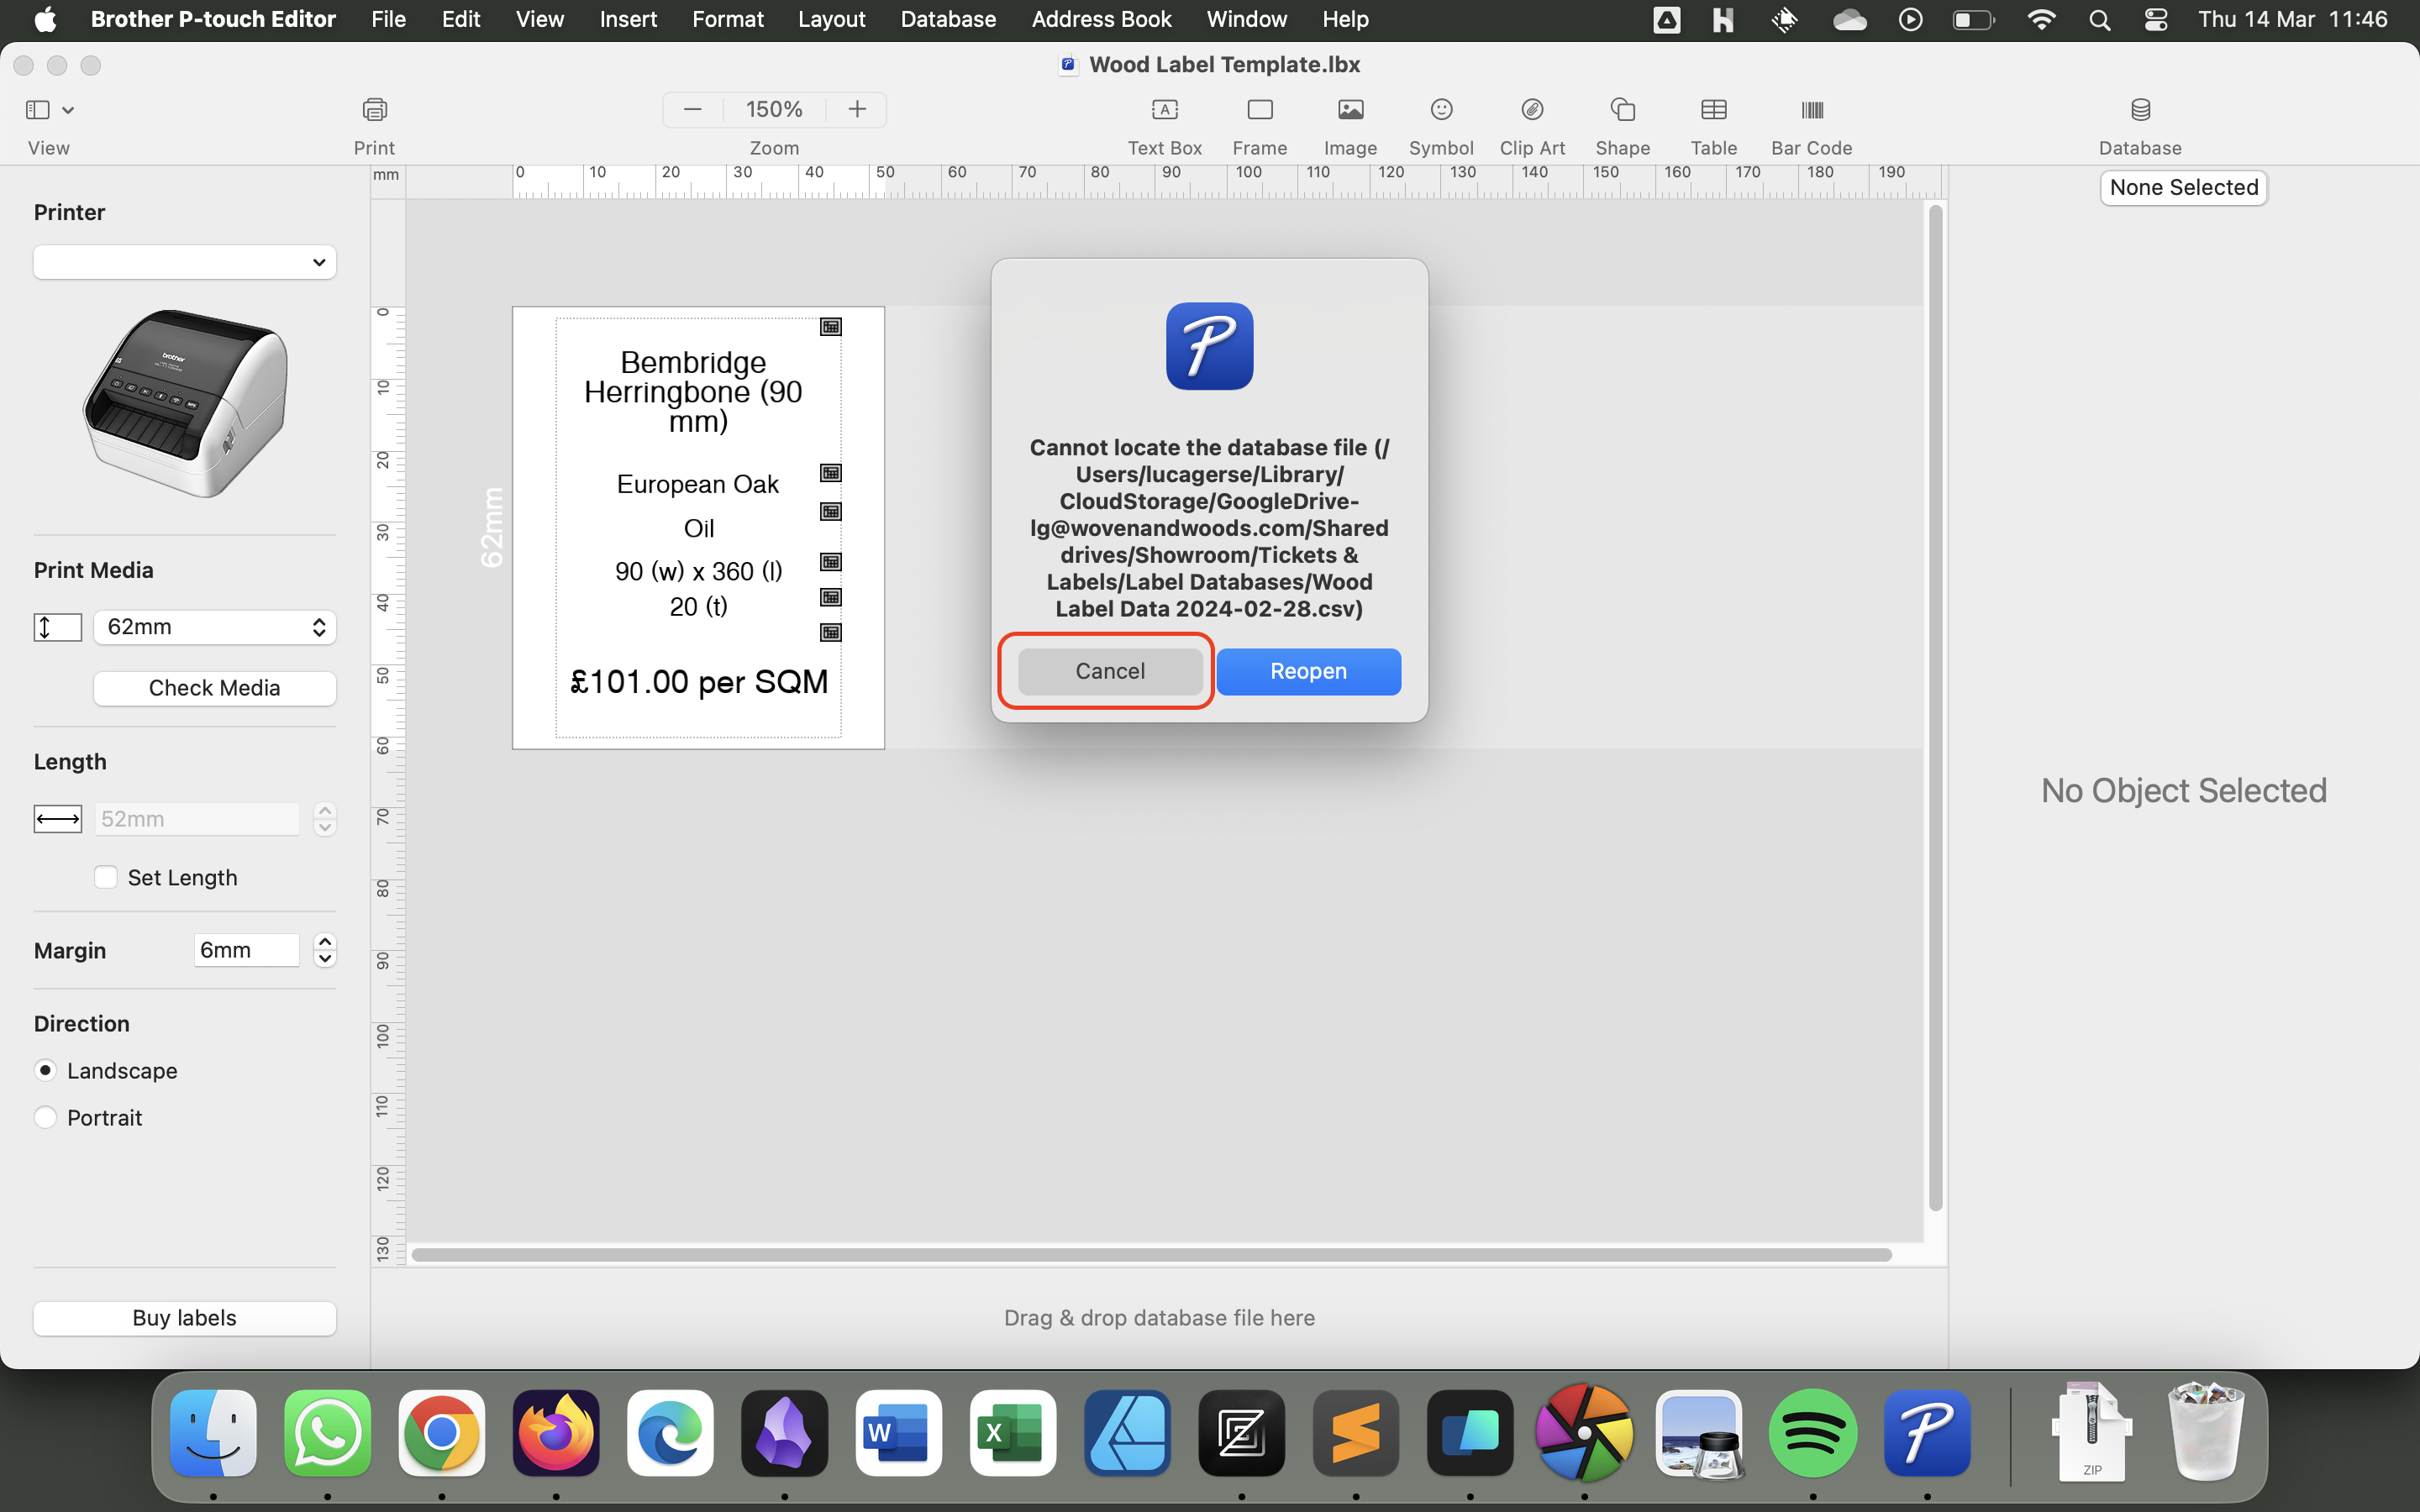
- When the template loads, you may be shown an error box. Just click Cancel.
- Make sure that the font being used is Jost. You can check this by selecting a text box and checking the right hand panel.
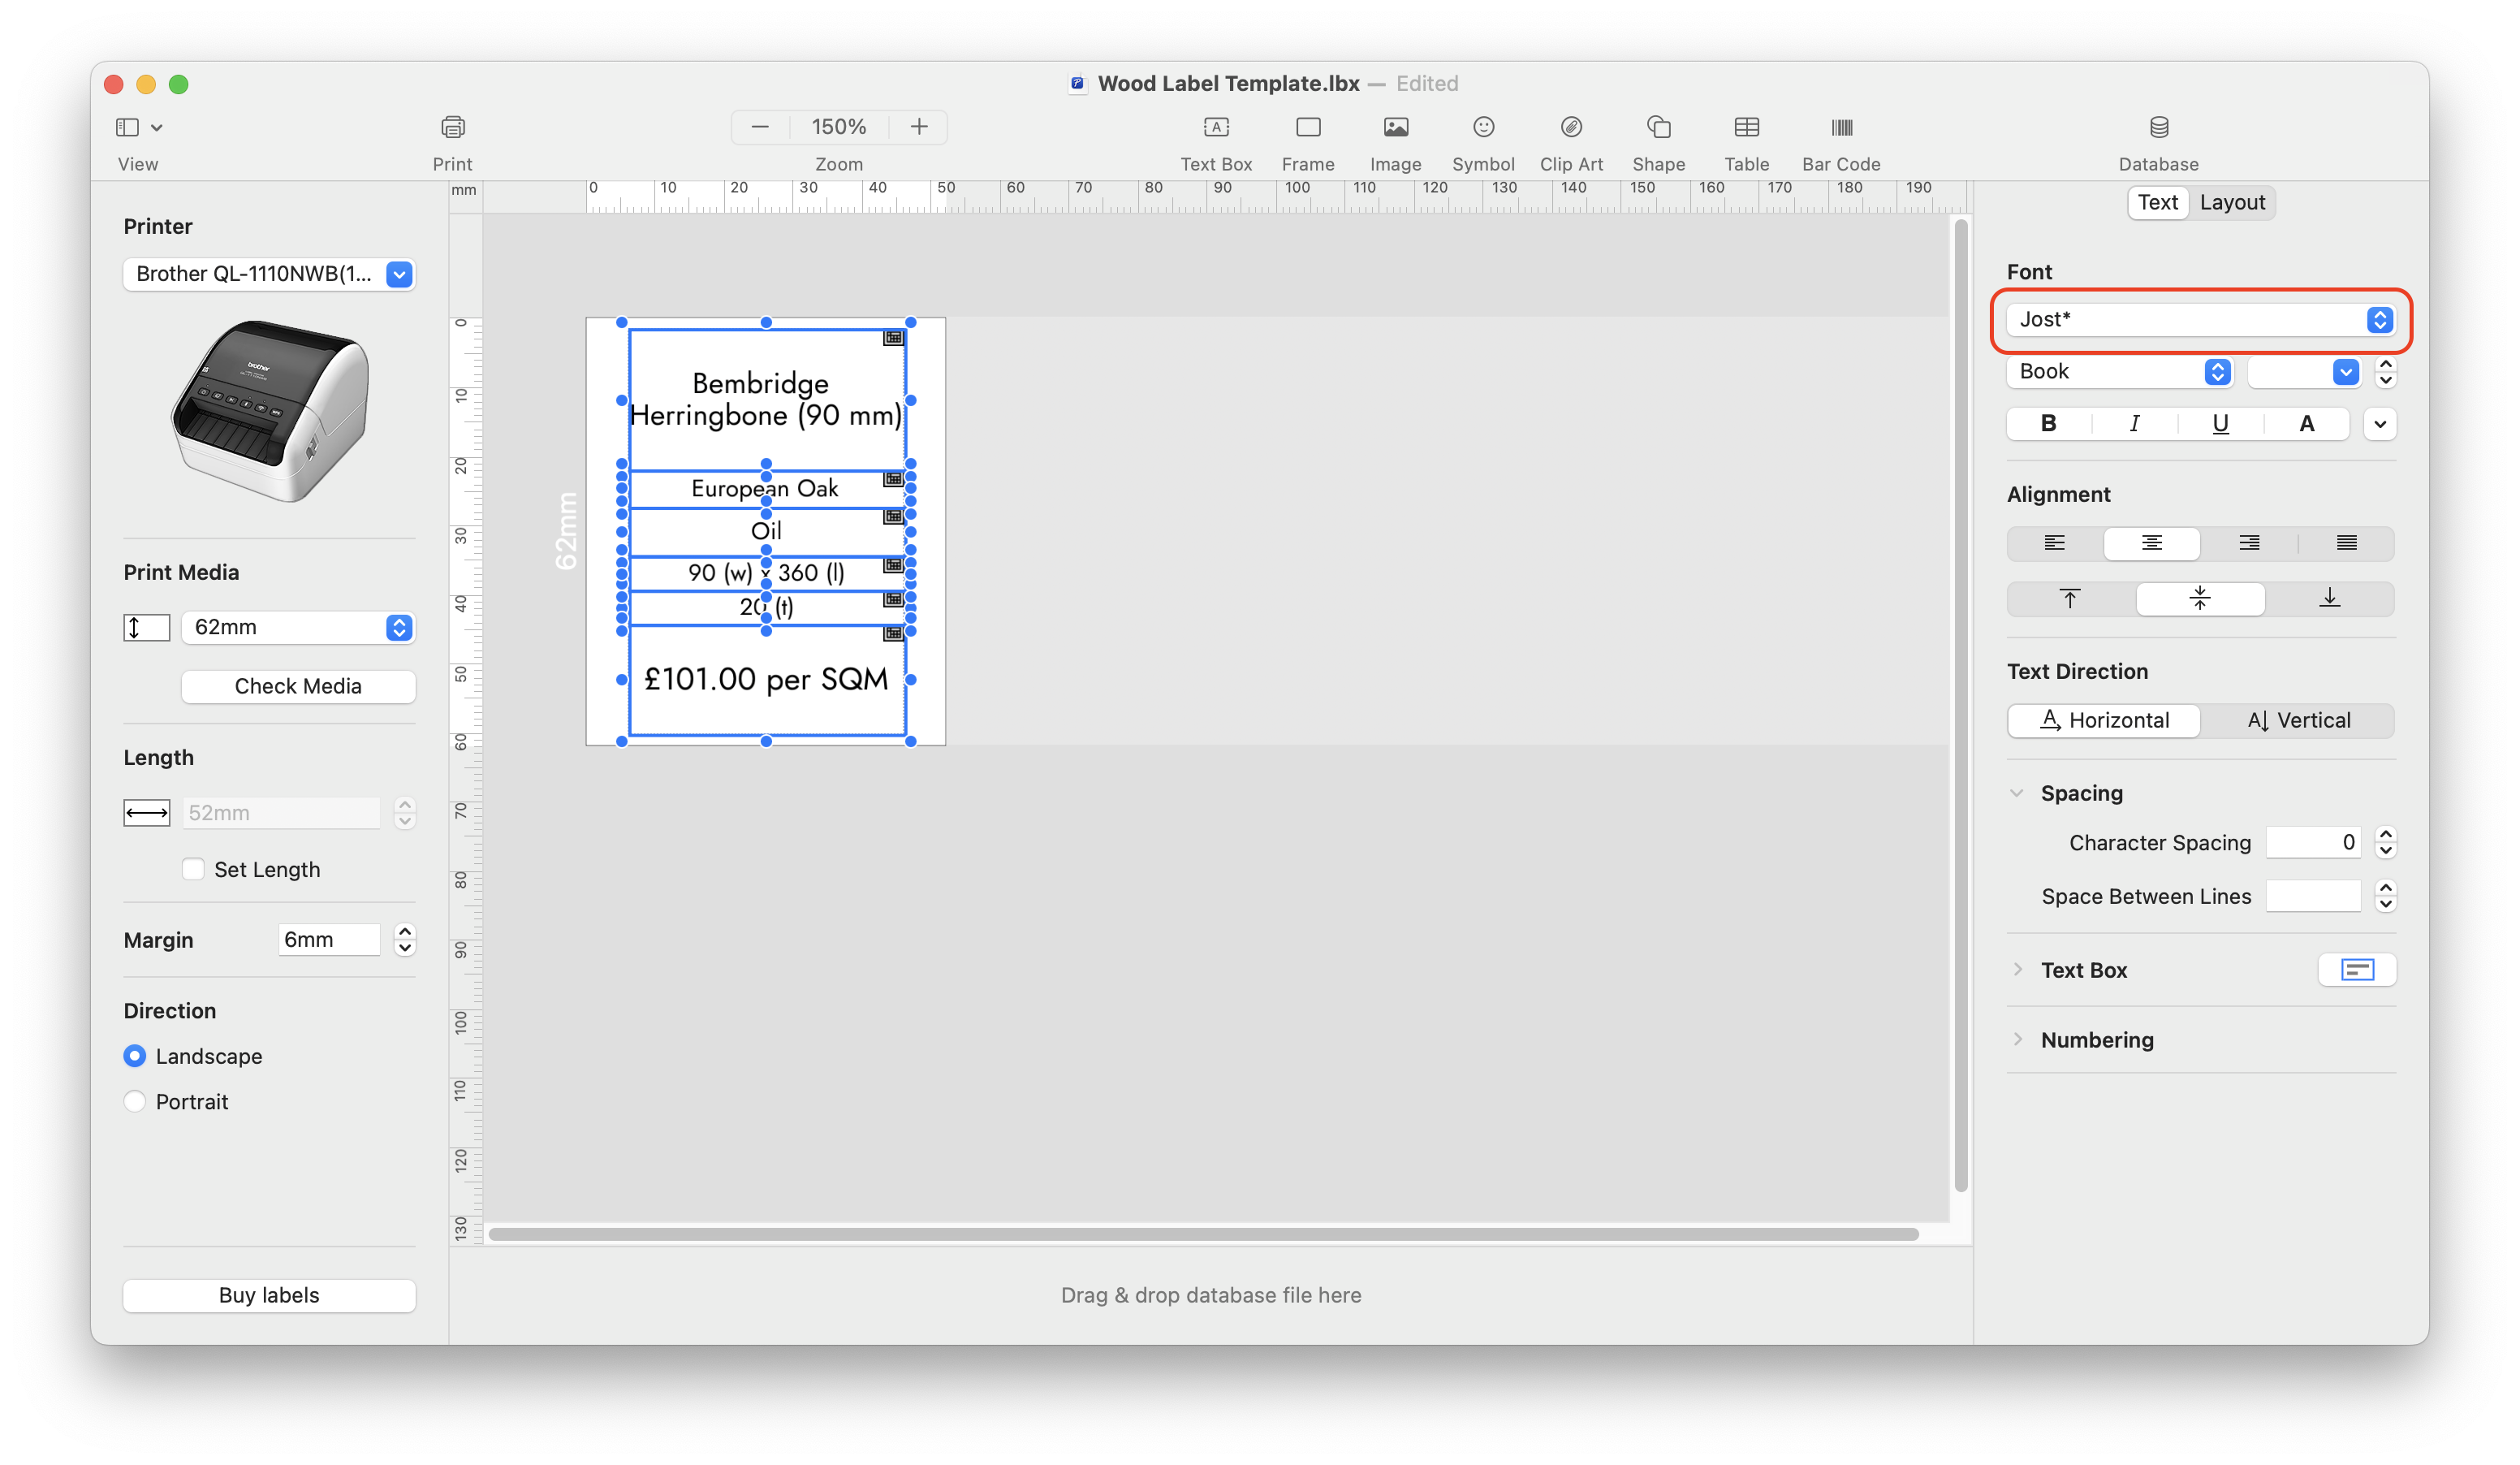
- If the font isn’t Jost, simply select it in the Font dropdown box. You can select multiple text boxes by click and dragging over them. The font weights should be as follows:
- Name: Medium
- Stats: Light
- Price: Medium
Import product data
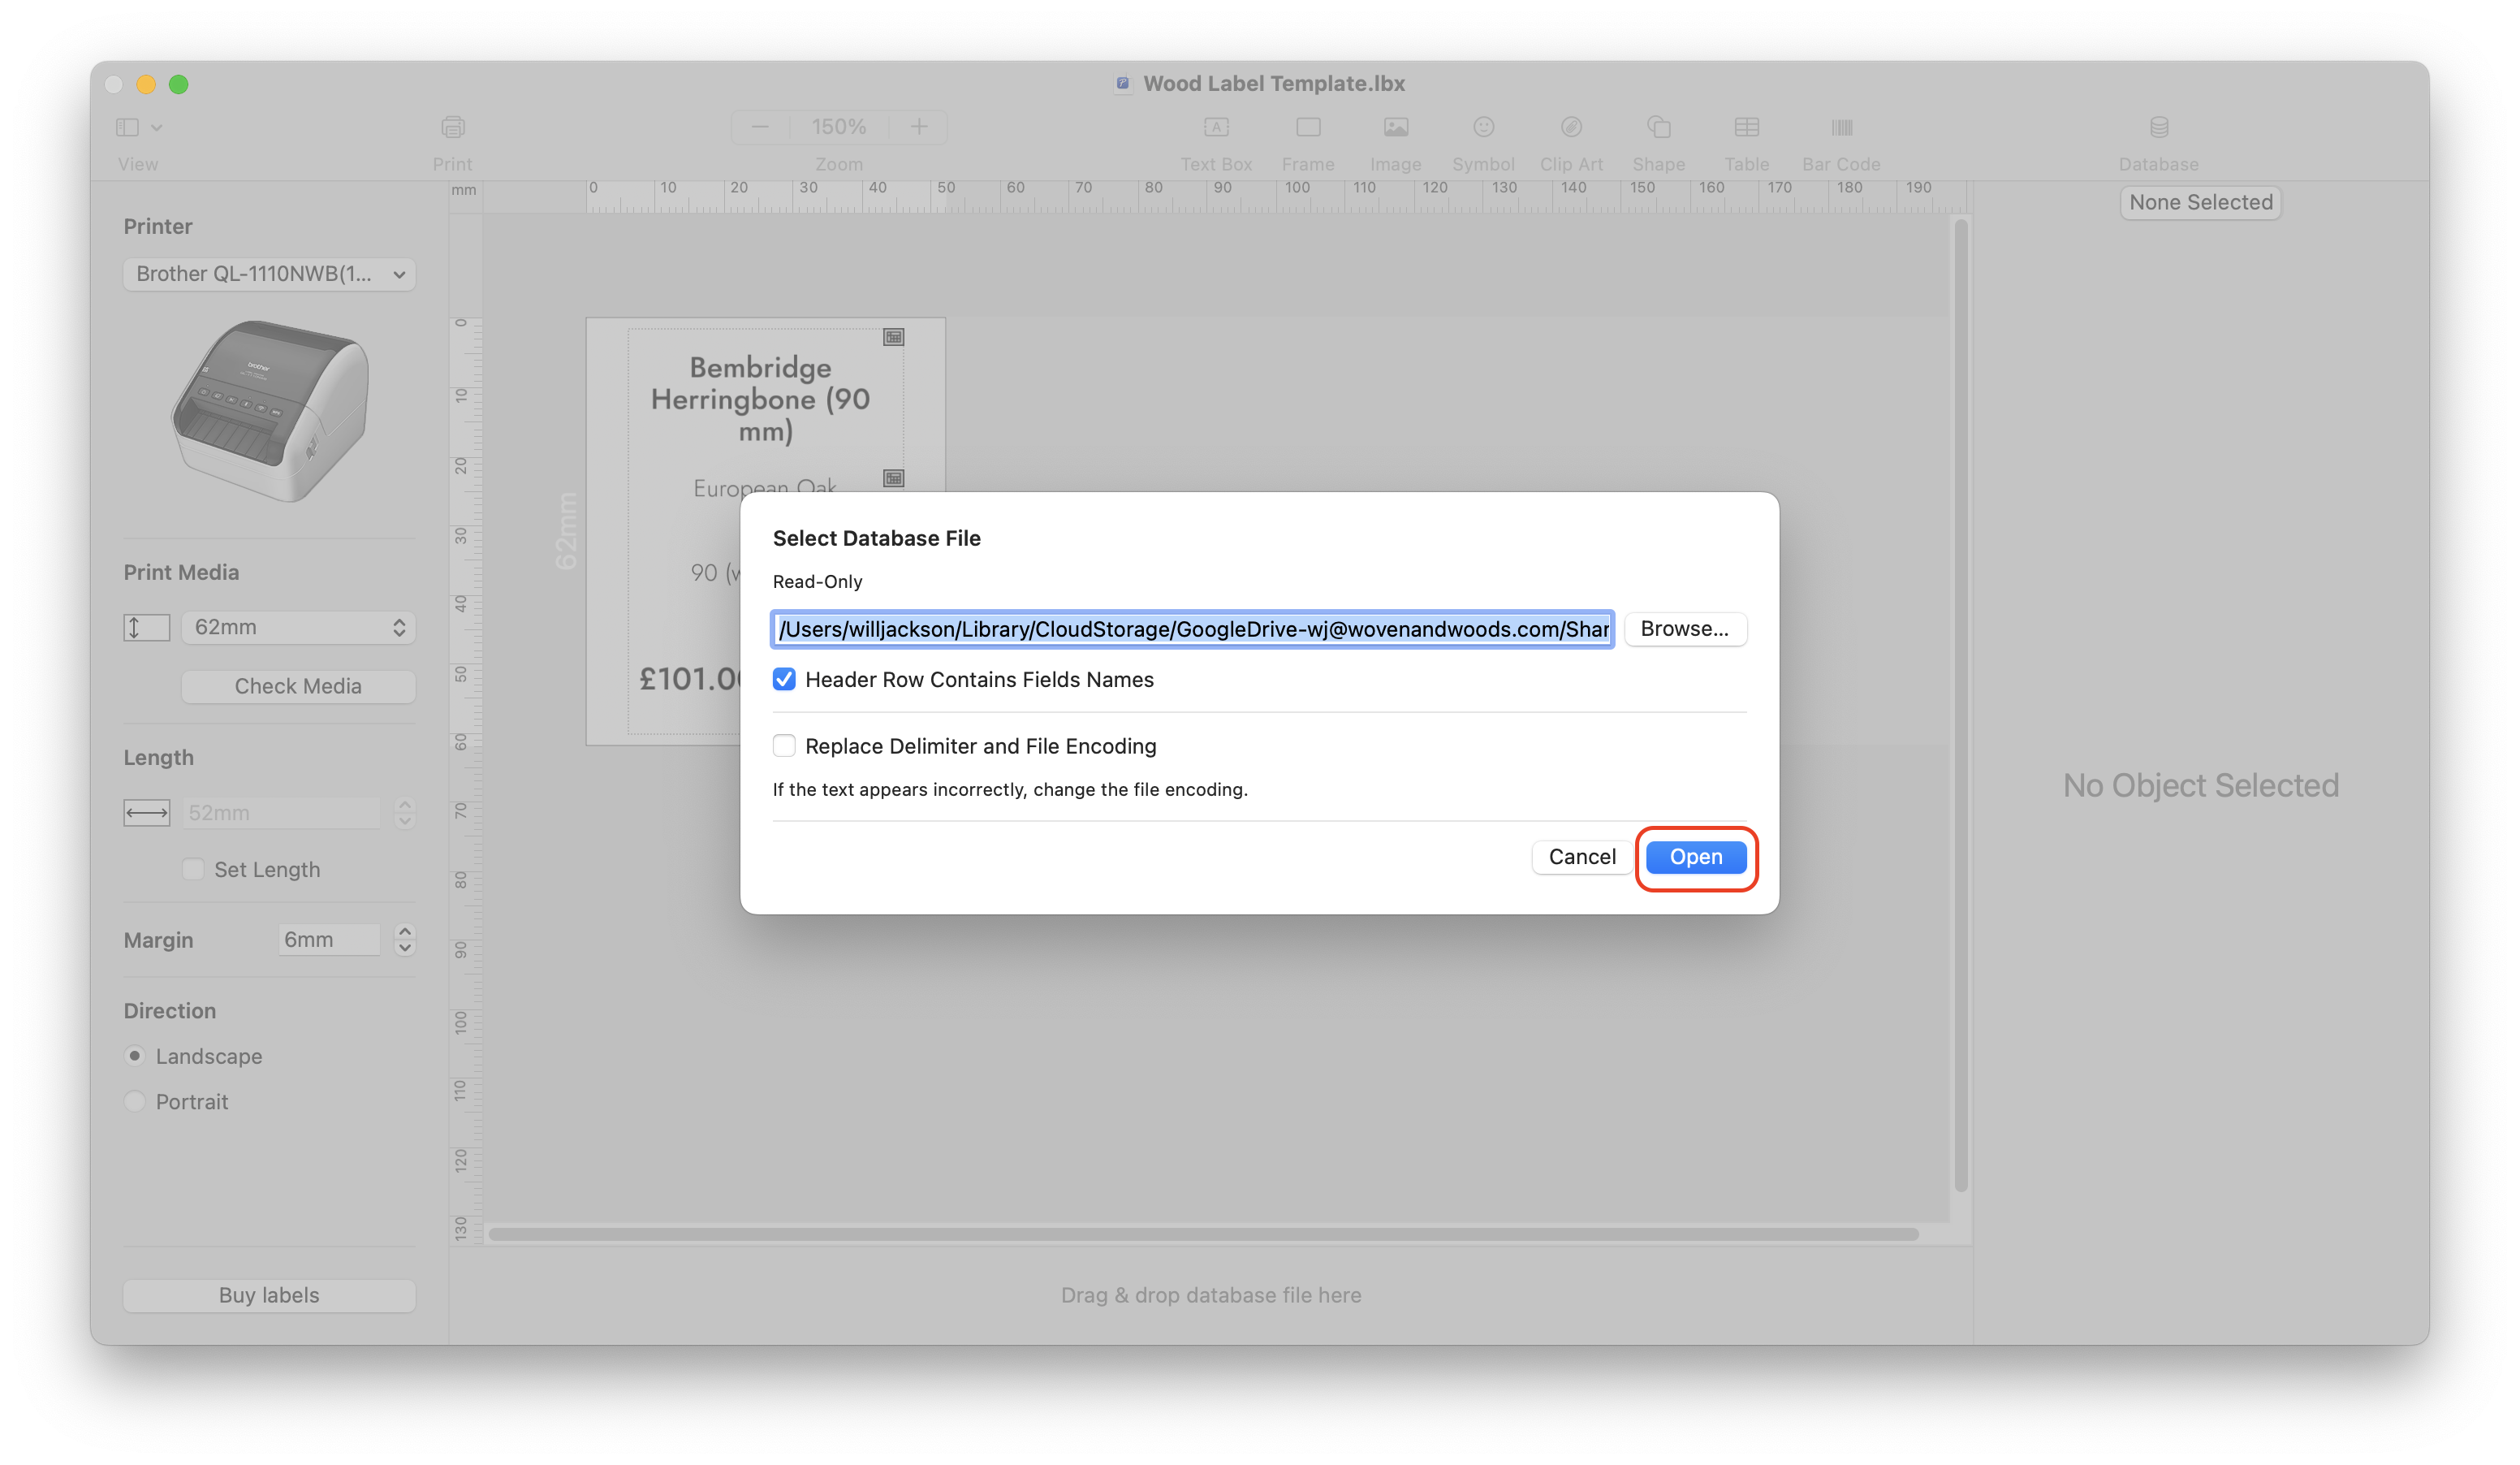
Section titled “Import product data”- Click Database in the taskbar and select Open.
- A dialogue box will appear. Leave the check boxes as they are and click the Browse… button.
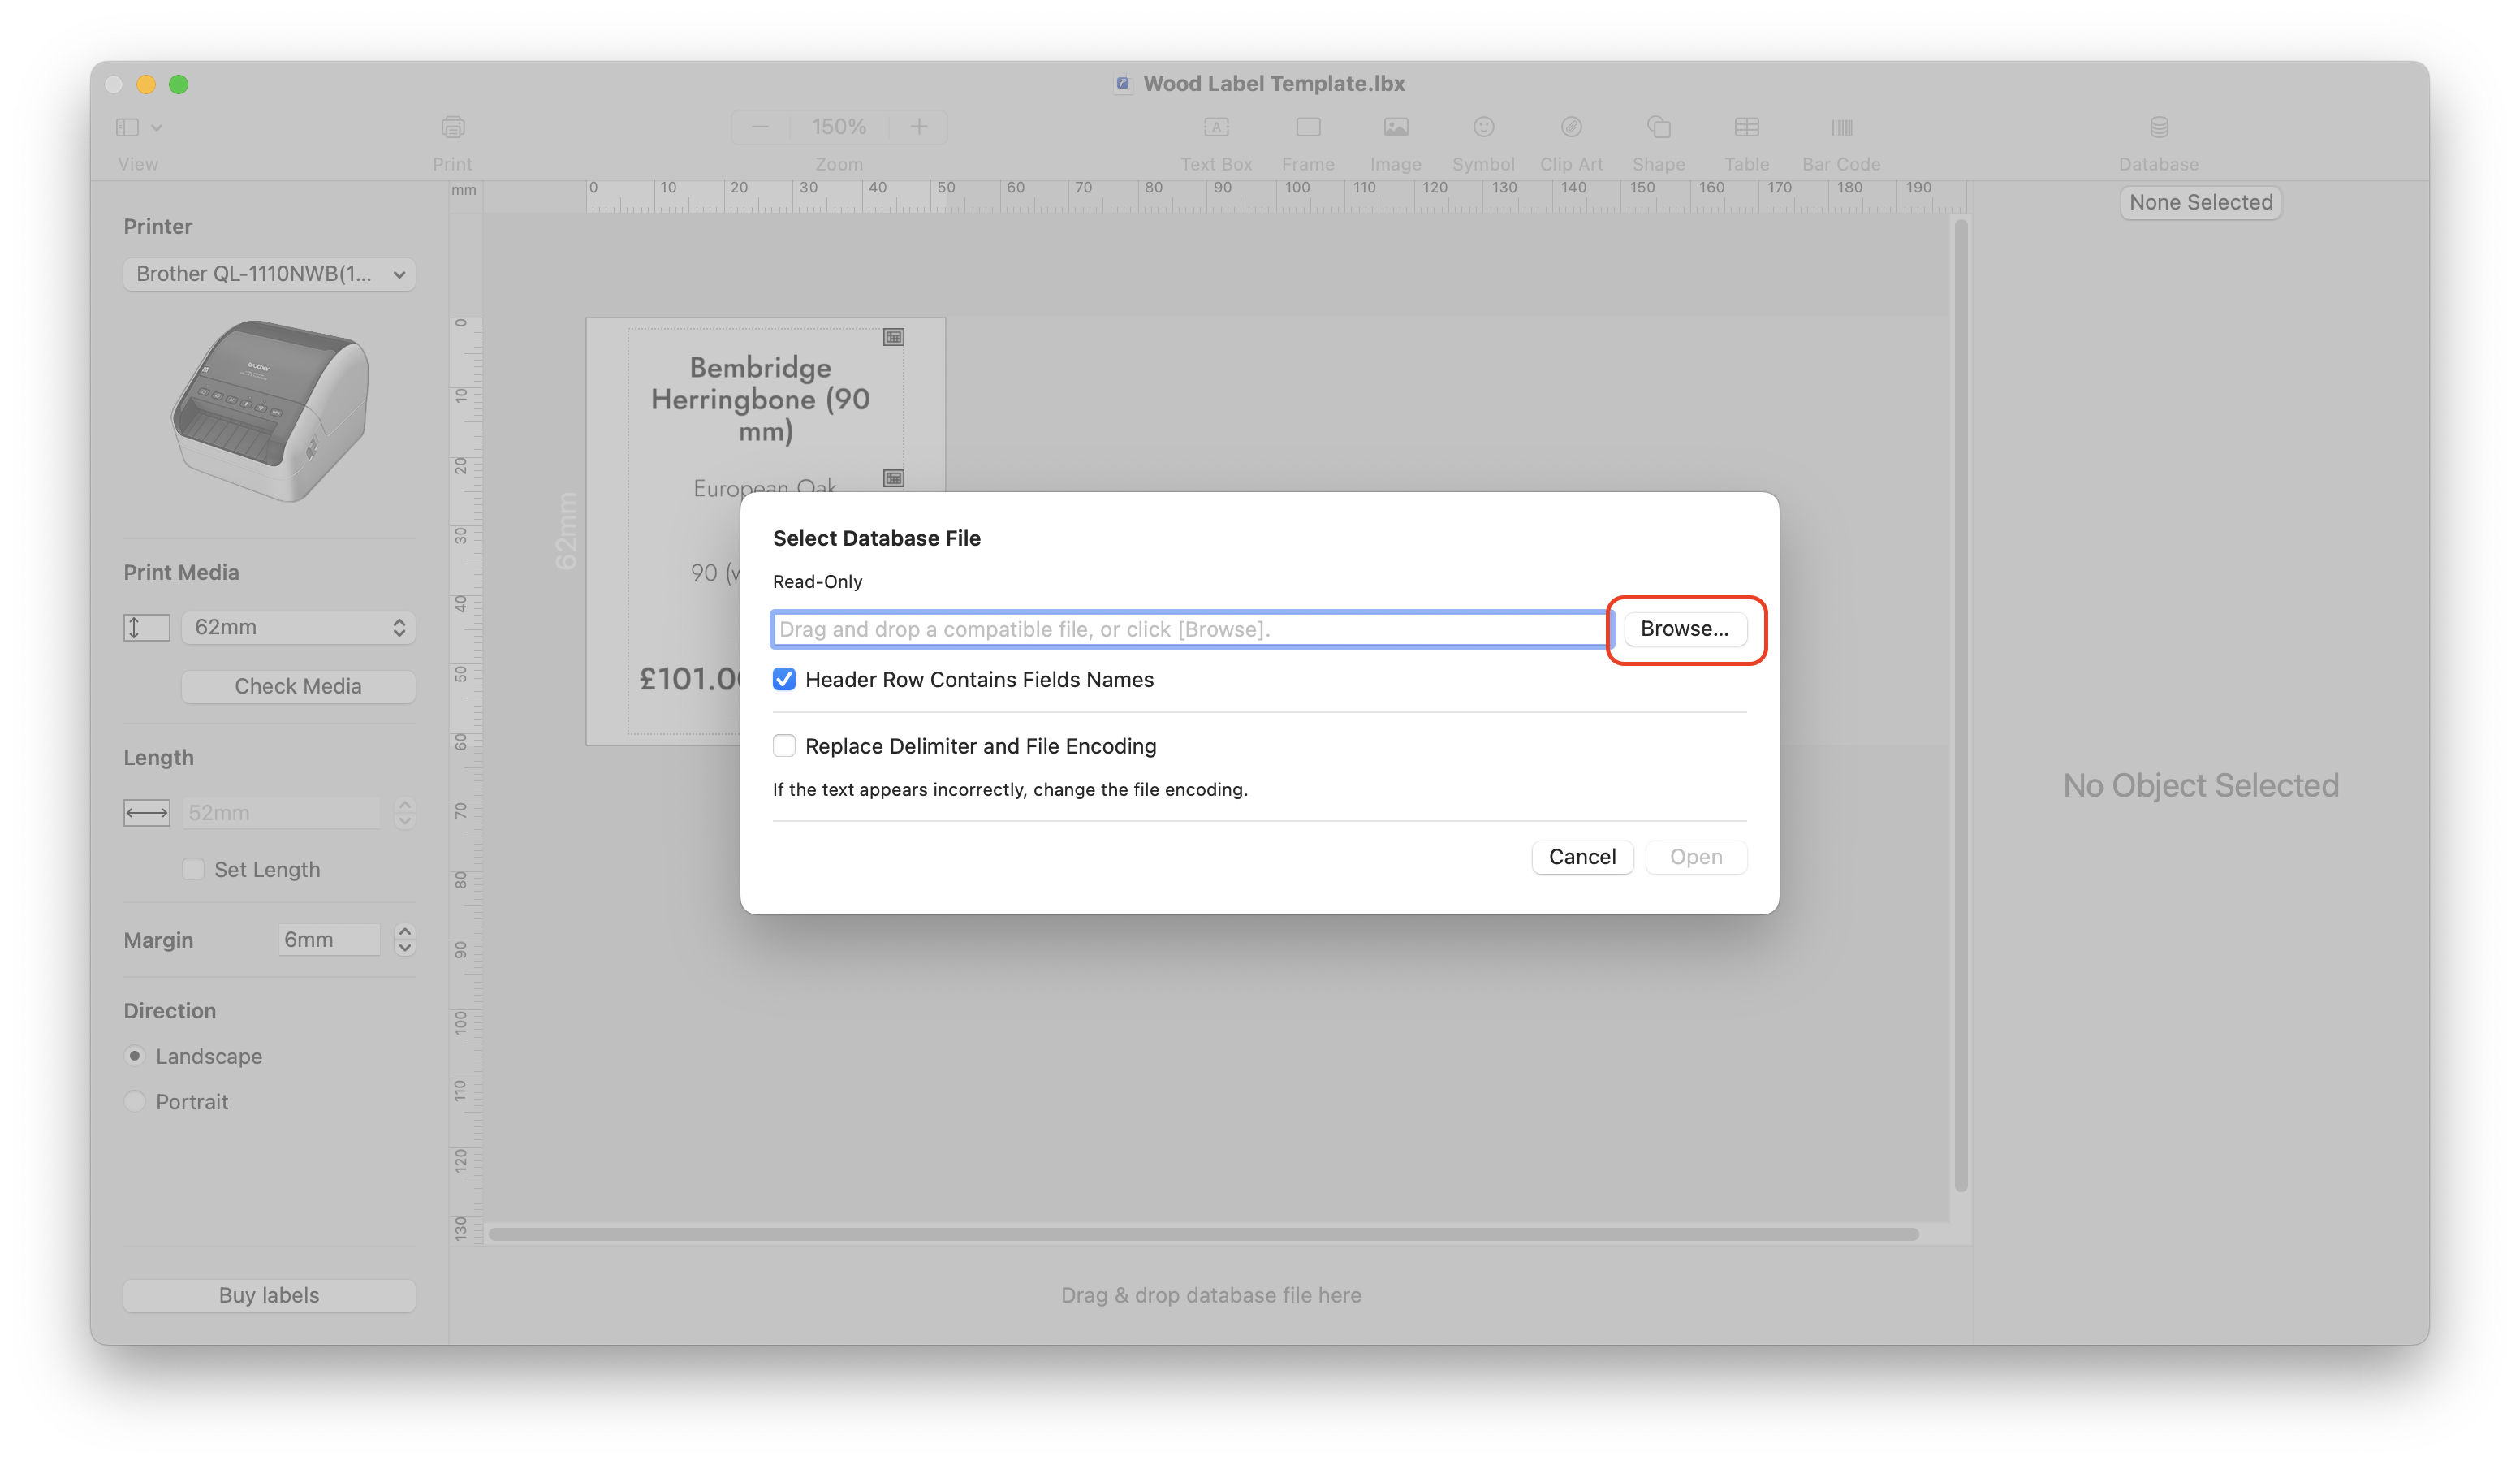
- In the Browse dialogue box, navigate to
Google Drive/Shared Drives/Showroom/Tickets & Labels/Label Databasesand double-click the relevant file.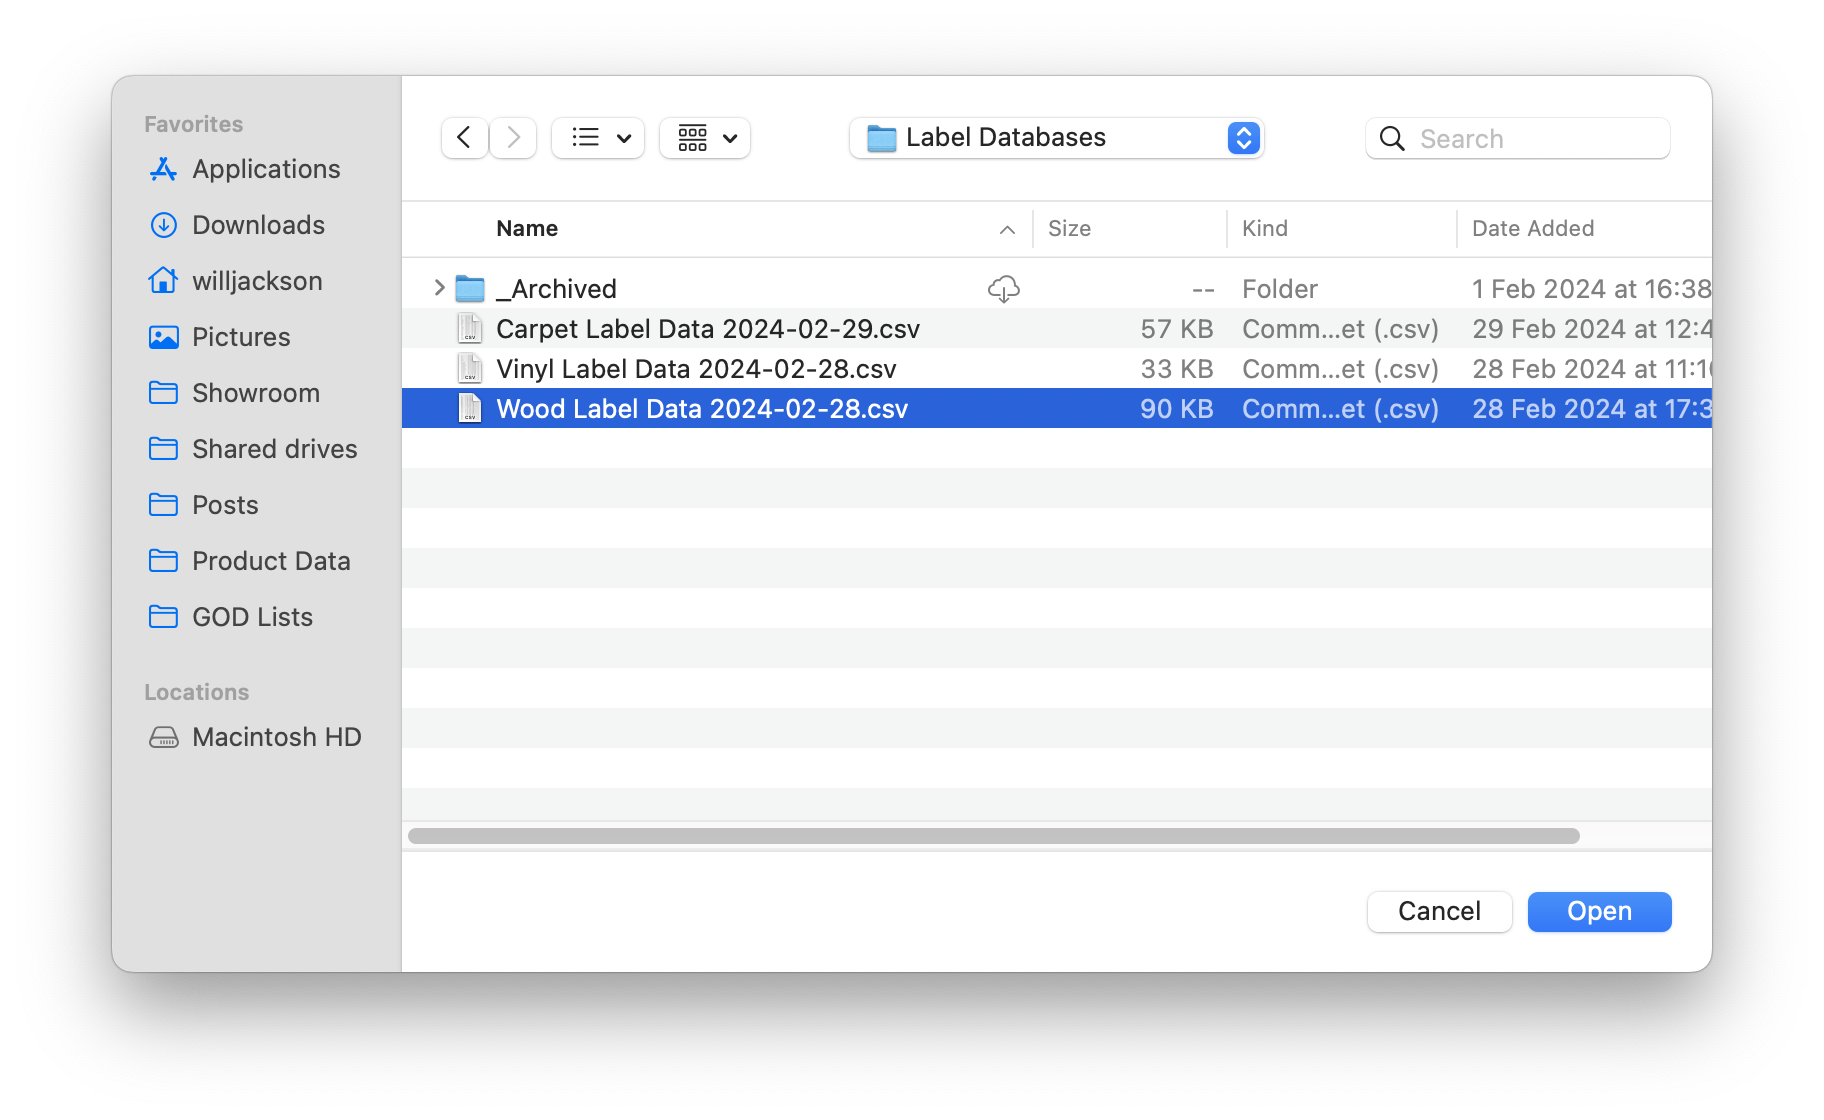
- Click Open.
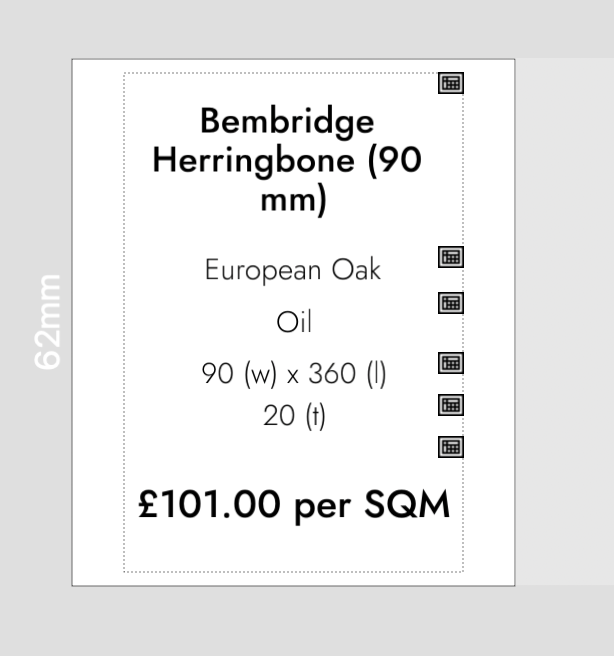
- A panel will open on the bottom of the screen containing the product data divided into columns.
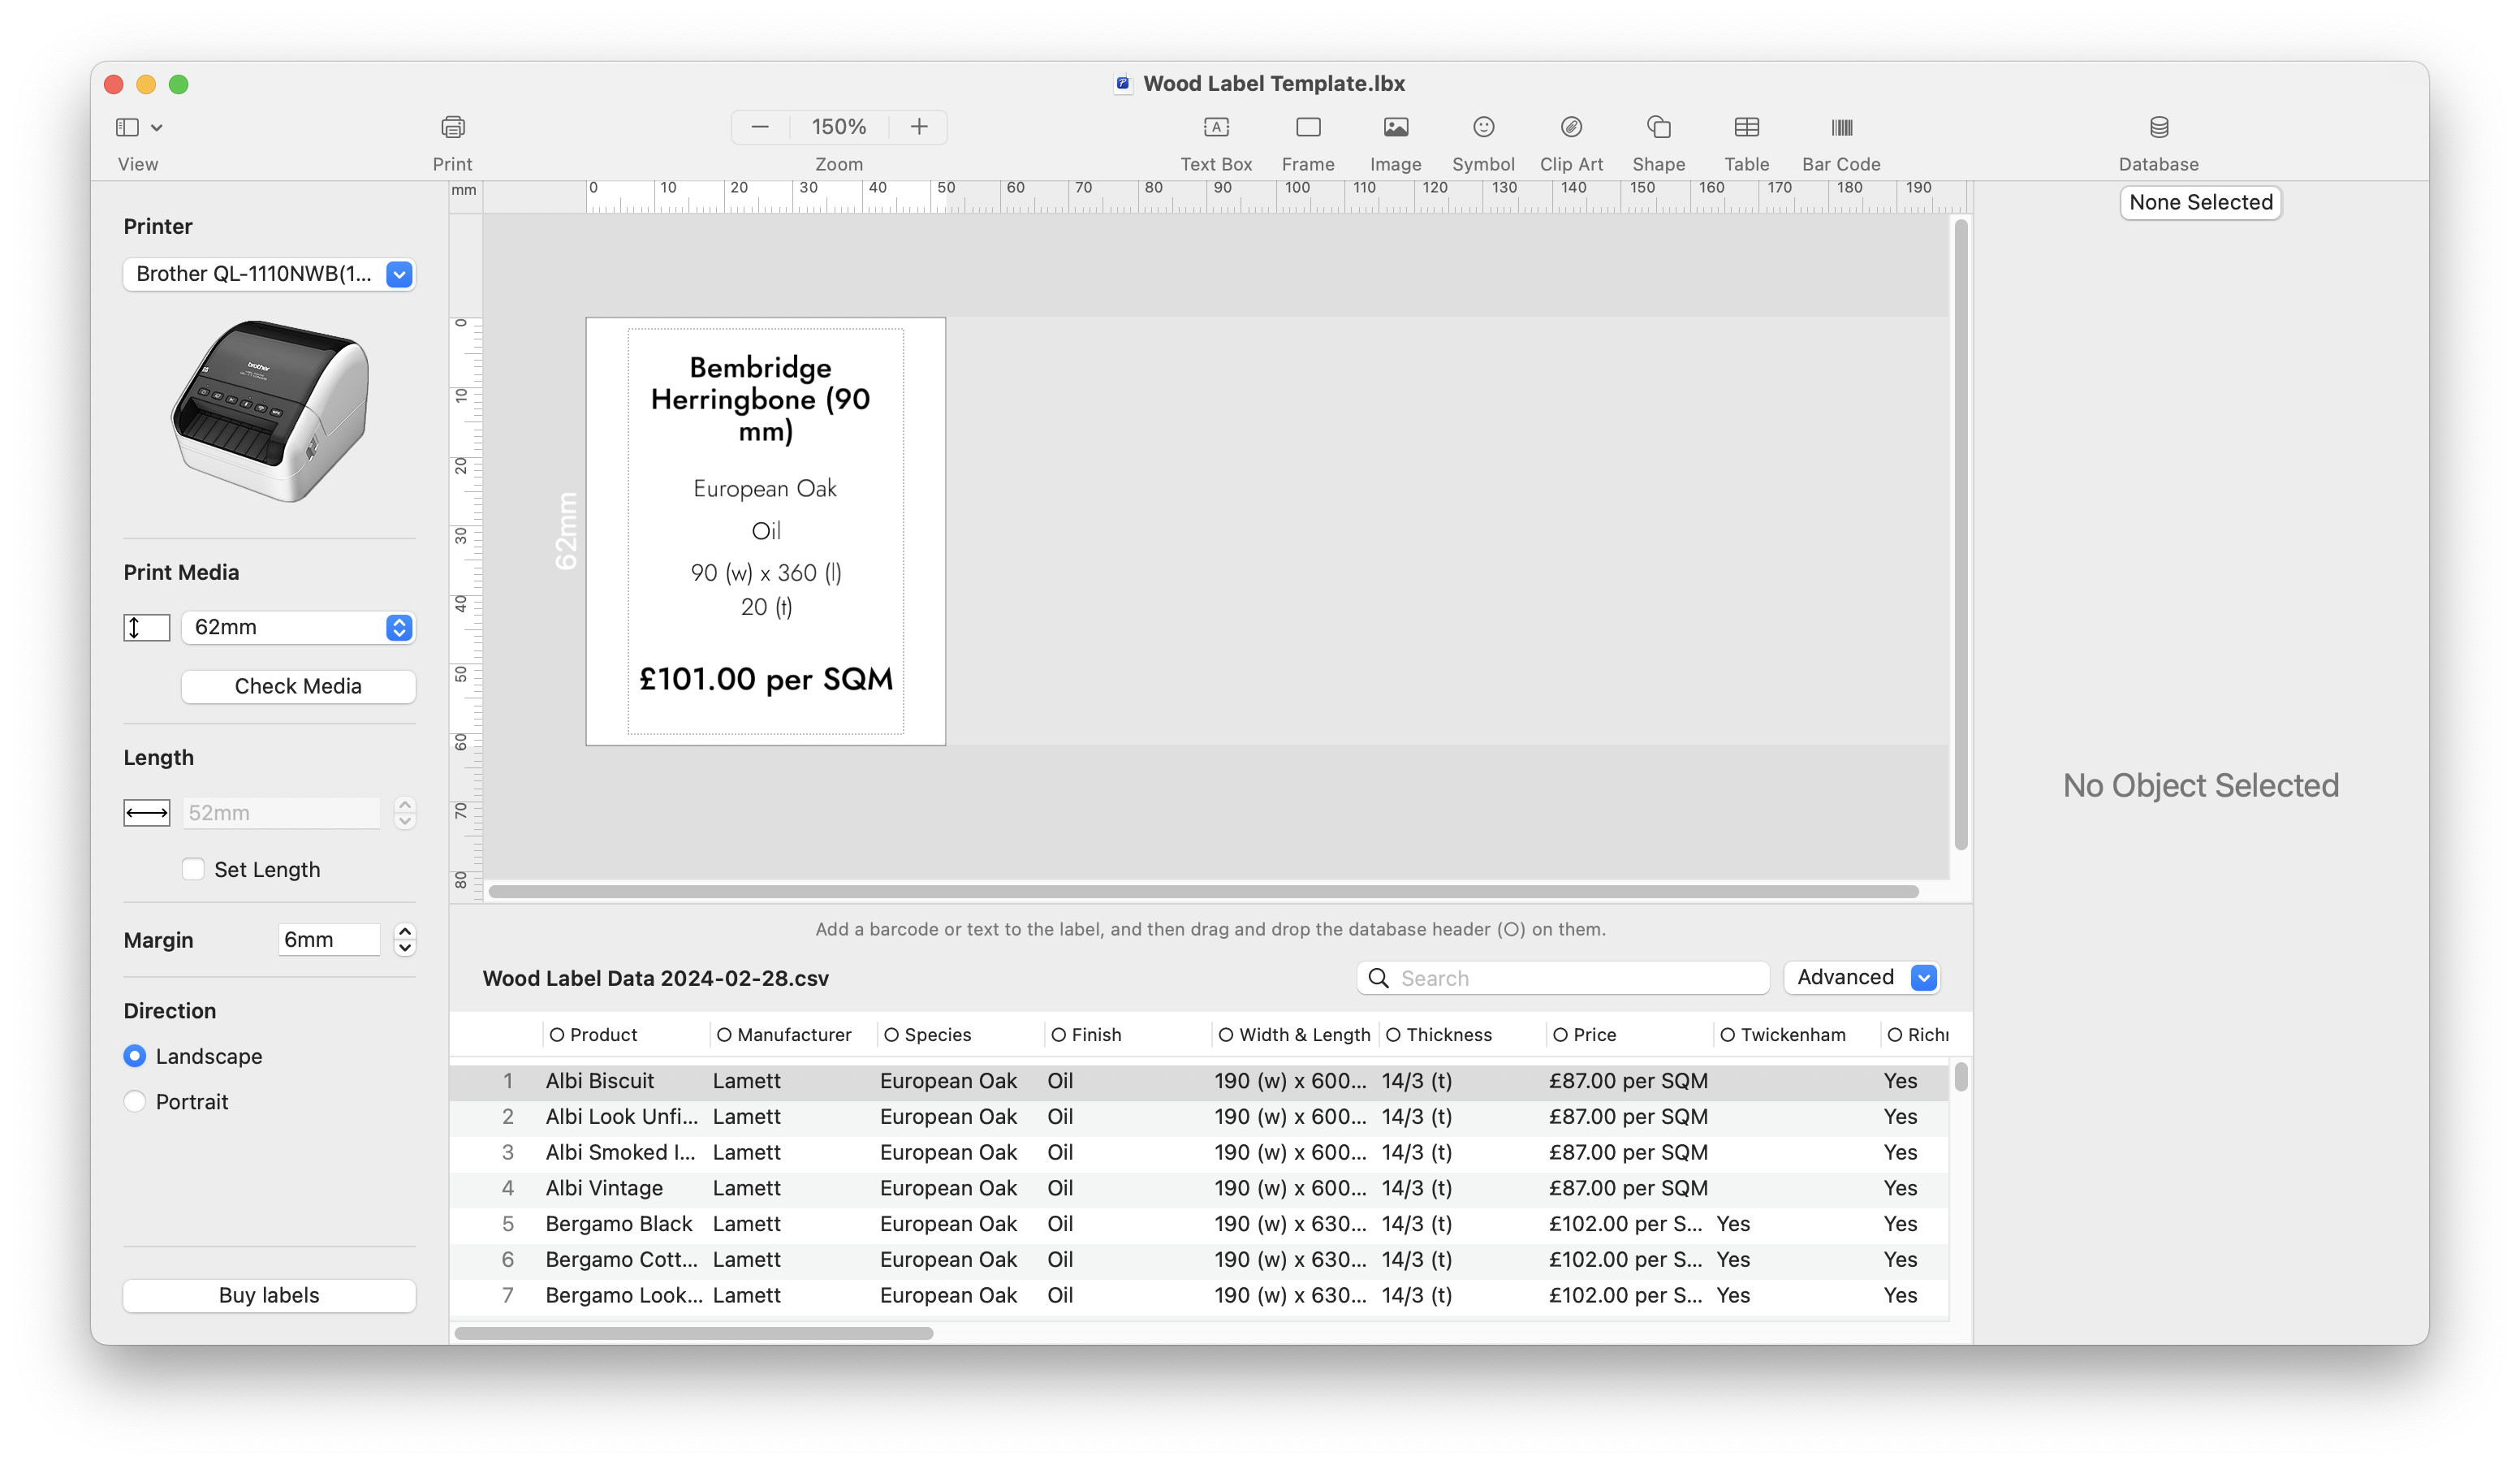
- To assign the data to the right part of the ticket, drag the circle icon next to the column name over the relevant text box. A blue rectangle will appear around the text box to show which one you are applying the data to.
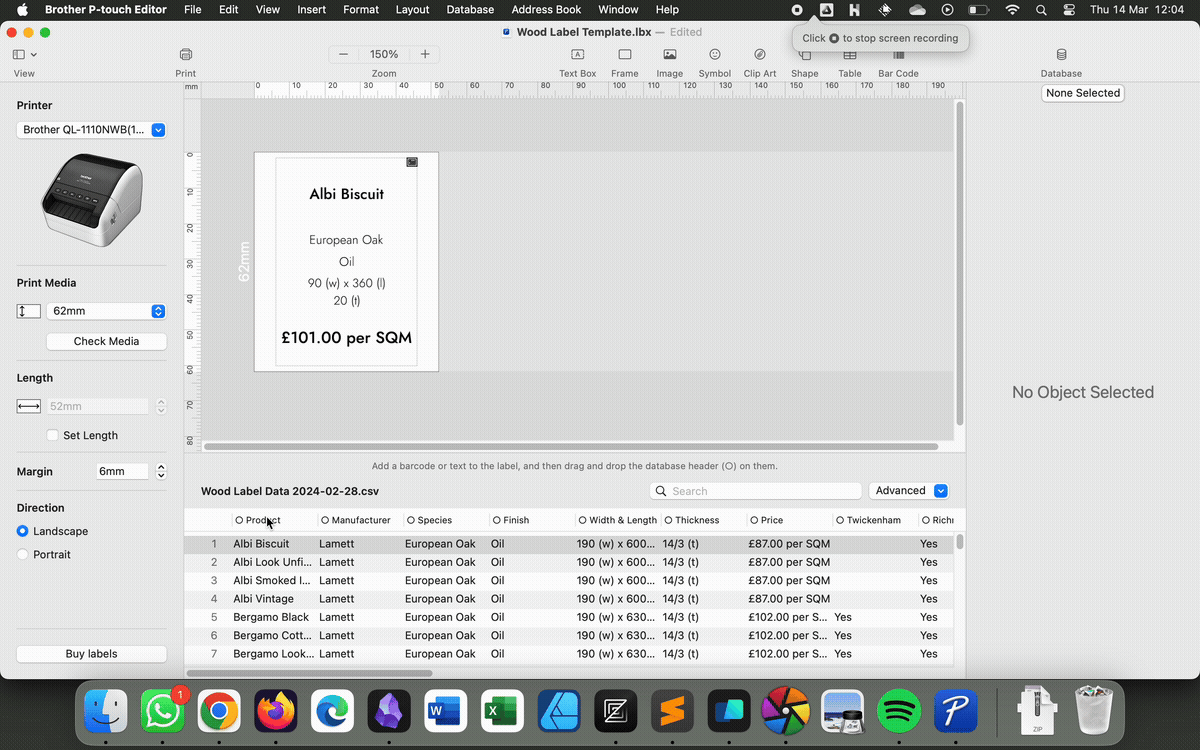
- If you click on a product in the lower panel, the information shown in the template should change to show the relevant information. You can scroll through the products using the up and down arrow keys.
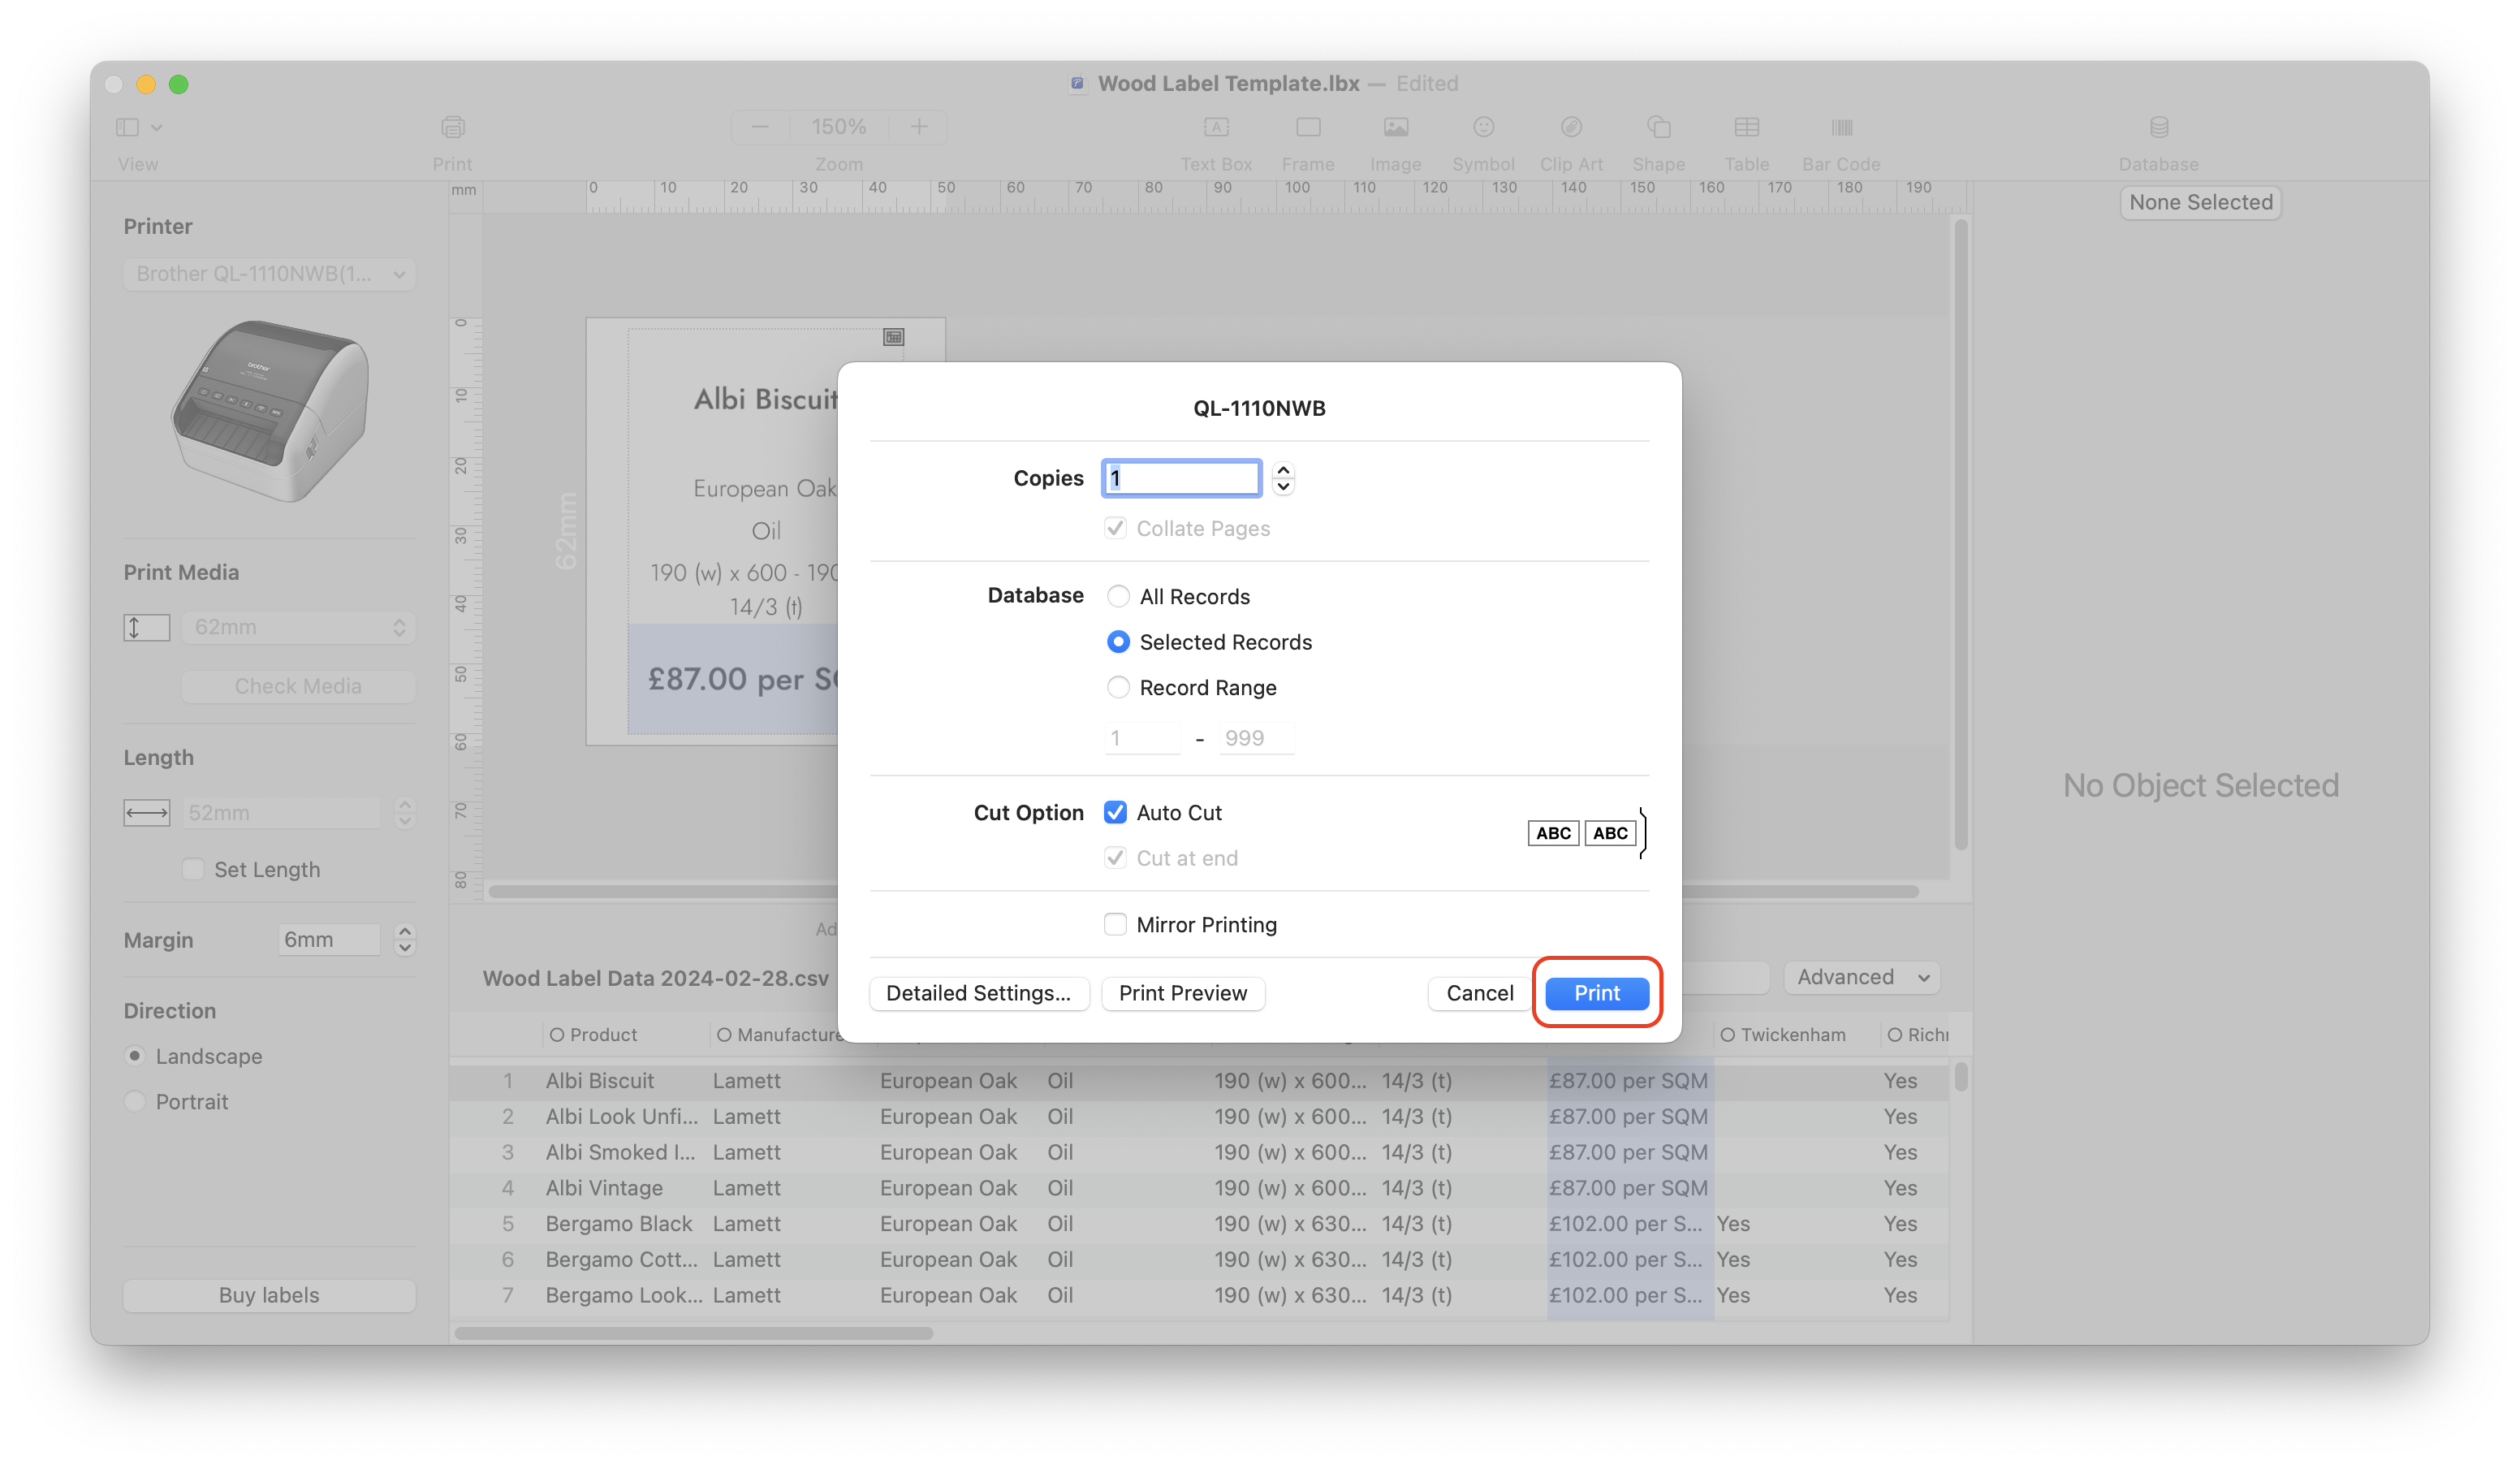
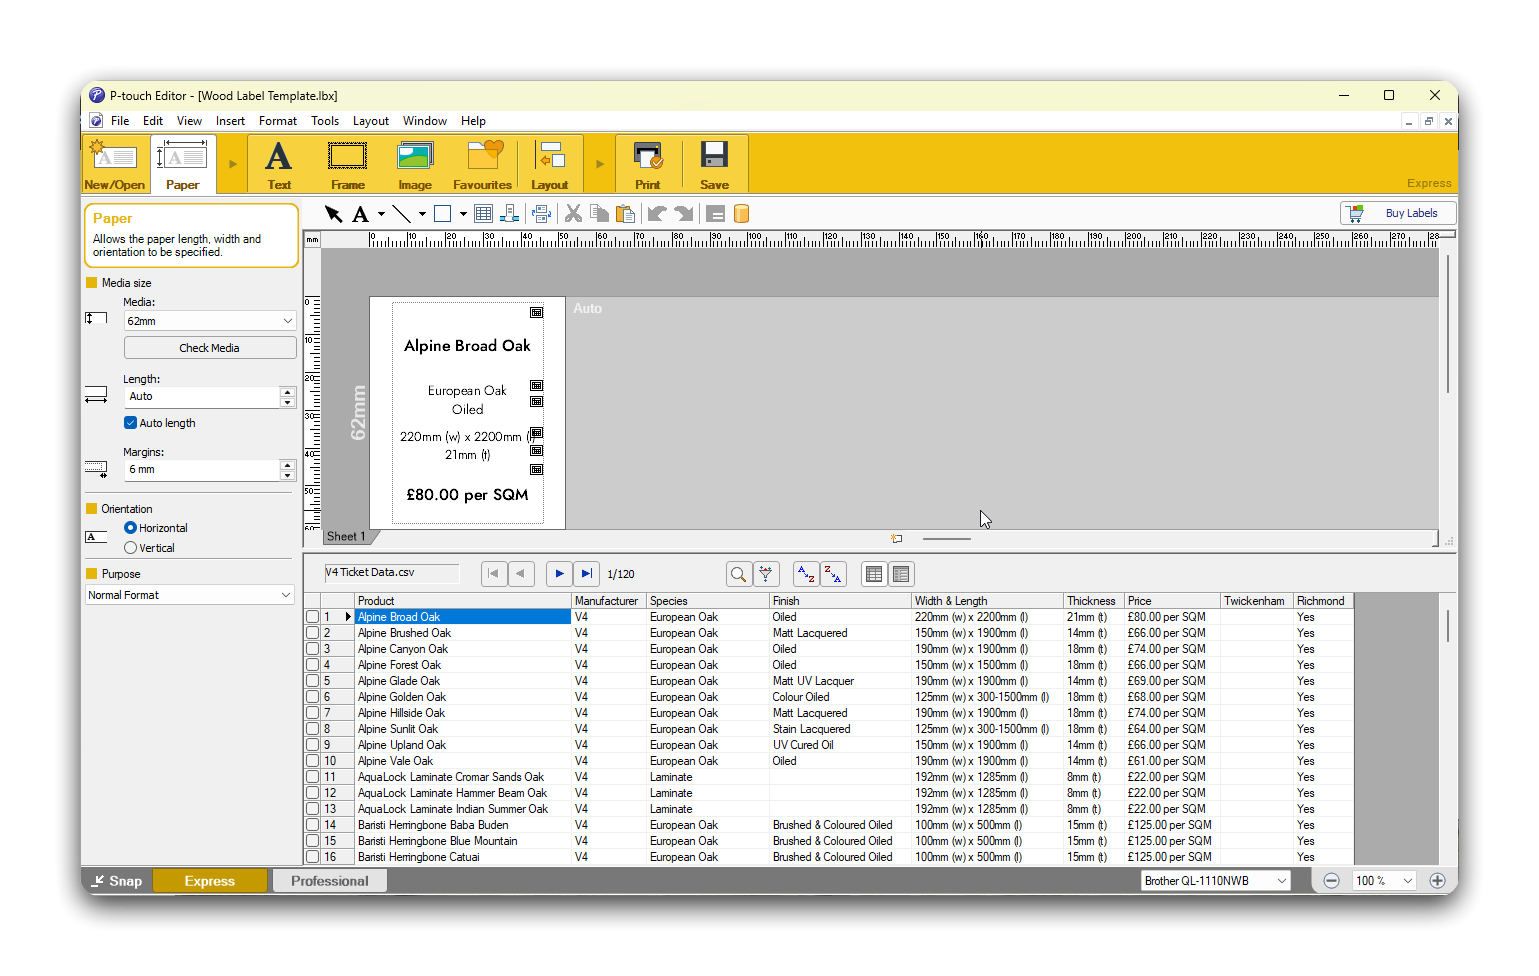
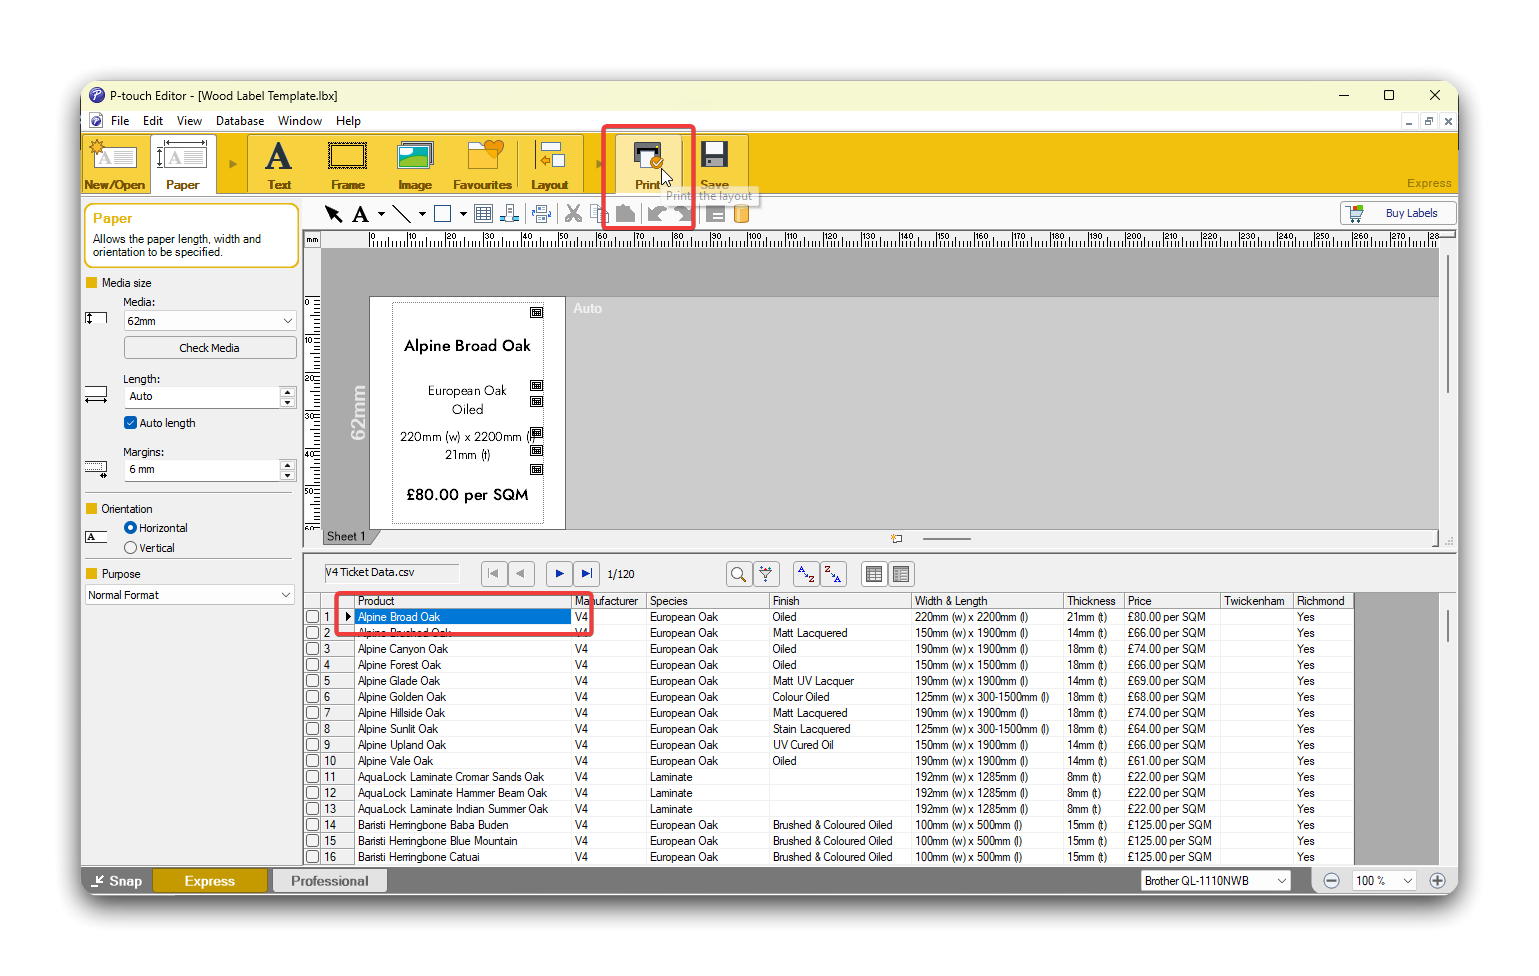
- To print a label, select the product - then click the File menu in the taskbar and select Print.

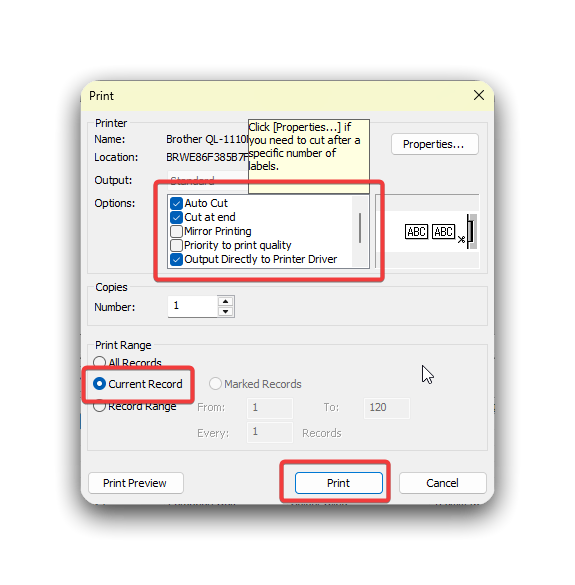
- This will open the Print dialogue box. Make sure that Auto Cut and Selected Records are selected, and click the Print button.
Windows
Section titled “Windows”Prerequisites
Section titled “Prerequisites”In order to generate labels, you’ll need to make sure you have the following installed:
- Google Drive
- Jost font
- Brother Label Printer Drivers
- Brother P-Touch Editor
Your computer should have been set up with the above before it was issued.
Install Google Drive
Section titled “Install Google Drive”- Open Google Chrome and navigate to the Google Drive download page.
- Click the Download Drive for desktop button.
- When the download has completed, click the download icon in the top right corner; then double click the file to start the installation process.
- The Google Drive setup screen should appear. Follow the steps and login with your Woven & Woods Google Workspace details. If asked whether you want to backup an local folder, click skip.
- After a few seconds, you should now see a Google Drive folder in your Home folder.
Install Jost Font
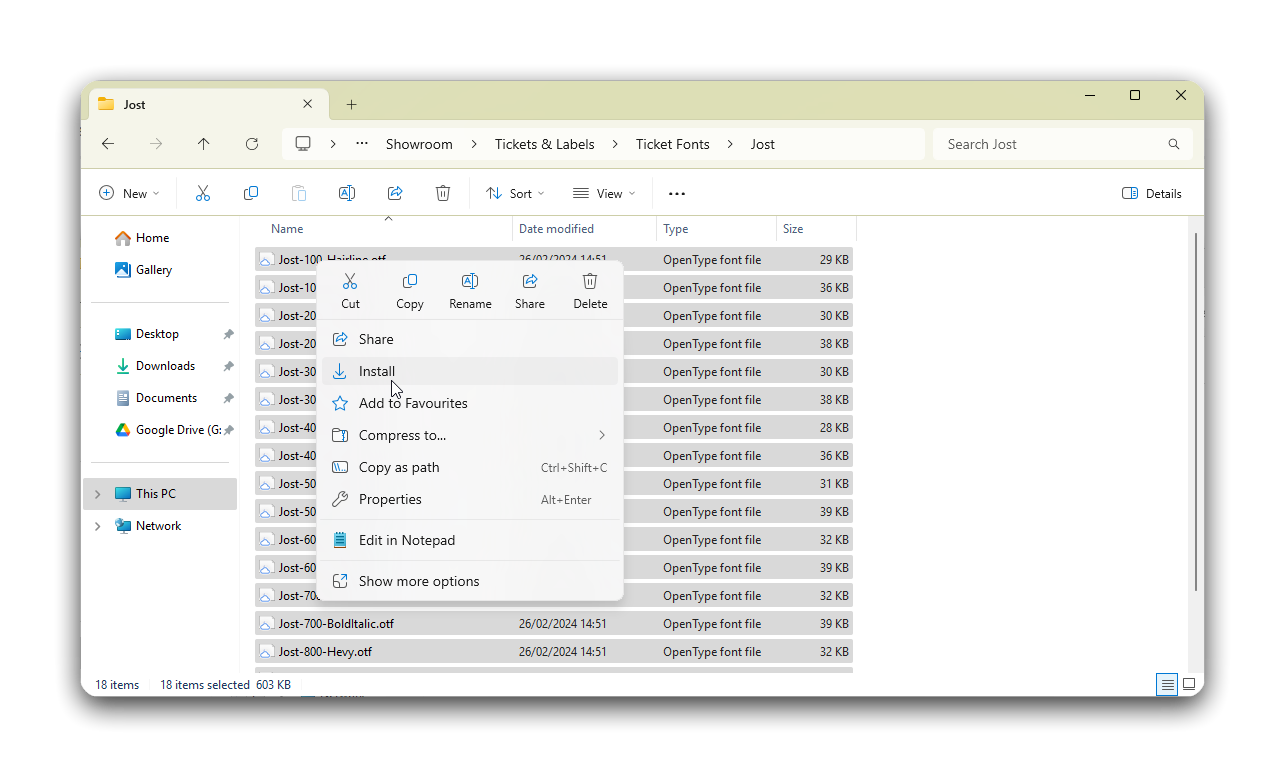
Section titled “Install Jost Font”- Open Explorer and navigate to
Google Drive/Showrooms/Fonts/Jost. - Highlight all the items in the folder with Ctrl+A, right click and select Install.
- If you have the Brother P-touch Editor open, you will need to close it completely and re-open it to use the new font.
Install the Label Printer
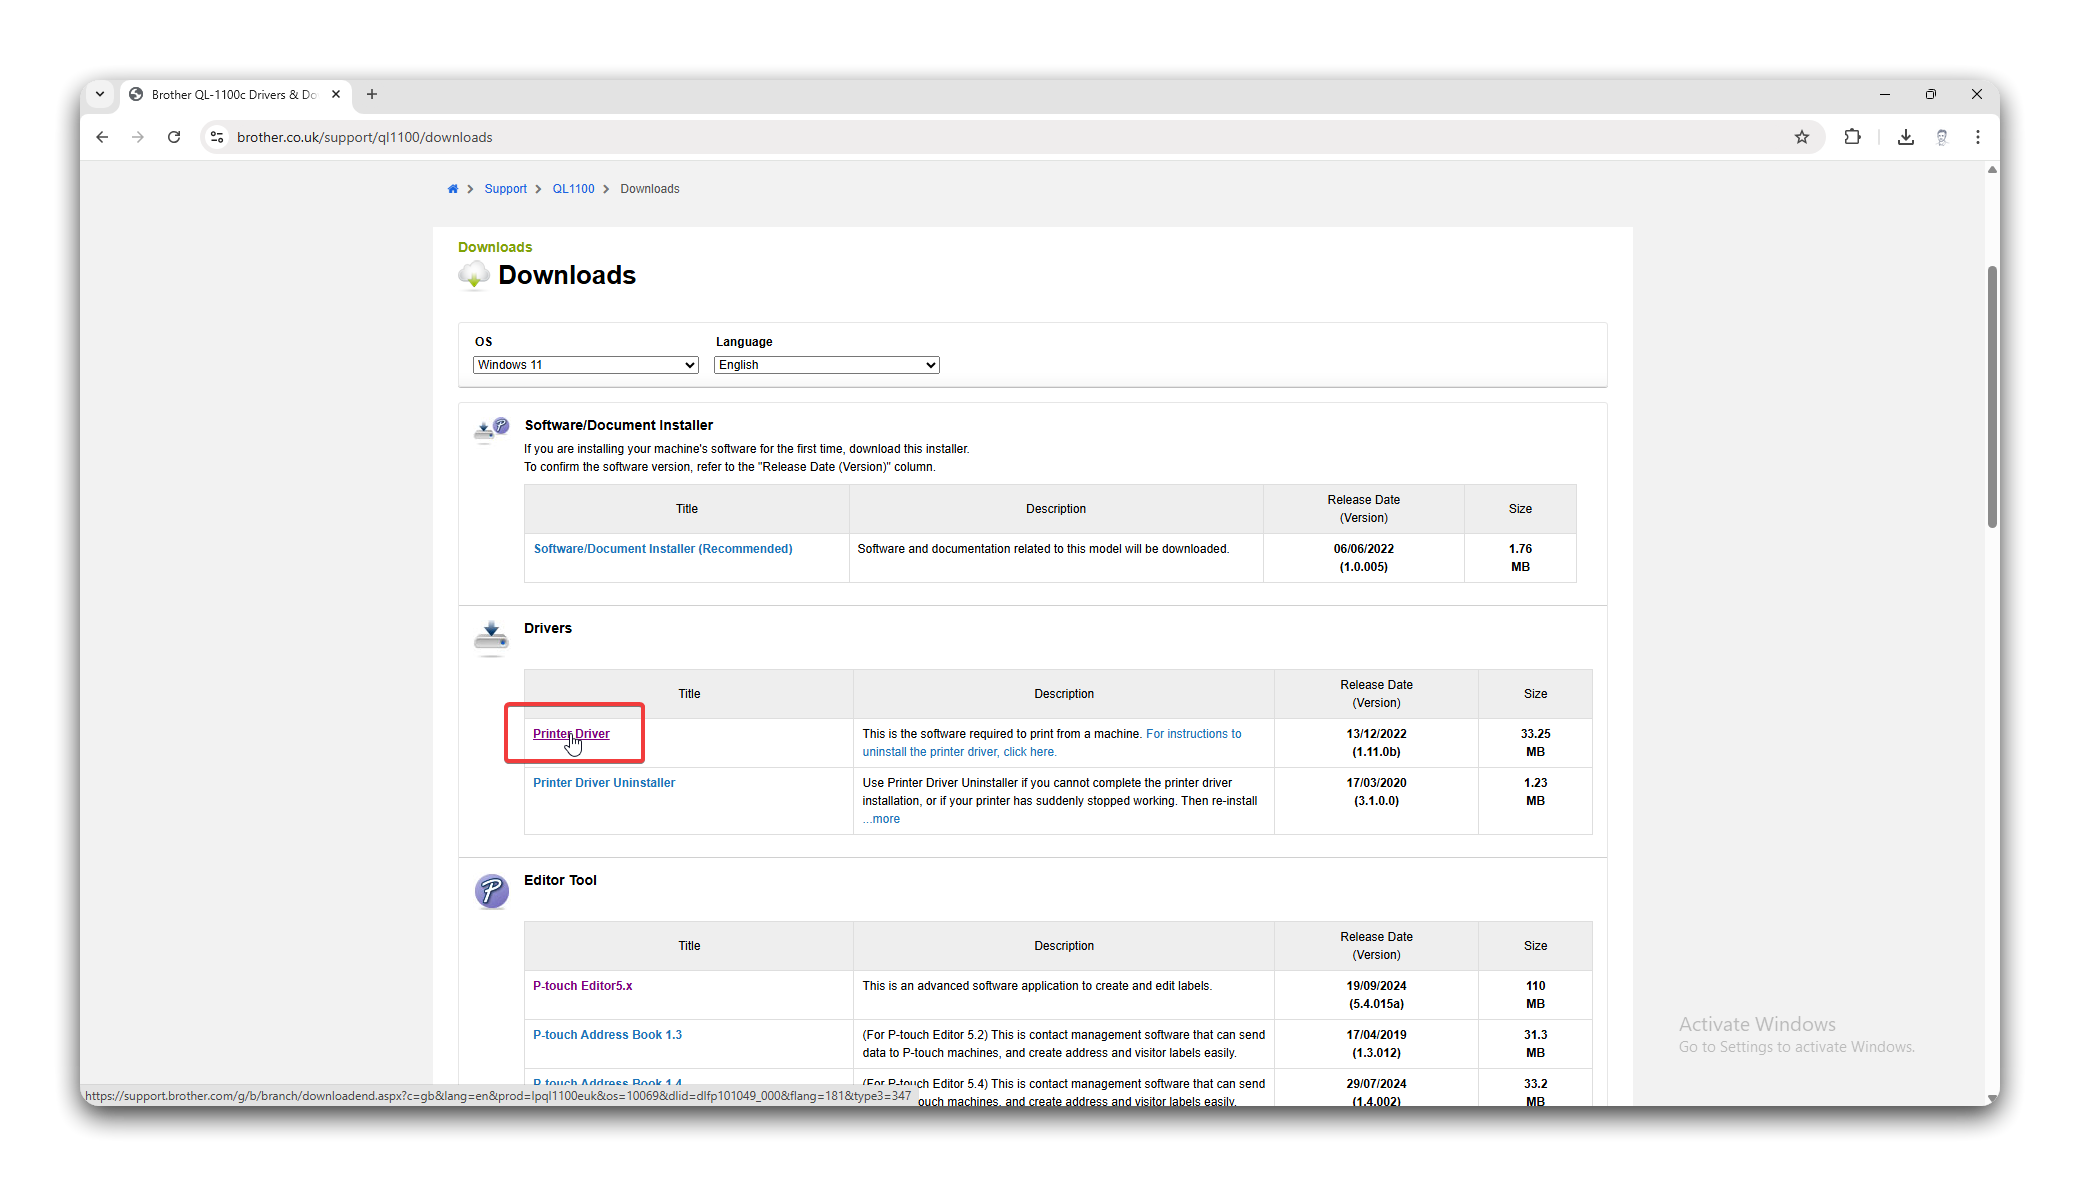
Section titled “Install the Label Printer”- Navigate to https://www.brother.co.uk/support/ql1100/downloads, scroll down and select the relevant operating system. This will usually be Windows 11. When done, click OK.

- When the page loads, click the Printer Driver link under the Drivers section.
- Click the Agree to the EULA and Download button.

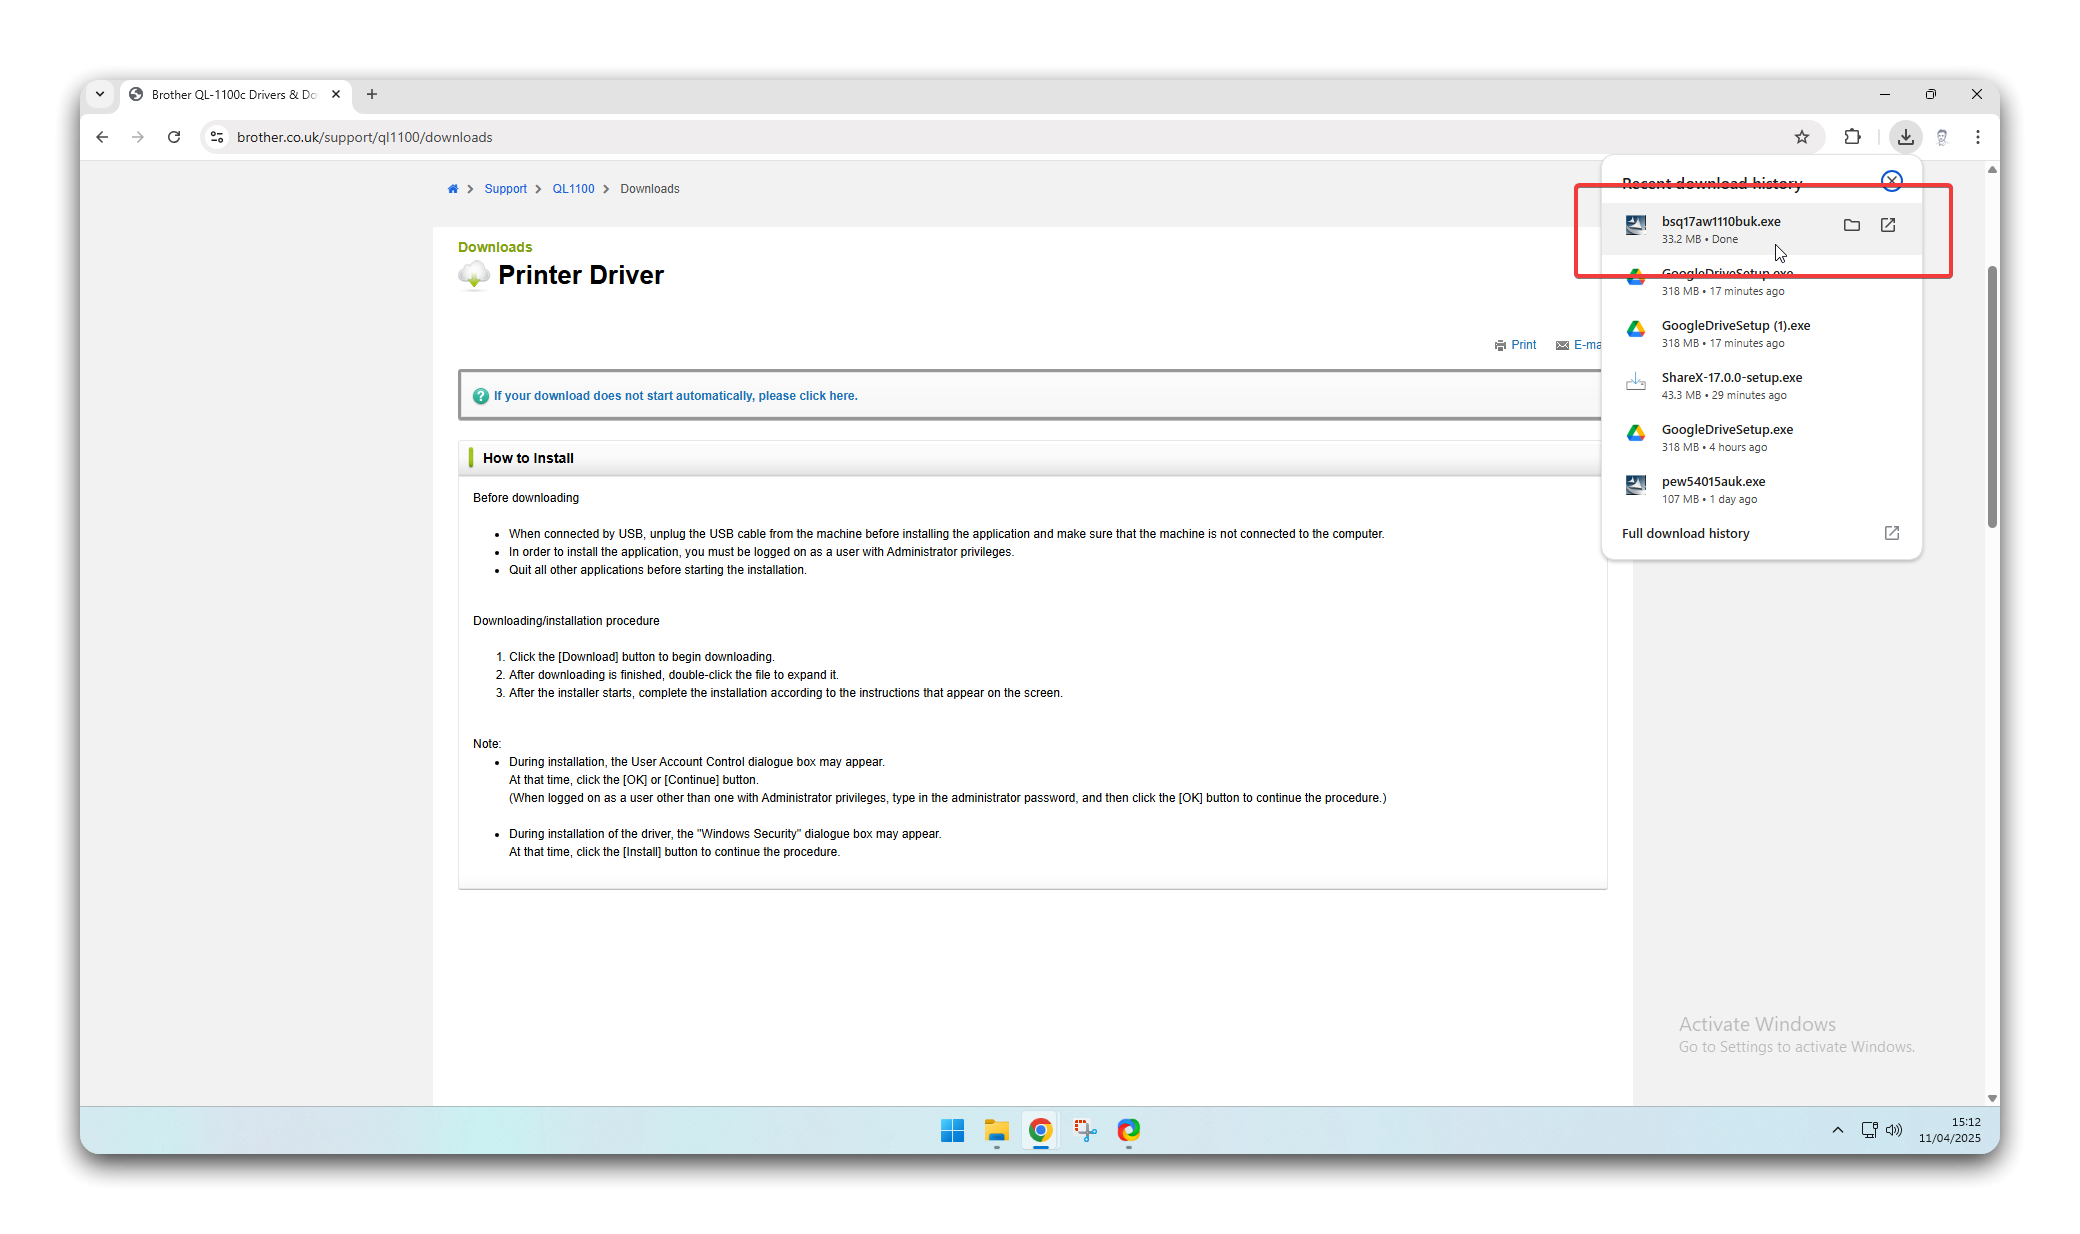
- When the file has downloaded, double click the link that appears in the top-right corner of the window.
- This will start the installation process. If the label printer isn’t switched on, do so now.
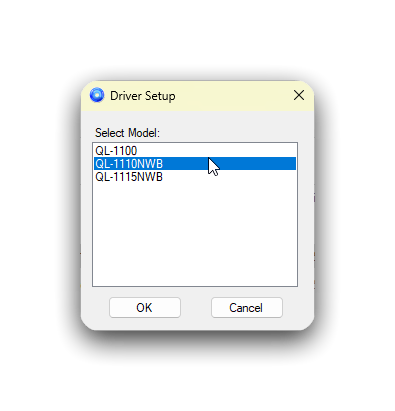
- When you get to this screen, select the option that says QL-1110NWB and click OK.
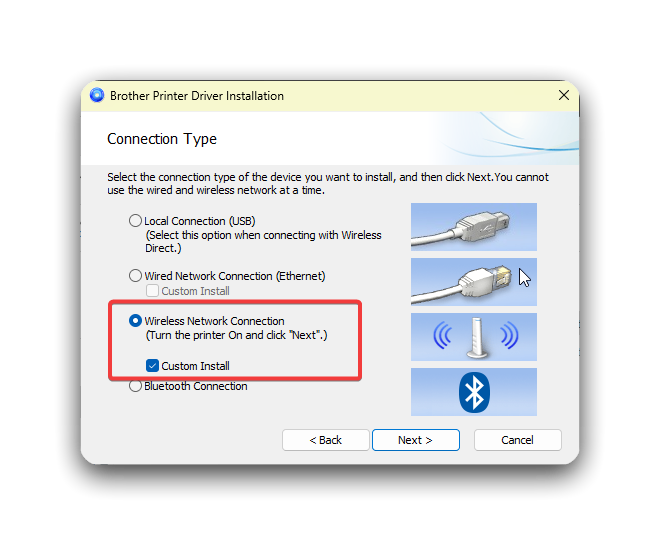
- Select the option that says Wireless Network Connection and then check the box that says Custom Install. Make sure both options are selected, or the installation will fail.
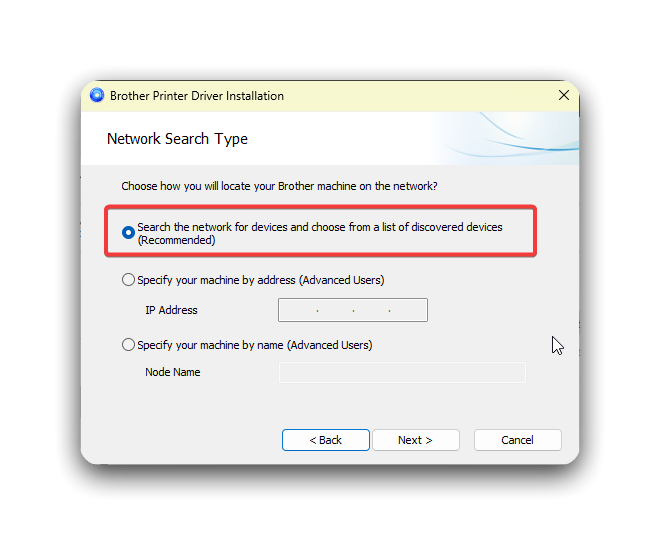
- Select the option that says Search the network….
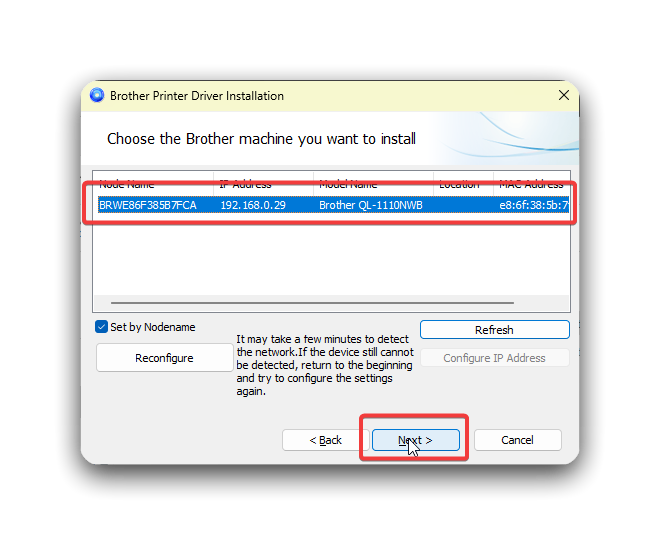
- After a few seconds, the printer should appear in the list. If it doesn’t appear - or you get an error message - make sure that the printer is plugged in, switched on and connected to wifi.
- If all looks ok, select the printer and click OK.
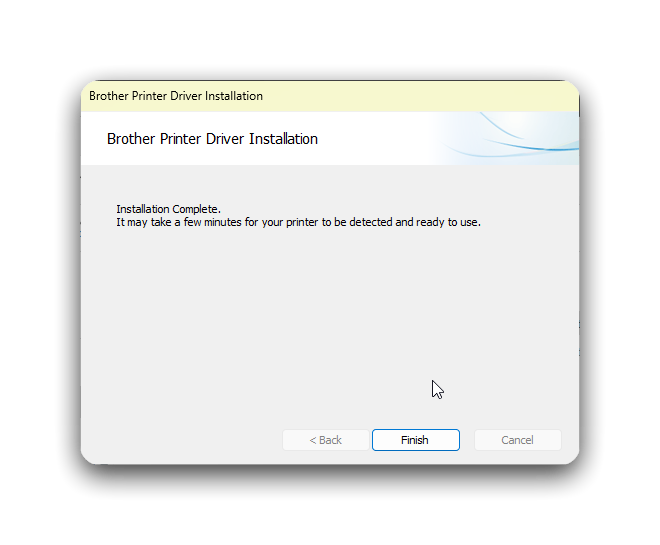
- If everything has gone as planned, you should see a window telling that installation was completed. Click Finish to close the window.
Install the Brother P-Touch Software
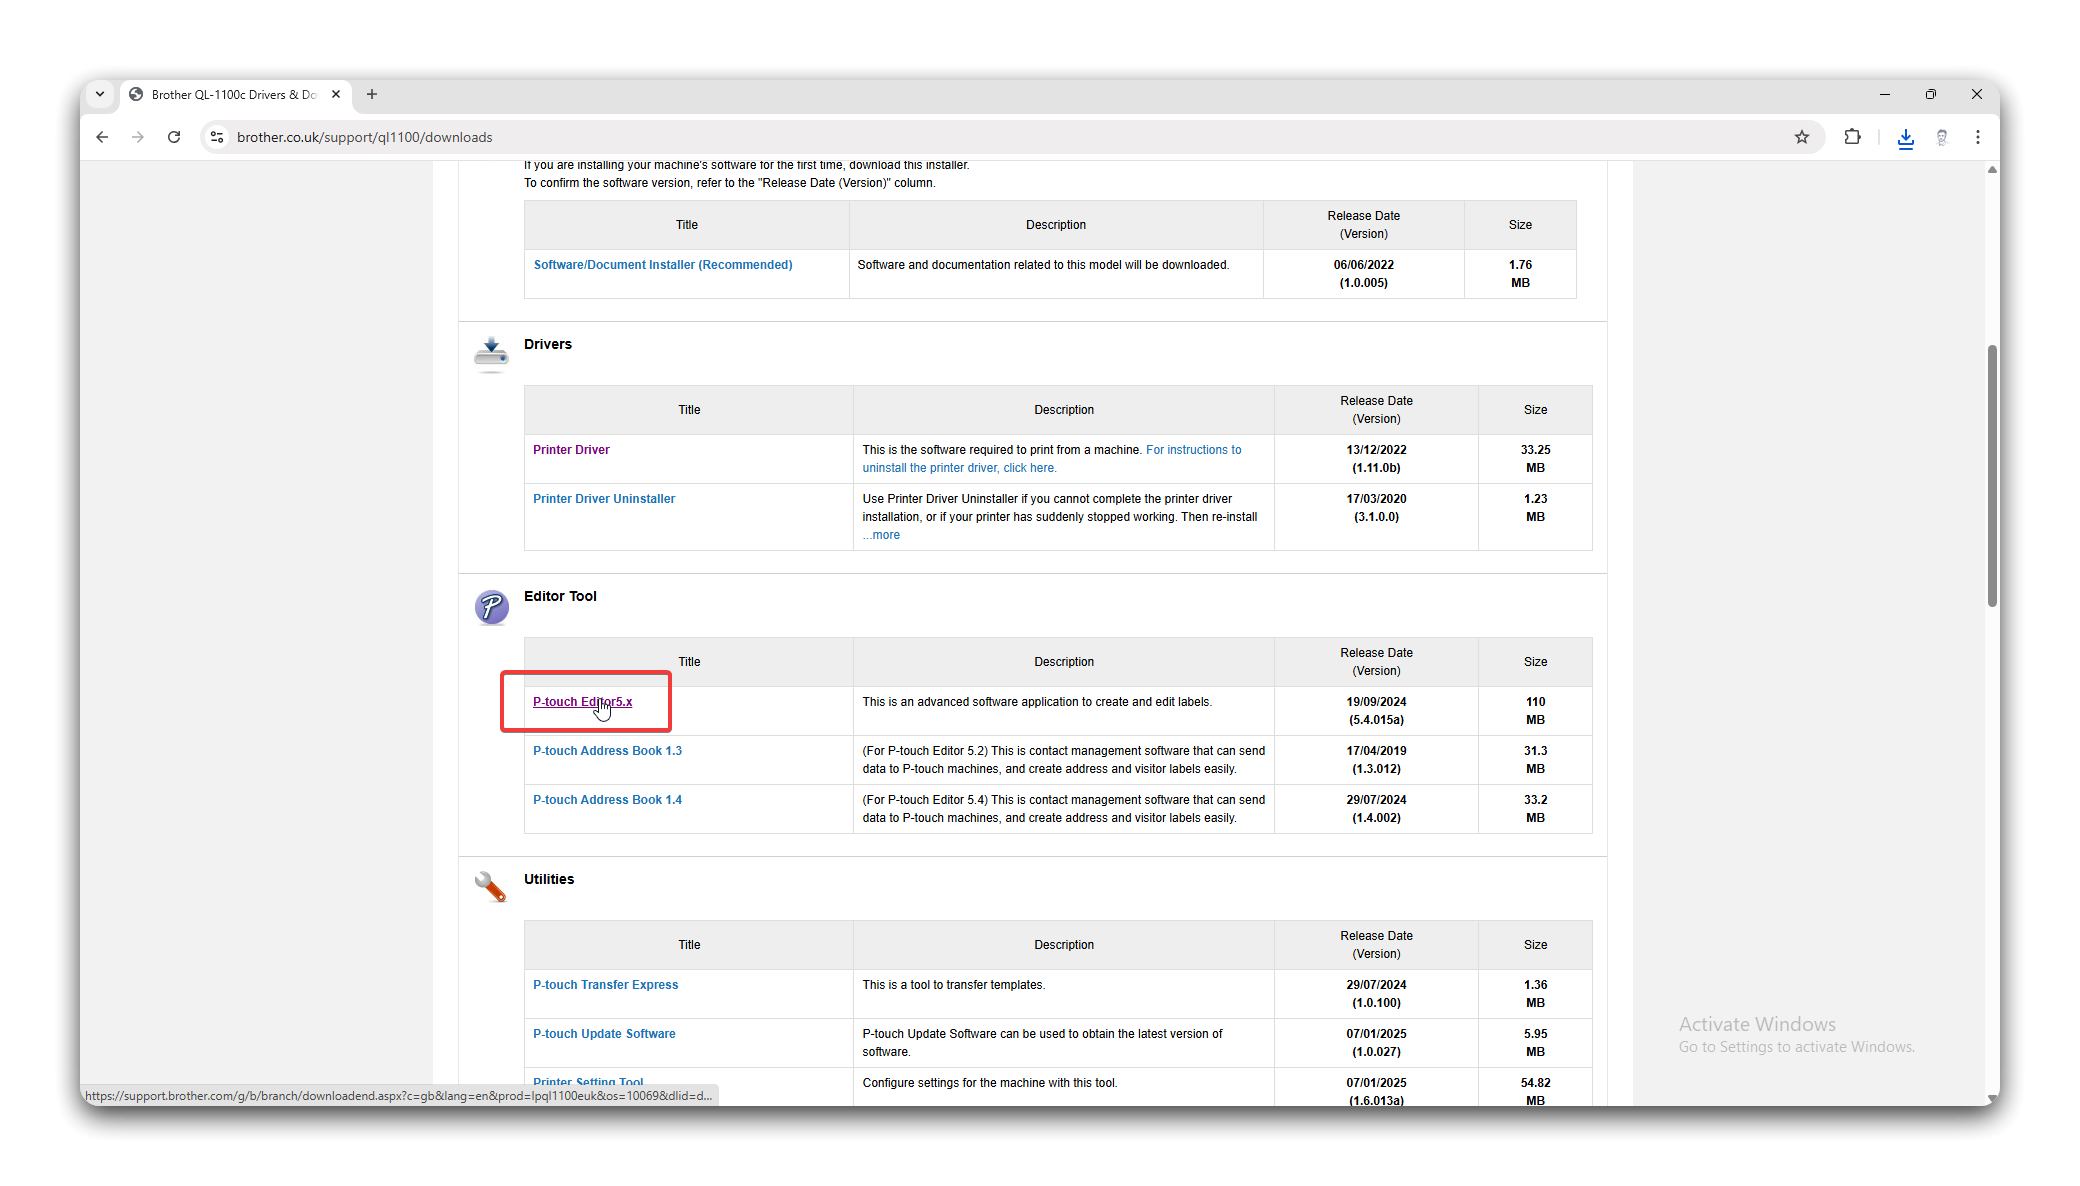
Section titled “Install the Brother P-Touch Software”- Navigate to https://www.brother.co.uk/support/ql1100/downloads, scroll down and select the relevant operating system. This will usually be Windows 11. When done, click OK.

- When the page loads, click the P-touch Editor 5.x link under the Editor Tool section.
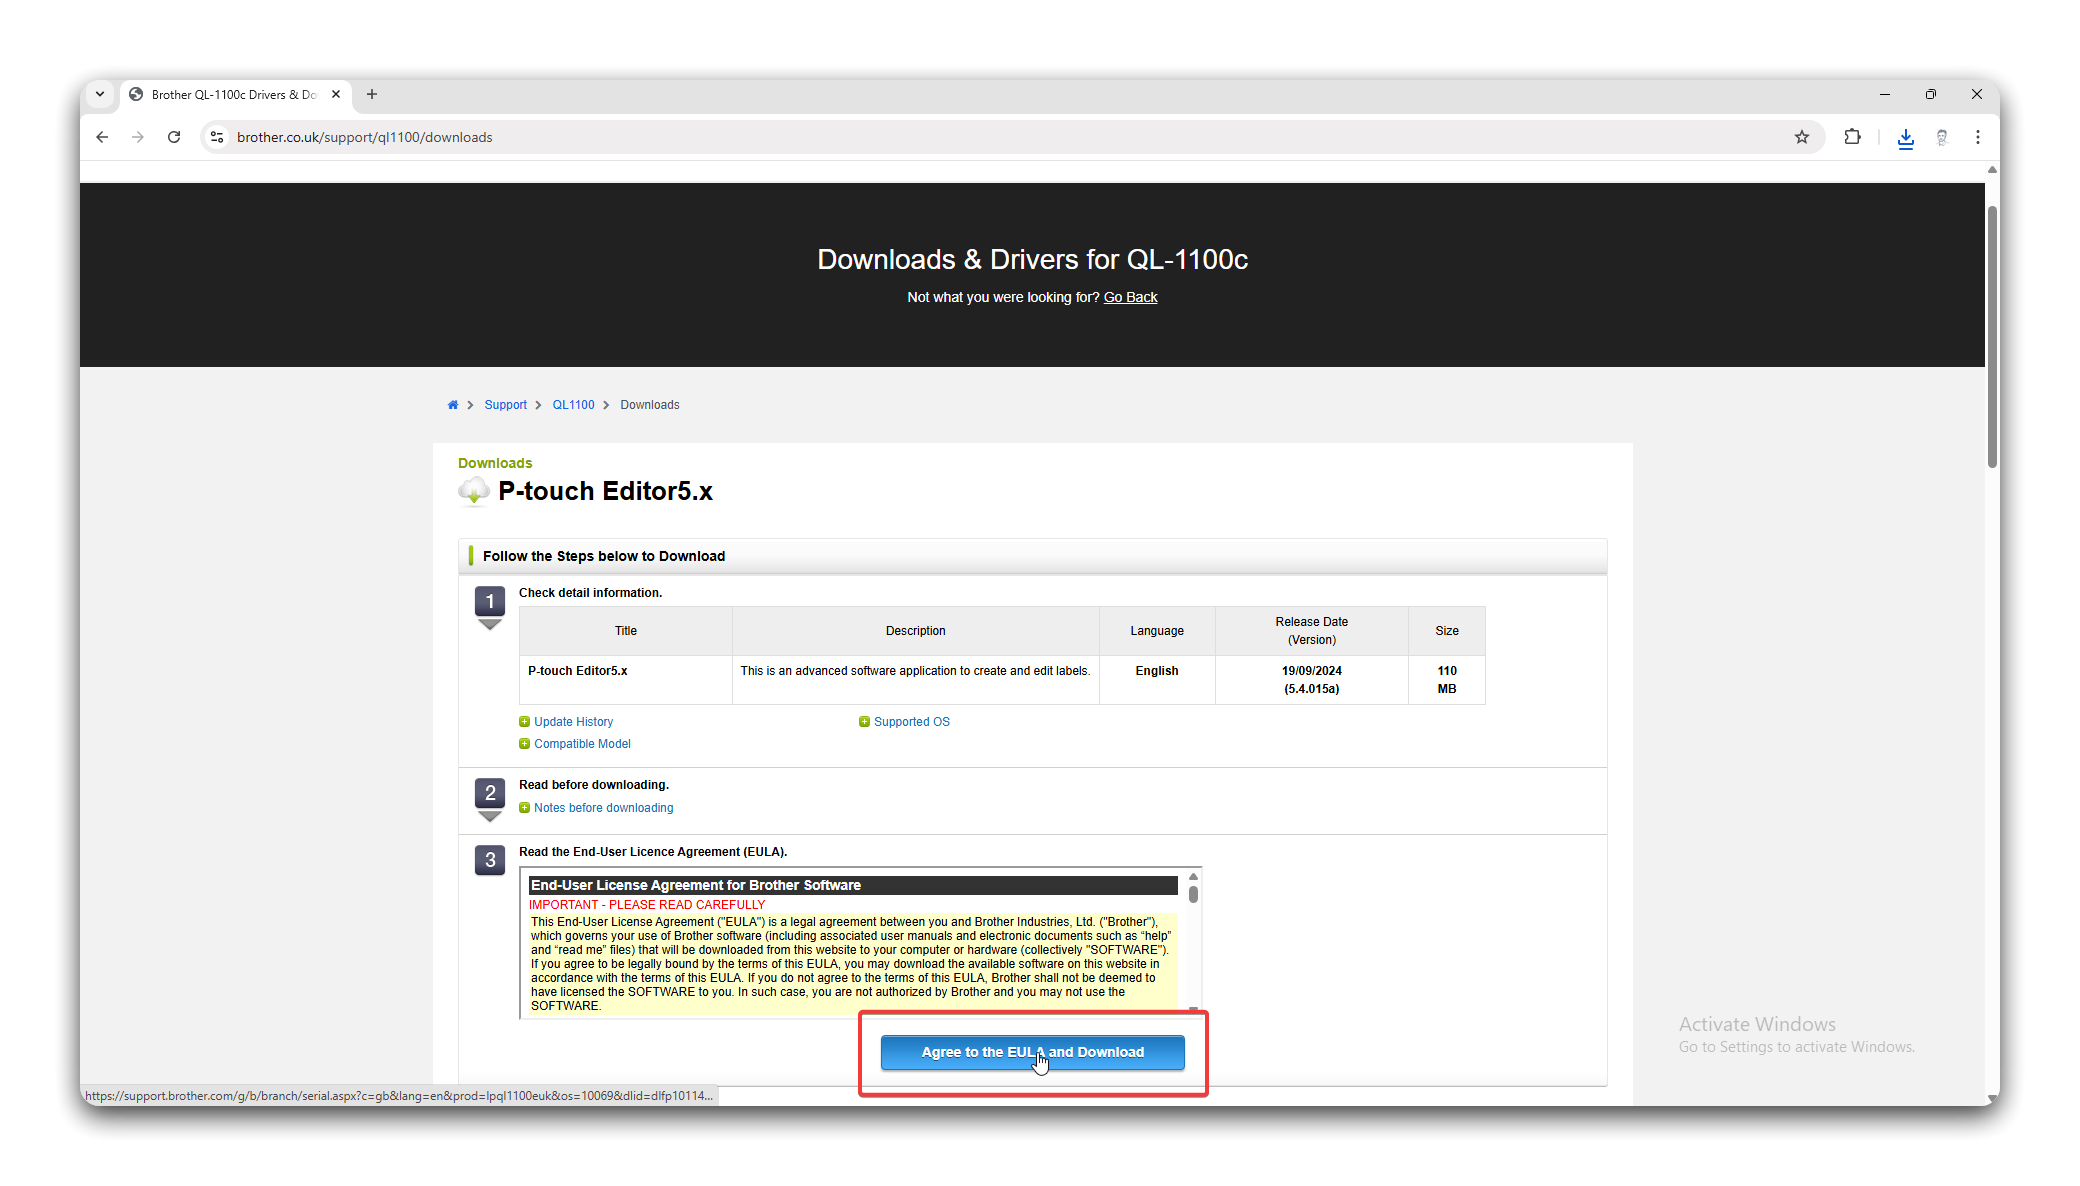
- Click the Agree to the EULA and Download button.
- To download the software, you will need to type in the serial number of a compatible printer. Enter
e0z413395and click Submit.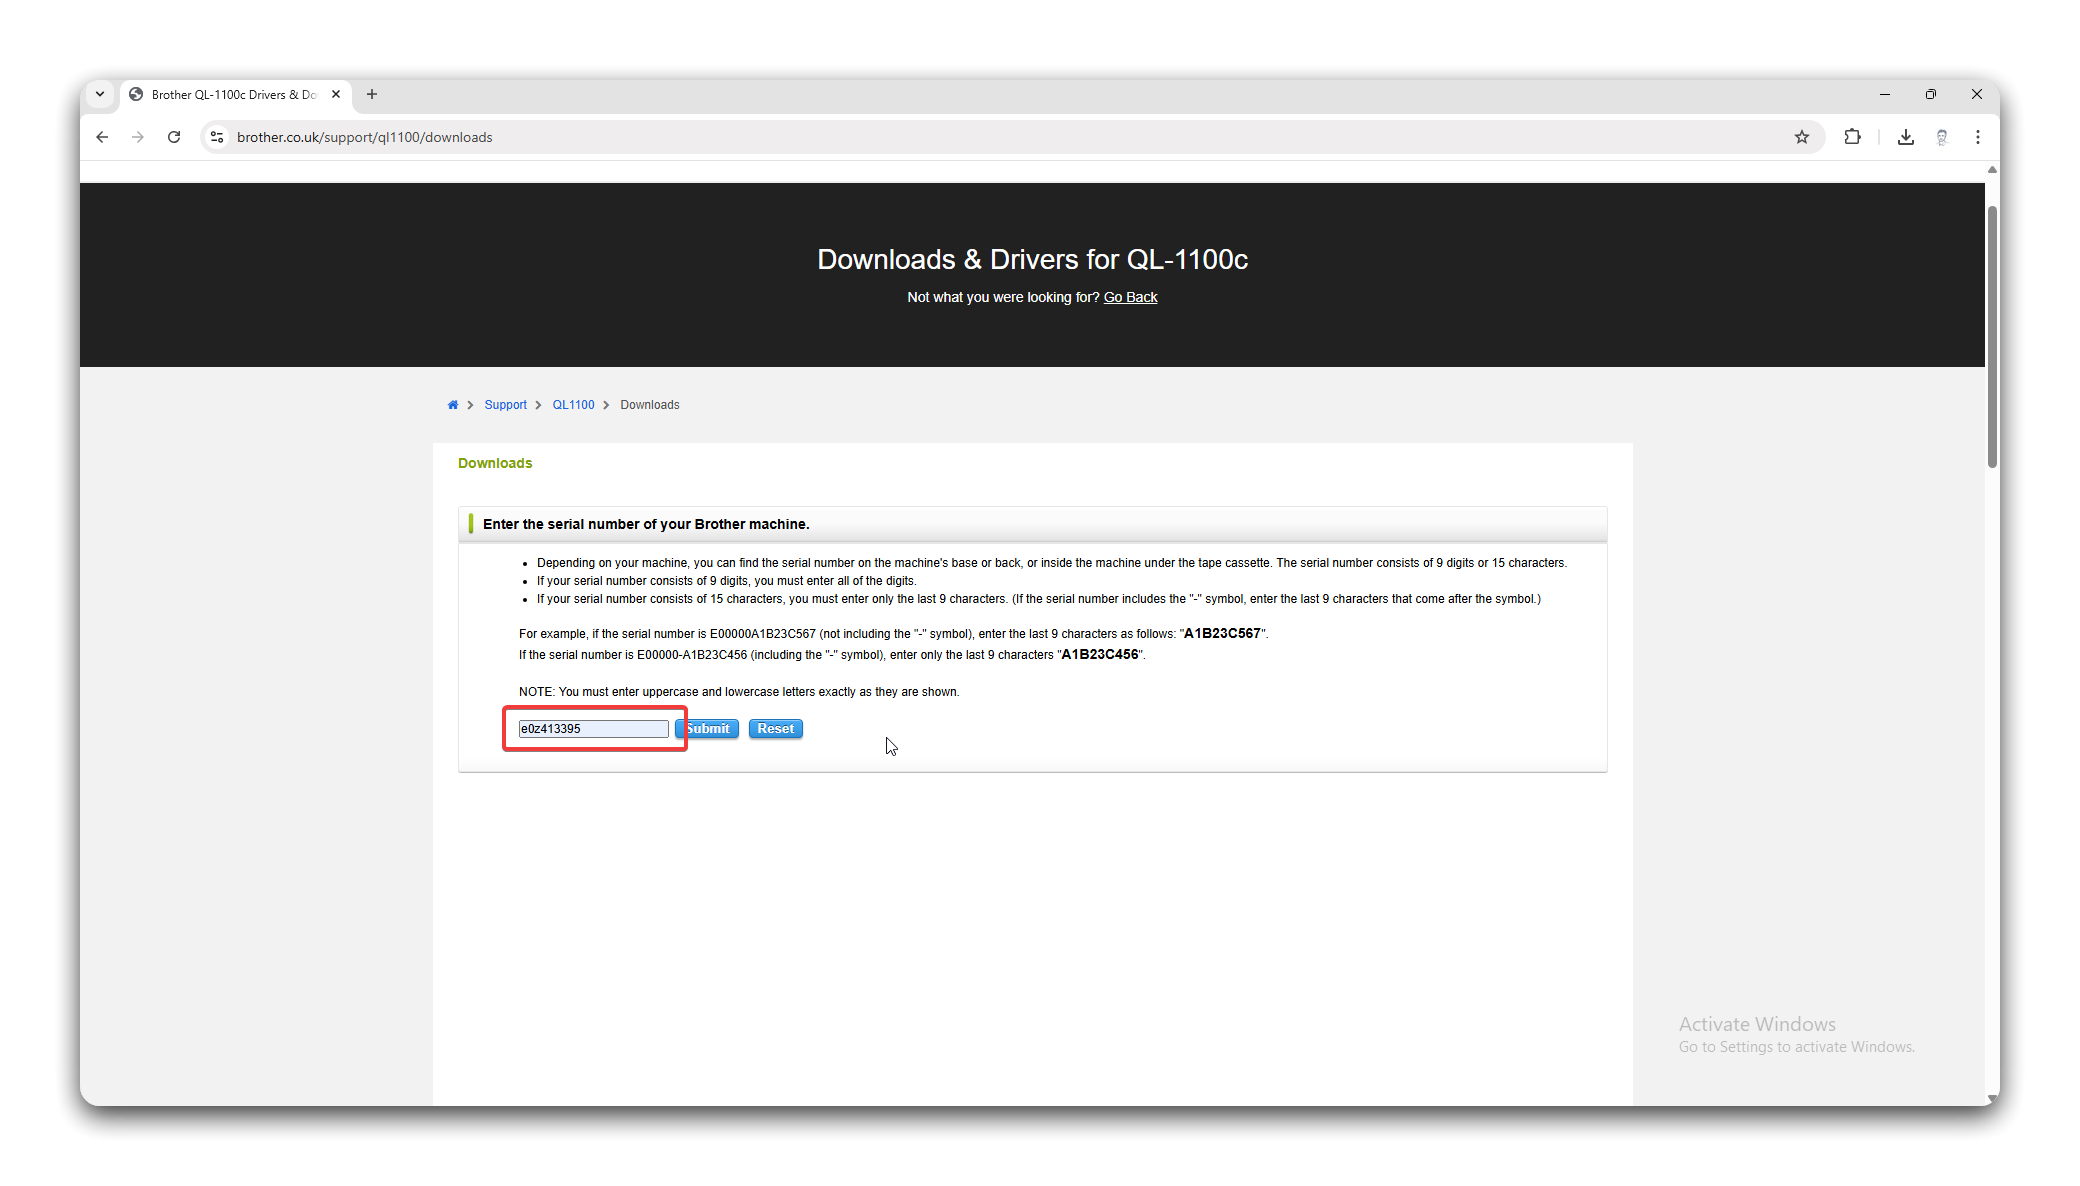
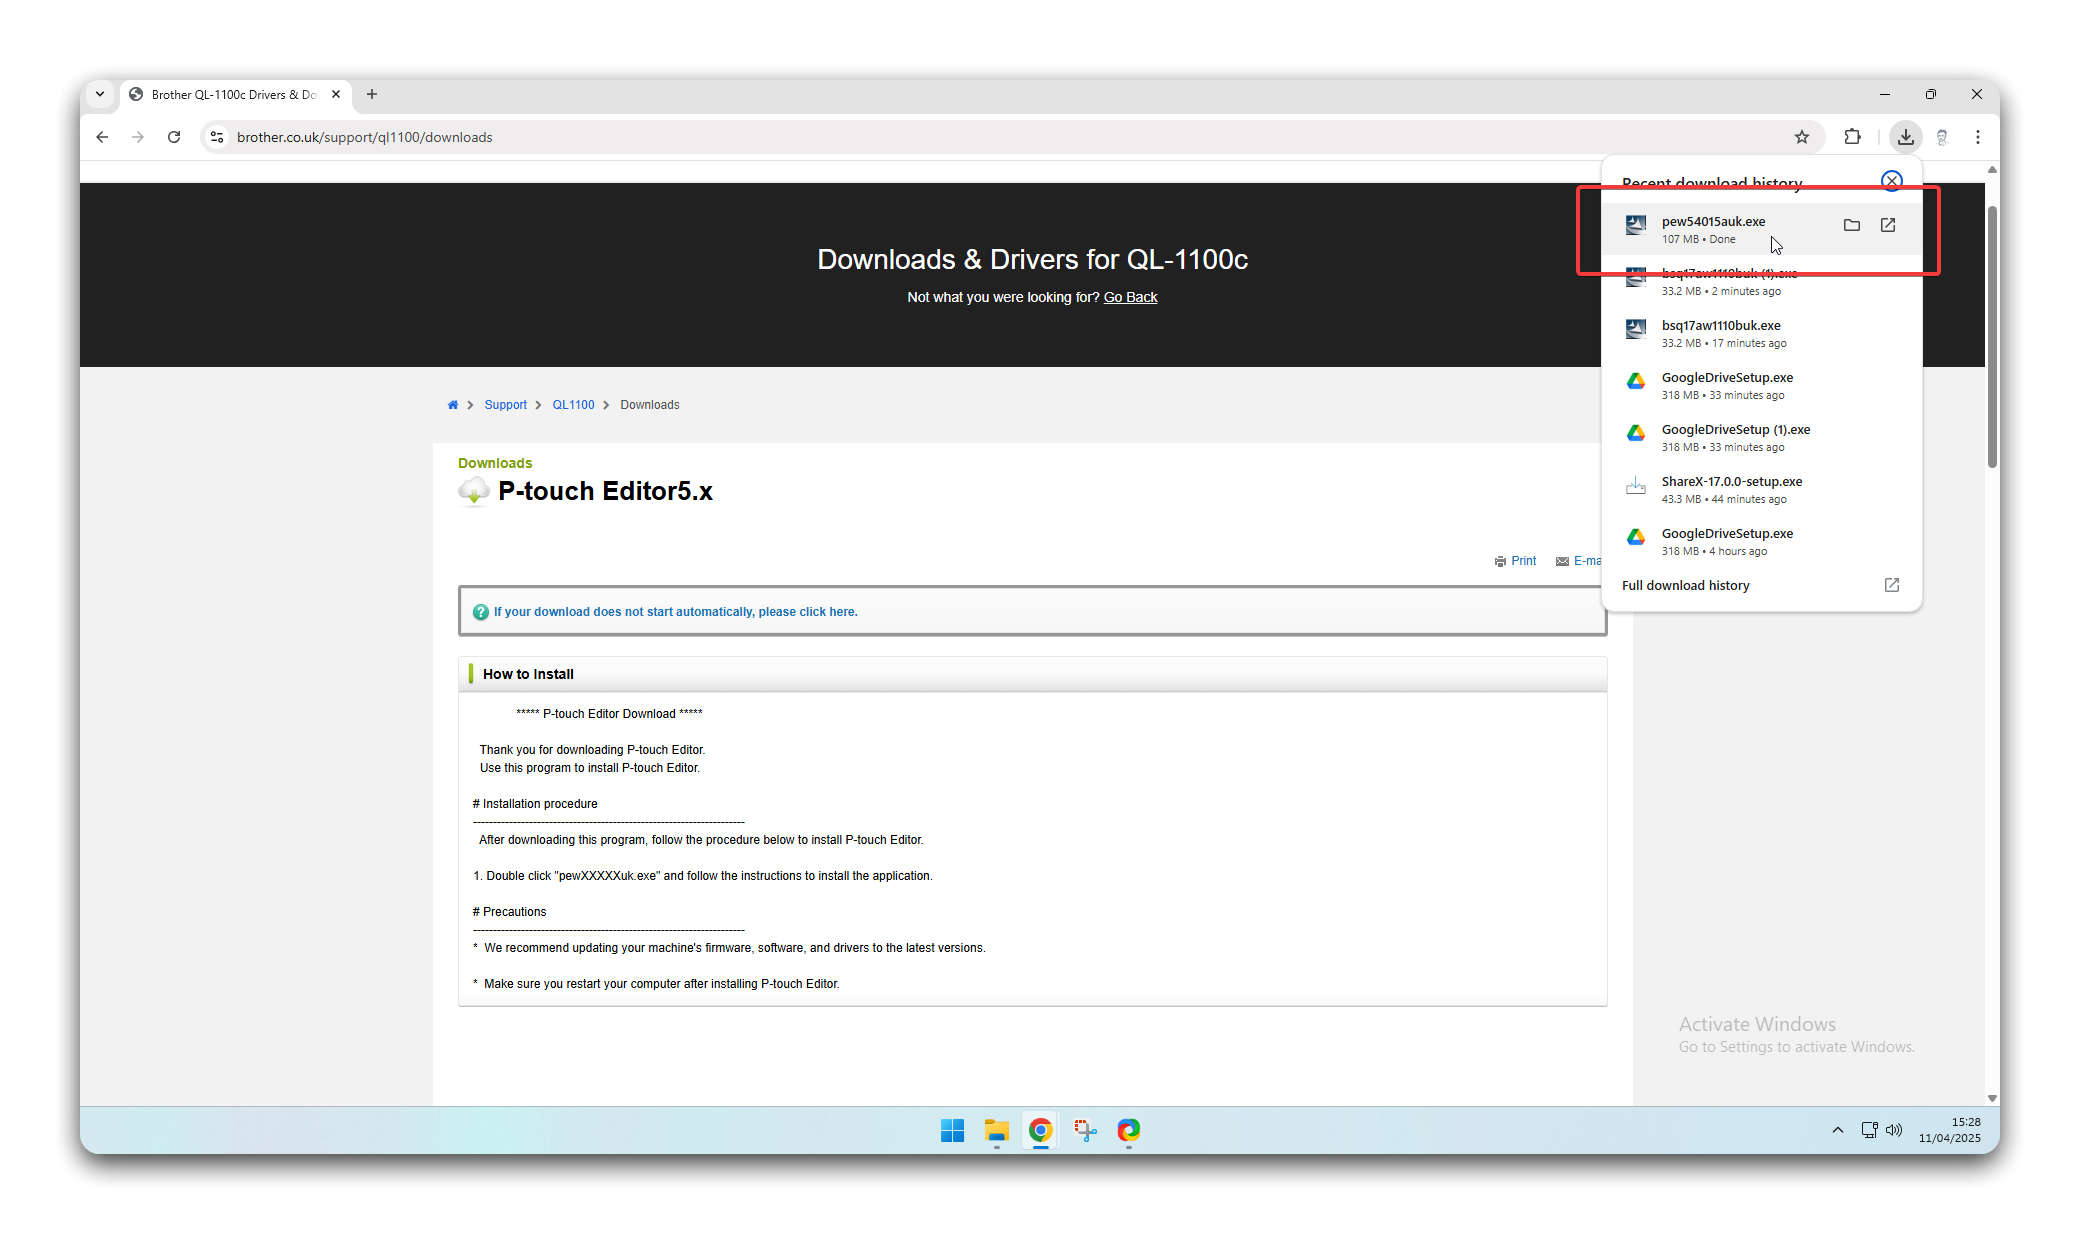
- When the download has completed, double click it in the panel that appears in the top-right corner of the screen.
- When the installer loads, click Install and wait for it to finish.
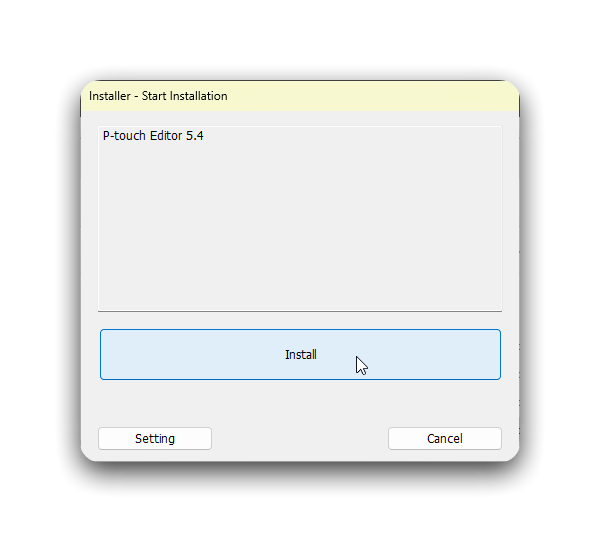
- When the installation completes, click Finish to exit.

Generate Tickets
Section titled “Generate Tickets”Open the Template
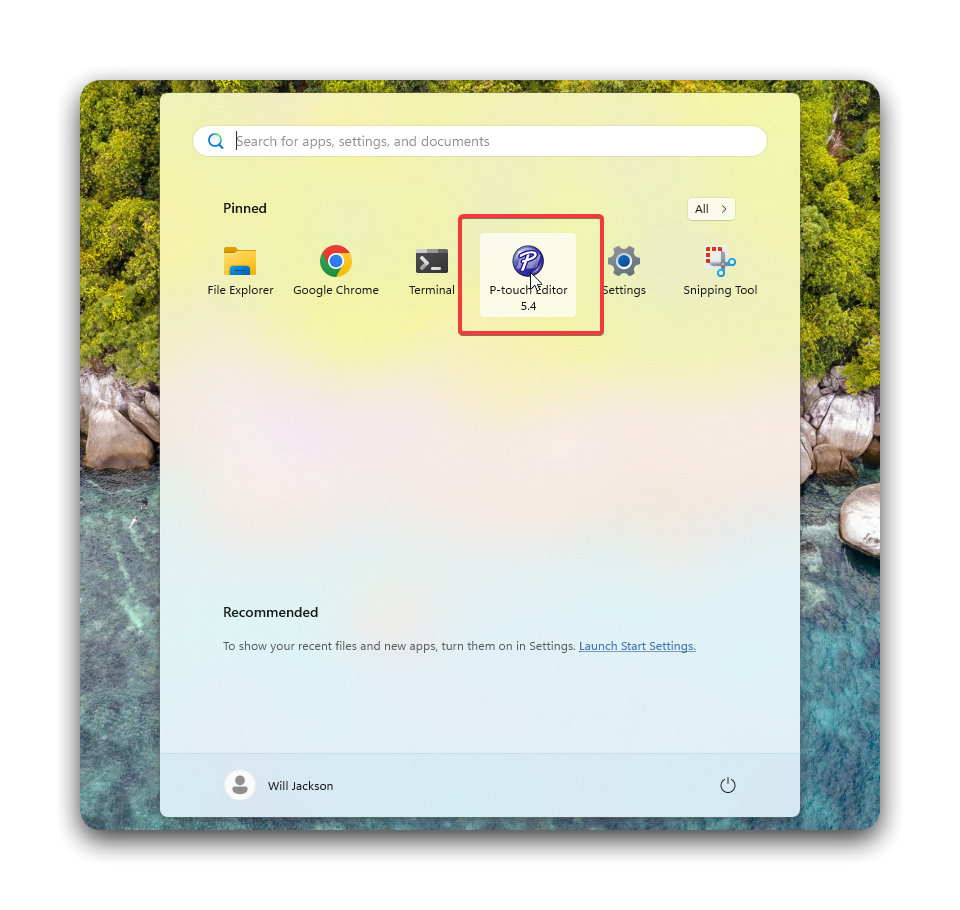
Section titled “Open the Template”- Click the Start Menu and select P-touch Editor.
- When the software opens, click Open, followed by Computer.
- Browse to
Google Drive/Showrooms/Tickets & Labels/Windows/Ticket Labelsand select the label template you want. Then click Open.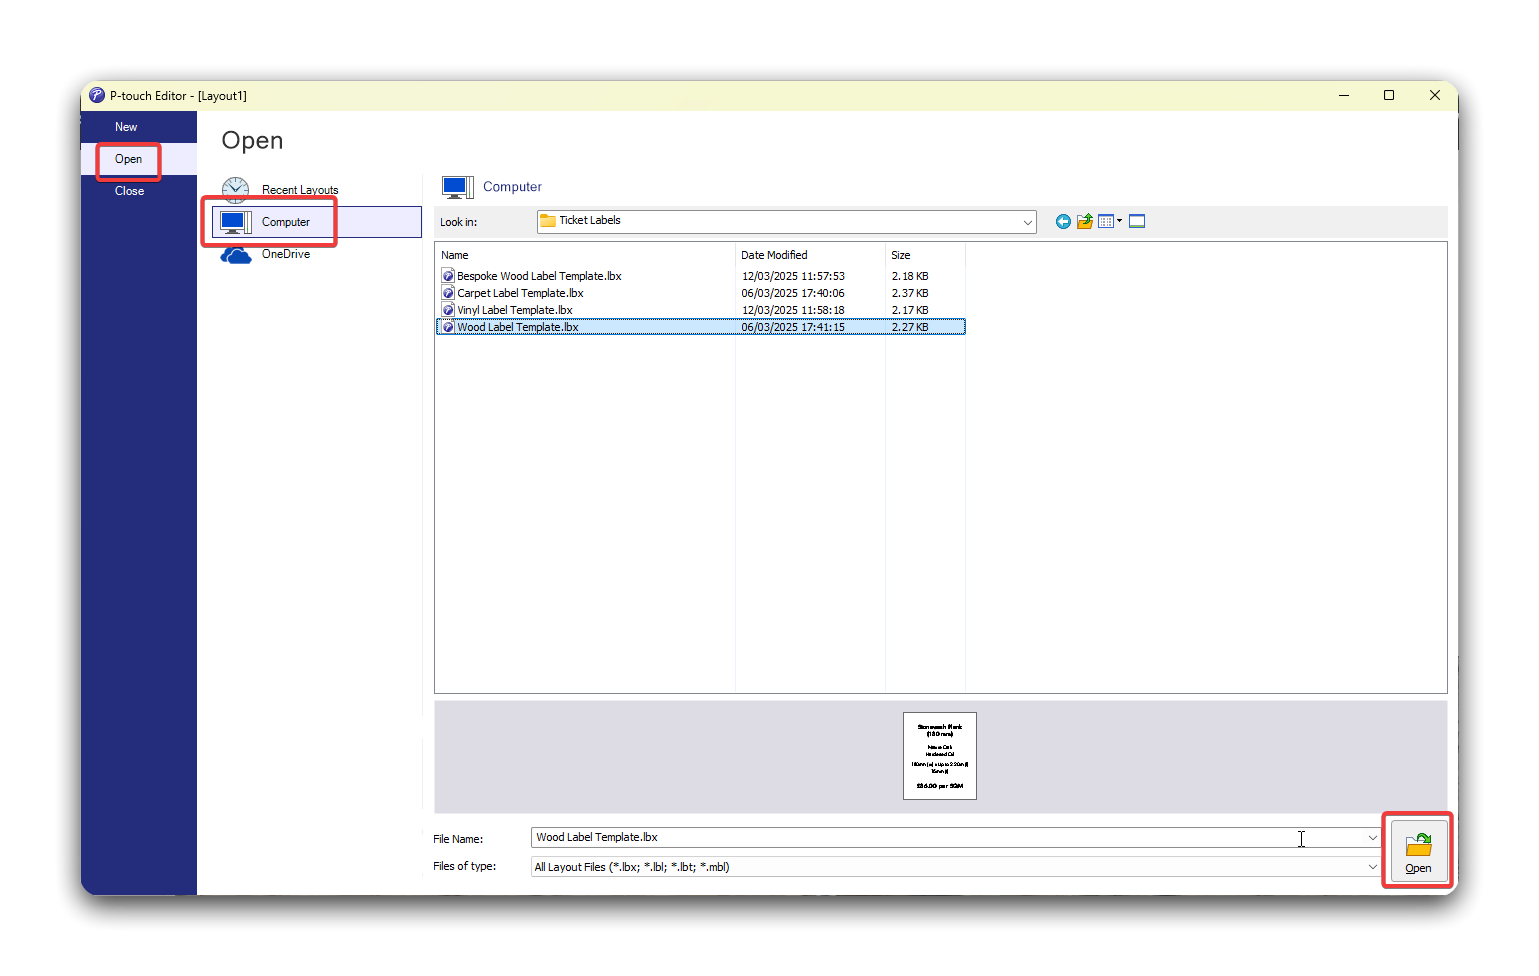
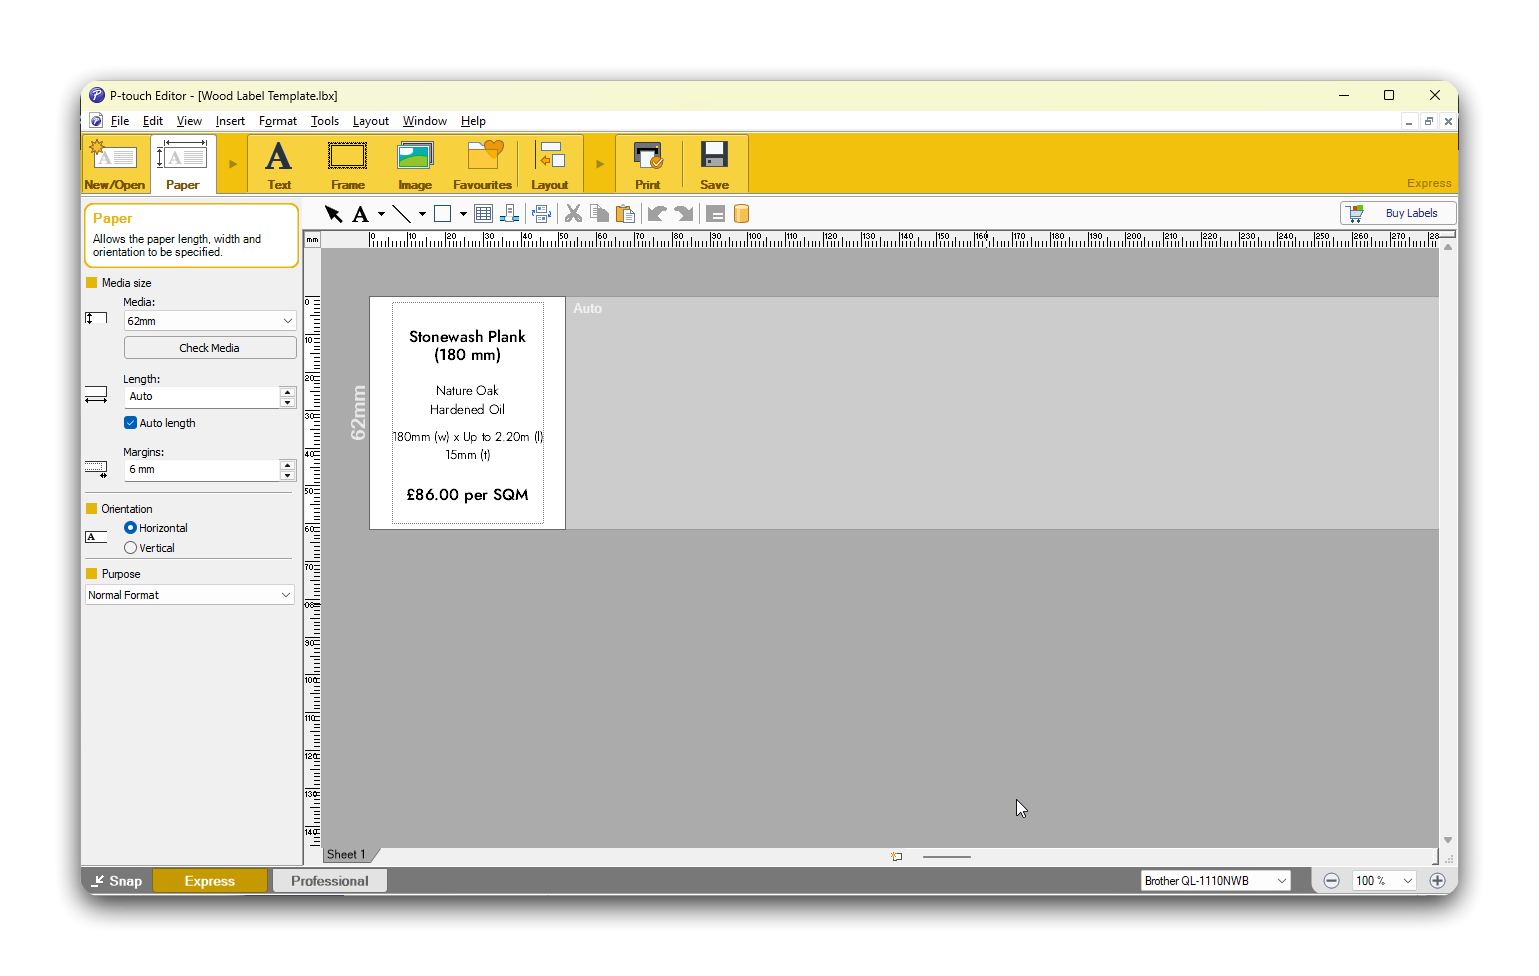
- You should get a window that looks a bit like this. If the formatting is wrong, remember to correct it before you continue.
- If the font isn’t Jost, select it in the Font dropdown box. You can select multiple text boxes by click and dragging over them. The font weights should be as follows:
- Name: Medium
- Stats: Light
- Price: Medium
Import Product Data
Section titled “Import Product Data”- Click the File menu, then Database and Connect….
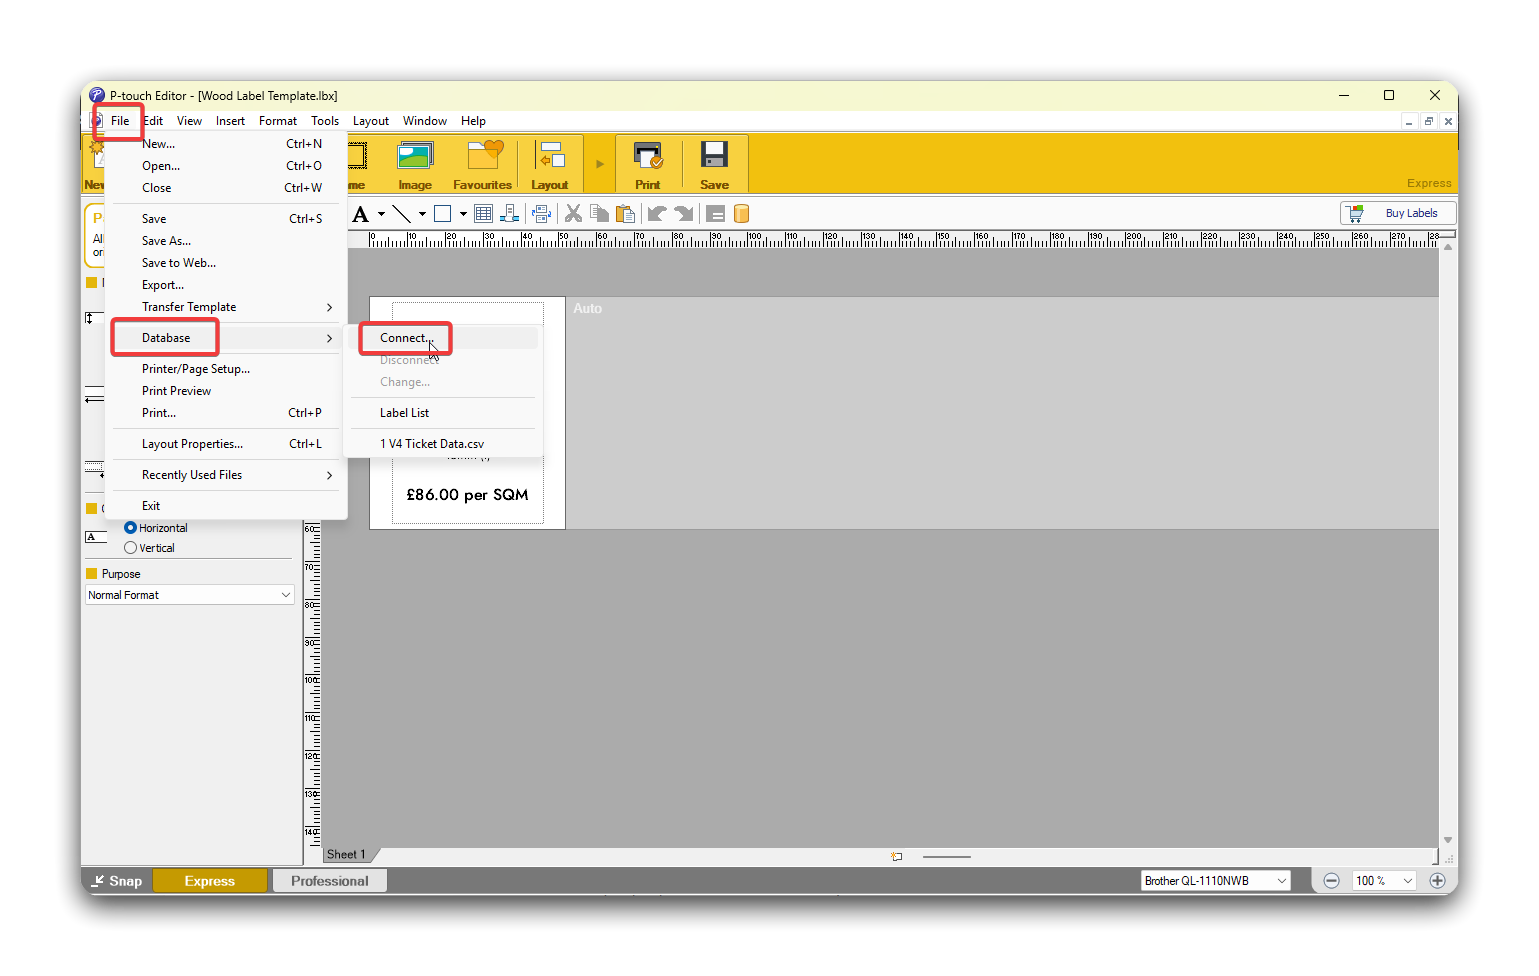
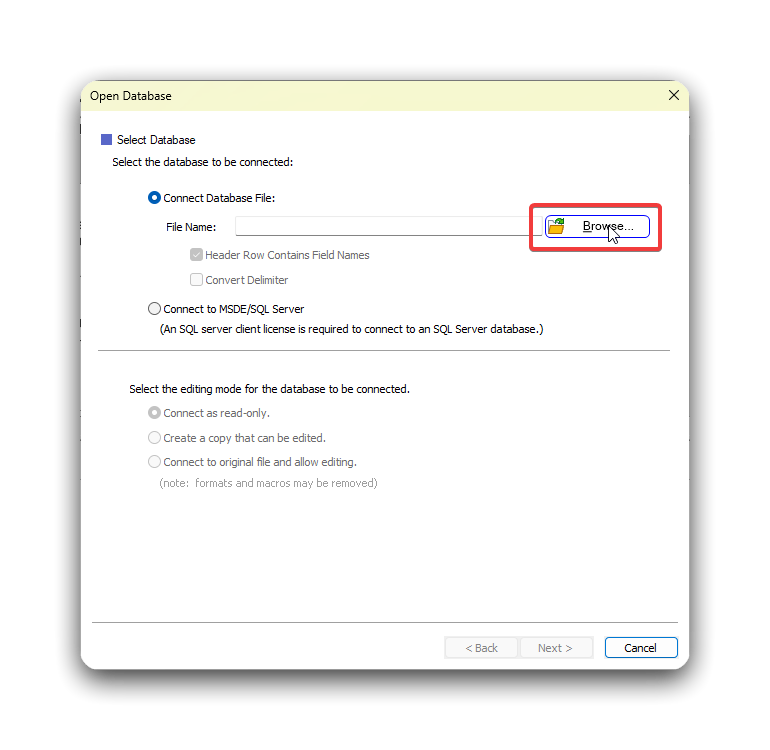
- When the window opens, make sure the box next to Select Database is selected and click Browse….
- Browse to
Google Drive/Showroom/Tickets & Data/Windows/Ticket Dataand select the database you need. Then click Open.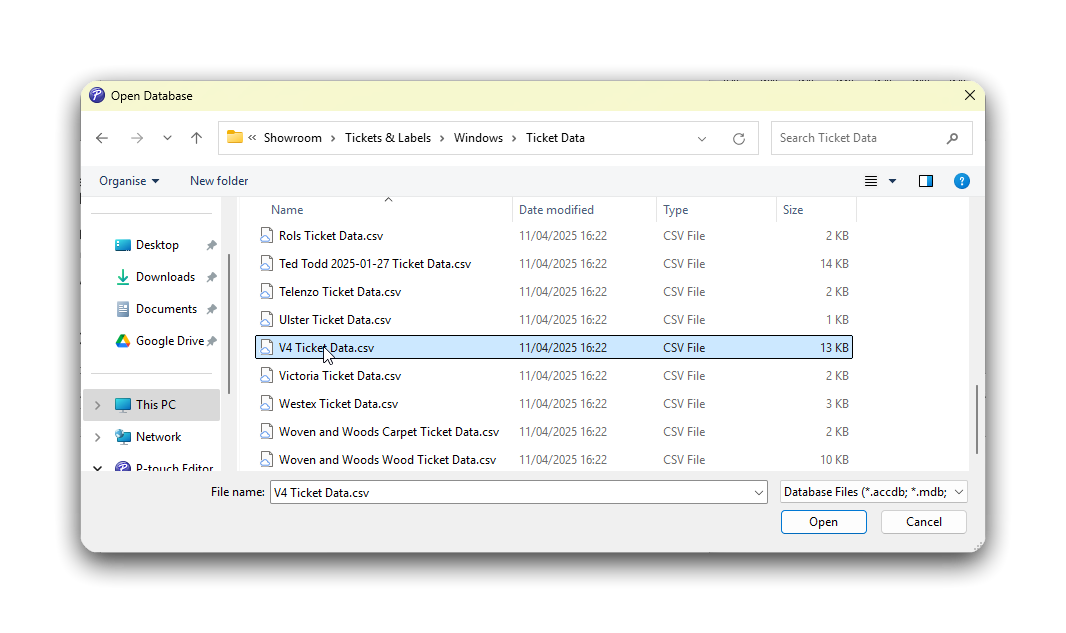
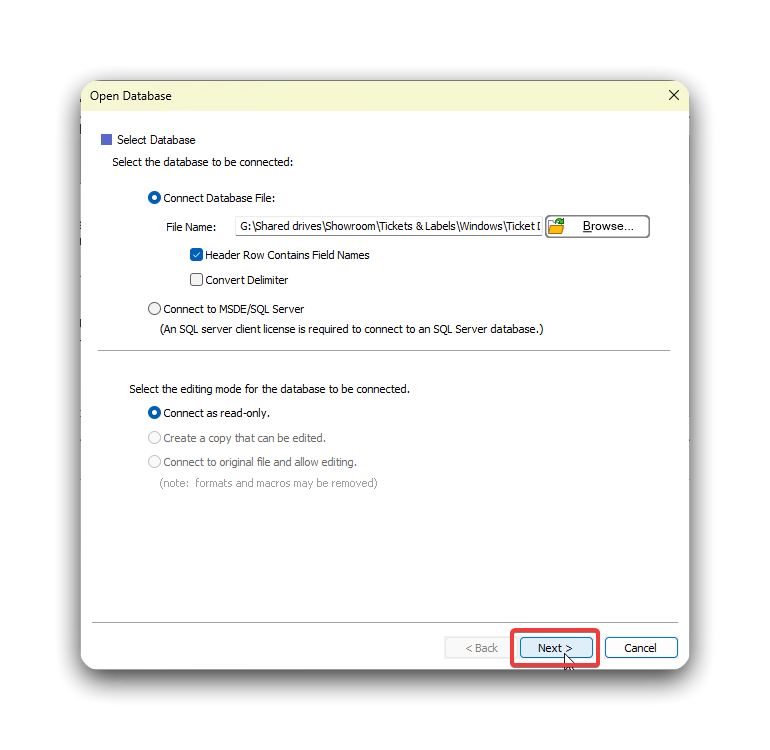
- When you’re returned to this screen, click Next.
- In the next window, you will need to use the dropdown boxes on the right hand side to match up the labels with the data. Make sure you do this, otherwise the data won’t pull through properly.
- When you’re done, click OK.

- You should now be back at the main screen, but now the data you imported will be listed at the bottom. If this isn’t there, start again from the beginning.
Print a Label
Section titled “Print a Label”- To print a single label, select the product in the data field at the bottom of the screen and then click Print.
You can also press Ctrl+P.
- In the print dialogue box, make sure the settings are as shown in the screenshot below.
- When you’re ready to print, click Print.
- To print multiple tickets at once, hold Shift while clicking each of them. You’ll know you’ve done this right if they’re all highlighted blue.
- Then just click Print as normal.
Applying Tickets
Section titled “Applying Tickets”- Peel off the back of the label and attach it to a ticket card. Try to put position it like in the image below:
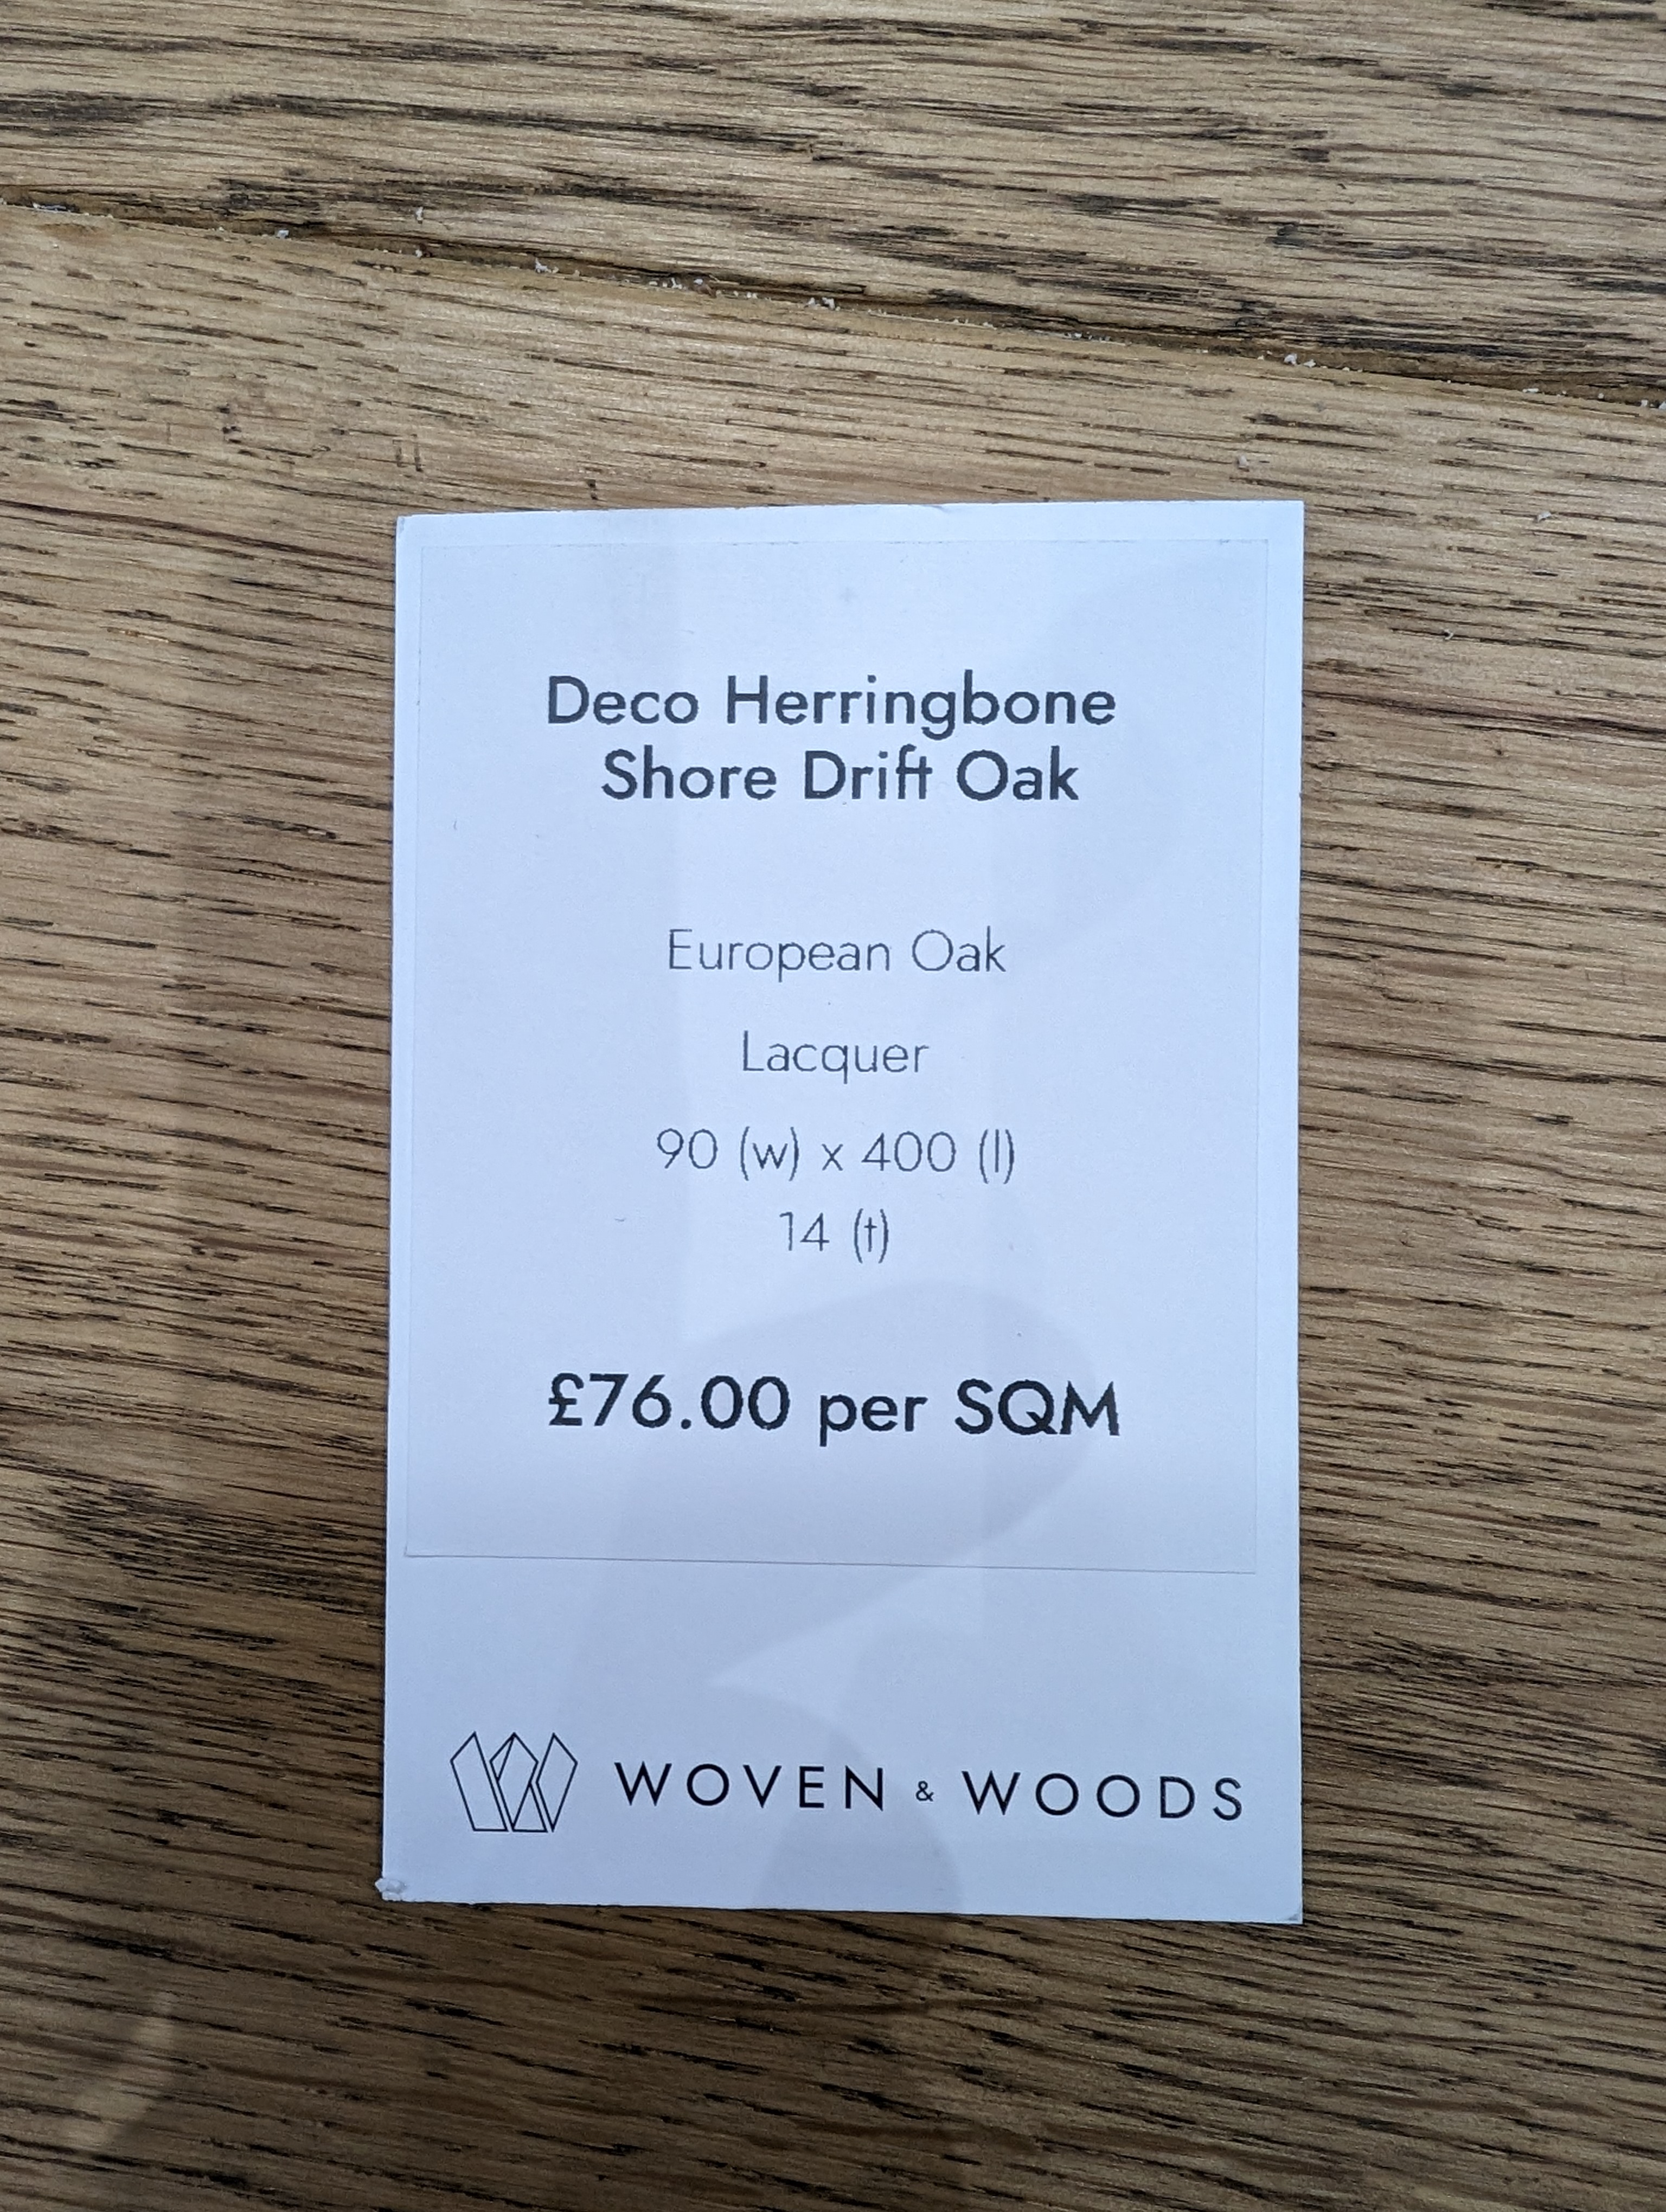
- The gap around the left, top and right edges on the label shoudl be equal.
- The ticket card has a small cross printed near the top edge - this should be completely covered by the label.